Category filter
Web Console Branding
Hexnode UEM gives you the flexibility to brand your portal with custom logos. The users can customize the solutions by featuring the brand logos on the dashboard, login page and favicon. The enrollment page customization is subject to enrolling iOS/iPadOS, macOS and Windows devices.
Logo Customization
Hexnode UEM provides customization options. These options allow the users to make changes in the dashboard, login page and favicon logos. The steps involved in logo customization are as mentioned below:
- Go to Admin > Brand Customization.
- Under Logo Customization, click on Change to change the Dashboard logo.
- Click on Change to change the Login page logo (Mobile view) and Favicon. The login page logo is for mobile view and on the Desktop the dashboard logo appears on the login page. The recommended image resolution for login page logo in mobile view is 250 * 100 pixels (aspect ratio of 5:2). The uploaded logos can be previewed on the customization page.
- Click Upload.
- Click Reset to undo the changes you have made in the previous steps.
Enrollment page customization
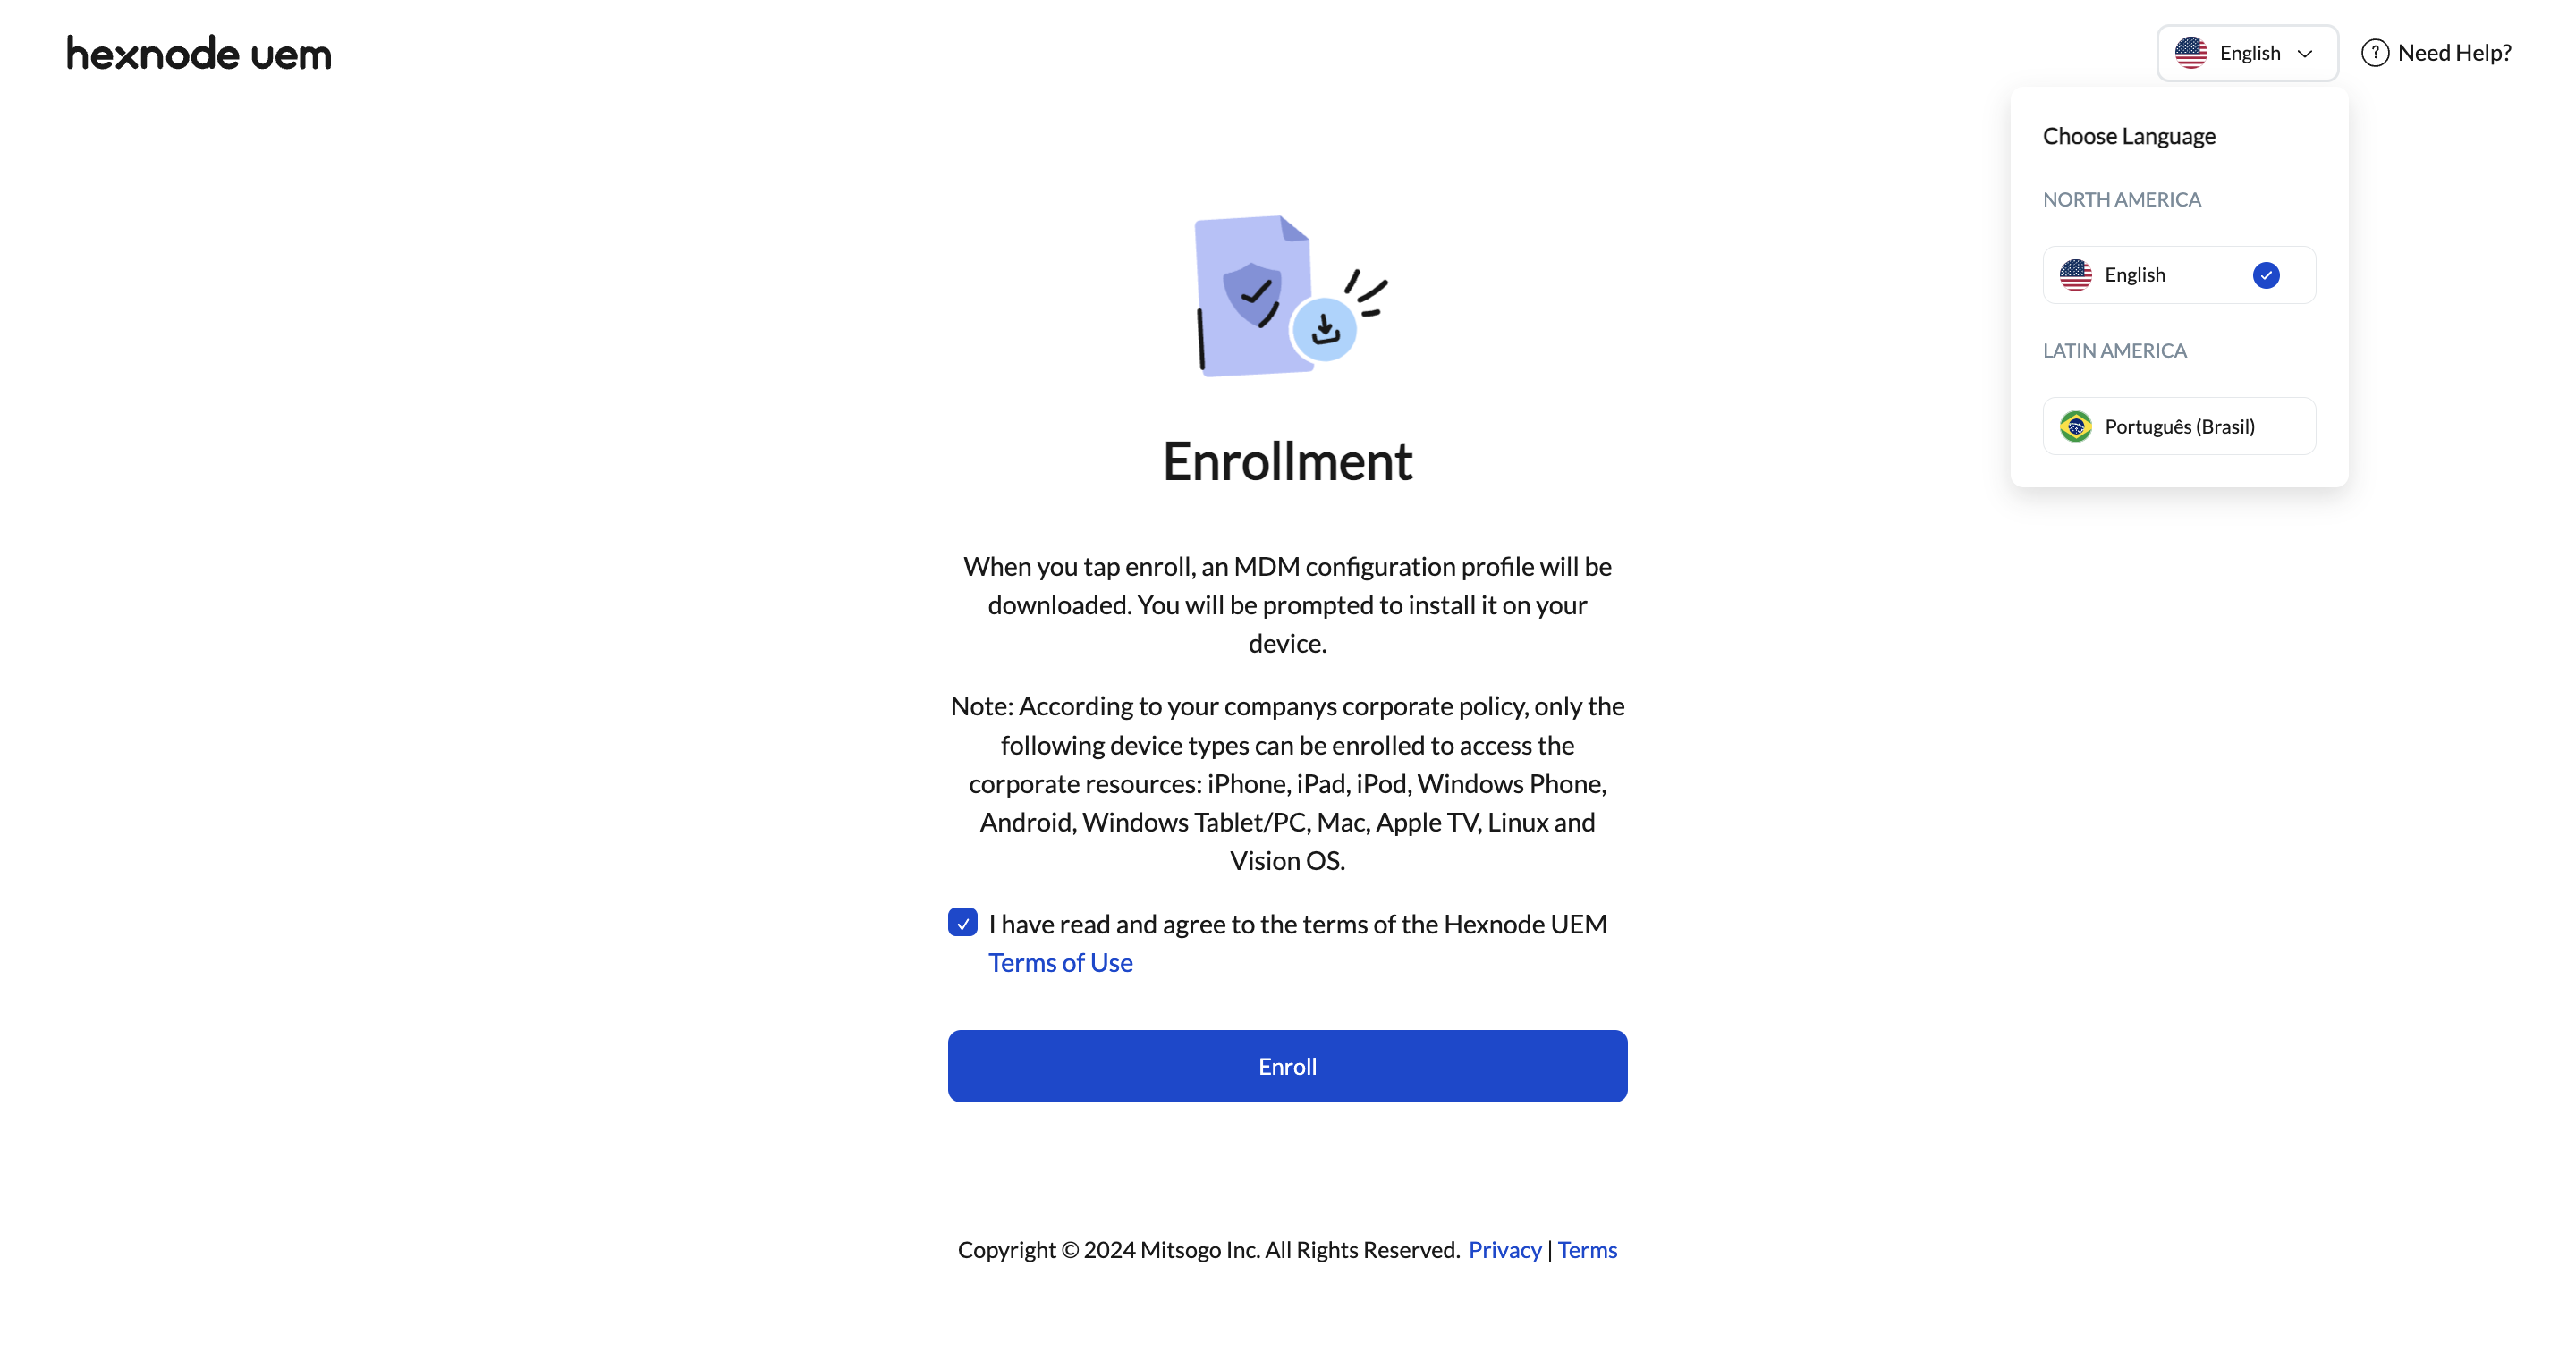
While enrolling an iOS/iPadOS, macOS or Windows device, the users will be asked to enter the enrollment URL which will look like https://yourportal.hexnodemdm.com/enroll/. They will be directed to a screen which displays the enrollment page. This screen consists of basic instructions on how to enroll devices in Hexnode UEM. Organizations can add their custom messages to the enrollment page in multiple languages offered by Hexnode UEM. These settings can be configured using Enrollment page customization settings.
Create multiple language profiles to customize the Enrollment page according to your language preferences,
- Go to Admin > Brand Customization.
- Under enrollment page customization, click Create.
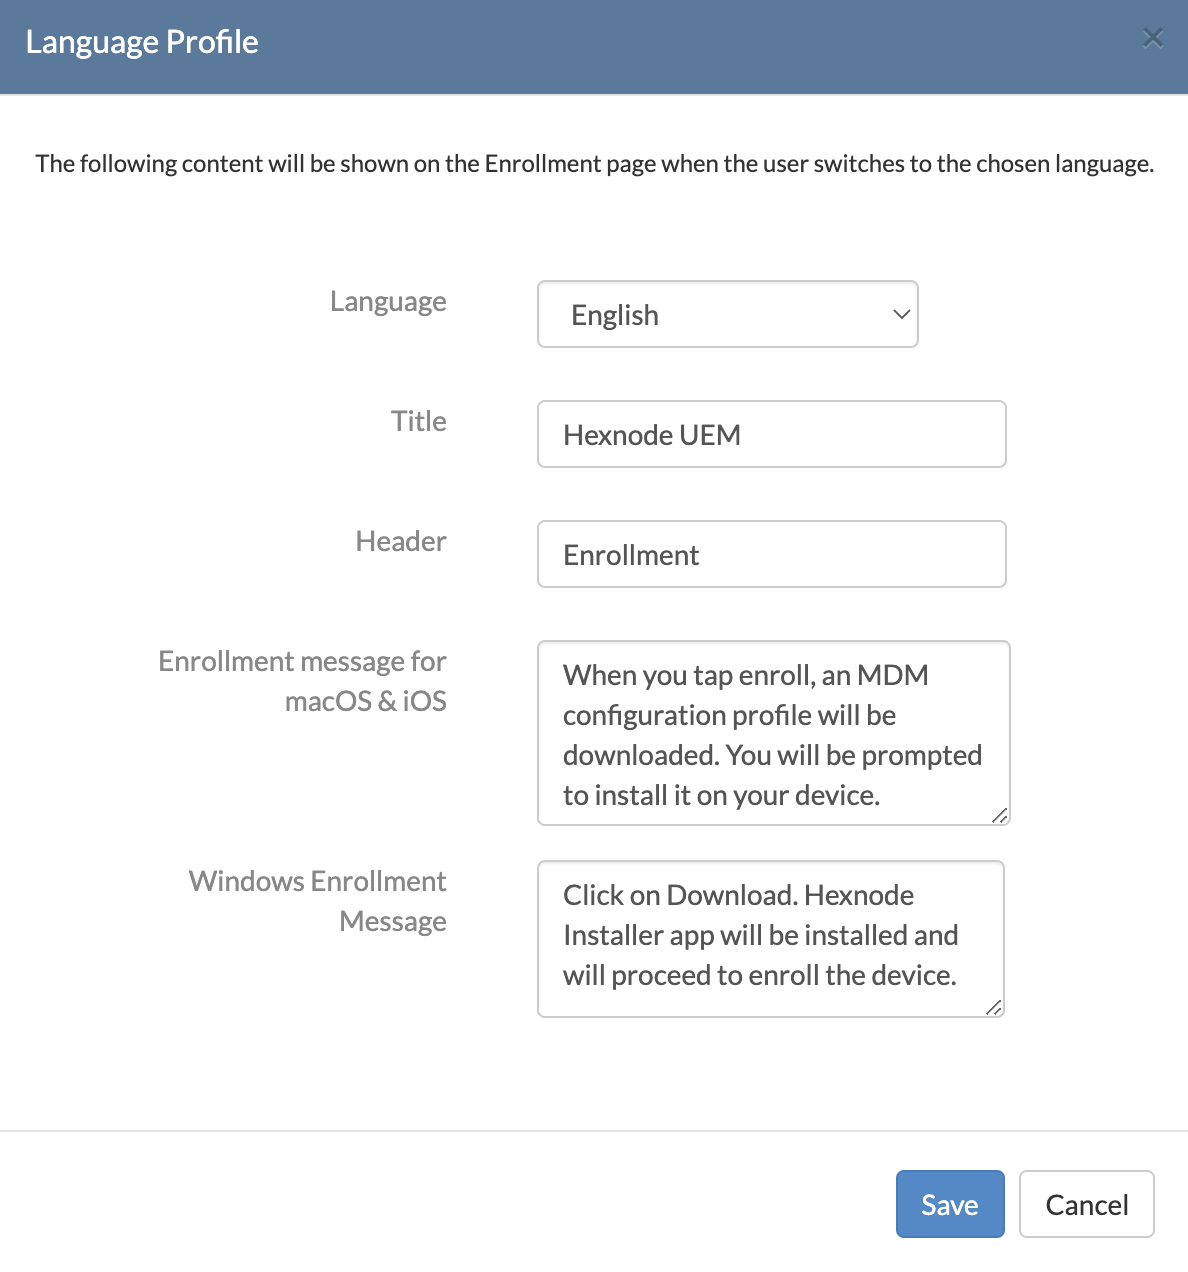
- In the Language Profile, choose a language for the enrollment page.

- Assign a title to the enrollment page.
- Assign a suitable header.
- Provide content for the enrollment message for macOS & iOS/iPadOS devices. You can also choose to go with the default enrollment message for this field.
- Provide content for the enrollment message for Windows devices. You can also choose to go with the default enrollment message for this field.
- Any changes to the enrollment message content would appear on the page right away.
- Click Save. This will create a new Language Profile.
- All language profiles will be listed under the enrollment page customization section. You can edit them at any time by clicking on the pencil icon or delete any language profiles using the bin icon.
- You can set a default language from the multiple languages offered by Hexnode UEM.
- The default language for the enrollment page can also be set based on the IP address using the option “Automatically select language based on IP location”.
- Click Save to save all the changes.


