Category filter
Managing Users in Hexnode
User Management in Hexnode UEM: Overview
Hexnode UEM provides a centralized interface for managing organizational users. Users can be created locally or imported via integrations with Microsoft Active Directory (AD), Microsoft Entra ID, Google Workspace, and Okta. Managing users, rather than just devices, allows administrators to associate policies and actions with an individual, covering all devices assigned to that specific user.
User Directory Navigation
Access all user management features by navigating to the Manage tab > Users.
1. Creating Users
Individual Local User Creation
- Navigate to Manage > Users and click New user.
- Complete the following data fields:
- Display Name [Mandatory]
- Email [Mandatory]
- Alternate Email, Mobile, and Password[Optional].
- Enrollment Trigger:
Action: Enable the checkbox “Send enrollment request“.Result: Hexnode automatically dispatches an invitation email/SMS to the user immediately upon account creation.
- Click Save.
Bulk User Creation (CSV Import)
The bulk import process adapts its workflow based on your organization’s Enrollment Mode settings.
Step 1: Prerequisite Enrollment Check
Before uploading your CSV, the system identifies your current security posture:
Condition A (Open Enrollment): If active, you must manually select the User Domains to which requests will be sent. Click Continue to move to the Enrollment Request page.
Condition B (Authenticated Enrollment): The system bypasses domain selection and automatically directs you to the Enrollment Request page. There, set the “Send enrollment request to” option to Bulk User.
Step 2: Configuration and Upload
- Navigate to Manage > Users > Bulk user.
- Upload CSV: Provide your file.
- Mandatory Data: Name, Email, Mobile Number, Ownership, Device Name, and Password.
Self-Enrollment Note: The Password defined in your CSV allows users to authenticate manually if Self Enrollment is enabled in your settings.
Step 3: Verification and Dispatch
- Click Next to review the parsed data.
- Select your Delivery Mode (Email or SMS).
- Click Send to finalize the import and dispatch invitations.
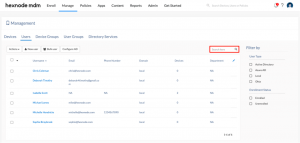
2. Managing Existing Users
Modifying and Deleting
Use the Actions dropdown after selecting a user from the list under Manage > Users.
| Action | Process | Constraints |
|---|---|---|
| Edit User | Select User > Actions > Edit User > Make the necessary edits > Save. | Local users only. Cannot edit Directory-synced users. |
| Delete User | Select User > Actions > Delete User. | Local users only. Cannot delete Default or Directory-synced users. |
Organizing the User List
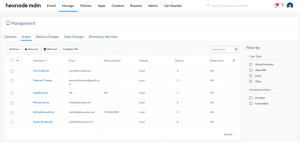
Navigate to Manage > Users:
- Search: Use the search bar (top right) to find users by Name or Email.
- Sort: Click any column header to toggle between Ascending and Descending order (User Name is ascending by default).
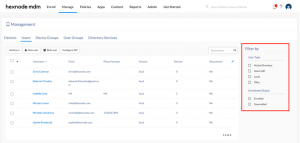
- Filter: Use the Filter by sidebar to narrow results by:
- User Type (Local vs. Directory)
- Enrollment Status
- Domains
Frequently Asked Questions (FAQs)
- What is the benefit of managing “Users” instead of just “Devices”?
Managing users allows for “User-Centric Management.” When you associate a policy with a user, that policy automatically applies to every device assigned to them, ensuring consistent security across an employee’s laptop, phone, and tablet.
- Can I edit a user imported from Microsoft Entra ID or Okta?
No. Users imported from external directory services (AD, Entra ID, Google Workspace, Okta) must be managed within their respective source platforms. Only Local Users created directly in Hexnode can be edited or deleted within the portal.
- How do passwords work for new users?
When creating a user, you can set a password manually. If Self Enrollment is enabled, the user will use this specific password to authenticate their device during the enrollment process.
- What is the difference between Open and Authenticated Enrollment during bulk import?
- Open Enrollment: Requires the admin to manually select the domains for the enrollment requests before proceeding.
- Authenticated Enrollment: Streamlines the process by skipping domain selection and moving directly to the request configuration page.
- Can I delete the “Default User”?
No. The Default User is a system-protected entity and cannot be removed from the Hexnode portal.
