Category filter
Script to create self-signed certificates on Windows devices
Certificates are crucial for securing computer and network systems by providing a reliable way to verify the identity of devices, individuals, and systems. Self-signed certificates, in particular, can save time and reduce hassle in closed systems where trust can be established without relying on a third-party CA. Create self-signed certificates directly on your Windows devices using Hexnode’s Execute Custom Script action.
PowerShell script
Create new self-signed certificate
|
1 |
New-SelfSignedCertificate -DnsName "www.example1.com", "www.example2.com" -CertStoreLocation "Path to certificate store" -Subject "www.example3.com" |
- DnsName – This parameter specifies domain names or hostnames to be included in the SAN extension of the certificate, allowing multiple domains or IPs to be valid for that certificate.
- CertStoreLocation – This parameter specifies the certificate store where the certificate must be stored. The supported values are Cert:\CurrentUser\My or Cert:\LocalMachine\My.
- Subject – This parameter specifies the subject of the certificate, i.e., the entity that is the target of the certificate. If this parameter is not used, the first domain name or hostname mentioned for
–DnsNameis used.
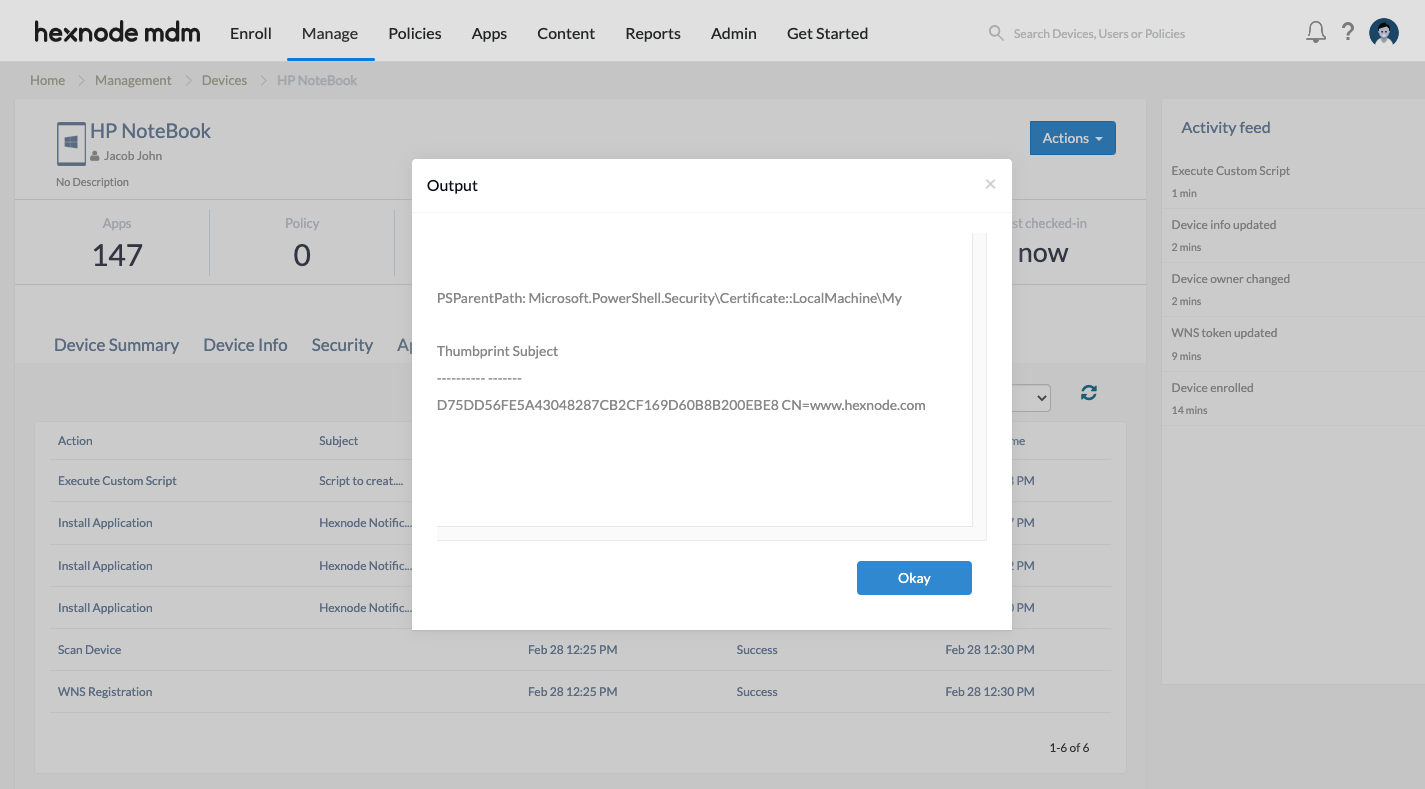
For example, to create a self-signed certificate for domains www.hexnode.com and www.microsoft.com, with the target as www.google.com and store it at Cert:\LocalMachine\My, deploy the following script:
|
1 |
New-SelfSignedCertificate -DnsName "www.google.com","www.microsoft.com" -CertStoreLocation "cert:\LocalMachine\My" -Subject "www.hexnode.com" |

- PSParentPath – Specifies the location where the certificate is stored.
- Thumbprint – It is a unique identifier that is used to verify the authenticity of a certificate.
- Subject – It refers to the entity that the certificate identifies, such as a website or device.
You can also provide a friendly name for the certificate using –friendlyname parameter.
|
1 |
New-SelfSignedCertificate -DnsName "www.hexnode.com","www.microsoft.com" -CertStoreLocation "cert:\LocalMachine\My" -friendlyname "Hexnode" |
Create new self-signed certificate of a specific type
|
1 |
New-SelfSignedCertificate -DnsName "www.example1.com", "www.example2.com" -CertStoreLocation "Path to certificate store" -Type "CertificateType" |
The –type parameter is used to specify the type of certificate to be created. The type of certificate affects the fields of the certificate and defines what it can be used for. You can create certificates of the following types:
- CodeSigningCert
- DocumentEncryptionCert
- SSLServerAuthentication
- DocumentEncryptionCertLegacyCsp
- Custom
If this parameter is not used, the default value SSLServerAuthentication is used.
For example, to create a certificate for the purpose of Document Encryption, deploy the following script:
|
1 |
New-SelfSignedCertificate -DnsName "www.hexnode.com","www.microsoft.com" -CertStoreLocation "cert:\LocalMachine\My" -type "DocumentEncryptionCert" |
Create self-signed certificate using existing certificate
You can create a new self-signed certificate based on an existing certificate. This is useful in situations where you need to create a new certificate that has similar or identical properties to an existing certificate, such as when renewing a certificate or creating a backup certificate.
|
1 2 3 |
Set-Location -Path "Path to certificate store for existing certificate" $OldCert = (Get-ChildItem -Path 'Thumbprint of the certificate') New-SelfSignedCertificate -CloneCert $OldCert -CertStoreLocation "Path to certificate store new certificate" |
- Set-Location – This cmdlet is used here to set the location to that of the certificate store.
- $OldCert – This parameter is used to store the contents of the certificate, which is identified by the thumbprint.
- CloneCert – This parameter is used to create a new certificate which inherits all fields and extensions of the existing certificate except the public key.
|
1 2 3 |
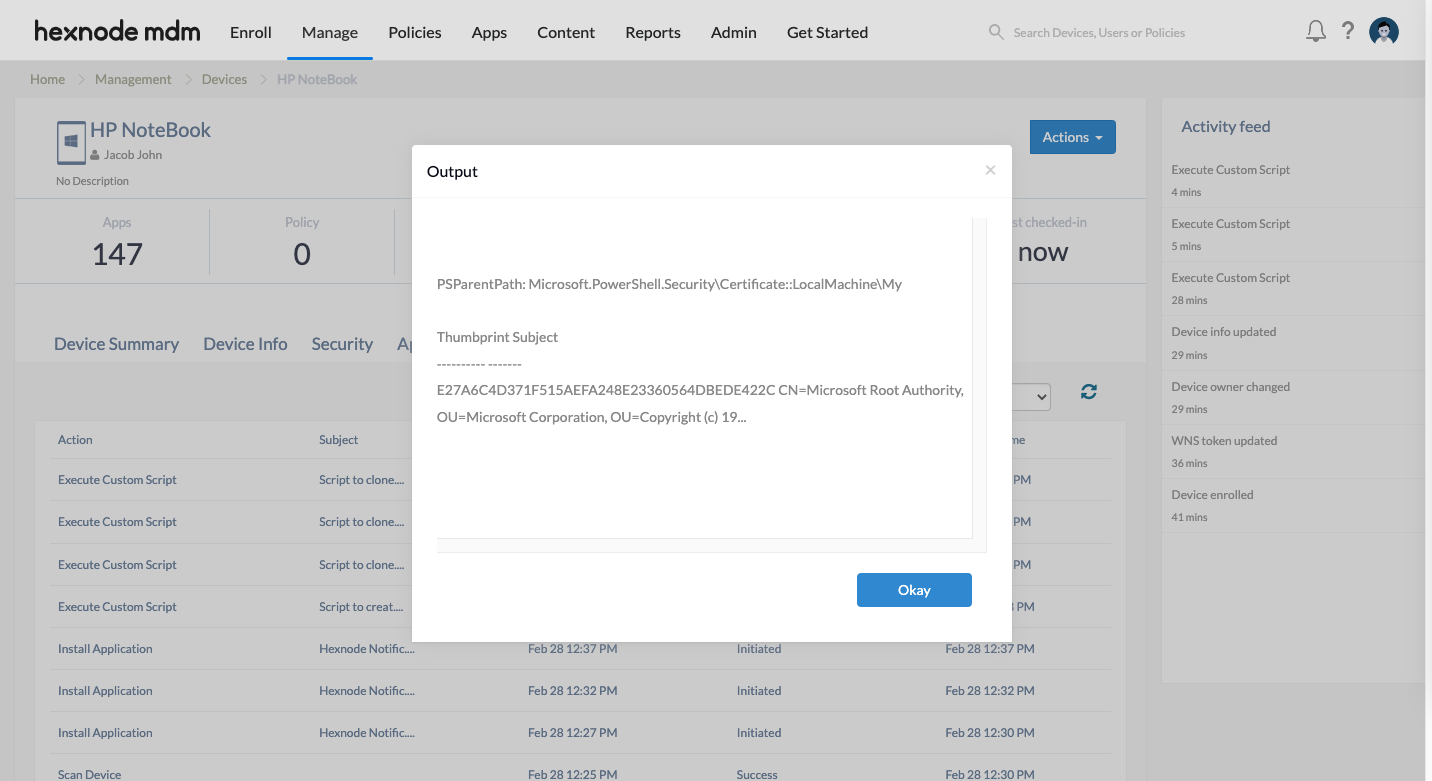
Set-Location -Path "cert:\LocalMachine\Root" $OldCert = (Get-ChildItem -Path a43489159a520f0d93d032ccaf37e7fe20a8b419) New-SelfSignedCertificate -CloneCert $OldCert -CertStoreLocation "cert:\LocalMachine\My" |
This will create a new self-signed certificate that inherits all fields from the existing root certificate with the subject Microsoft Root Authority.

Create self-signed certificate with custom validity period
|
1 |
New-SelfSignedCertificate -DnsName "www.example1.com", "www.example2.com" -CertStoreLocation "Path to certificate store" -NotBefore 'mm/dd/yyyy' -NotAfter 'mm/dd/yyyy' |
- NotBefore – Specifies the date after which the certificate becomes valid in mm/dd/yyyy format. The default value is 10 minutes before the certificate is created.
- NotAfter – Specifies the date after which the certificate becomes valid in mm/dd/yyyy format. The default value is 1 year after the certificate was created.
For example, to create a self-signed certificate to be valid from 1st January,2023 to 31st December, 2023:
|
1 |
New-SelfSignedCertificate -DnsName "www.hexnode.com","www.microsoft.com" -CertStoreLocation "cert:\LocalMachine\My" -NotBefore '01/01/2023' -NotAfter '12/31/2023' |
Create self-signed certificate signed by a test certificate
|
1 |
New-SelfSignedCertificate -DnsName "www.example1.com", "www.example2.com" -CertStoreLocation "Path to certificate store" -testroot |
The –testroot parameter adds the built-in test certificate to the intermediate certification authority (CA) certificate store of the device. This parameter should be used for testing purposes only.
For example, to create a self-signed certificate for domain www.hexnode.com for testing purposes, deploy the following script:
|
1 |
New-SelfSignedCertificate -DnsName "www.hexnode.com" -CertStoreLocation "cert:\LocalMachine\My" -testroot |