Category filter
Manage login to Macs using cloud identity providers with Hexnode Access
Hexnode Access is a feature that allows users to log in to their macOS devices using cloud IdP (identity provider) credentials. We’ve all experienced the ease of using cloud credentials when asked to sign up/log in to websites or apps instead of creating new credentials for each of them. Similarly, logging into macOS devices is made smoother with Hexnode UEM’s integration with IdPs Microsoft Entra ID, Google Workspace and Okta. In addition, IT admins can remotely customize how the login window will look, provide users access to help links, and enable them to connect to a network, all from the login screen itself.
Configure Hexnode Access:
To configure Hexnode Access on macOS devices:
- Login to Hexnode UEM portal.
- Go to Policies, select an existing policy or click on New Policy to create a new one.
- Navigate to macOS > Security > Hexnode Access and click Configure.
Basic settings:
Identity provider: Select an IdP of your preference from the drop-down. Microsoft Entra ID, Google Workspace and Okta are supported by Hexnode Access.
1. Microsoft Entra ID
Configure authentication by: Admins can choose to move forward either using the IdP domains already added to the Hexnode UEM portal or by creating a new app registration in the IdP portal. Select the preferred method from the drop-down.
Microsoft Entra ID domains added to Hexnode portal:
Admins can select the domains listed under Admin > Microsoft Entra ID in the Hexnode UEM portal to configure the authentication.
- Domains: Select one or more domains from the drop-down.
- Allow access for all users: Mark the checkbox if all the user groups in the above-selected domains should be given access to the device.
- Allow access only for: If all the user groups in the selected domains shouldn’t be given access to the device, specify the ones that should be given access.
Creating a new app registration in Microsoft Entra ID portal:
A new app registration has to be created for the Hexnode Access app in the Microsoft Entra ID.
How to register Hexnode Access with Microsoft Entra ID?
Create a new app registration:
- Login to the Microsoft Entra ID portal.
- Click on the Show portal menu icon at the left top corner of the page and navigate to Microsoft Entra ID > Manage > App registrations > New registration.
- Enter Hexnode Access in the Name field.
- Under the Supported account types field, select Accounts in this organizational directory only (company name only – Single tenant).
- Under the Redirect URI field, select Web from the Select a platform drop down and enter a valid URI in the adjacent field. The URI will be of the format https://portalname.hexnodemdm.com/azure_devicelogin_callback . Replace
portalnamewith the name of the corresponding Hexnode UEM portal’s name. - Click Register.
- Once you have registered the app in the Microsoft Entra ID portal, return to the Integrations tab in the Hexnode UEM portal to continue configuring the authentication settings.
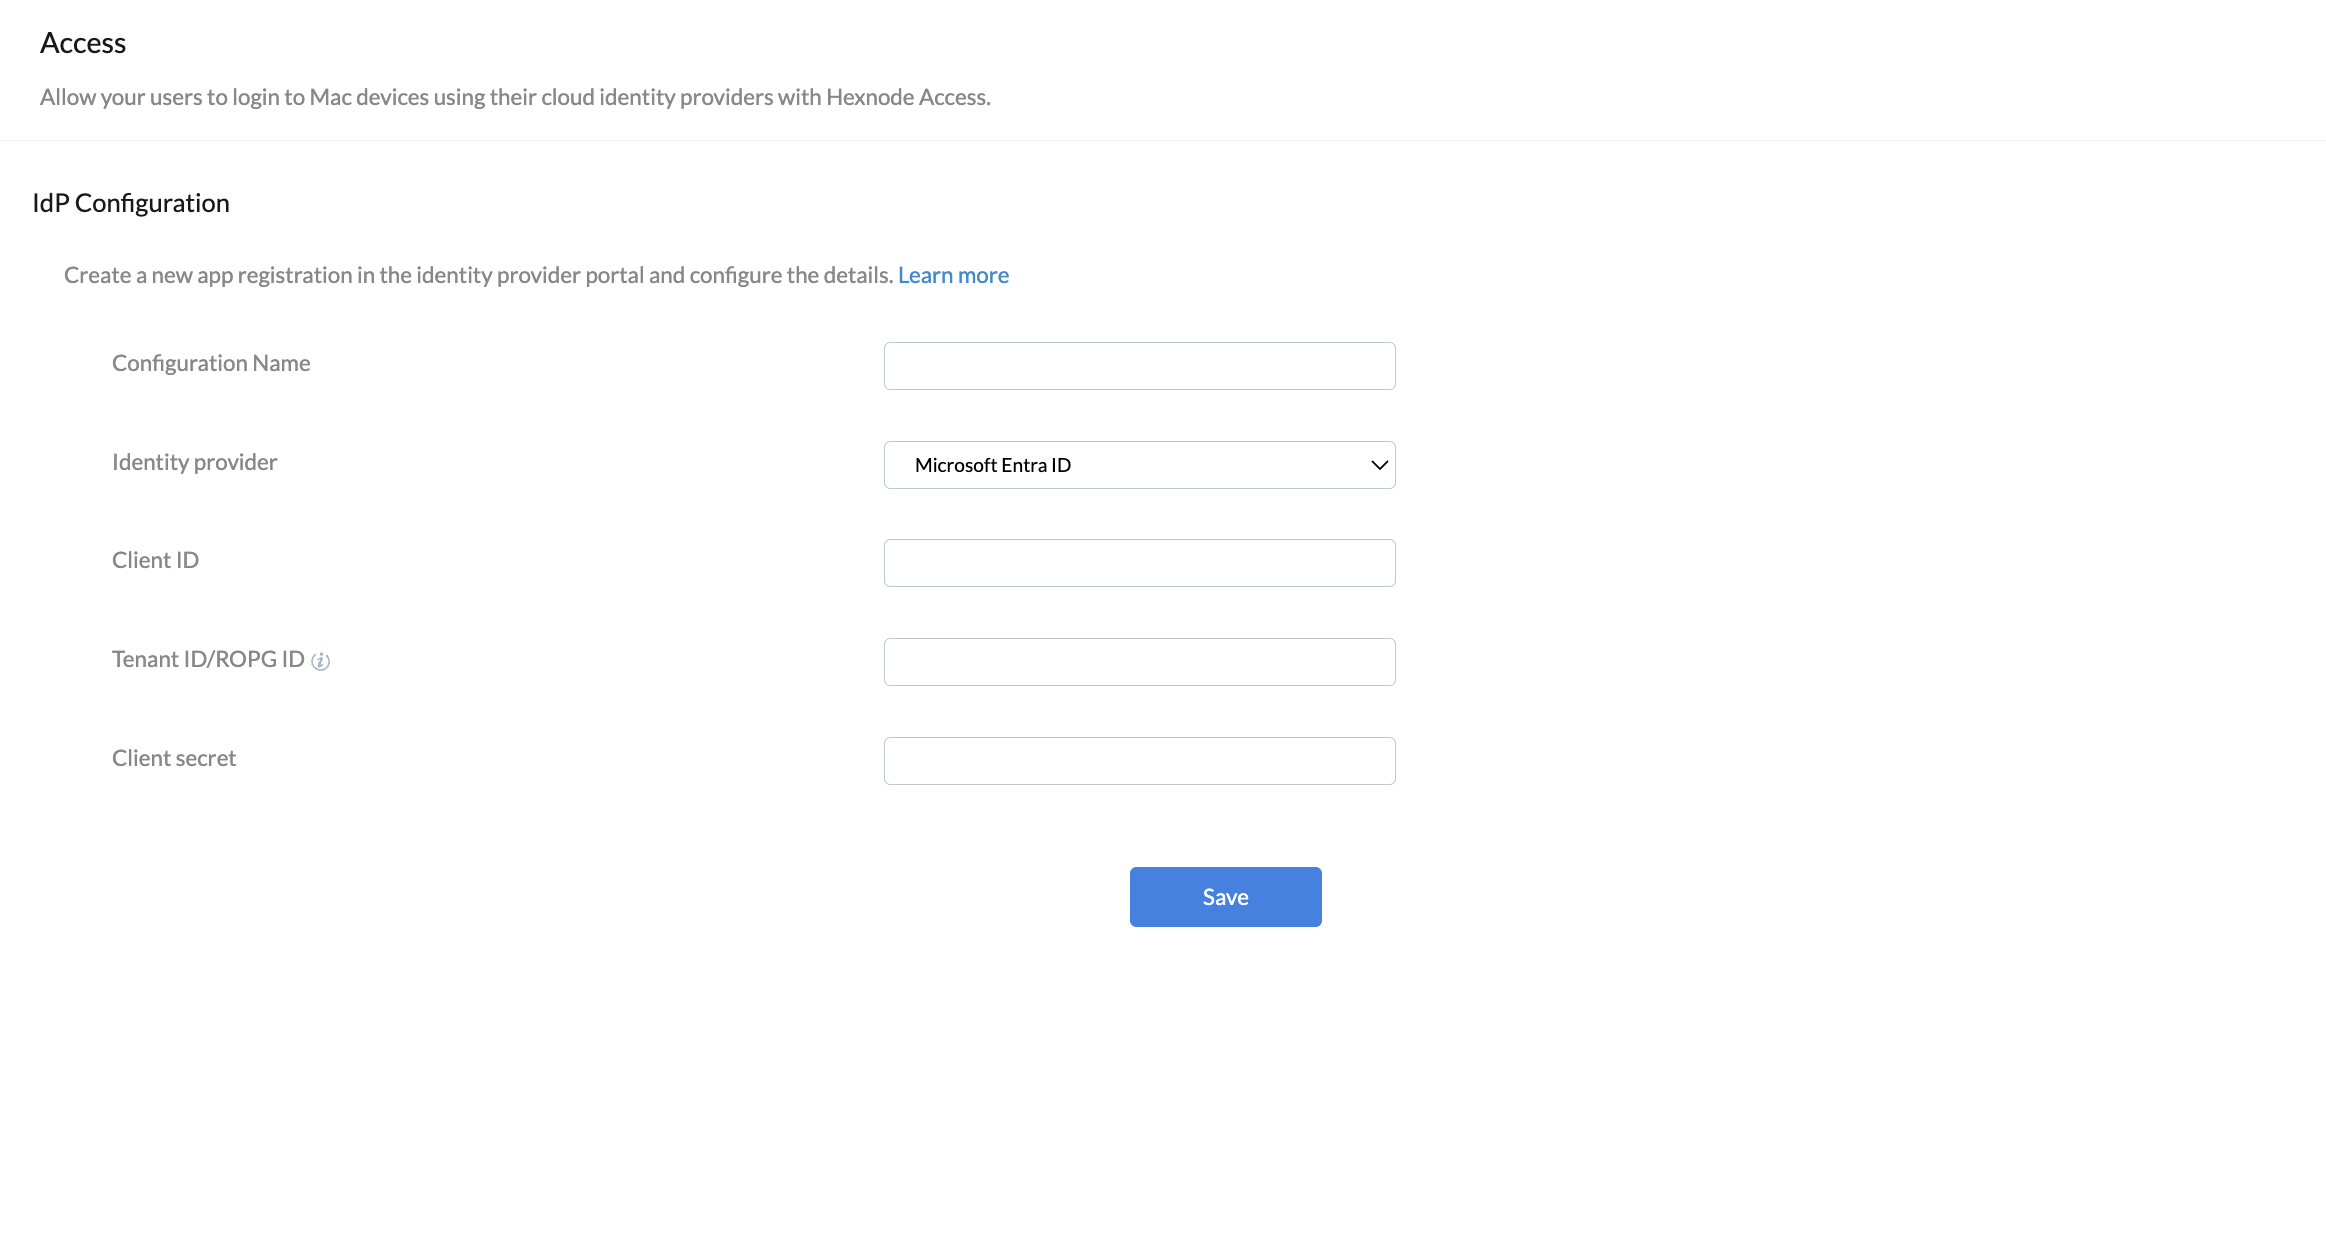
- Configuration Name: Enter a name for the configuration.
- Identity provider: Choose Microsoft Entra ID from the drop-down menu.
- Client ID: Enter the Application/Client ID of the registered app from the Microsoft Entra ID portal. It is used to authenticate the user.
- Tenant ID/ROPG ID: Enter the Tenant ID/ROPG (Resource Owner Password Grant) ID of your Microsoft Entra ID portal.
- Client secret: Enter the client secret of the registered app, which is known only by the app and your IdP.
2. Google Workspace
Configure authentication by: Admins can choose to move forward either using the Google Workspace domains already added to the Hexnode UEM portal, creating OAuth credentials in Google Cloud or by uploading an LDAP certificate. Select the preferred method from the drop-down.
Google Workspace domains added to Hexnode portal: Admins can choose domains listed under Admin > Google Workspace in the Hexnode UEM portal to configure the authentication.
- Domains: Select one or more domains from the drop-down.
- Allow access for all users: Mark the checkbox if all the user groups in the above-selected domains should be given access to the device.
- Allow access only for: If all the user groups in the selected domains aren’t given access, specify the ones that should be given access to the device.
Creating OAuth credentials in Google Cloud: OAuth credentials has to be created for the Hexnode Access app in Google Cloud.
How to create OAuth credentials for Hexnode Access?
- Login to Google Cloud.
- Click on the Navigation menu icon at the left top corner of the page and navigate to APIs and Services > Credentials.
- Click Create Credentials and select OAuth Client ID.
- Select Web Application from the Application type drop-down.
- Enter Hexnode Access in the Name field.
- Click Add URI under Authorized Redirect URIs and enter a valid URI. The URI will be of the format https://portalname.hexnodemdm.com/gsuite_devicelogin_callback . Replace
portalnamewith the corresponding Hexnode UEM portal’s name. - Click Create.
- Once you have registered the app and generated OAuth credentials in Google Cloud, return to the Integrations tab in the Hexnode UEM portal to continue configuring the authentication settings.
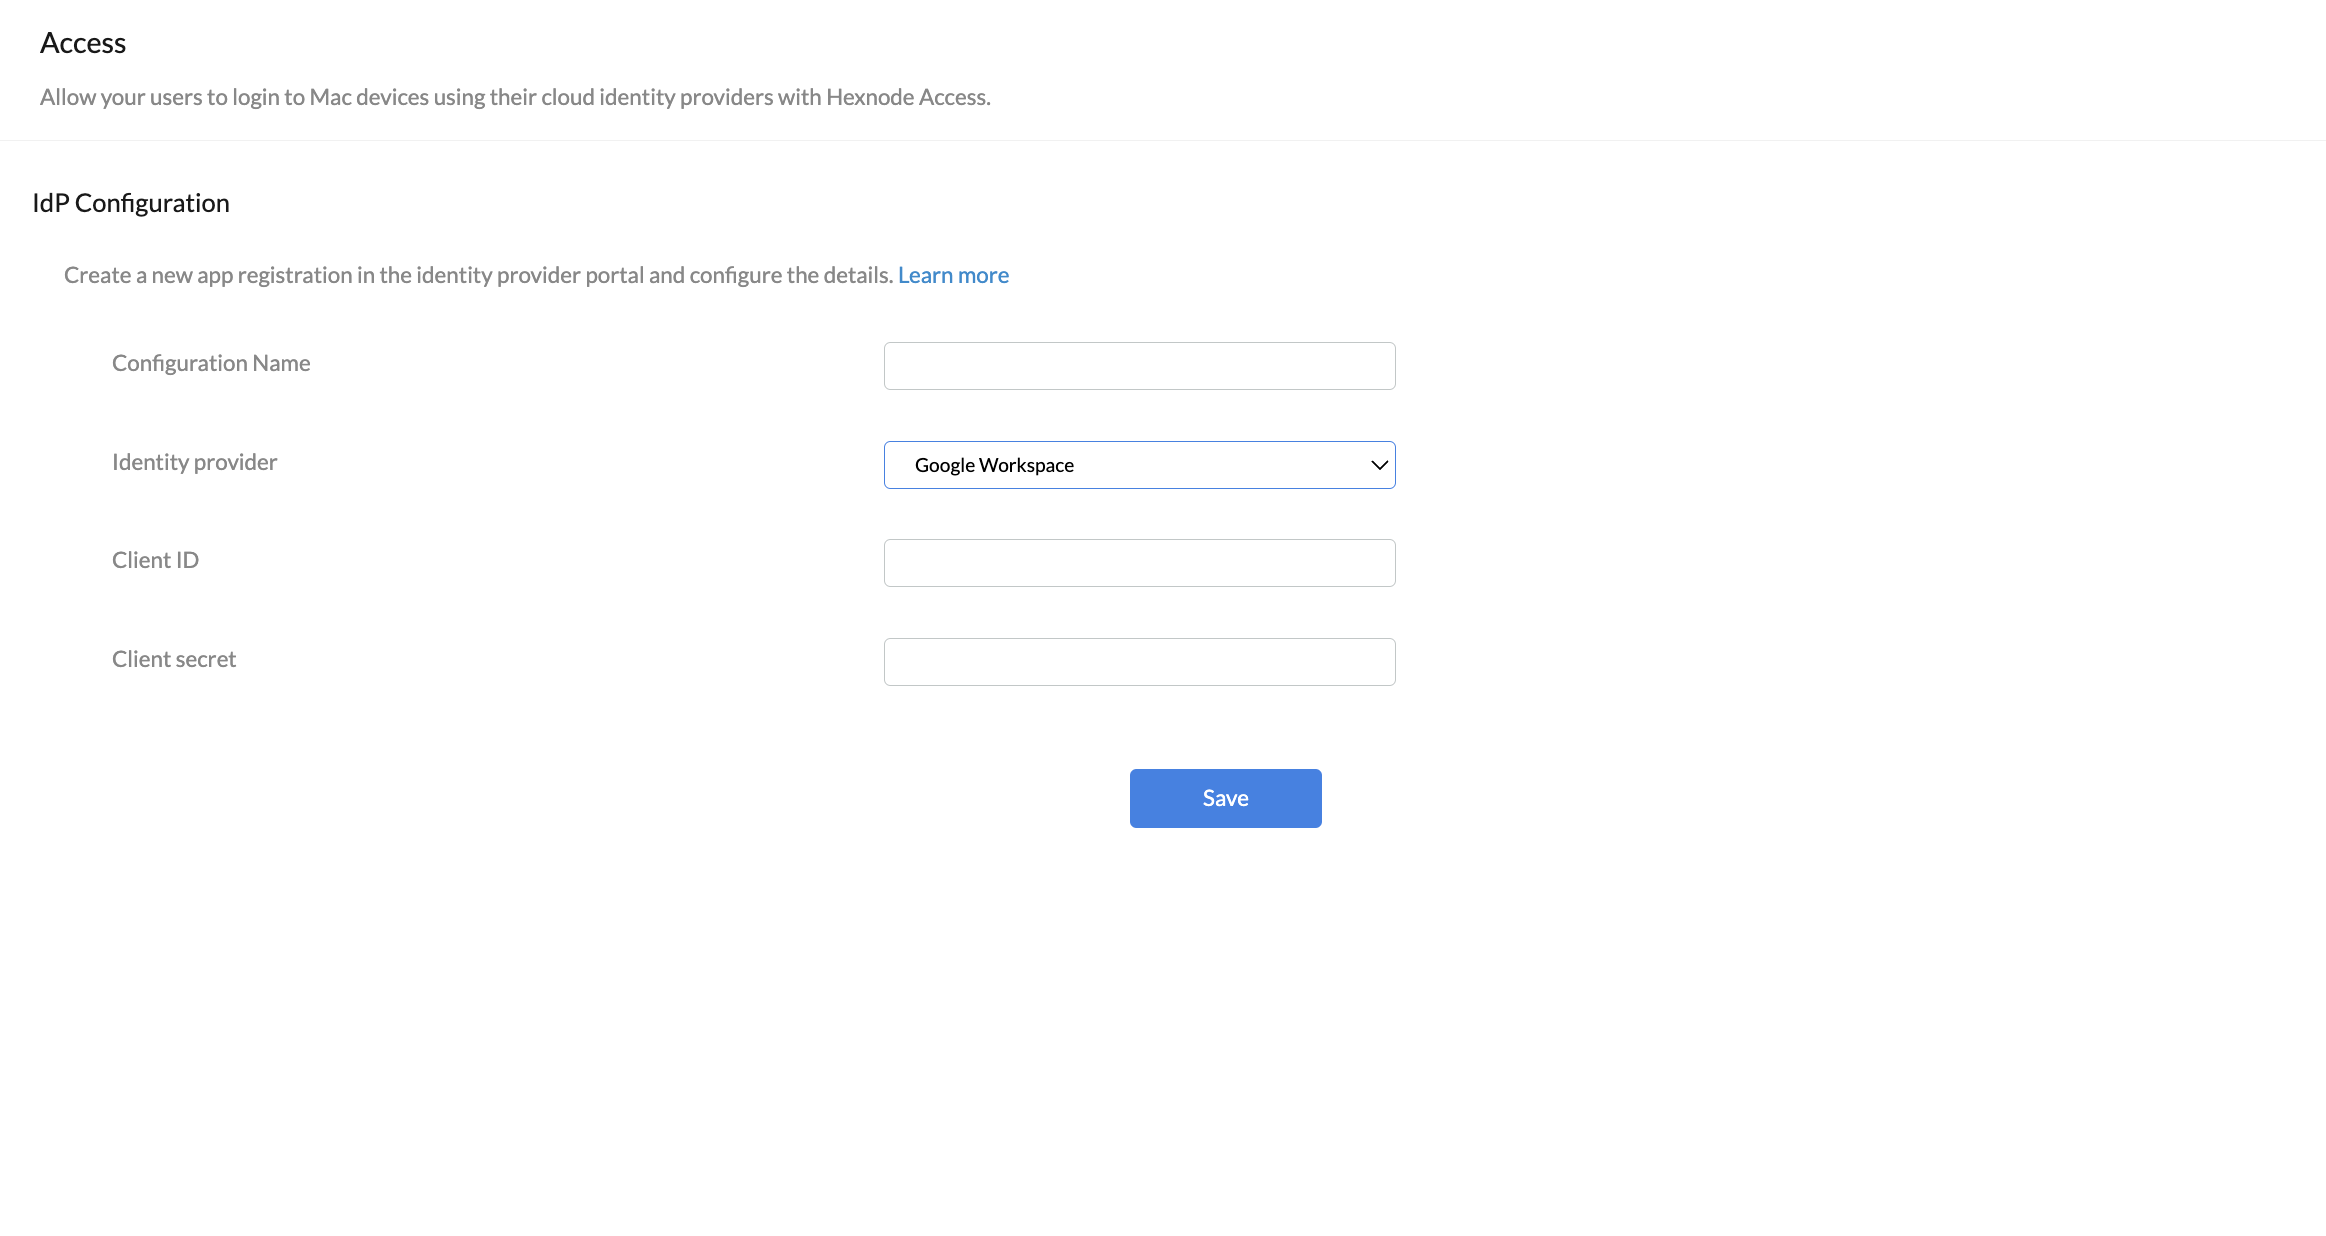
- Configuration Name: Enter a name for the configuration.
- Identity provider: Choose Google Workspace from the drop-down menu.
- Client ID: Enter the Application/Client ID of the registered app from the Google Workspace portal. It is used to authenticate the user.
- Client secret: Enter the client secret of the registered app, which is known only by the app and your IdP.
LDAP Certificate: Admins can create and upload an LDAP certificate to set up authentication for Google Workspace domains listed under Admin > Google Workspace.
Create LDAP certificate for Hexnode Access:
- Login to the Google Admin portal.
- Click on the Main menu icon at the top left corner of the page.
- Navigate to Apps > LDAP.
- Click ADD CLIENT.
- In the LDAP client name field, enter Hexnode Access and provide a description for the client.
- Click Continue.
- On the next page, set up the access permissions based on your organization’s requirements.
- Click ADD LDAP CLIENT.
- A confirmation window will appear indicating that the LDAP client was successfully created.
- Click on the Download certificate option to download a zip file containing the LDAP certificate.
Choose file: Select the downloaded zip file containing the LDAP certificate.
3. Okta
Configure authentication by: Admins can choose to move forward either using the Okta domains already added to the Hexnode UEM portal or by creating a new app registration in the Okta domain. Select the preferred method from the drop-down.
Okta domains added to Hexnode portal: Admins can select the domains listed under Admin > Okta in the Hexnode UEM portal to configure the authentication.
- Domains: Select one or more domains from the drop-down.
- Allow access for all users: Mark the checkbox if all the user groups in the above-selected domains should be given access to the device.
- Allow access only for: If all the user groups in the selected domains shouldn’t be given access to the device, specify the ones that should be given access.
Creating a new app registration in the Okta domain: A new app registration has to be created for the Hexnode Access app in the Okta domain.
How to register Hexnode Access with Okta?
- Login to the Okta portal.
- Open the Admin console for your organization.
- Navigate to Applications > Applications to view the current app integrations.
- Click on Create App Integration.
- Select OIDC – OpenID Connect as the Sign-in method.
- For the Application type, select Native Application, then click Next.
- Enter a name for your app integration.
- Click on Advanced in the Grant type section and select Resource Owner Password.
- Navigate to Sign-in redirect URIs and add the URI. The URI will be of the format: https://portalname.hexnodemdm.com/okta_devicelogin_redirect.
Replaceportalnamewith the name of the corresponding Hexnode UEM portal’s name. - Click Save.
- The application will be successfully created, and you need to configure the Client secret.
- On the home screen of the newly registered application under General tab, click Edit.
- Select the option Client secret corresponding to the Client authentication.
- Click Save under the CLIENT SECRETS section.
- A client secret will be generated.
- Once you have registered the app in the Okta portal, return to the Integrations tab in the Hexnode UEM portal to continue configuring the authentication settings.
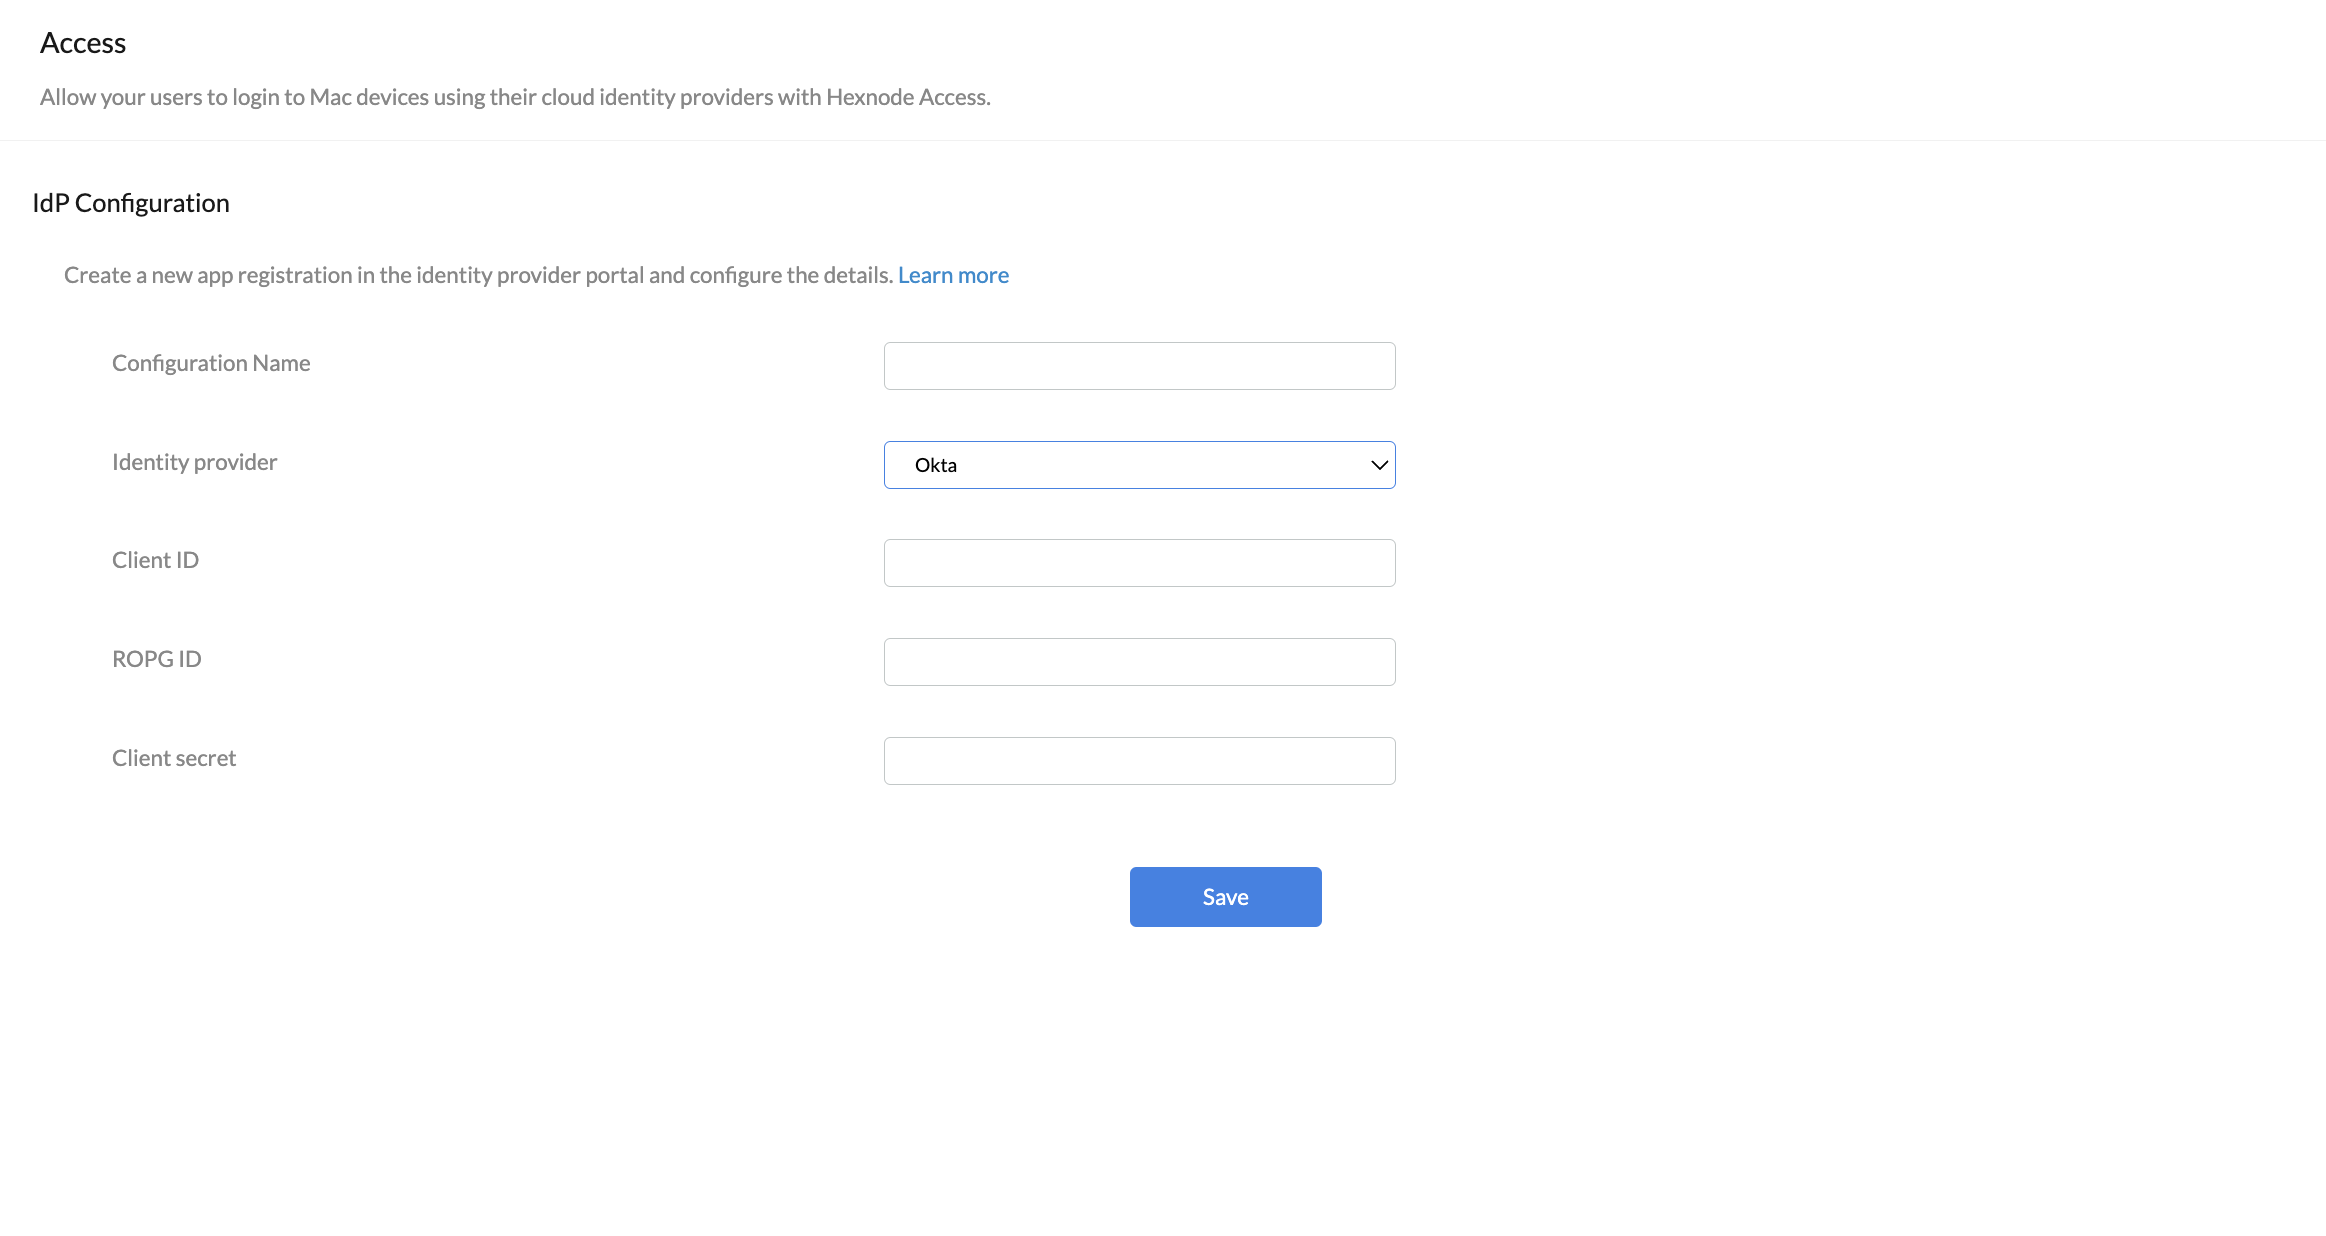
- Configuration Name: Enter a name for the configuration.
- Identity provider: Choose Okta from the drop-down menu.
- Client ID: Enter the Application/Client ID of the registered app from the Okta portal. It is used to authenticate the user.
- ROPG ID: Enter the Tenant ID/ROPG (Resource Owner Password Grant) ID of your Okta portal. (e.g dev-123456.okta.com)
- Client secret: Enter the client secret of the registered app, which is known only by the app and your IdP.
Select configuration: The configured app registrations will be visible in this drop-down menu, allowing for the selection of the desired one. Alternatively, the Create new configuration option can be chosen, which will redirect you to the Integrations tab for configuring a new app registration.
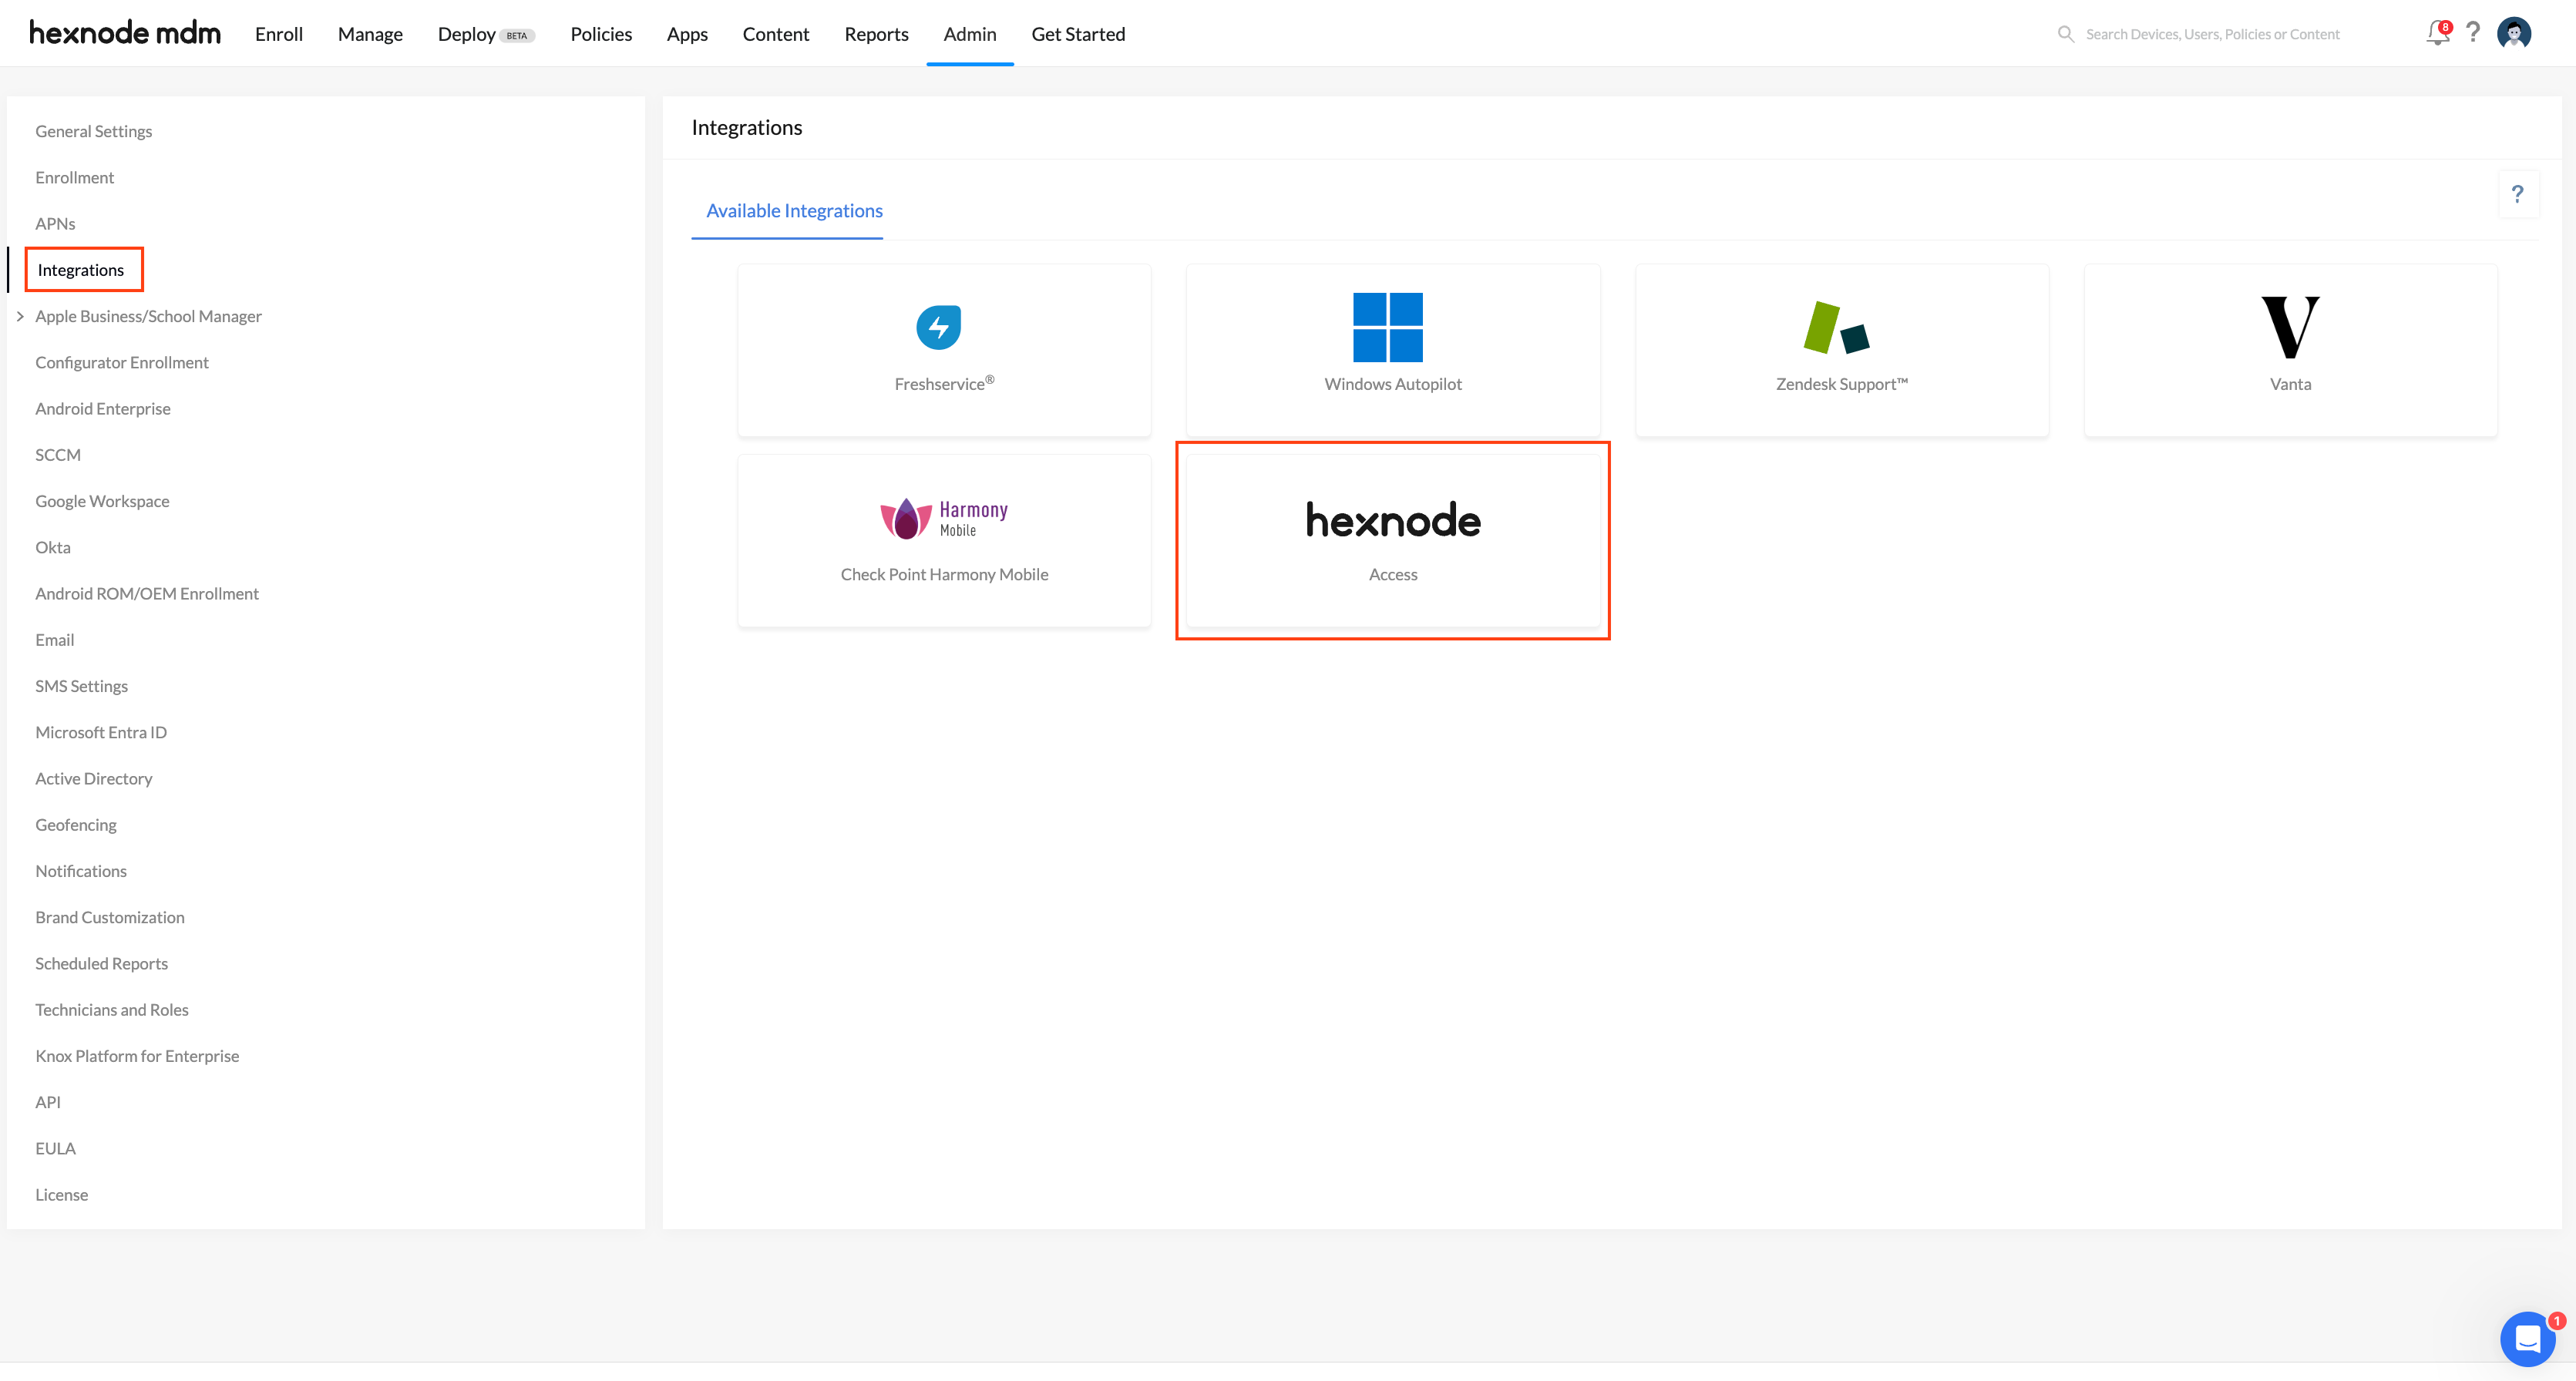
Hexnode Access in the Integrations tab: By default, the Integrations tab in the Admin console features a Hexnode Access tile. Here, you can create new app registrations in the corresponding Cloud Identity Provider (IdP) portal. Also, the Hexnode Access tile displays a list of policies configured using the associated app registration.
Scheduled sync:
Choose the time interval for synchronizing the identity provider’s user list with Hexnode from the drop-down:
- Every 12 hours
- Every 24 hours
- Every 2 days
- Every 4 days
- Every week
Account settings:
Set up account settings according to various identity providers (IdP).
When choosing domains added to Hexnode portal:
- Set user type of newly created user to Admin: When enabled, all new users created on the device will be assigned admin privileges.
- Set Admin user type only for: If admin privileges are not required for all users, specify the users who should be granted admin privileges.
- Migrate local account to network accounts: Check this option to migrate existing local accounts to network accounts.
For the option “creating app registration with IdP”:
- Set user type of newly created user to Admin: When enabled, all new users created on the device will be assigned admin privileges.
- Migrate local account to network accounts: Check this option to migrate existing local accounts to network accounts.
For the option “LDAP Certificate”:
Migrate local account to network accounts: Check this option to migrate existing local accounts to network accounts.
Login settings:
You can adjust the login settings to manage authentication processes, improving both security and user experience.
- Sync password with cloud account: When this option is checked, the local account password will be synchronized with the network password. If unchecked, users will be prompted to set a new password for their local account.
- Allow Offline Access: Checking this option permits users to bypass network authentication and use the local login button at the login screen to authenticate locally.
- Allow offline access only for: When the Allow Offline Access option is enabled, you can specify user group names to restrict offline access to only those groups.
- Limit Offline Access: Check this option if you want users to re-authenticate online using their Cloud IdP credentials after a set period of time.
- Require authentication every: If the option Limit Offline Access is checked, select the frequency for re-authentication from the drop-down:
- Every login
- Every 15 days
- Every 30 days
- Every 45 days
- Every 60 days
- Every 90 days
- Every 120 days
- Every 180 days
- Fallback to local login: Check this option to fallback to local login when the device has no network connection.
- Set login page background – Upload an image to set as the login page background.
- Blur background image – Adjust the slider to blur the background image.
- Login page logo – Upload an image to set as the login page logo.
- Customize placeholder: Customize the login window placeholders to your preferred language, especially beneficial for organizations where English is not the primary language. Click the Preview button to see how the login window will appear with the customized placeholders.
- Allow access to network settings: Mark the checkbox to allow users to connect to a network from the login window. If enabled, click Network Settings on the login page and select a network to connect to.
- Help URL: Add a link that may be resourceful to the users when logging into the device or during enrollment and onboarding.
- Backup help file: Upload a file that the users can access in case they cannot connect to a network and are unable to open the help URL.
- Enable FileVault: Select this option to activate FileVault upon user login.
- Save FileVault recovery key: Check this option to store the FileVault recovery key on the device.
- Set recovery key file path: Specify the location where the FileVault recovery key needs to be saved.
- Navigate to Policy Targets.
- Click on Devices/ Device Groups/ Users/ User Groups/ Domains.
- Choose the targets and click OK and then Save.
- Go to the Policies tab and choose the desired policy.
- Click on the Manage drop-down and select Associate Targets.
- Choose the target entities and click Associate. You can choose devices, users, groups, and domains as the policy targets.
- Case 1: If the local account password is changed when the user is logged in:
The user will be prompted to enter the current local account password to update it.
- Case 2: If the local account password is changed and the user is logged out:
If the local account password is changed and the user is subsequently logged out of the device, the user will need to log in using the new password. After the successful login, the new password will be automatically synced with the Cloud IdP, eliminating the need for manual password update via the Cloud IdP console.
- Case 1: If the Cloud IdP password is changed when the user is logged in:
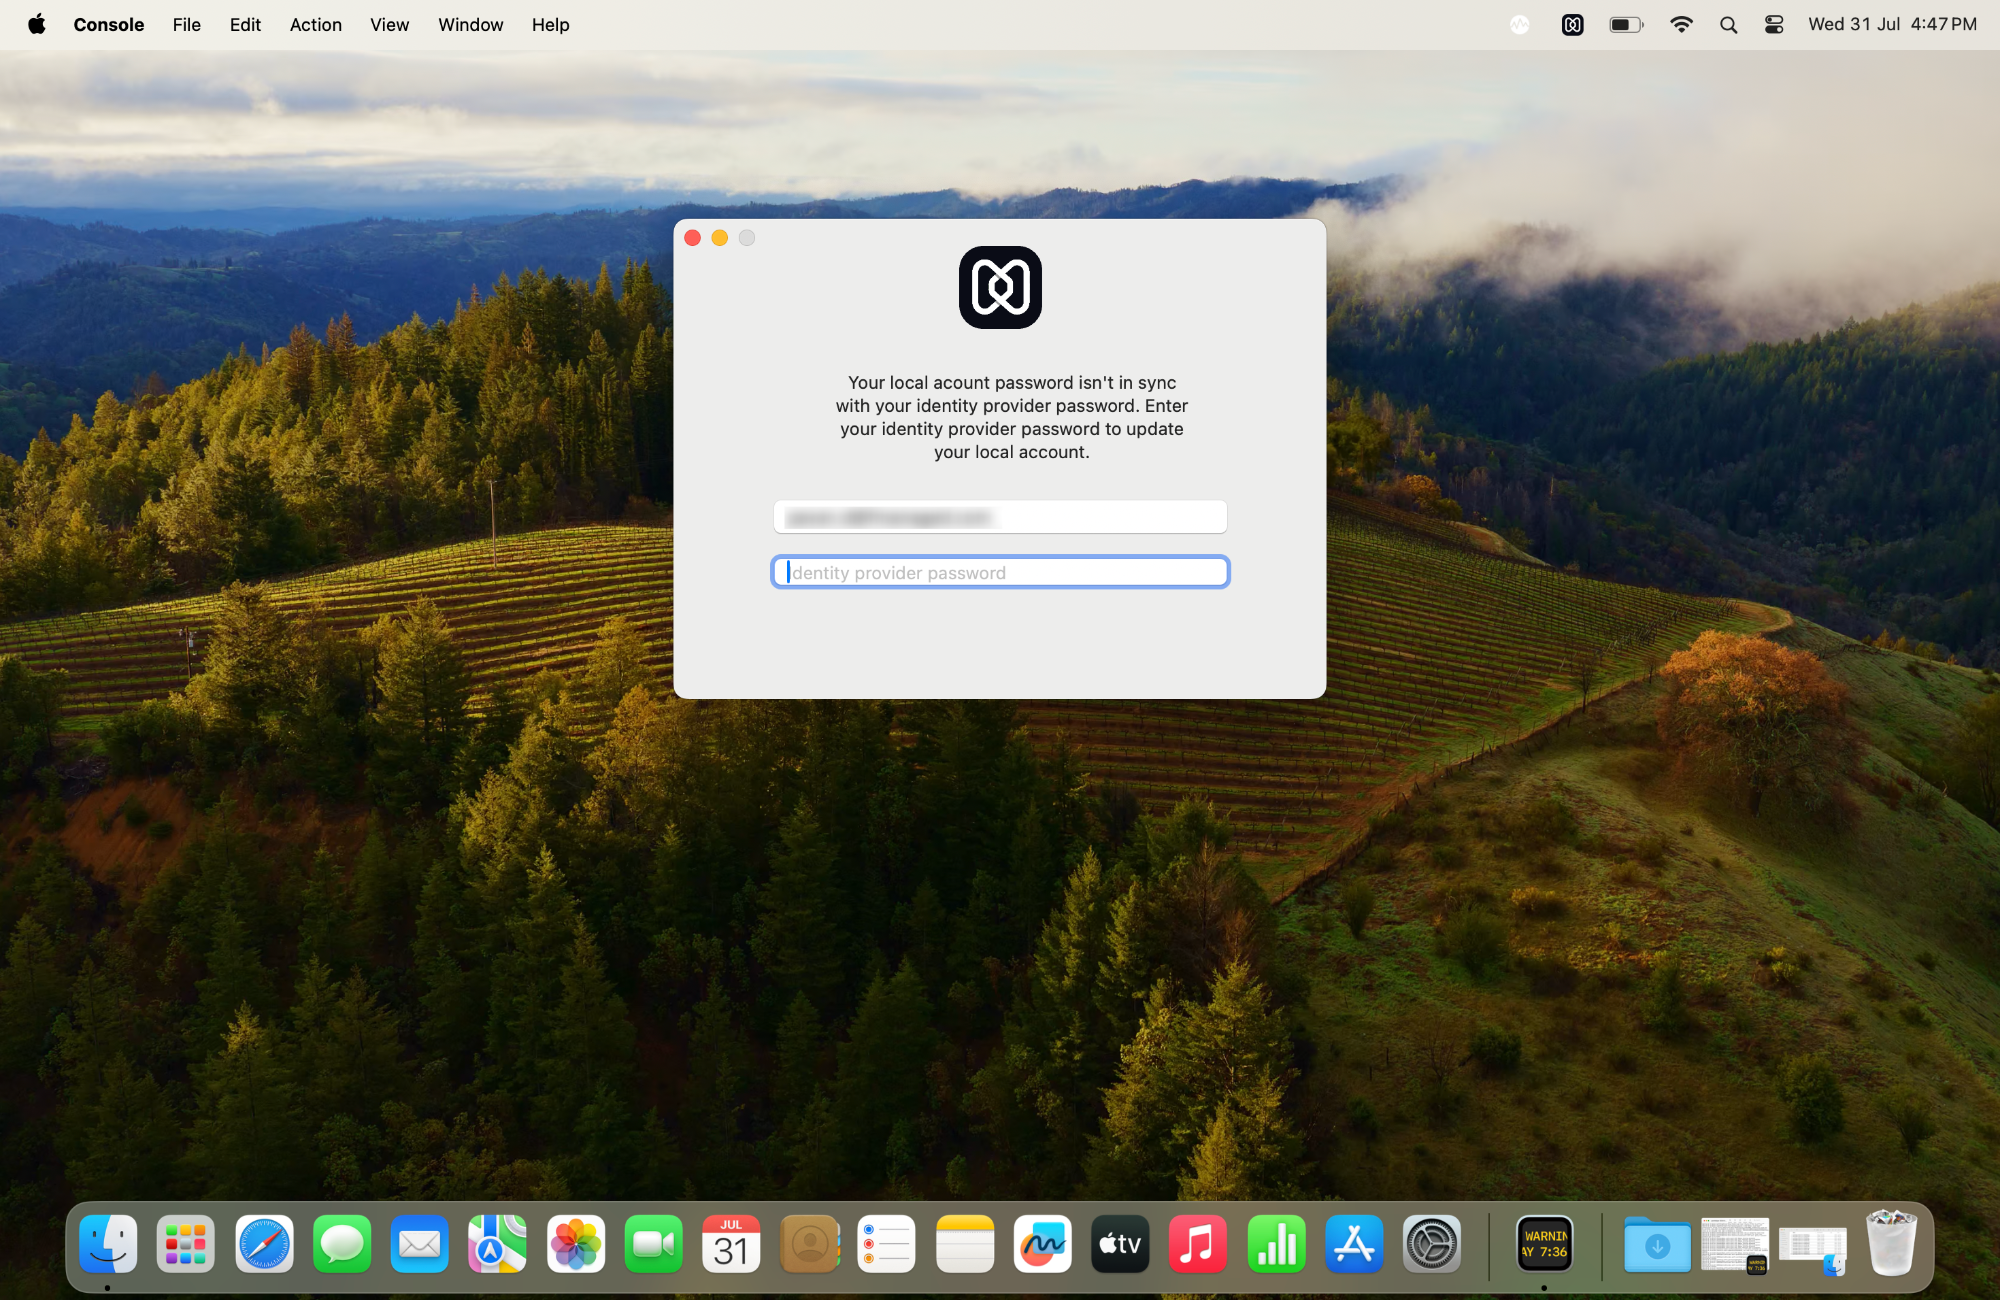
The user will receive a prompt to enter the new Cloud IdP password to sync it with their local account.
- Case 2: If the Cloud IdP password is changed when the user is logged out:
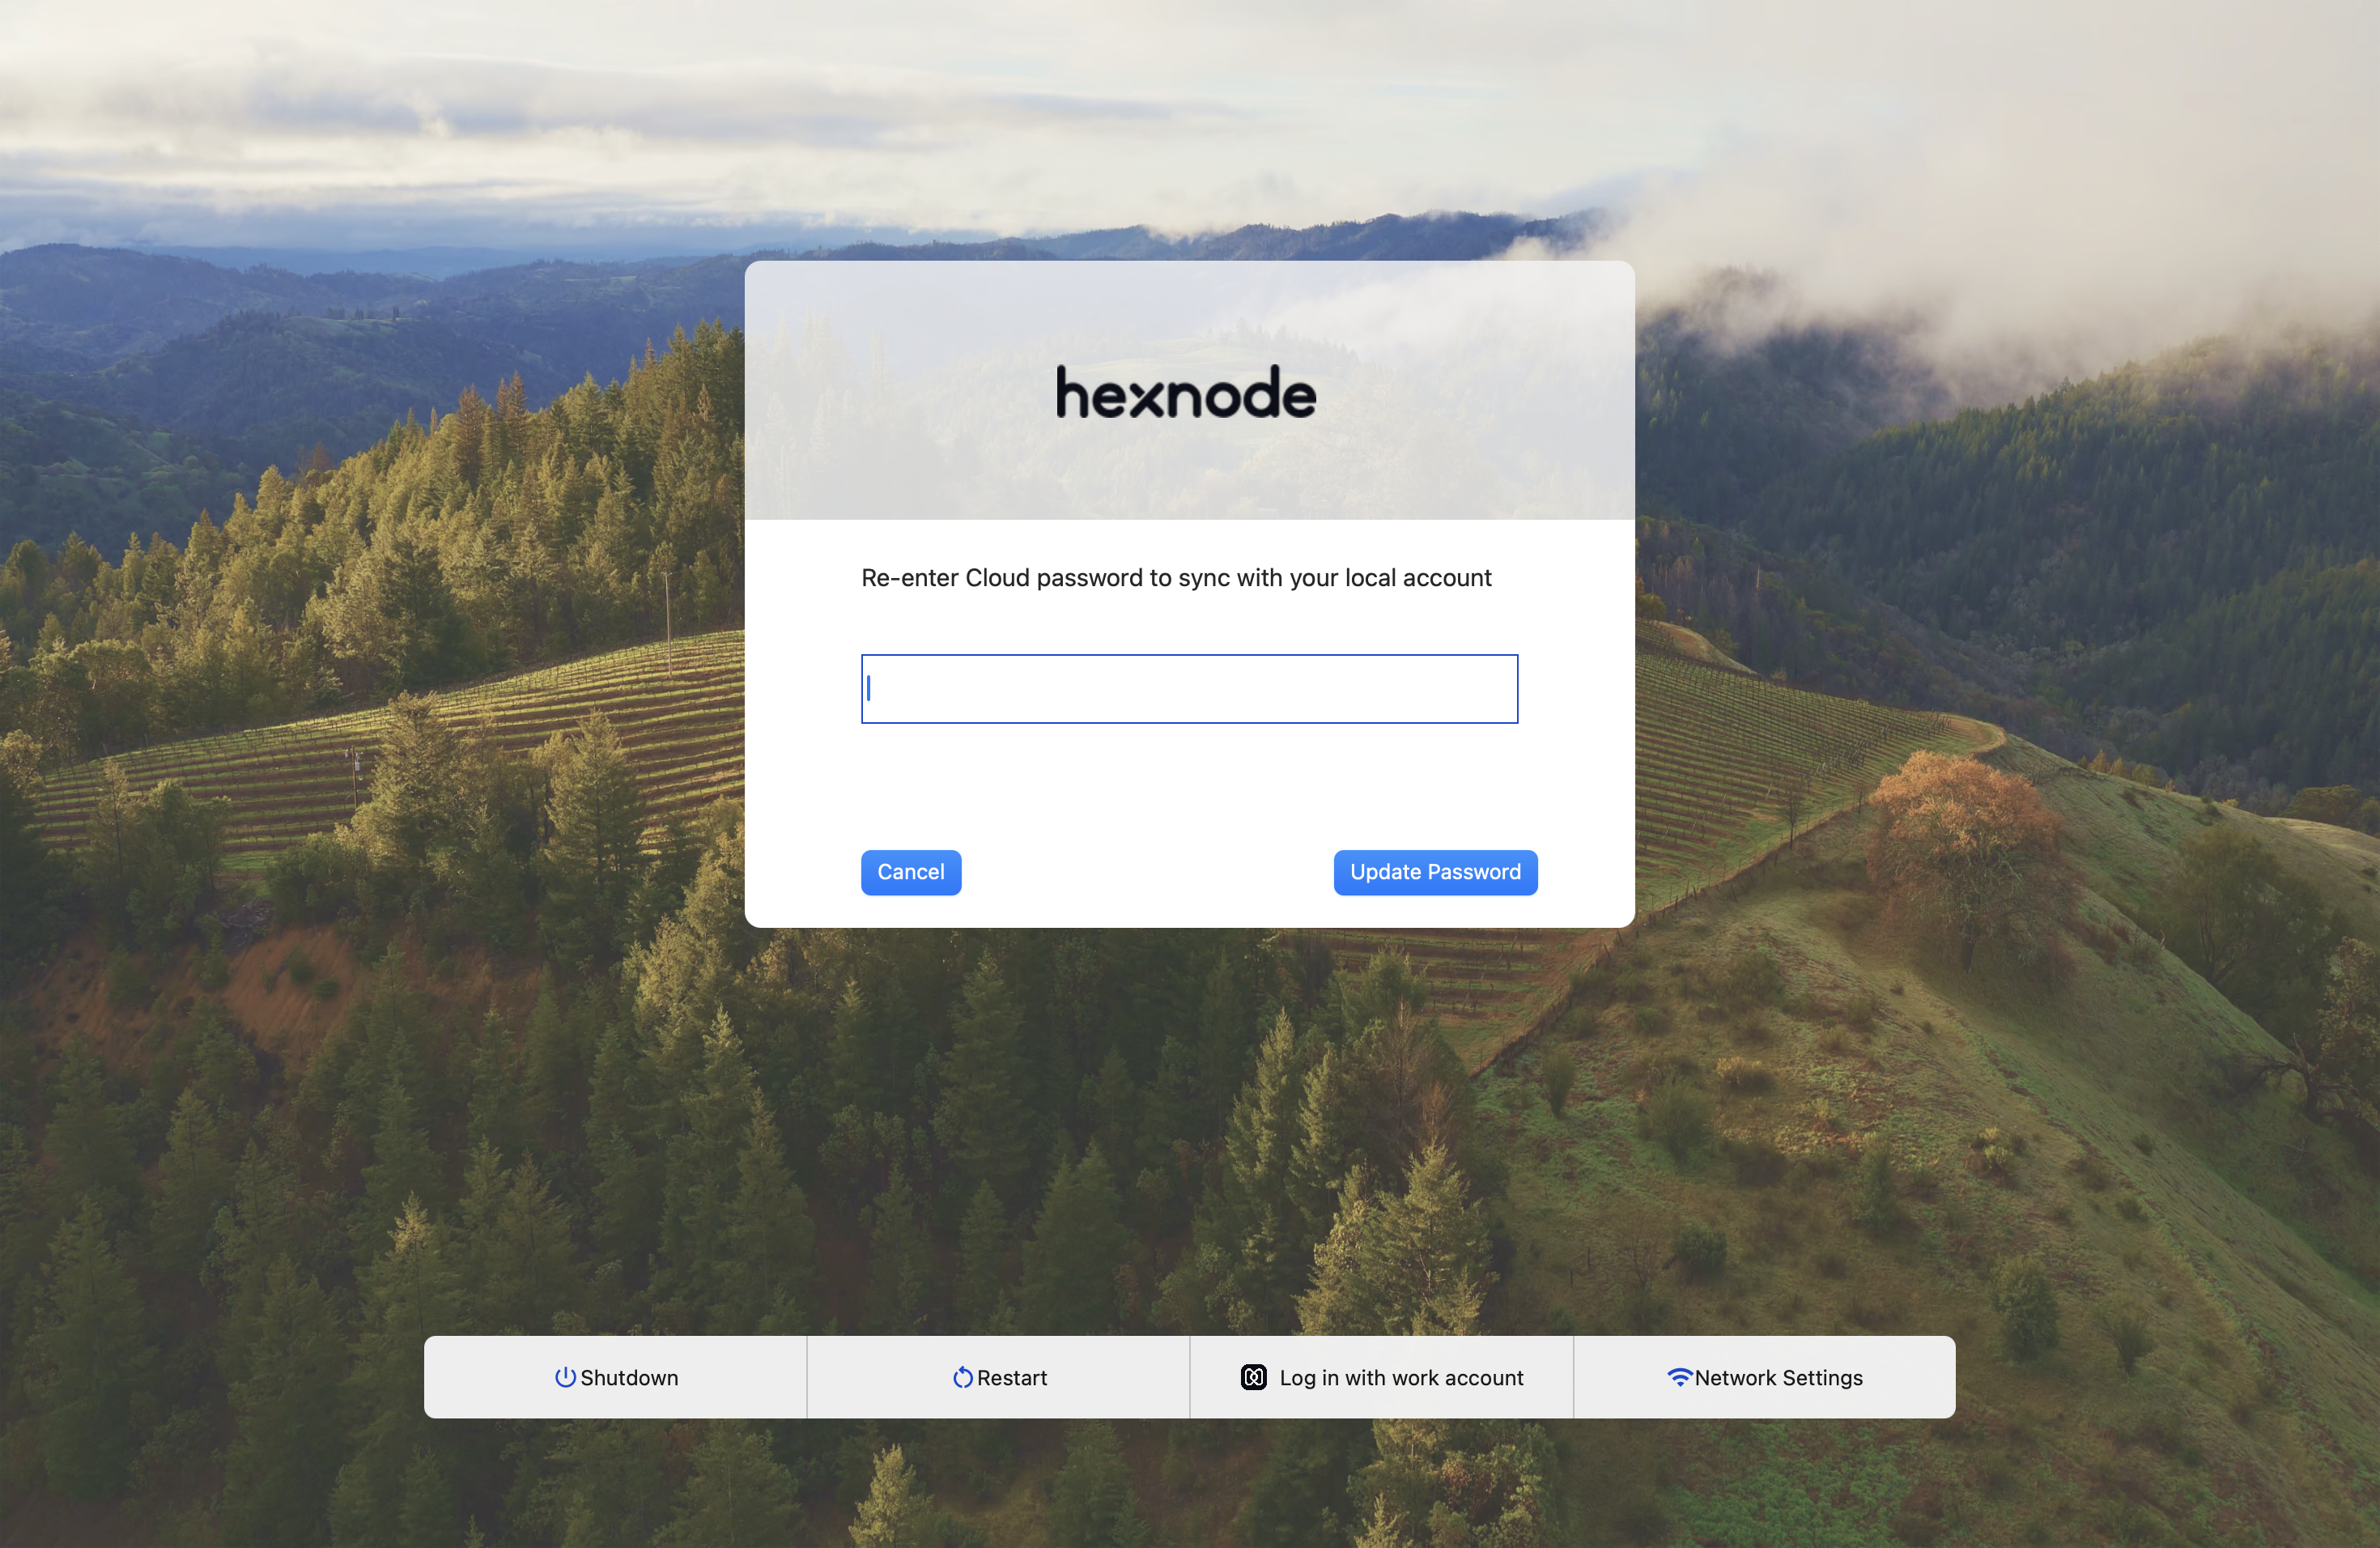
At the device’s login screen, the user will be prompted to enter the new Cloud IdP password to sync it with the local account.
- Case 1: If the Cloud IdP password is expired when the user is logged in:
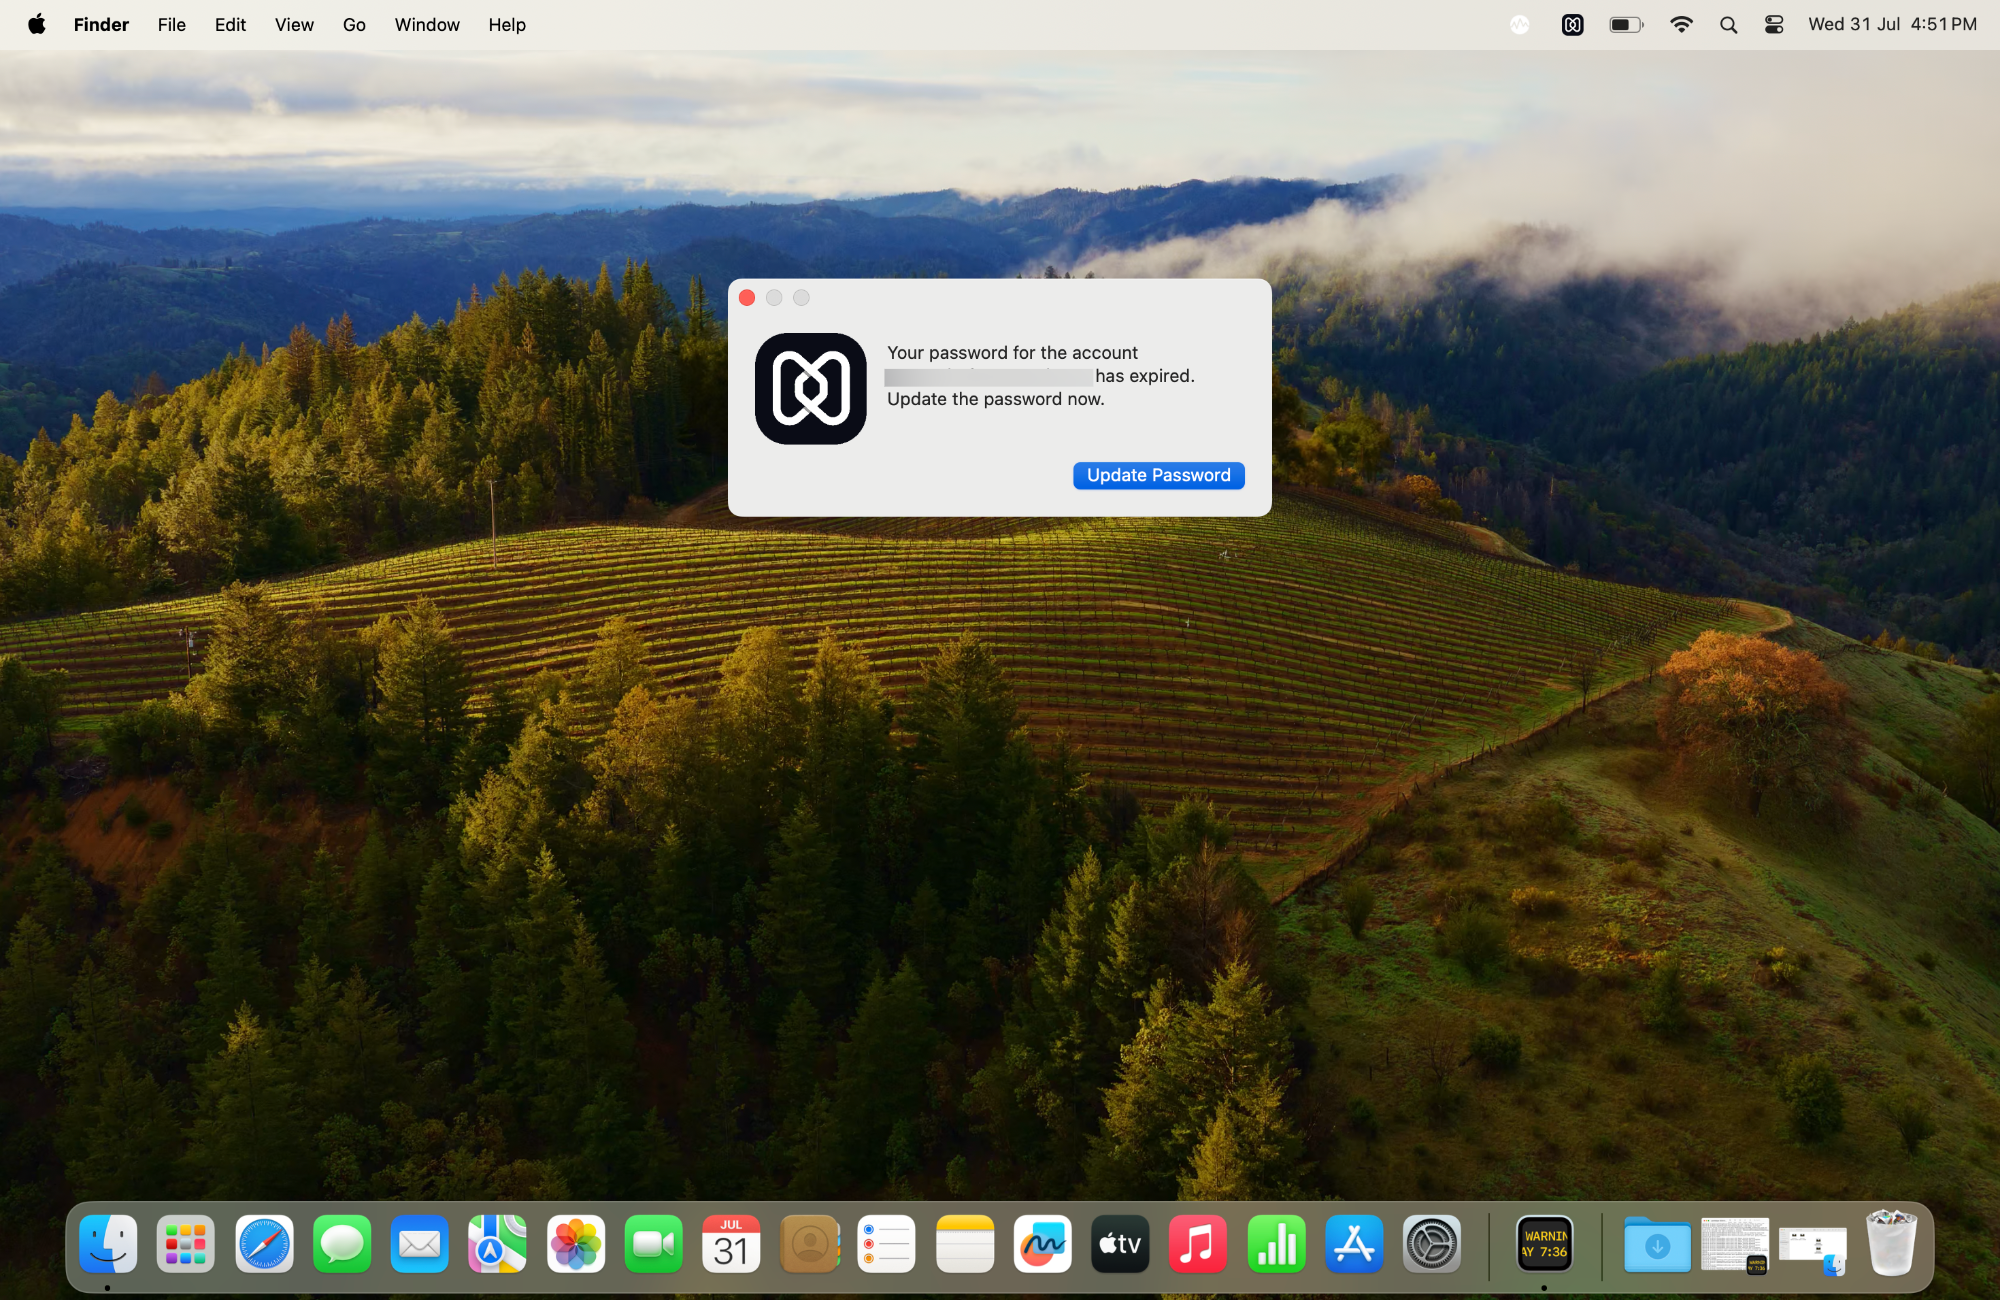
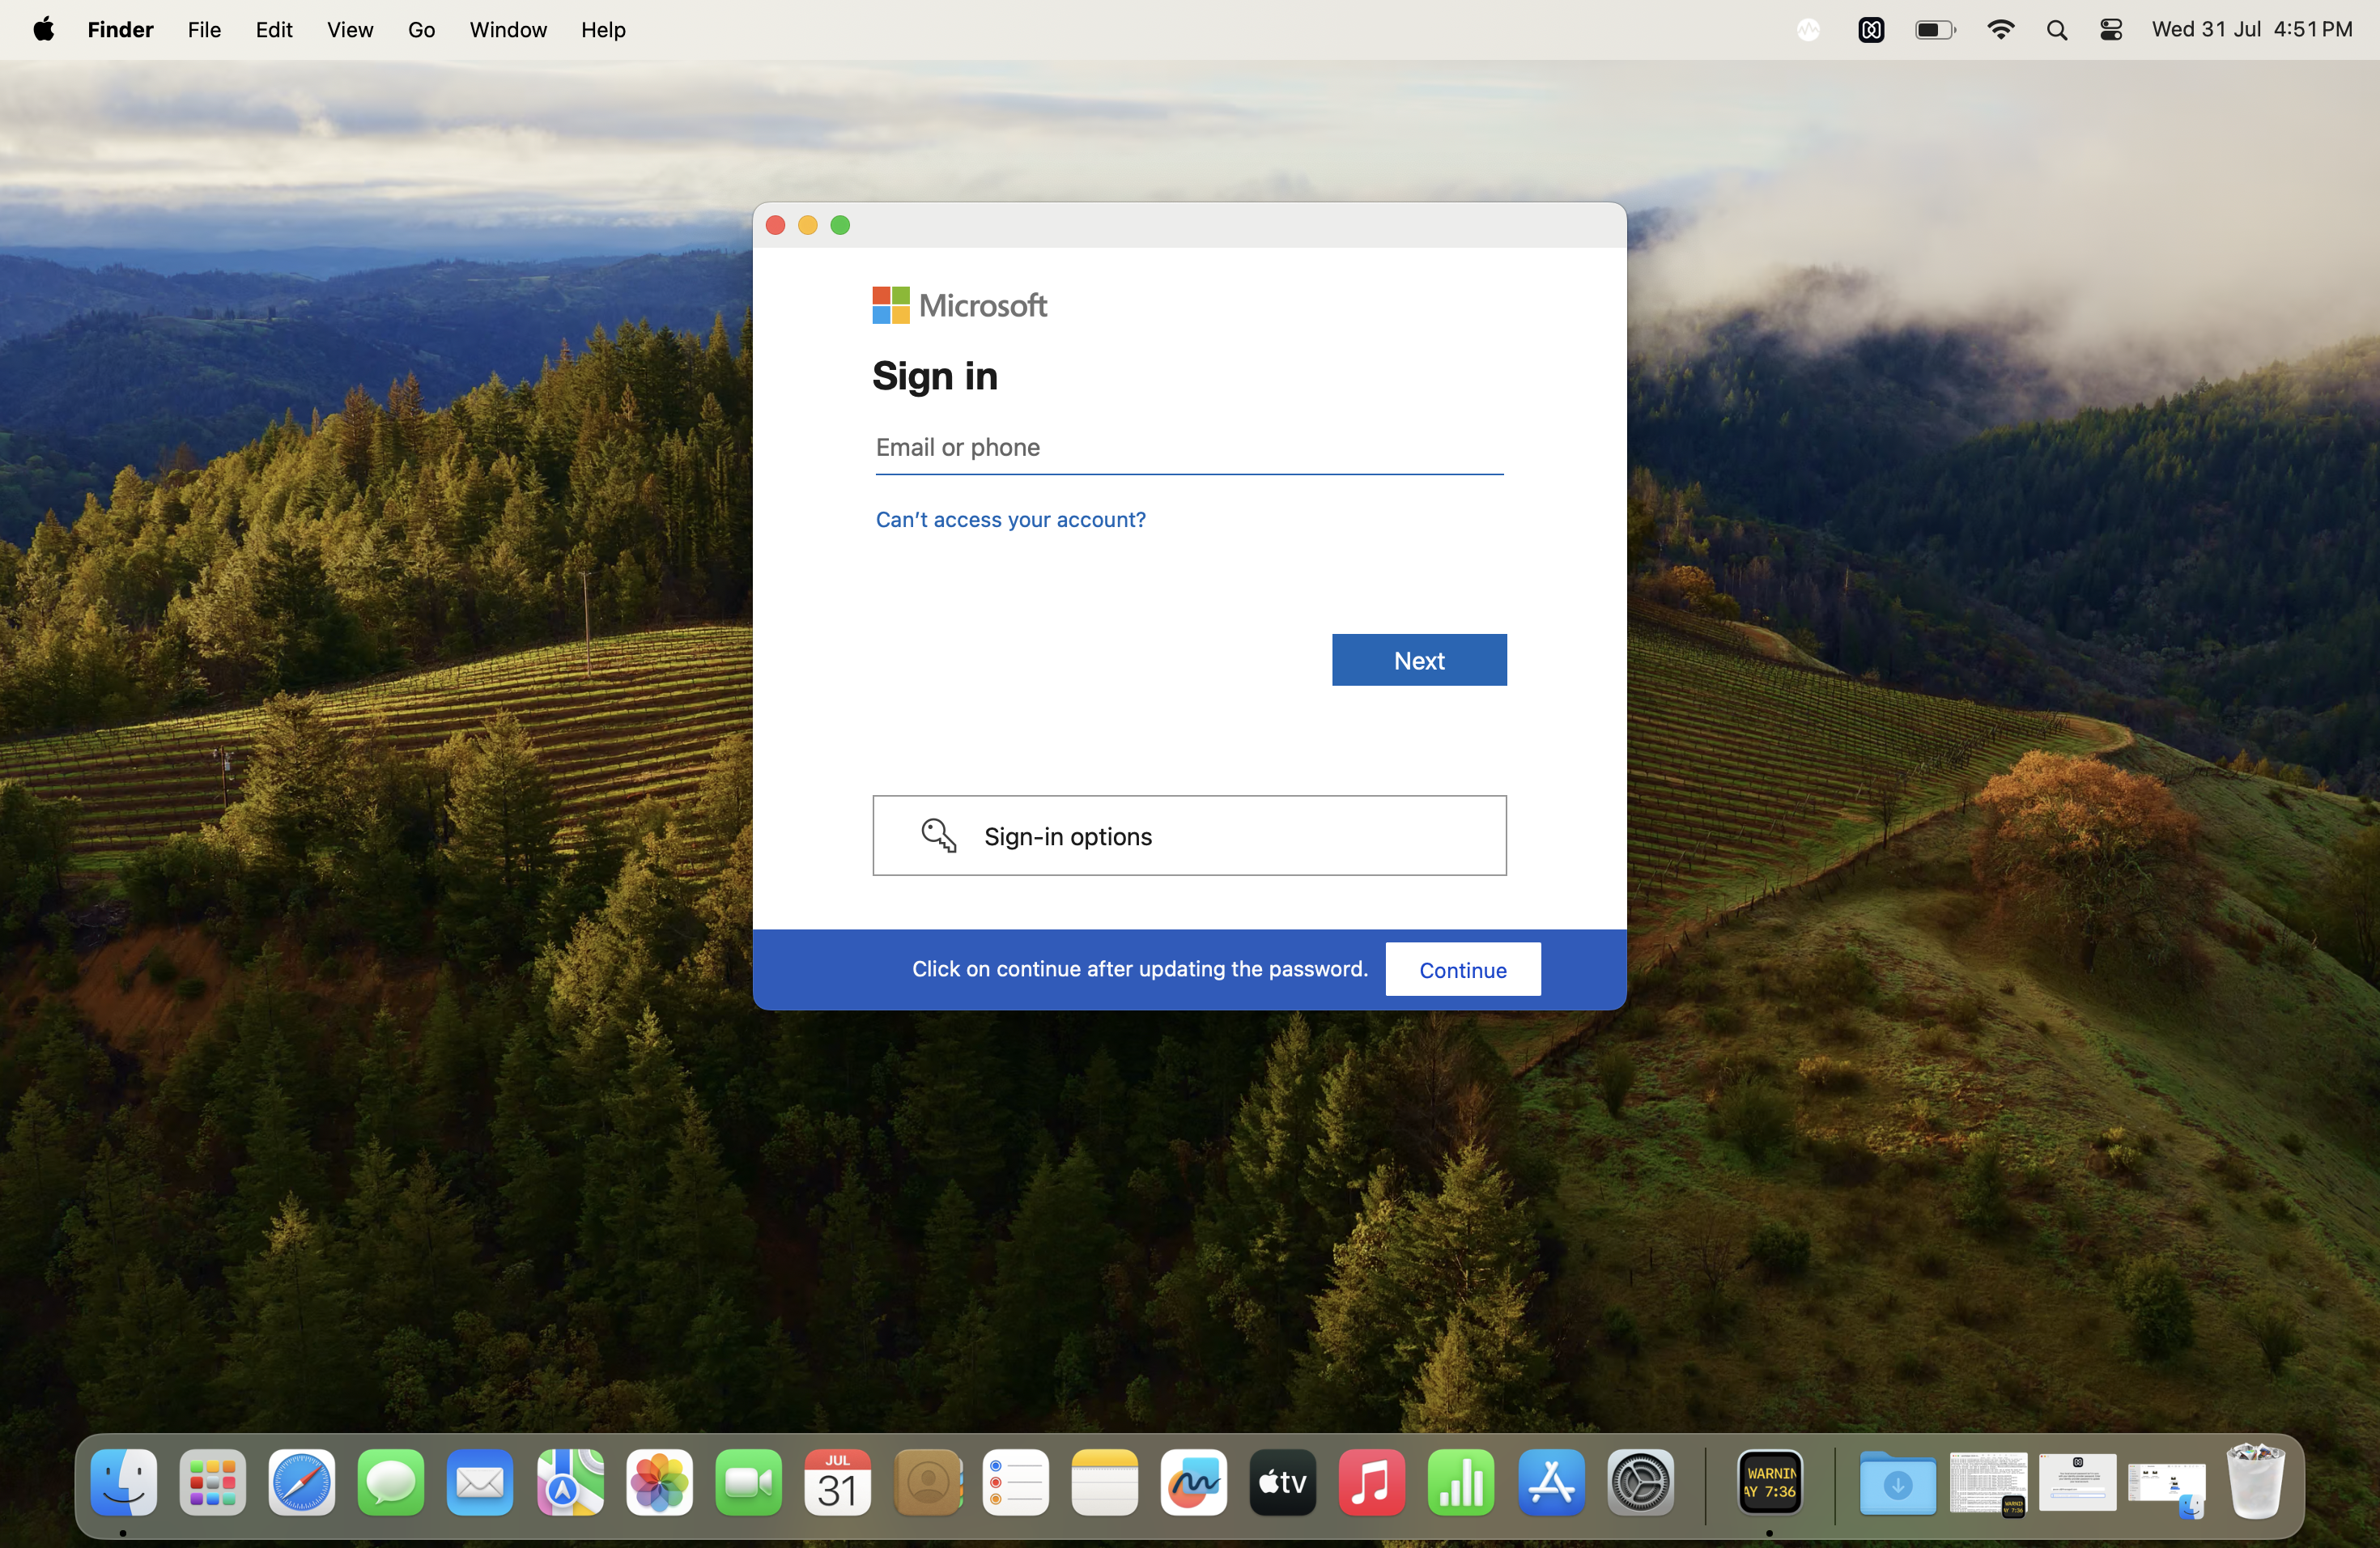
Initially, a pop-up will appear requesting the Cloud IdP password to verify the account.
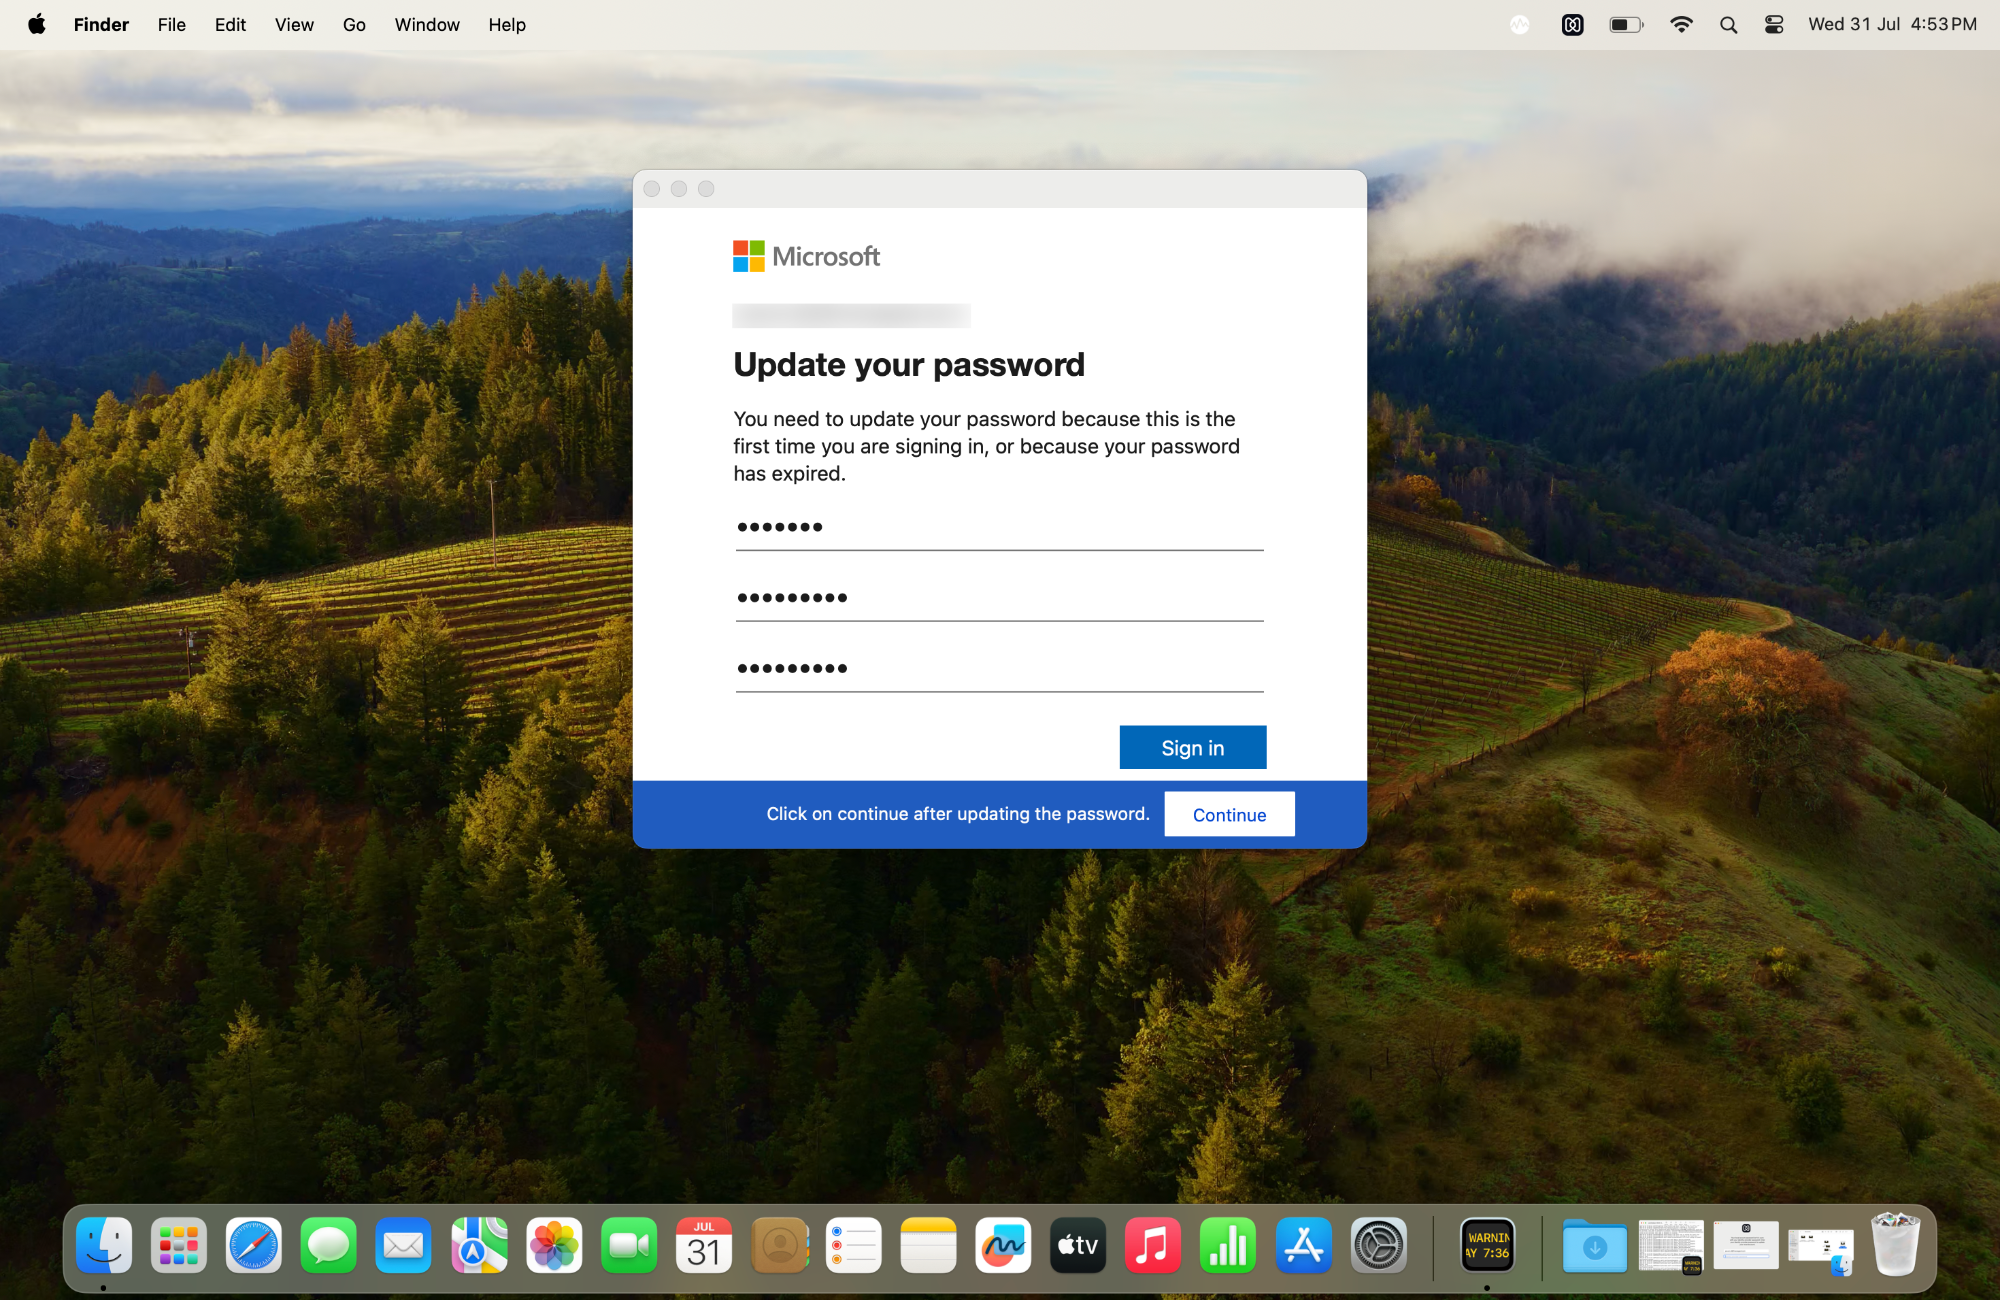
After account verification, a prompt to update the Cloud IdP password will be displayed.
Clicking on the “Update Password” option will redirect to a page where the user needs to enter the Cloud IdP account email address.
After entering the email address, a pop-up will appear allowing the user to update the Cloud IdP password.
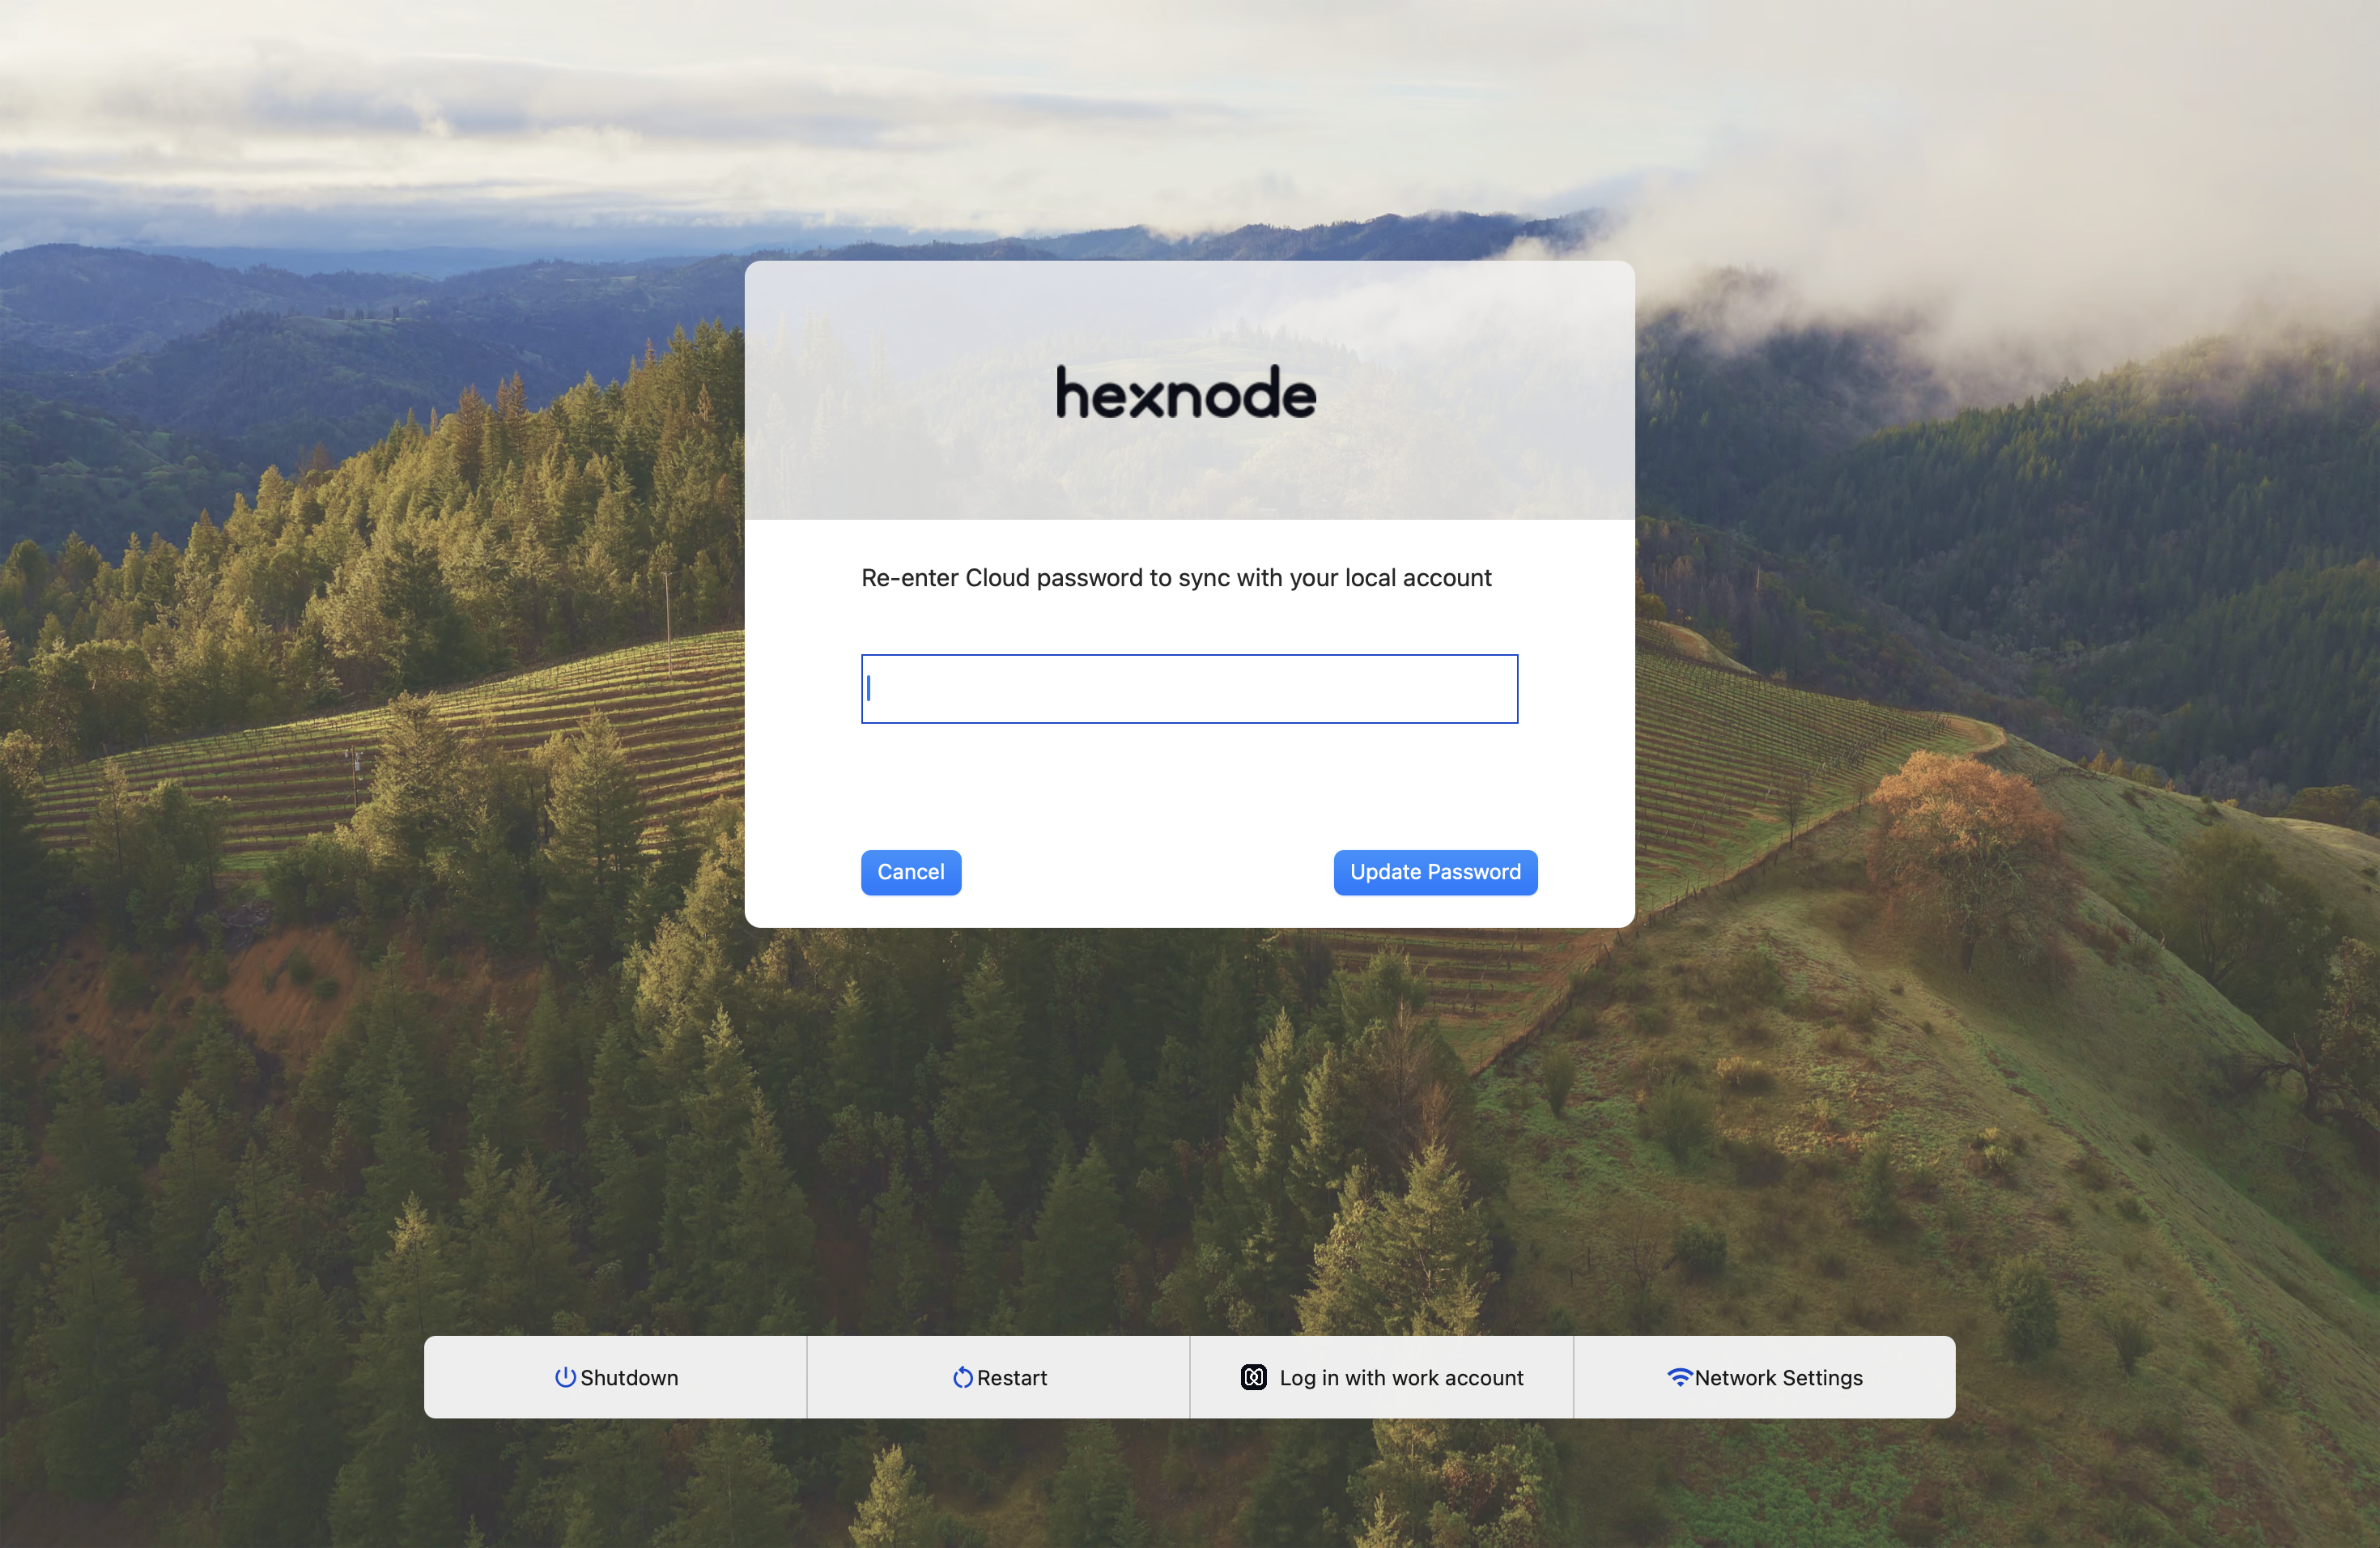
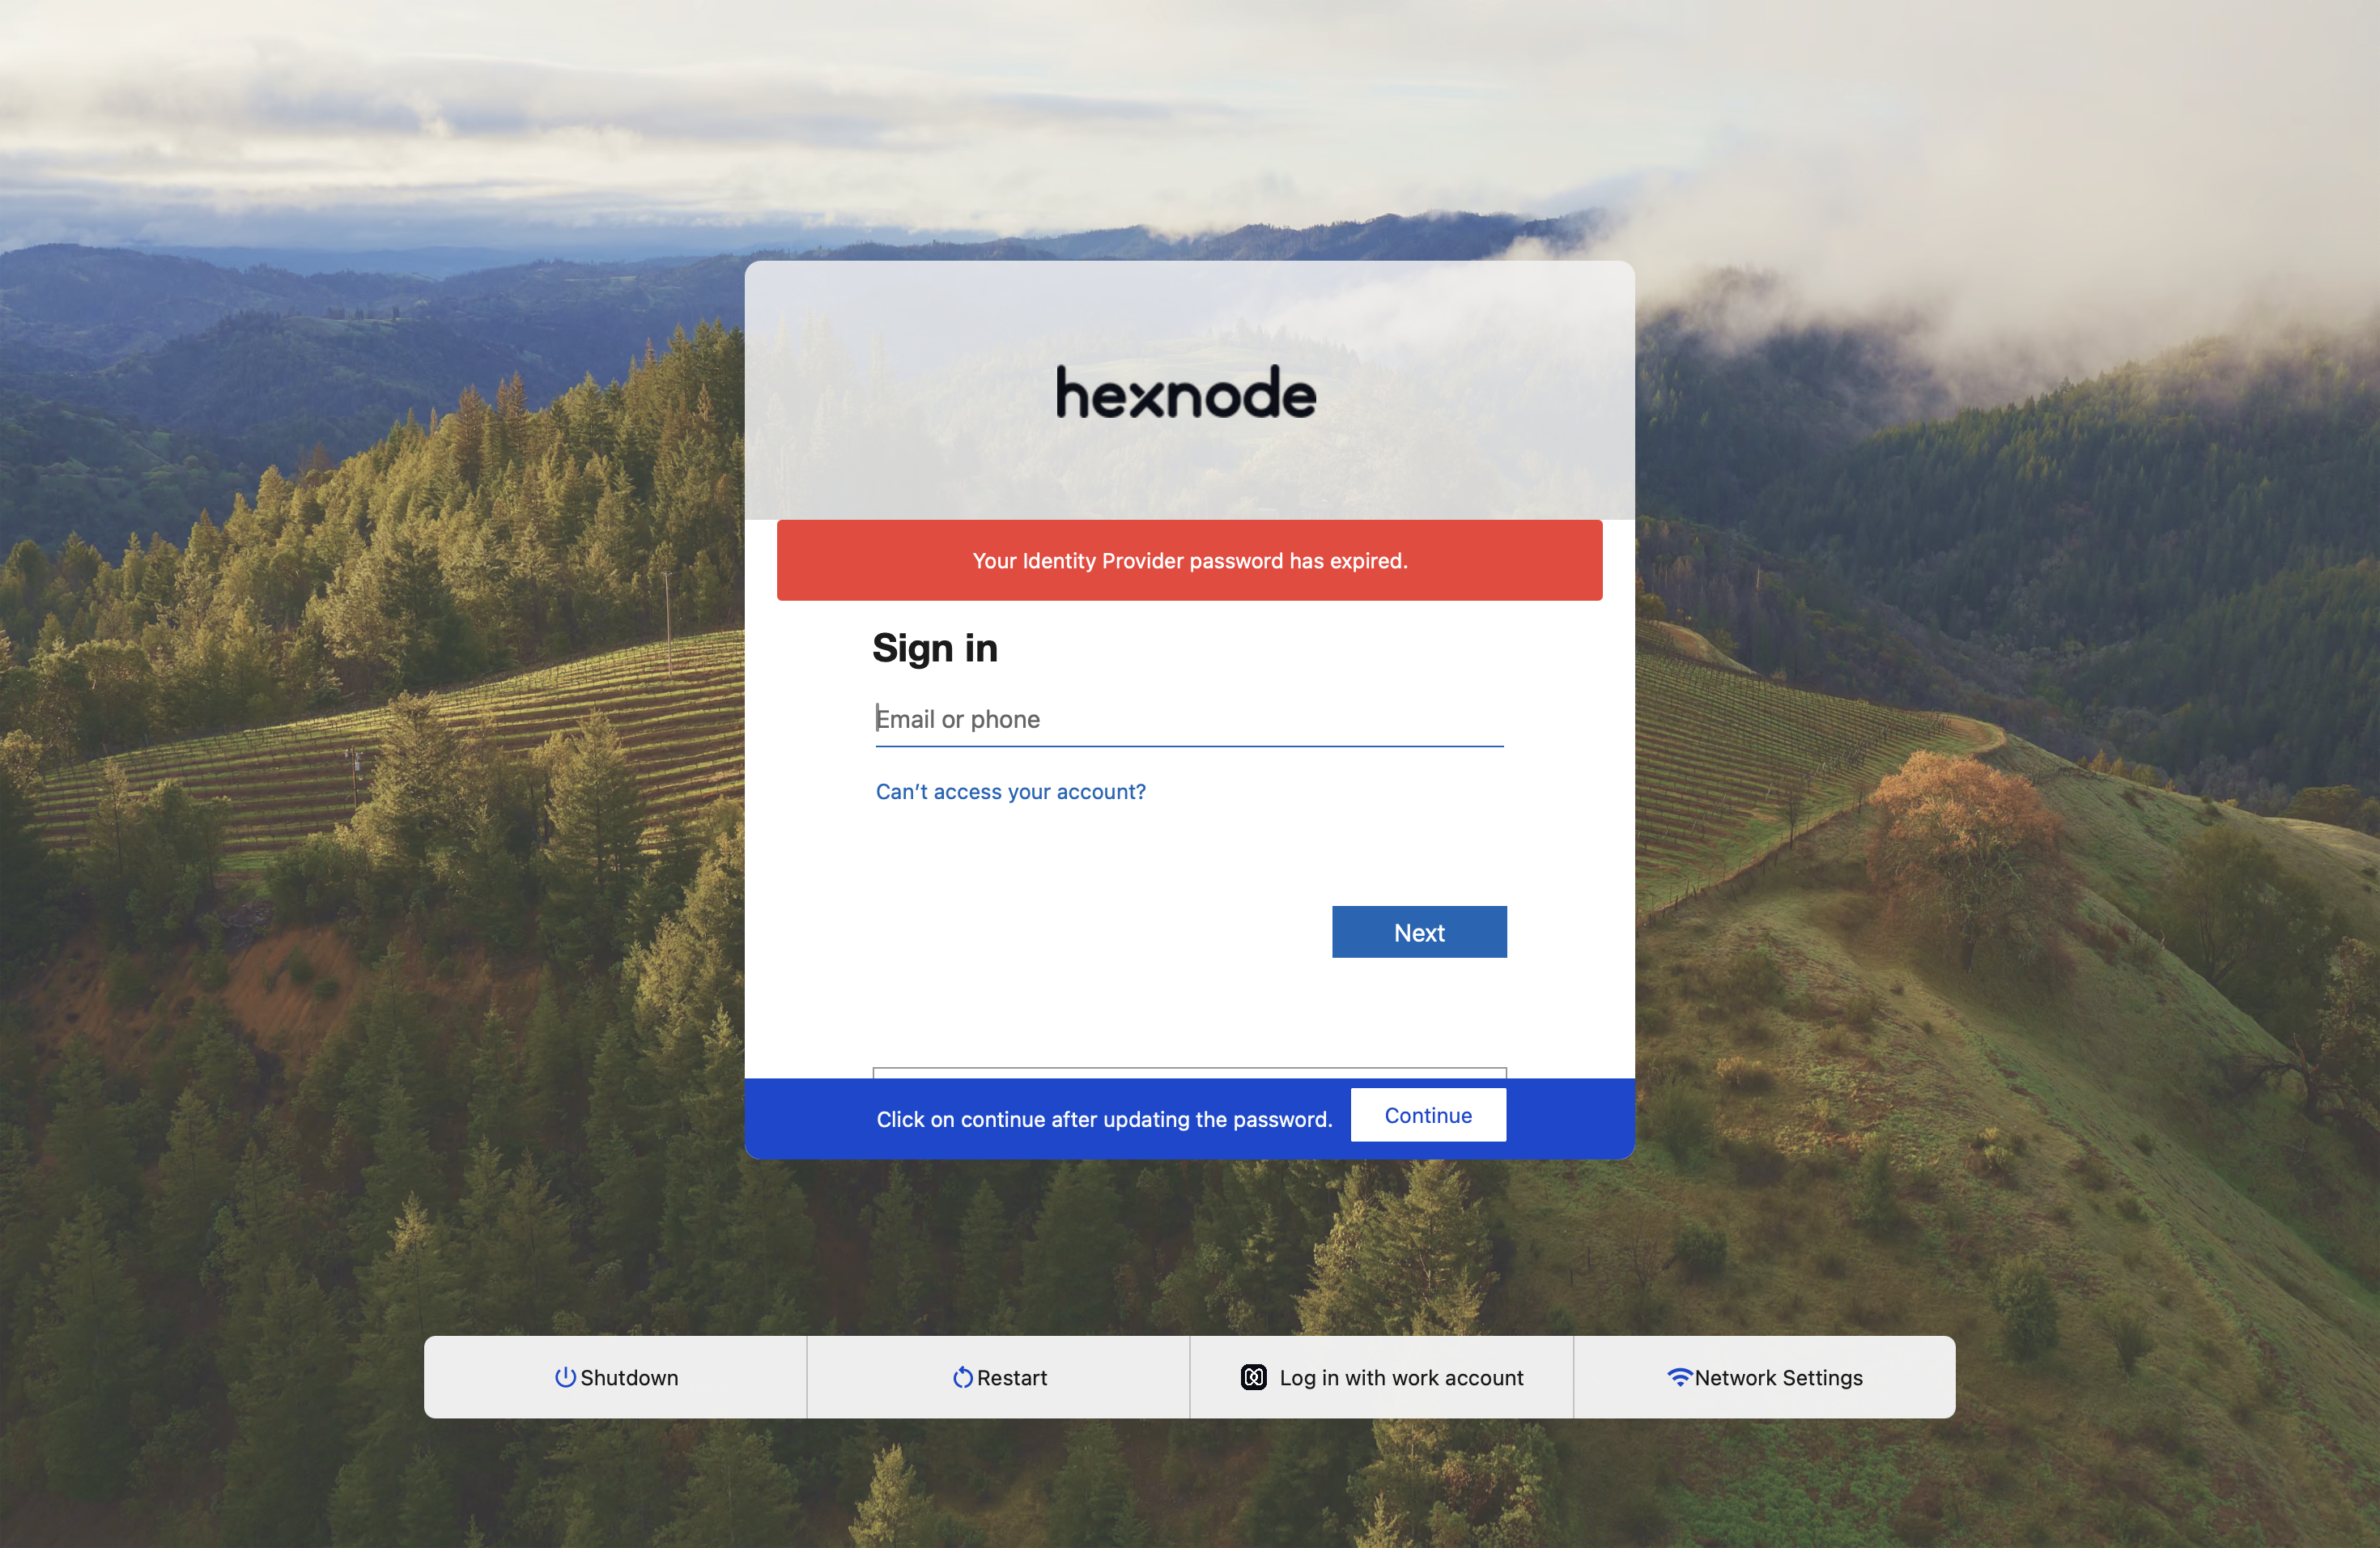
- Case 2: If the Cloud IdP password is expired when the user is logged out:
First, the user will need to re-enter the Cloud IdP password to synchronize with the local account.
After re-entering the password, a warning message about the expired password will appear, prompting the user to enter the Cloud IdP email address.
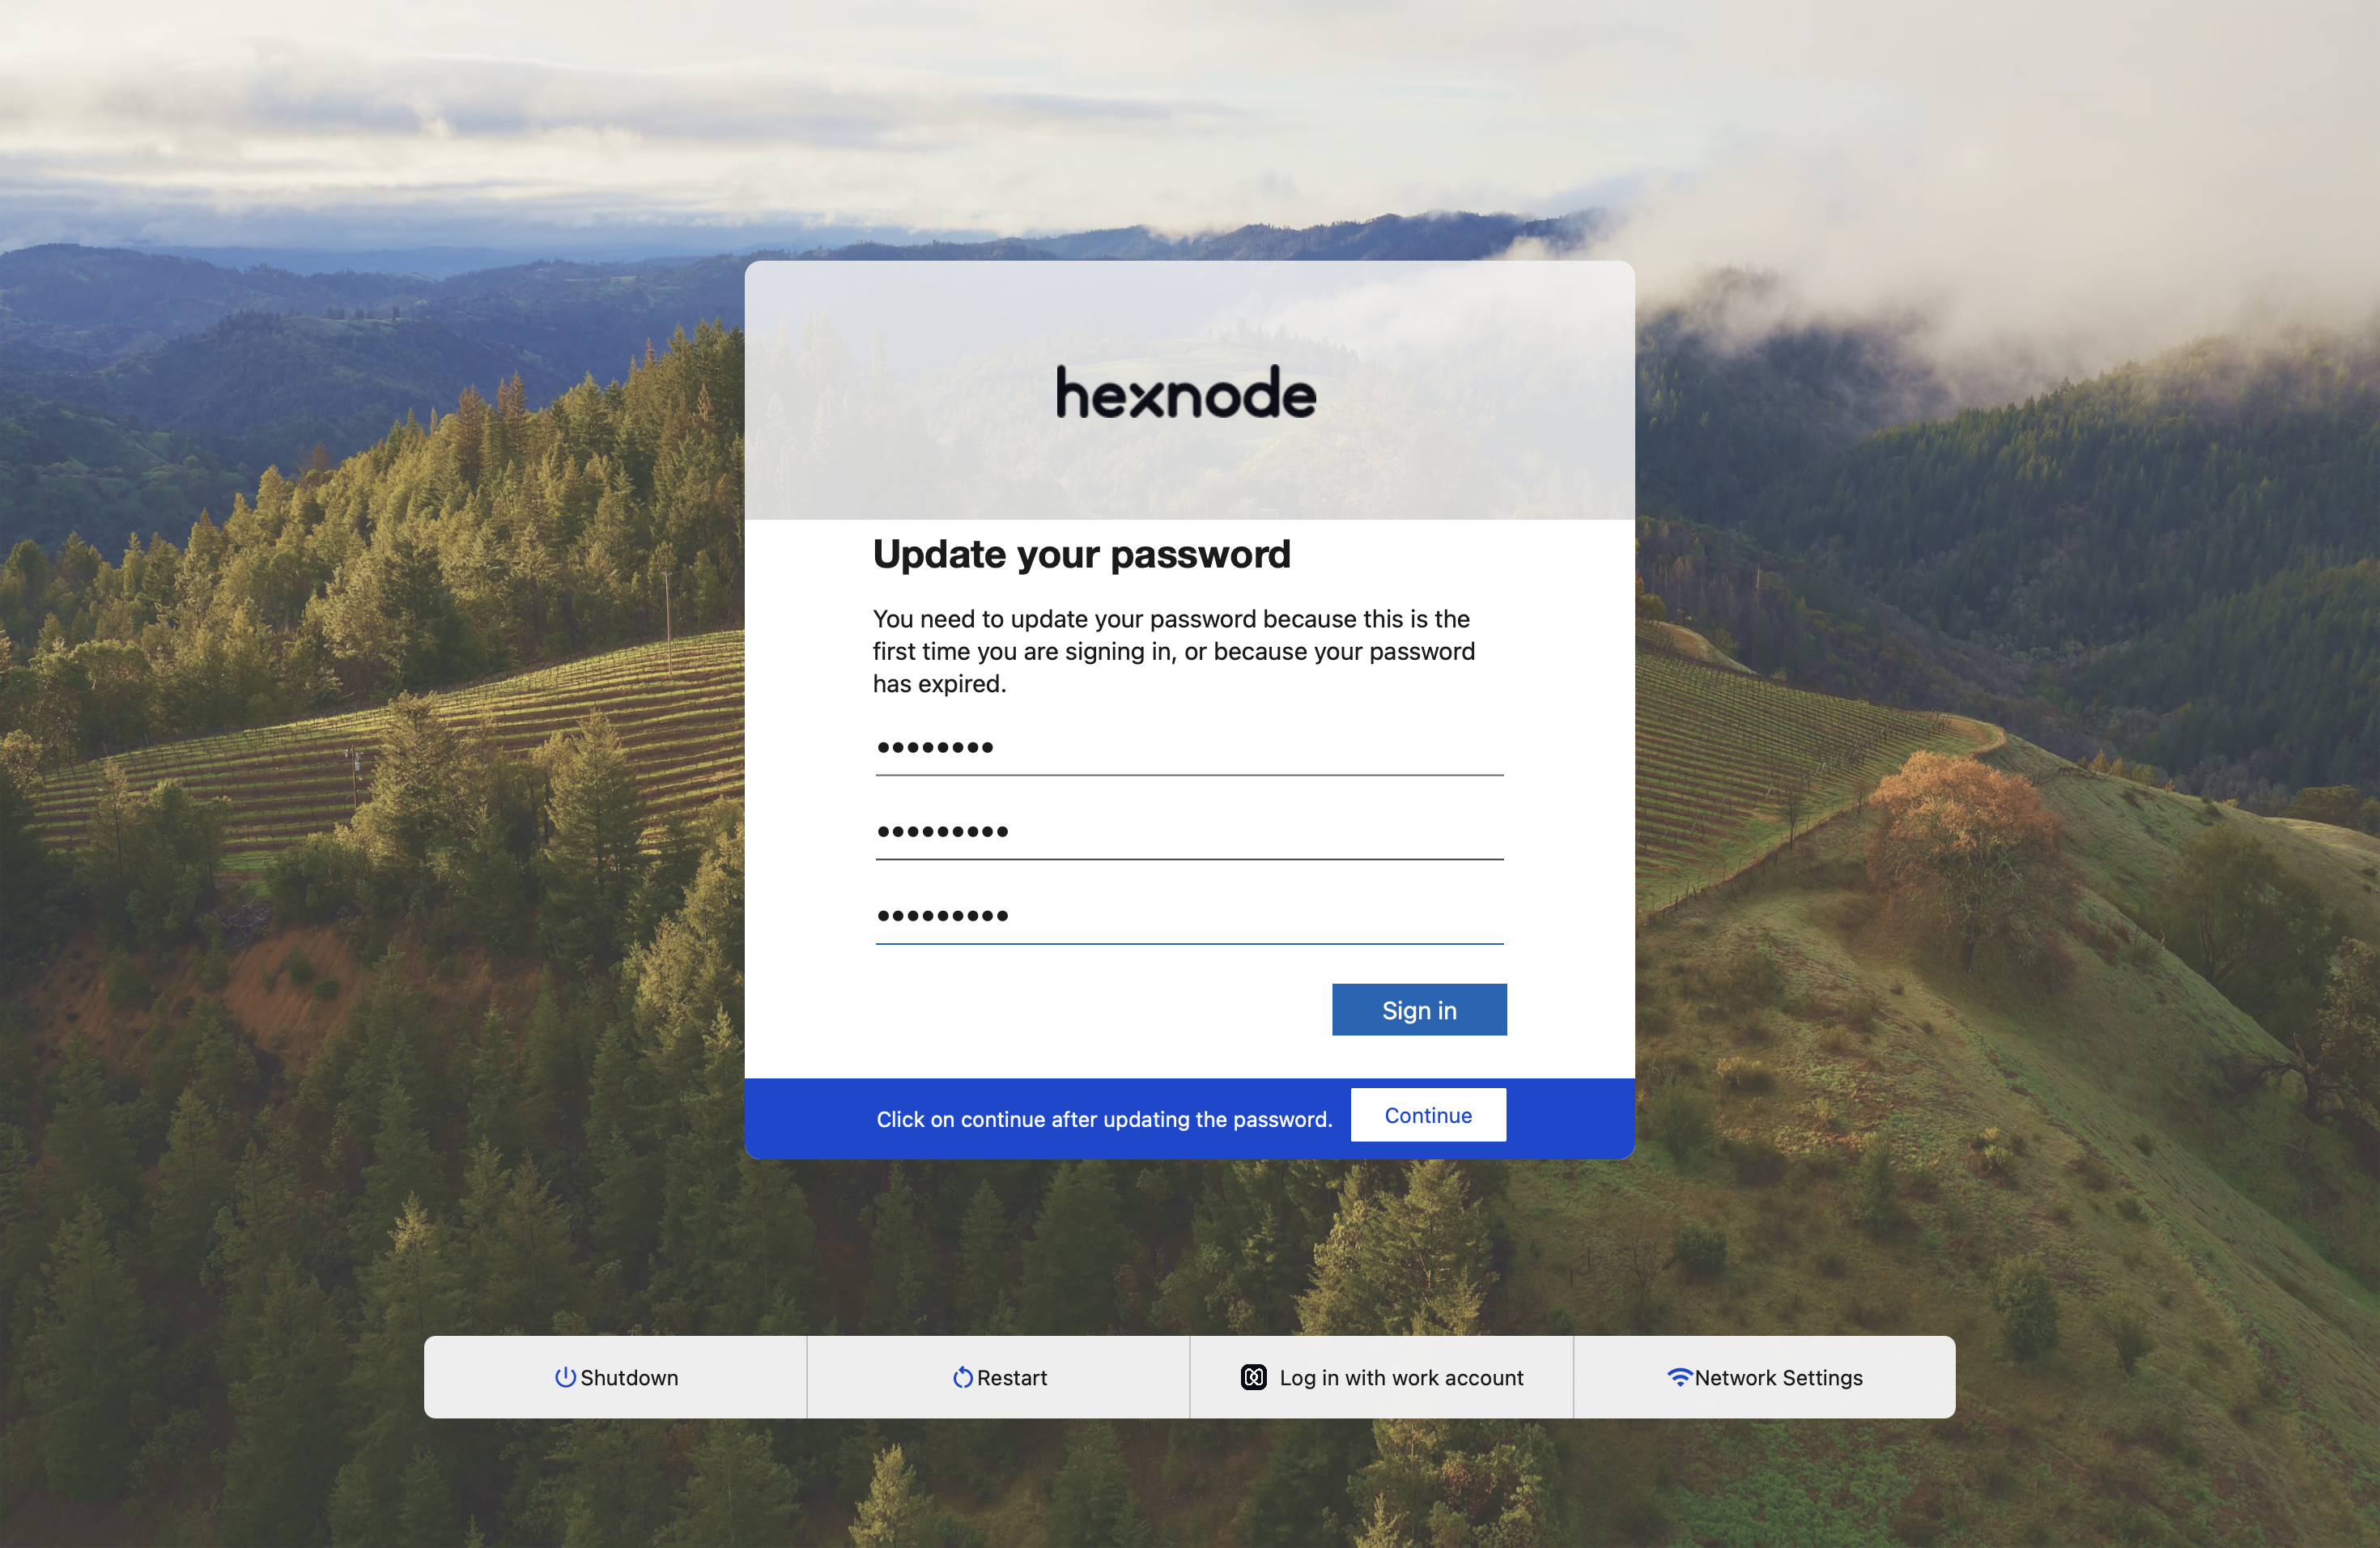
After verifying the email address, a prompt to update the password will be shown on the login screen.
Login Window Appearance
You can personalize the appearance of the Hexnode Access login window on the device with this setting.
Advanced Settings
You can improve the Hexnode Access login by adding additional options to the device’s login window, which are helpful for the login process.
FileVault Settings
FileVault can be activated when the first user logs into the device via Hexnode Access.
EULA Settings
You can distribute End User License Agreement (EULA) for users to acknowledge. To do this, you can select a pre-configured EULA from the drop-down. Alternatively, the Add new EULA option from the drop-down can be chosen, which will redirect you to the Admin tab for configuring a new EULA.
To configure EULA, navigate to Admin > EULA > Add.
Clicking the Add button will open a window where you can enter the EULA Title and the content for the EULA, which can be provided as either a Custom Link or Custom Text.
Login scripts
You can choose a script that should be executed on logging into the device. The supported file formats include Perl (.pl), Bash (.sh), Shell (.sh), C Shell (.csh), Zsh (.zsh), Korn Shell (.ksh), Hypertext Preprocessor (.php), Ruby (.rb), and Python (.py).
Choose script file source – The script can be either uploaded directly from the device or selected from the Hexnode repository if the file is already added to My Files under the Content tab in the Hexnode UEM portal. Alternatively, if the Hexnode repository is selected, you also have the option to generate scripts using Hexnode Genie.
File name – On uploading files, the file name field will be auto-populated. If Hexnode repository is chosen as the file source, select a file from the File name drop-down.
Binary path – Binary path will be auto-populated depending on the type of the selected file.
Arguments – If necessary, specify the arguments that would be required in the script.
Please go through our detailed document on how to execute custom scripts on macOS devices for better insight.
Associate policies with macOS devices
If the policy has not been saved:
If you have the policy saved already:
What happens at the device end?
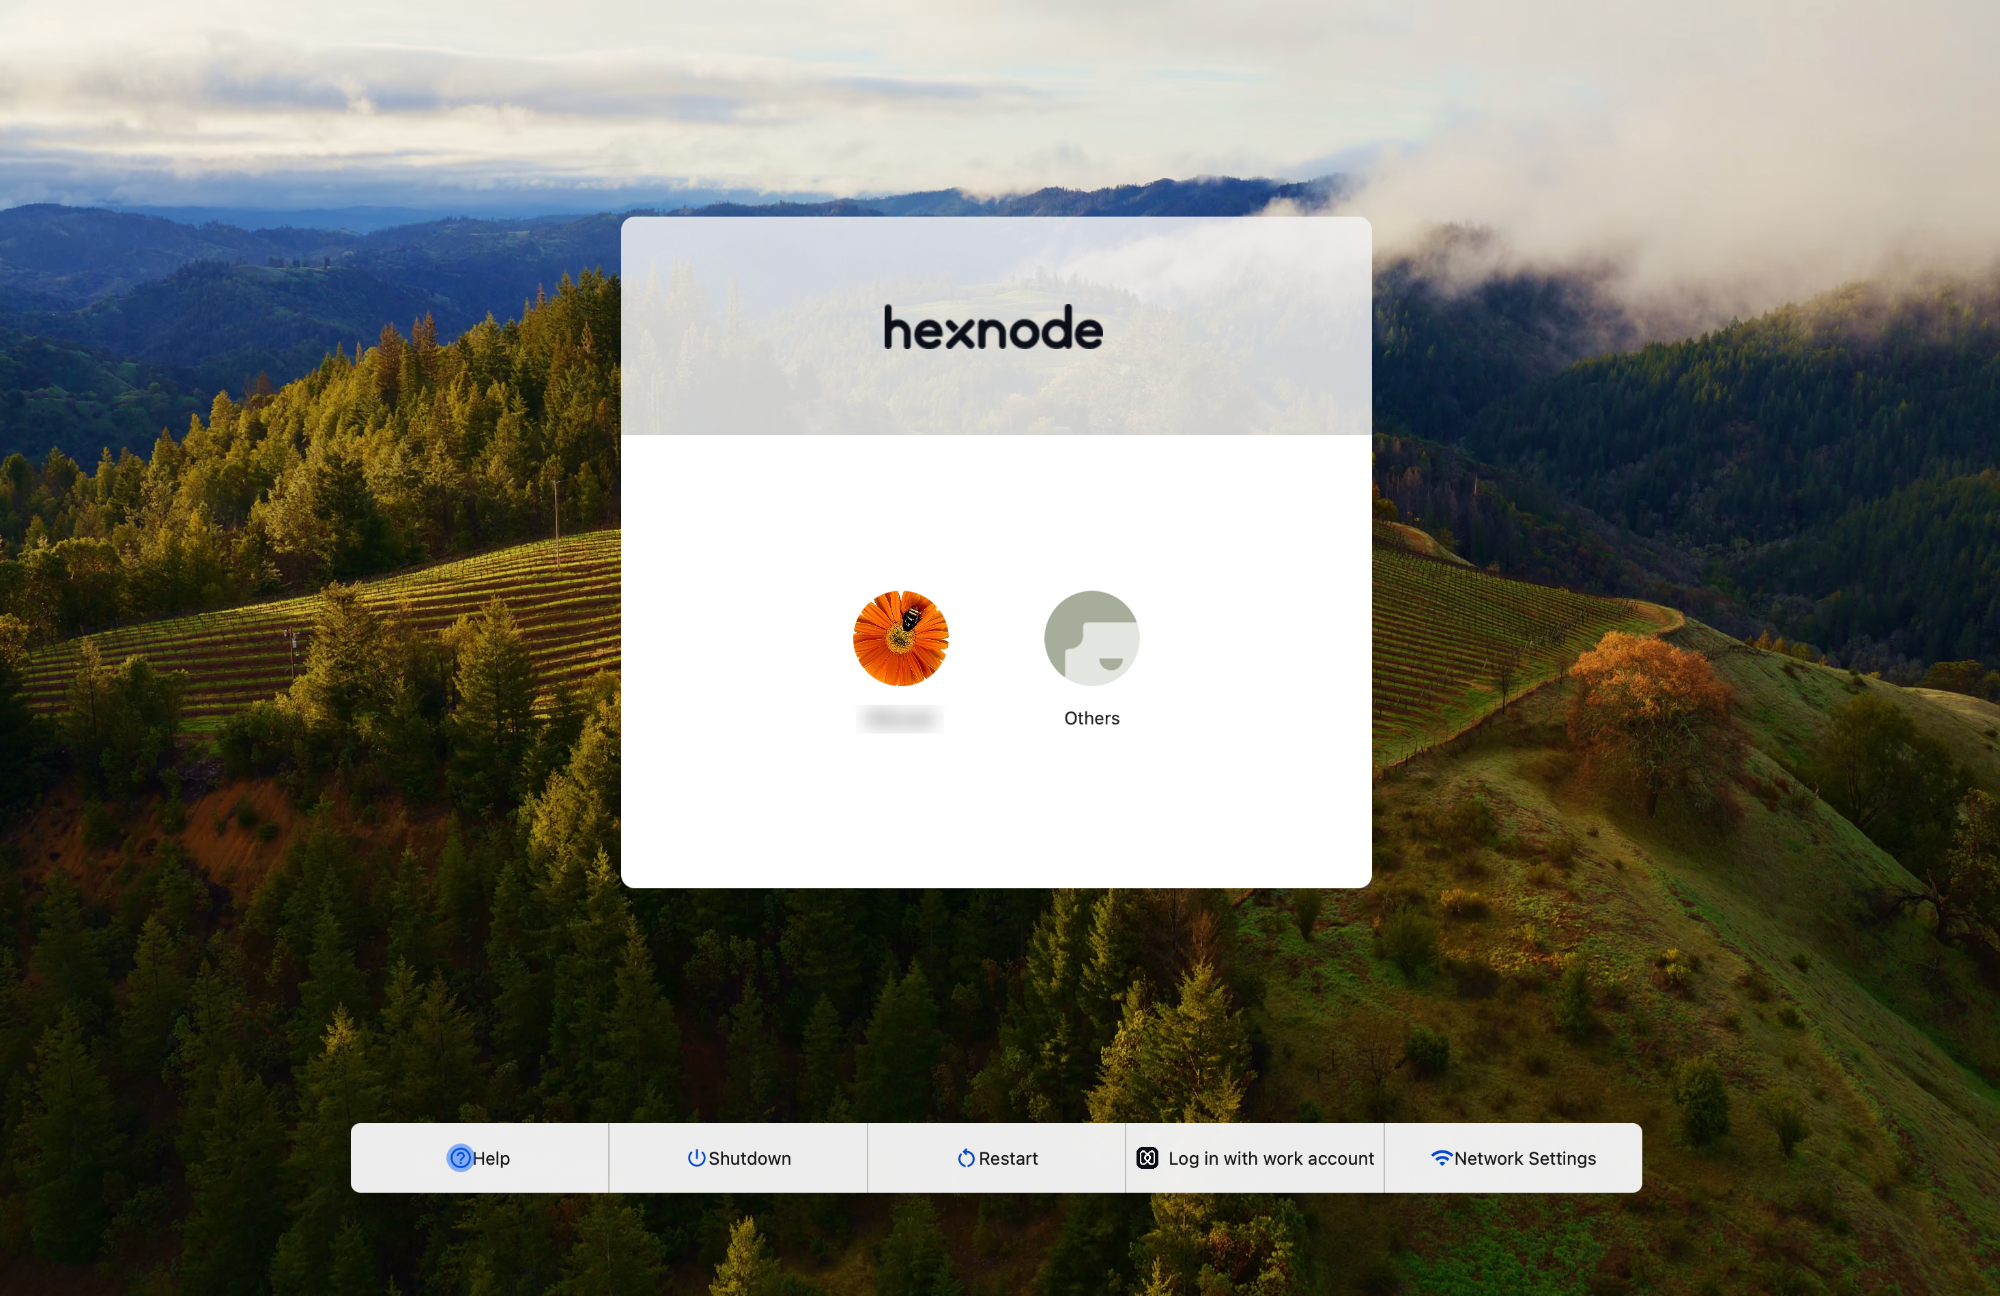
Once the policy is associated with the device, the user can either log in as usual to the local accounts or choose the Log in with work account option.
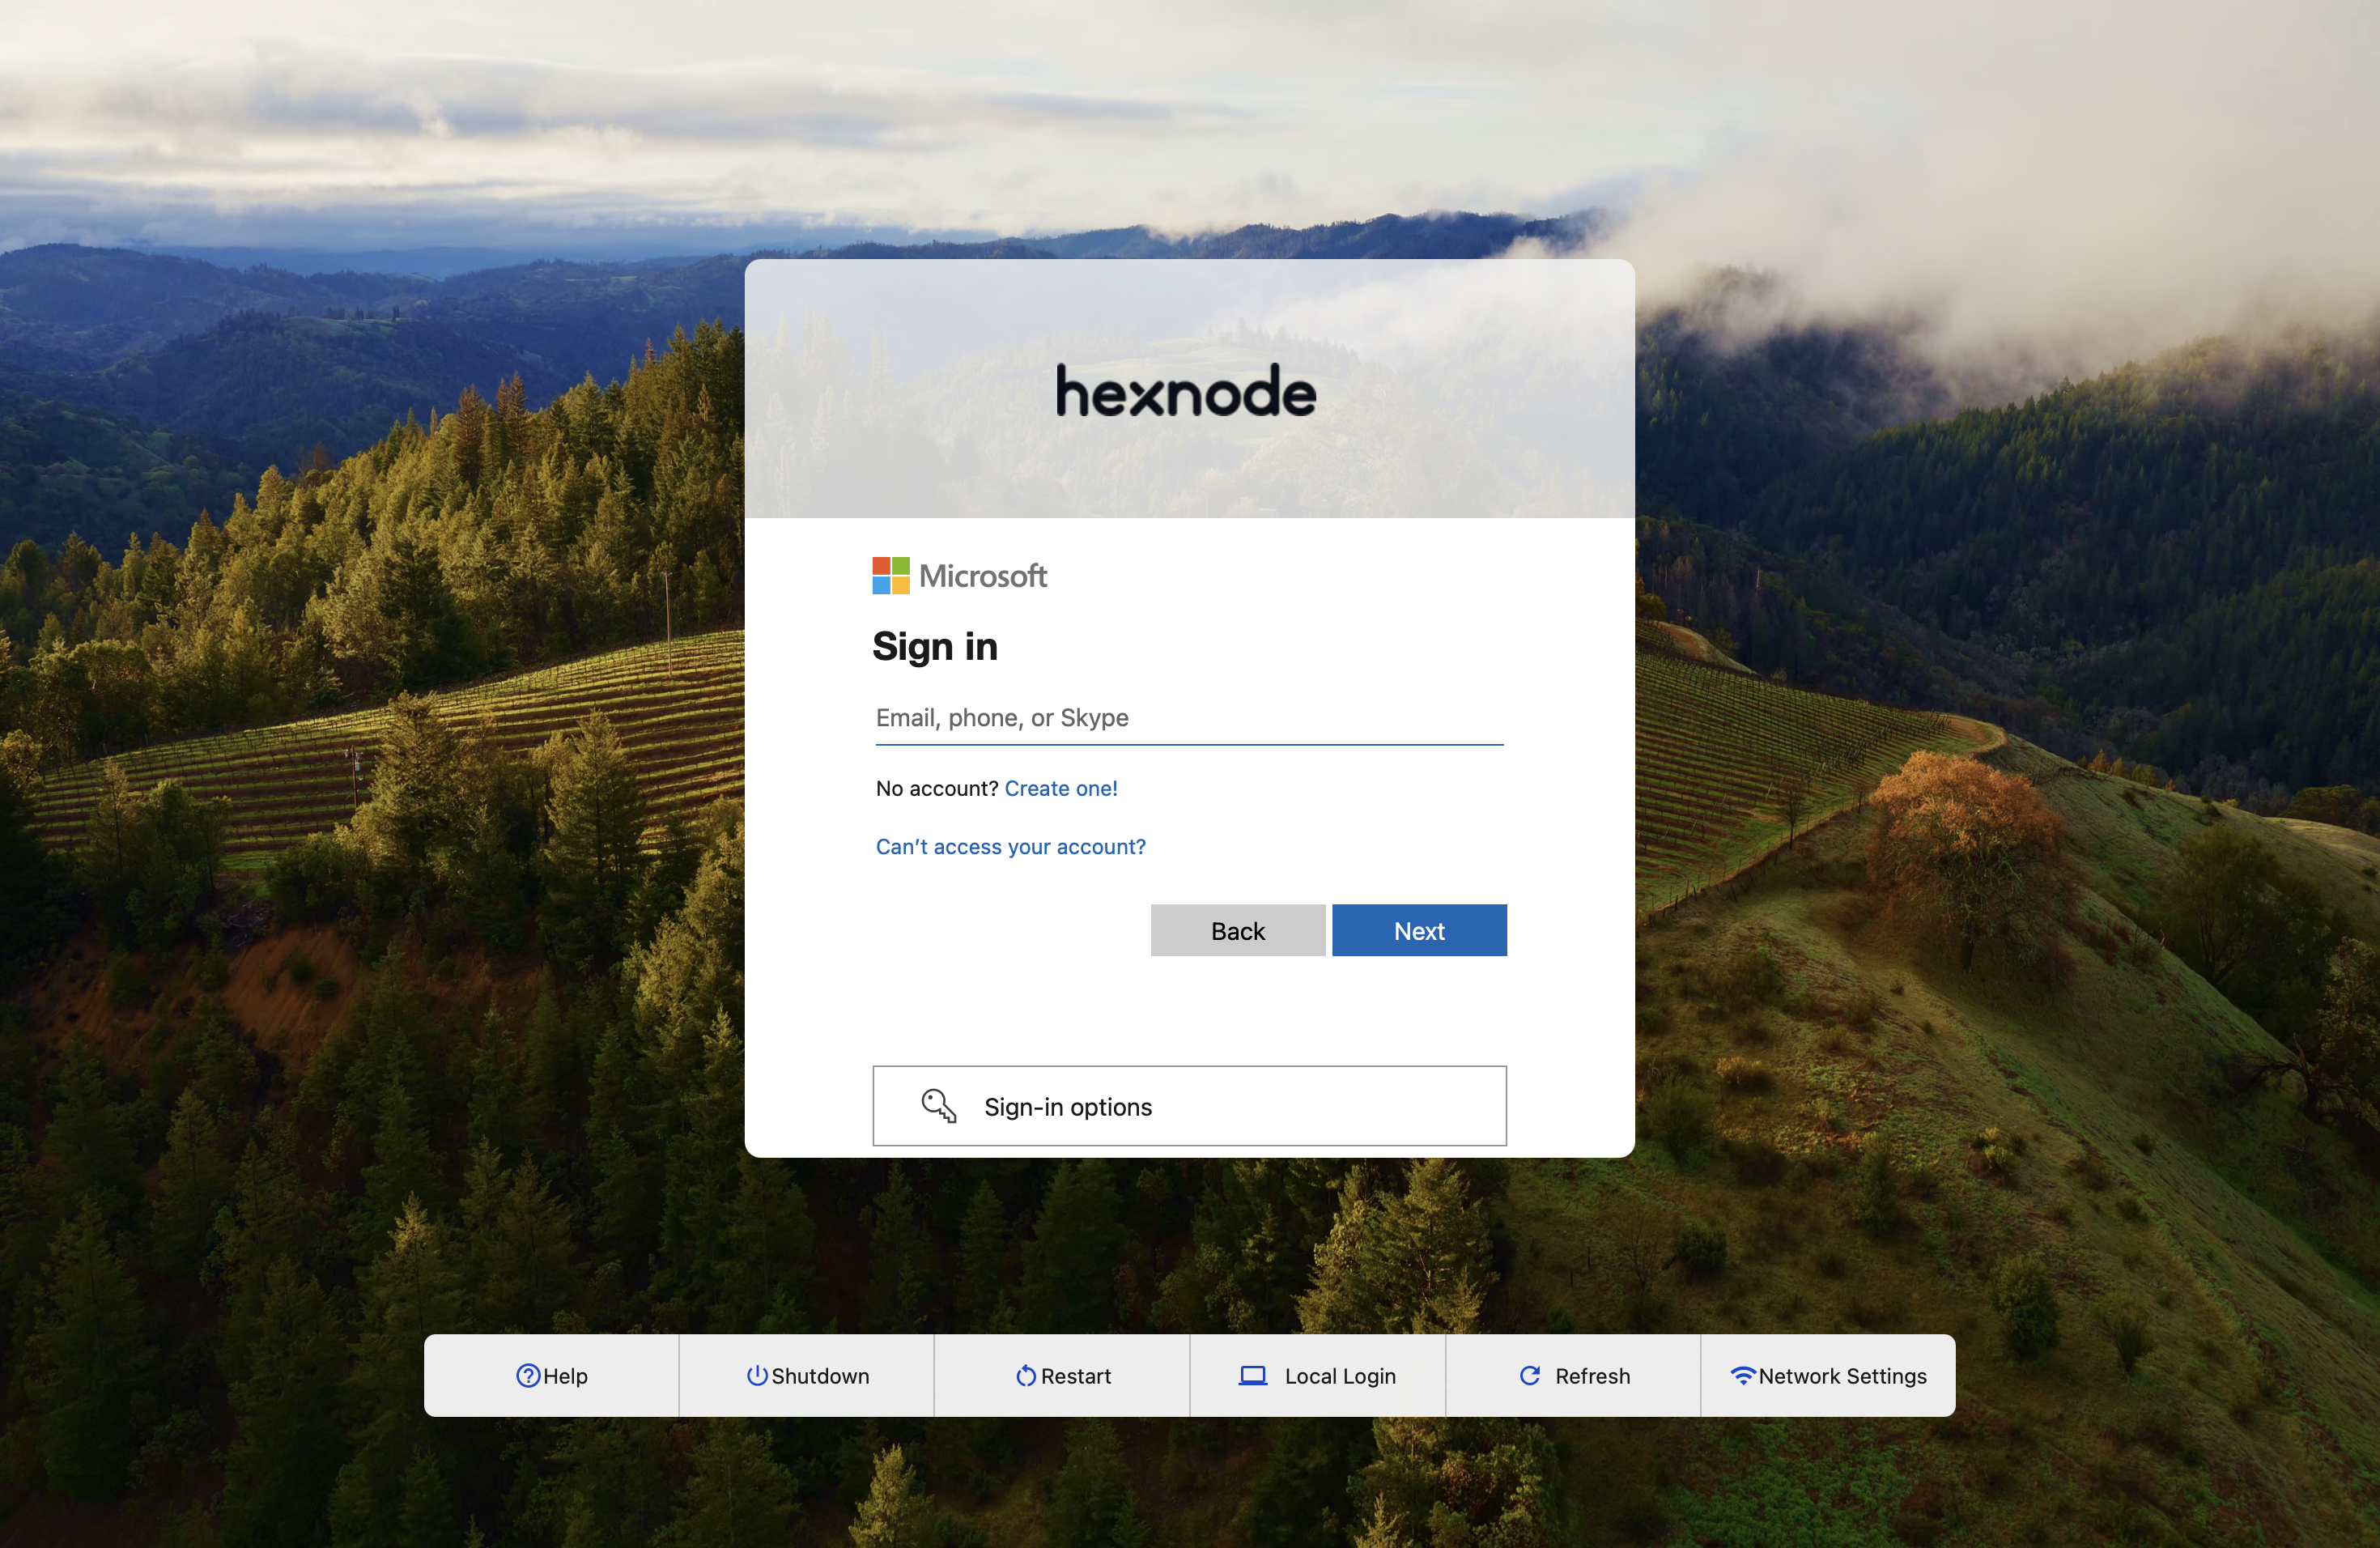
By clicking Log in with work account, the user can log in using their IdP credentials.
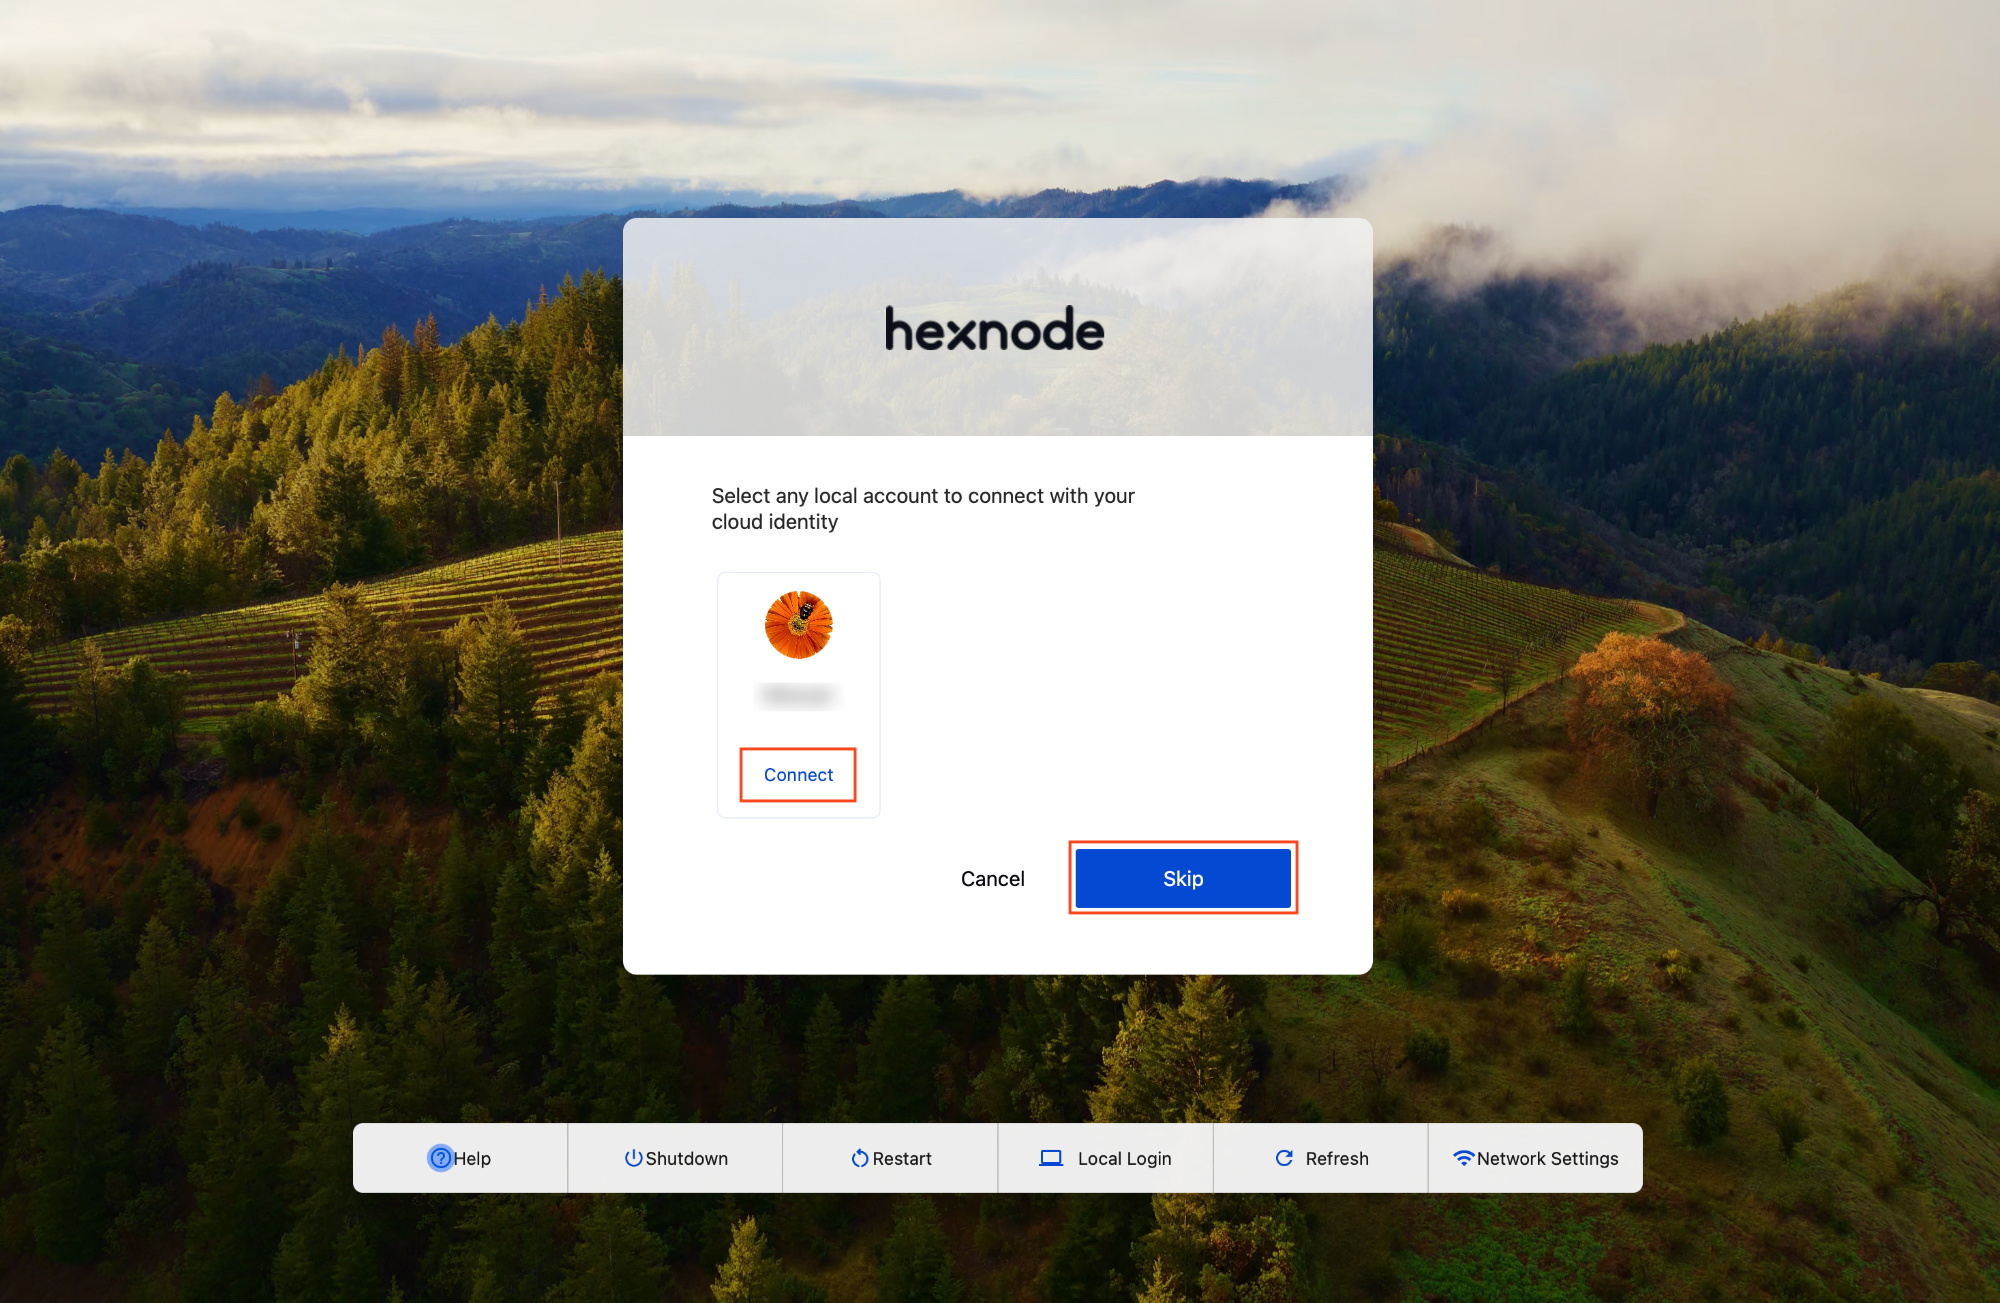
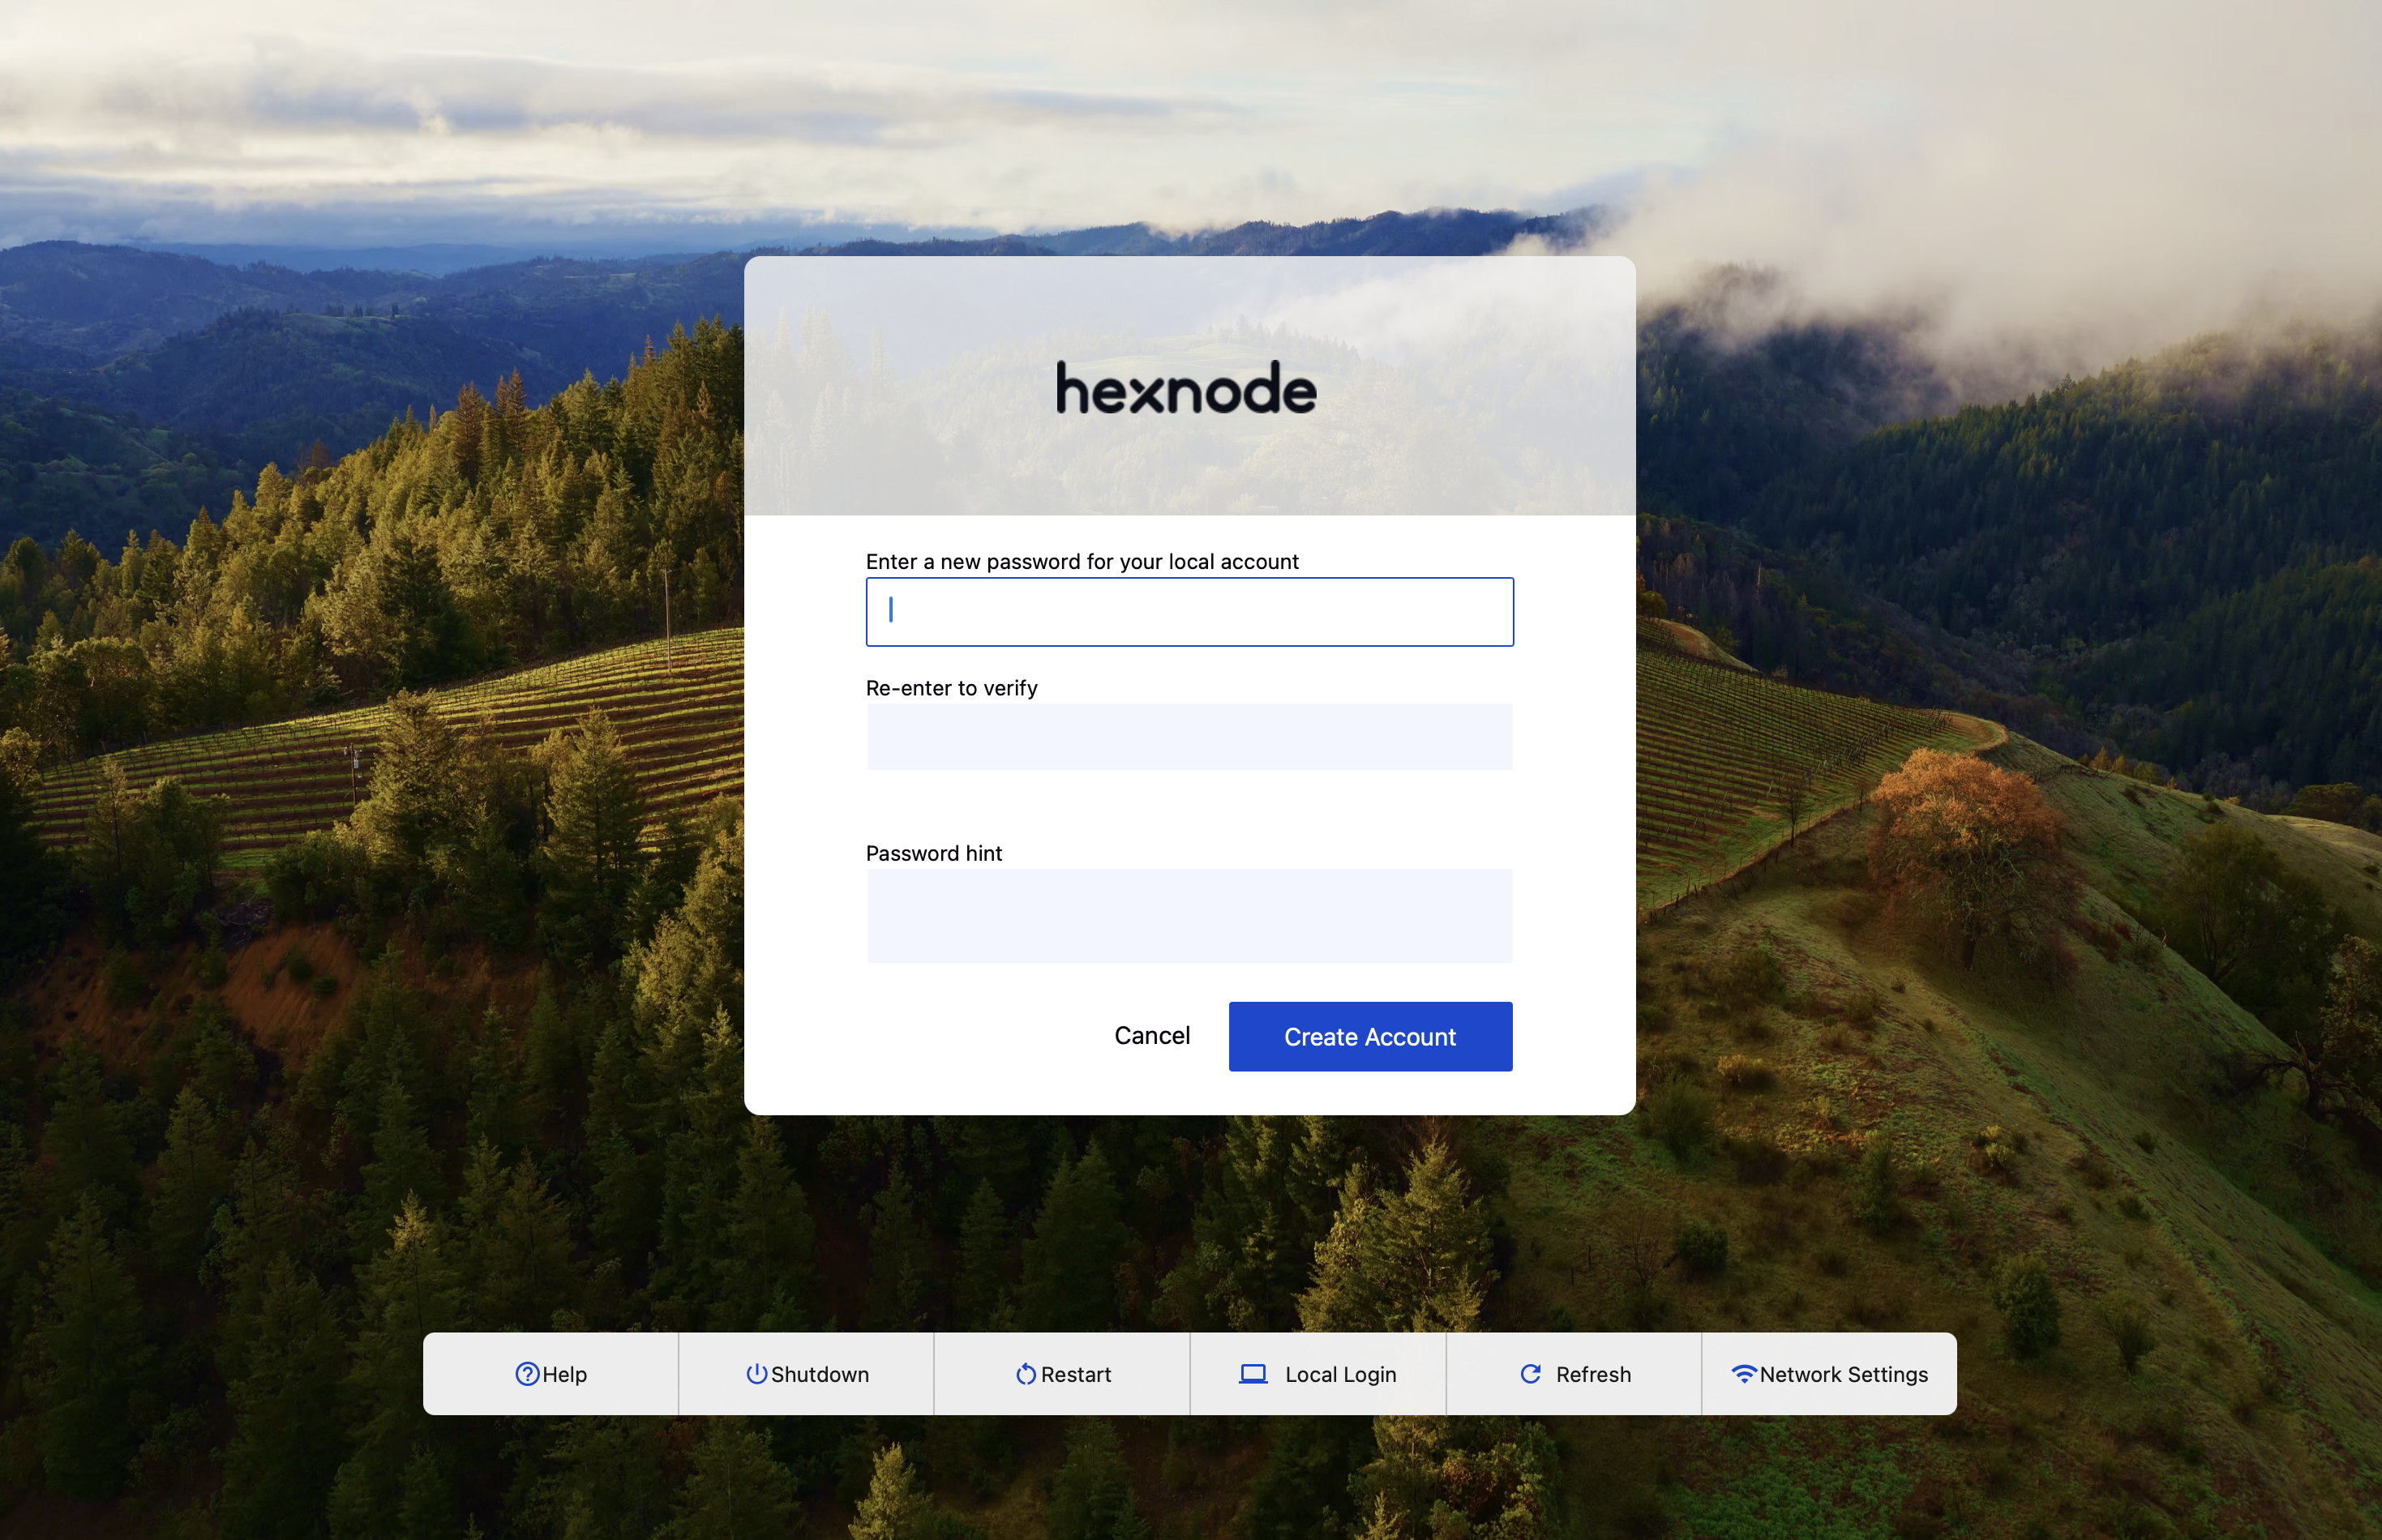
Once authentication is complete, the user will have the option to connect to an already existing local account or to create a new one.
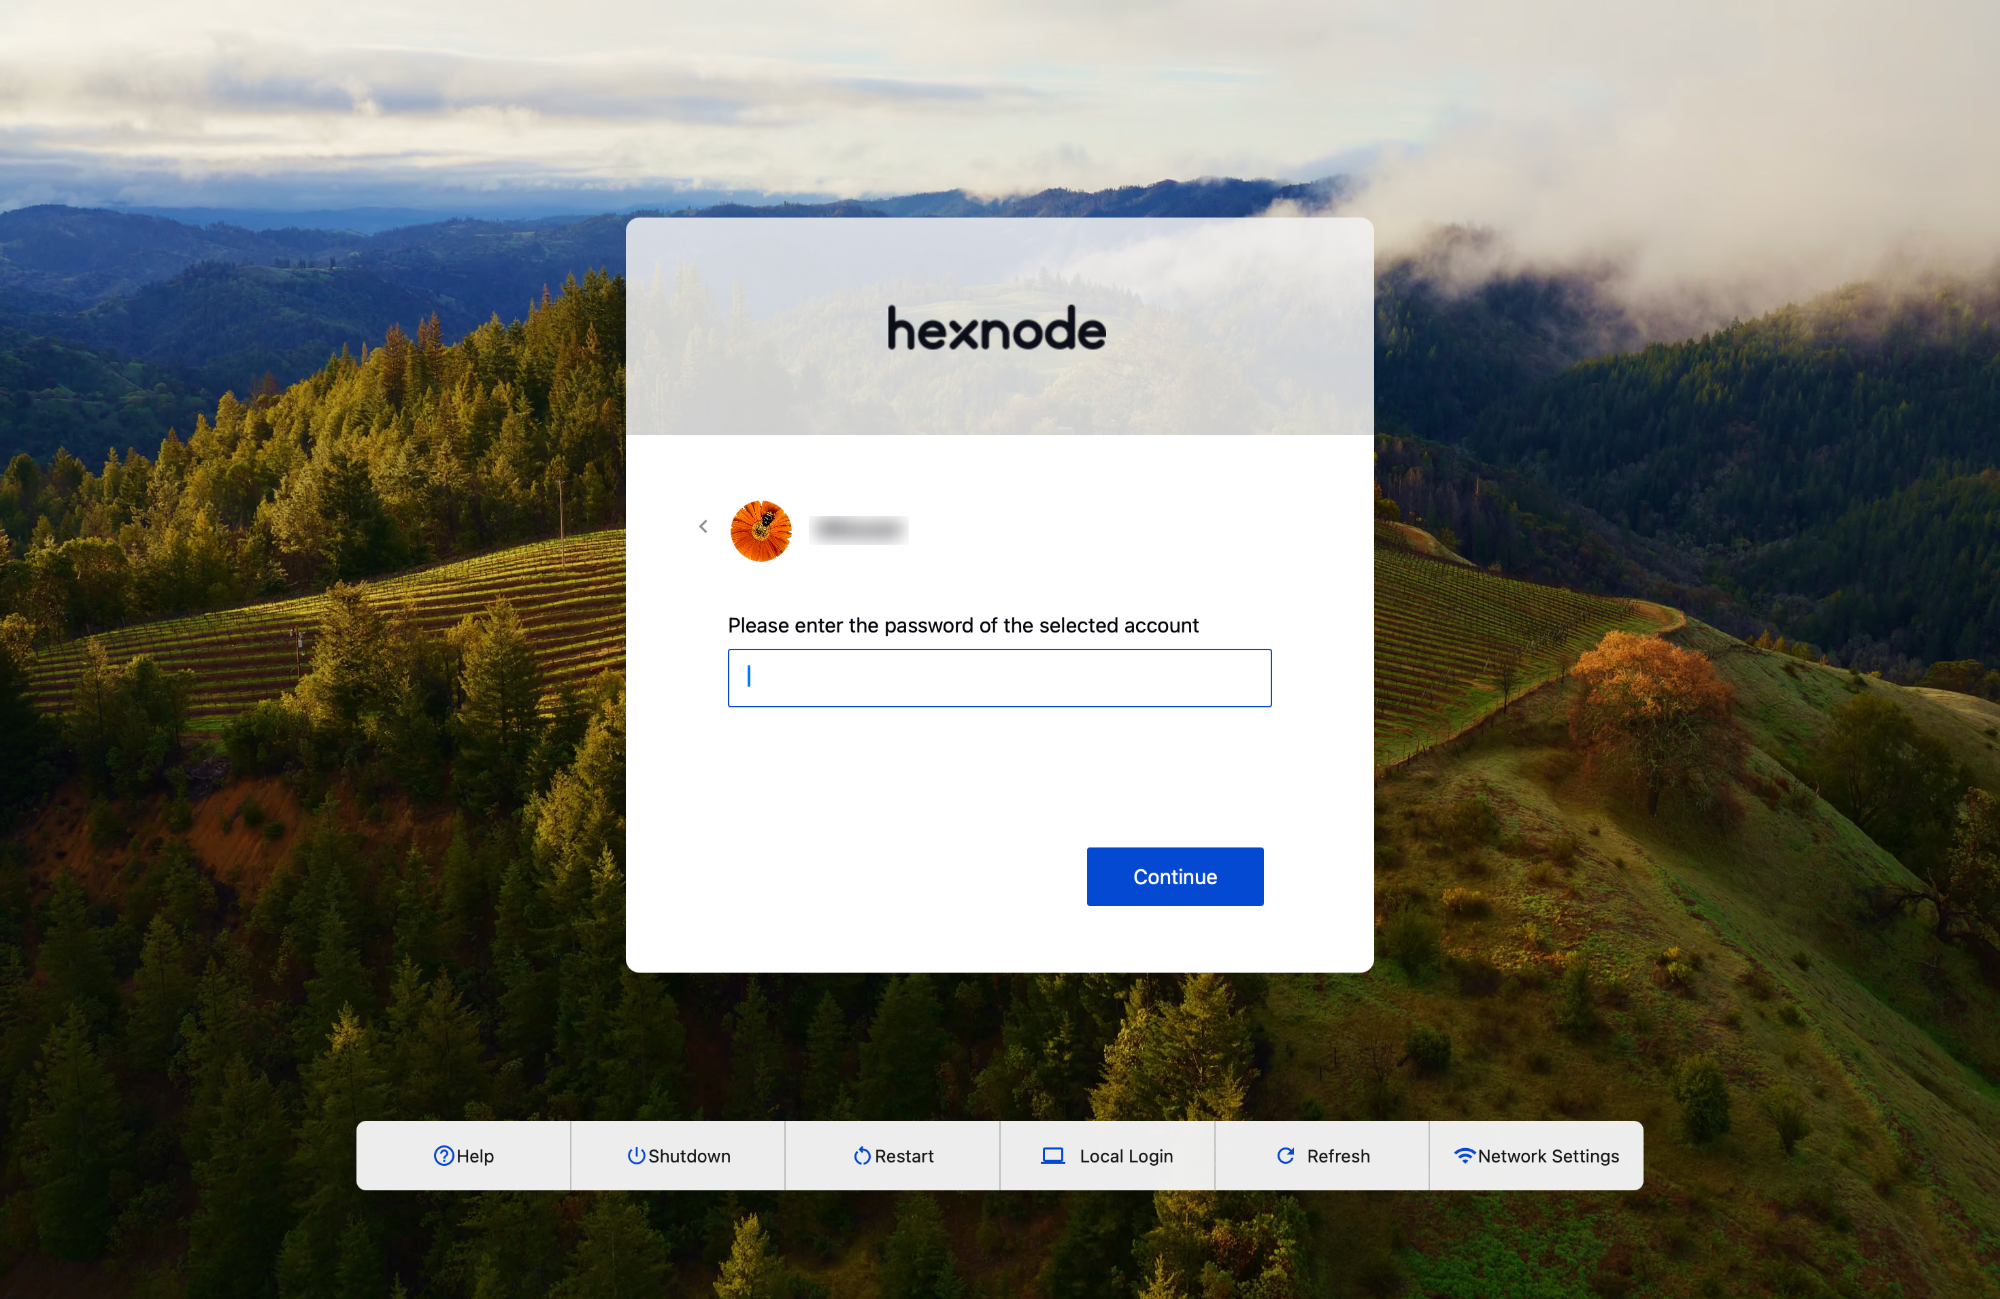
On clicking Connect, the user will be prompted to enter the password of the corresponding local account.
On clicking Skip, the user will be prompted to set a password for the new local account that is being created. Once it is done, the user will be logged into the device.
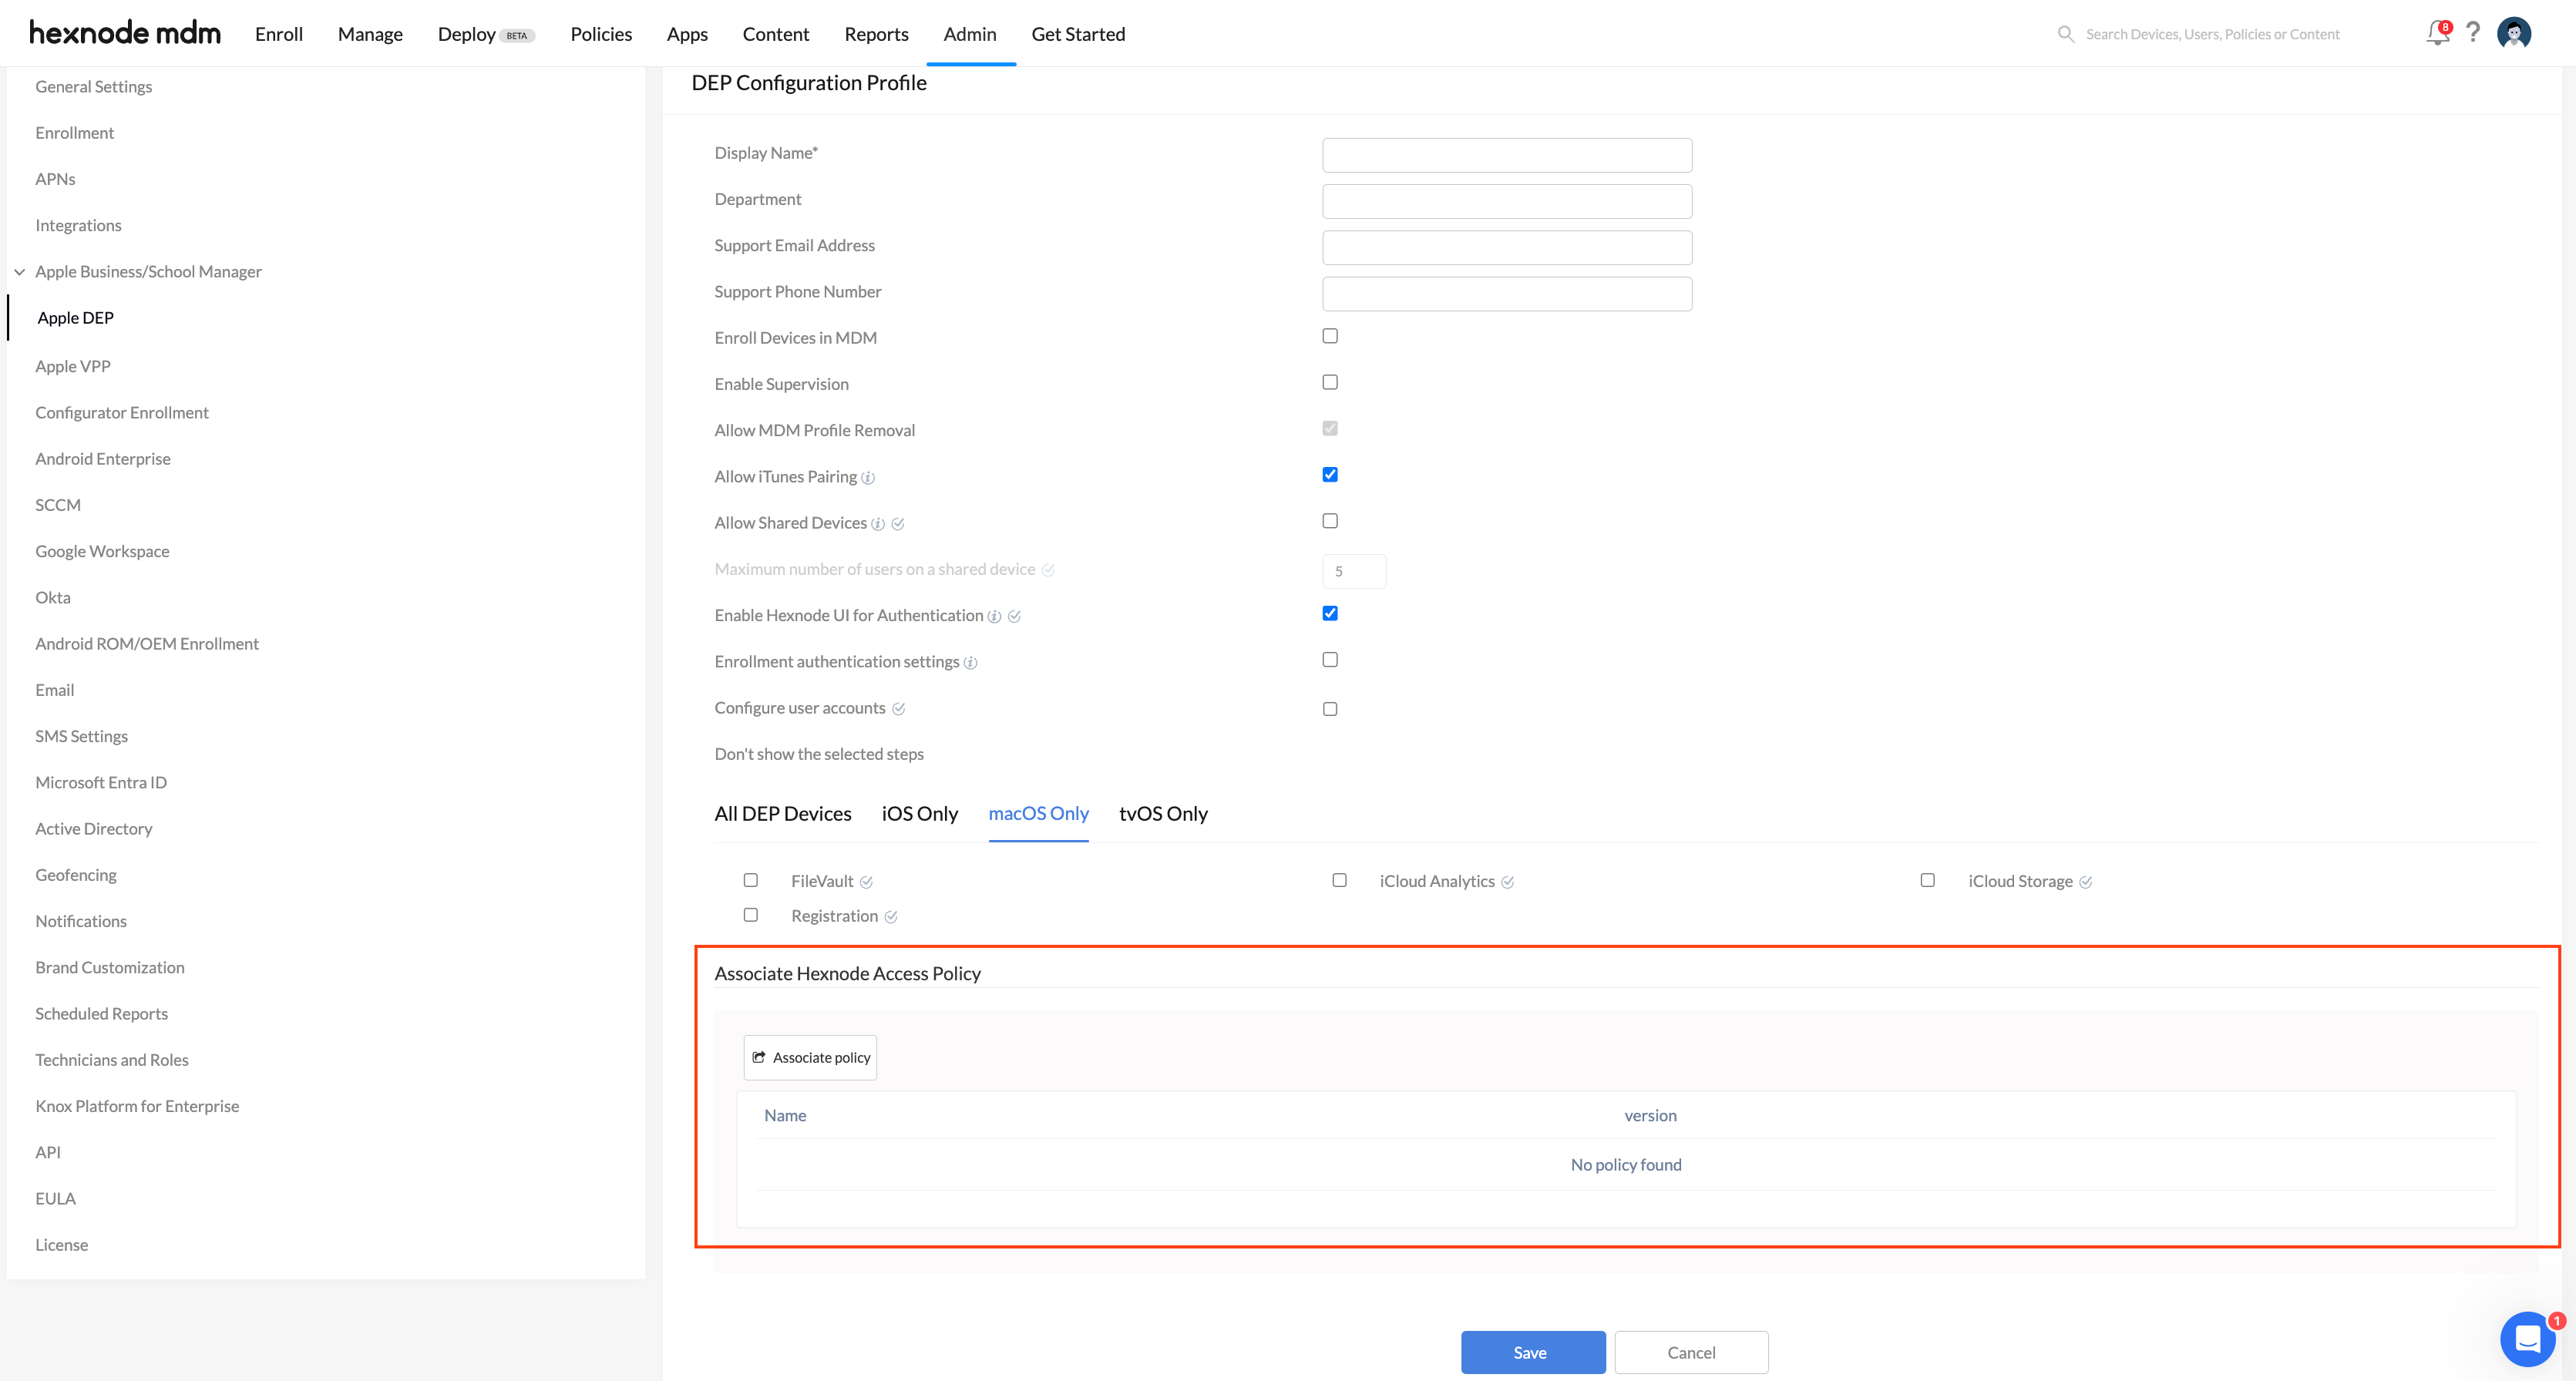
Linking Hexnode Access policy in the Apple DEP tab
When setting up a DEP Configuration Profile, you can associate it with a pre-configured Hexnode Access policy. This allows users to log in with their IdP credentials immediately after completing the DEP enrollment process.
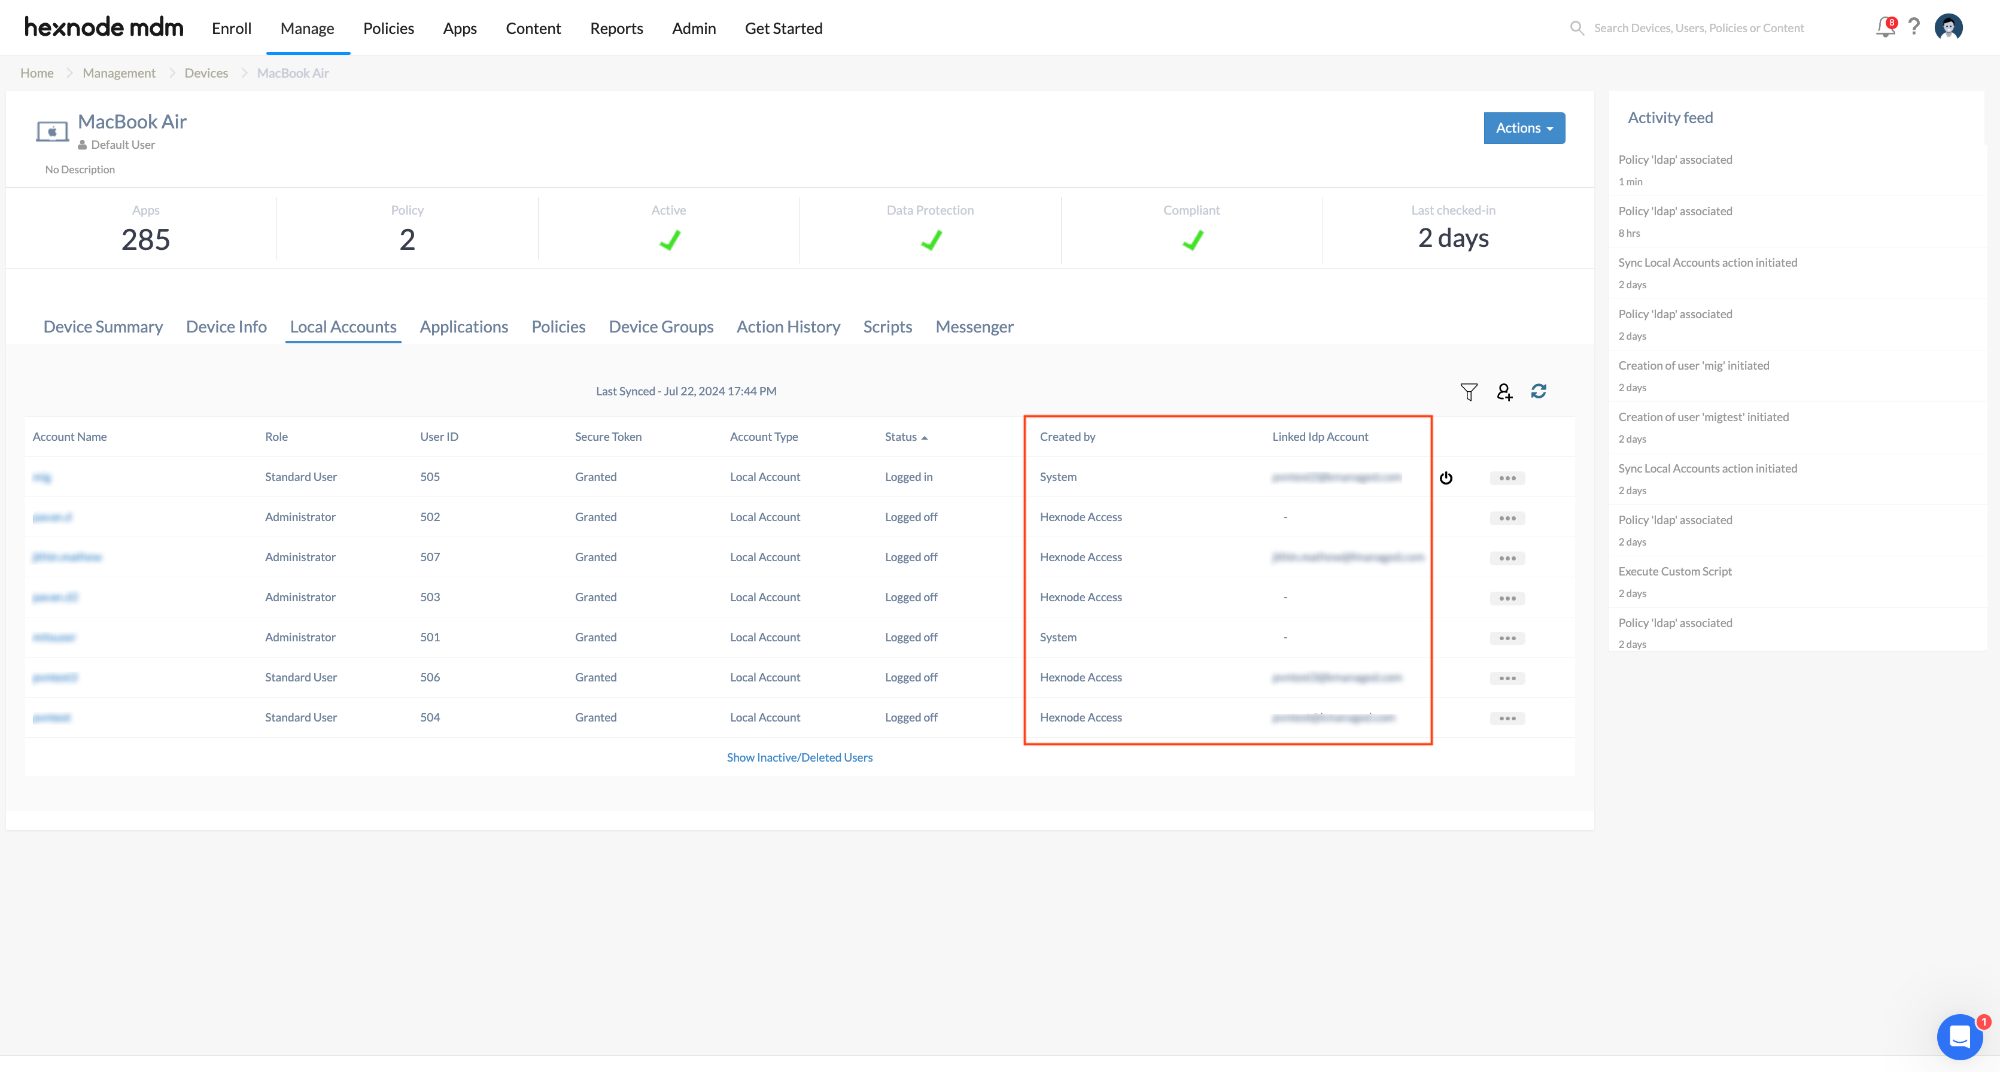
View local accounts created through Hexnode Access policy
You can view the local accounts created via Hexnode Access, along with the corresponding IdP account details, under the Local Accounts tab in the device details section of the Hexnode UEM portal. A filter is available here, allowing you to distinguish between accounts created by Hexnode Access and those created by the System.
Password update and expiry scenarios for local and Cloud IdP accounts
After applying the Hexnode Access policy to the devices, if either the local account password or the Cloud Identity Provider (IdP) password is changed or expires and is not yet synced, users must authenticate with the updated password to ensure that both the device and the cloud passwords are aligned.
The following are three scenarios that occur when the local account or Cloud IdP password is either updated or expires.
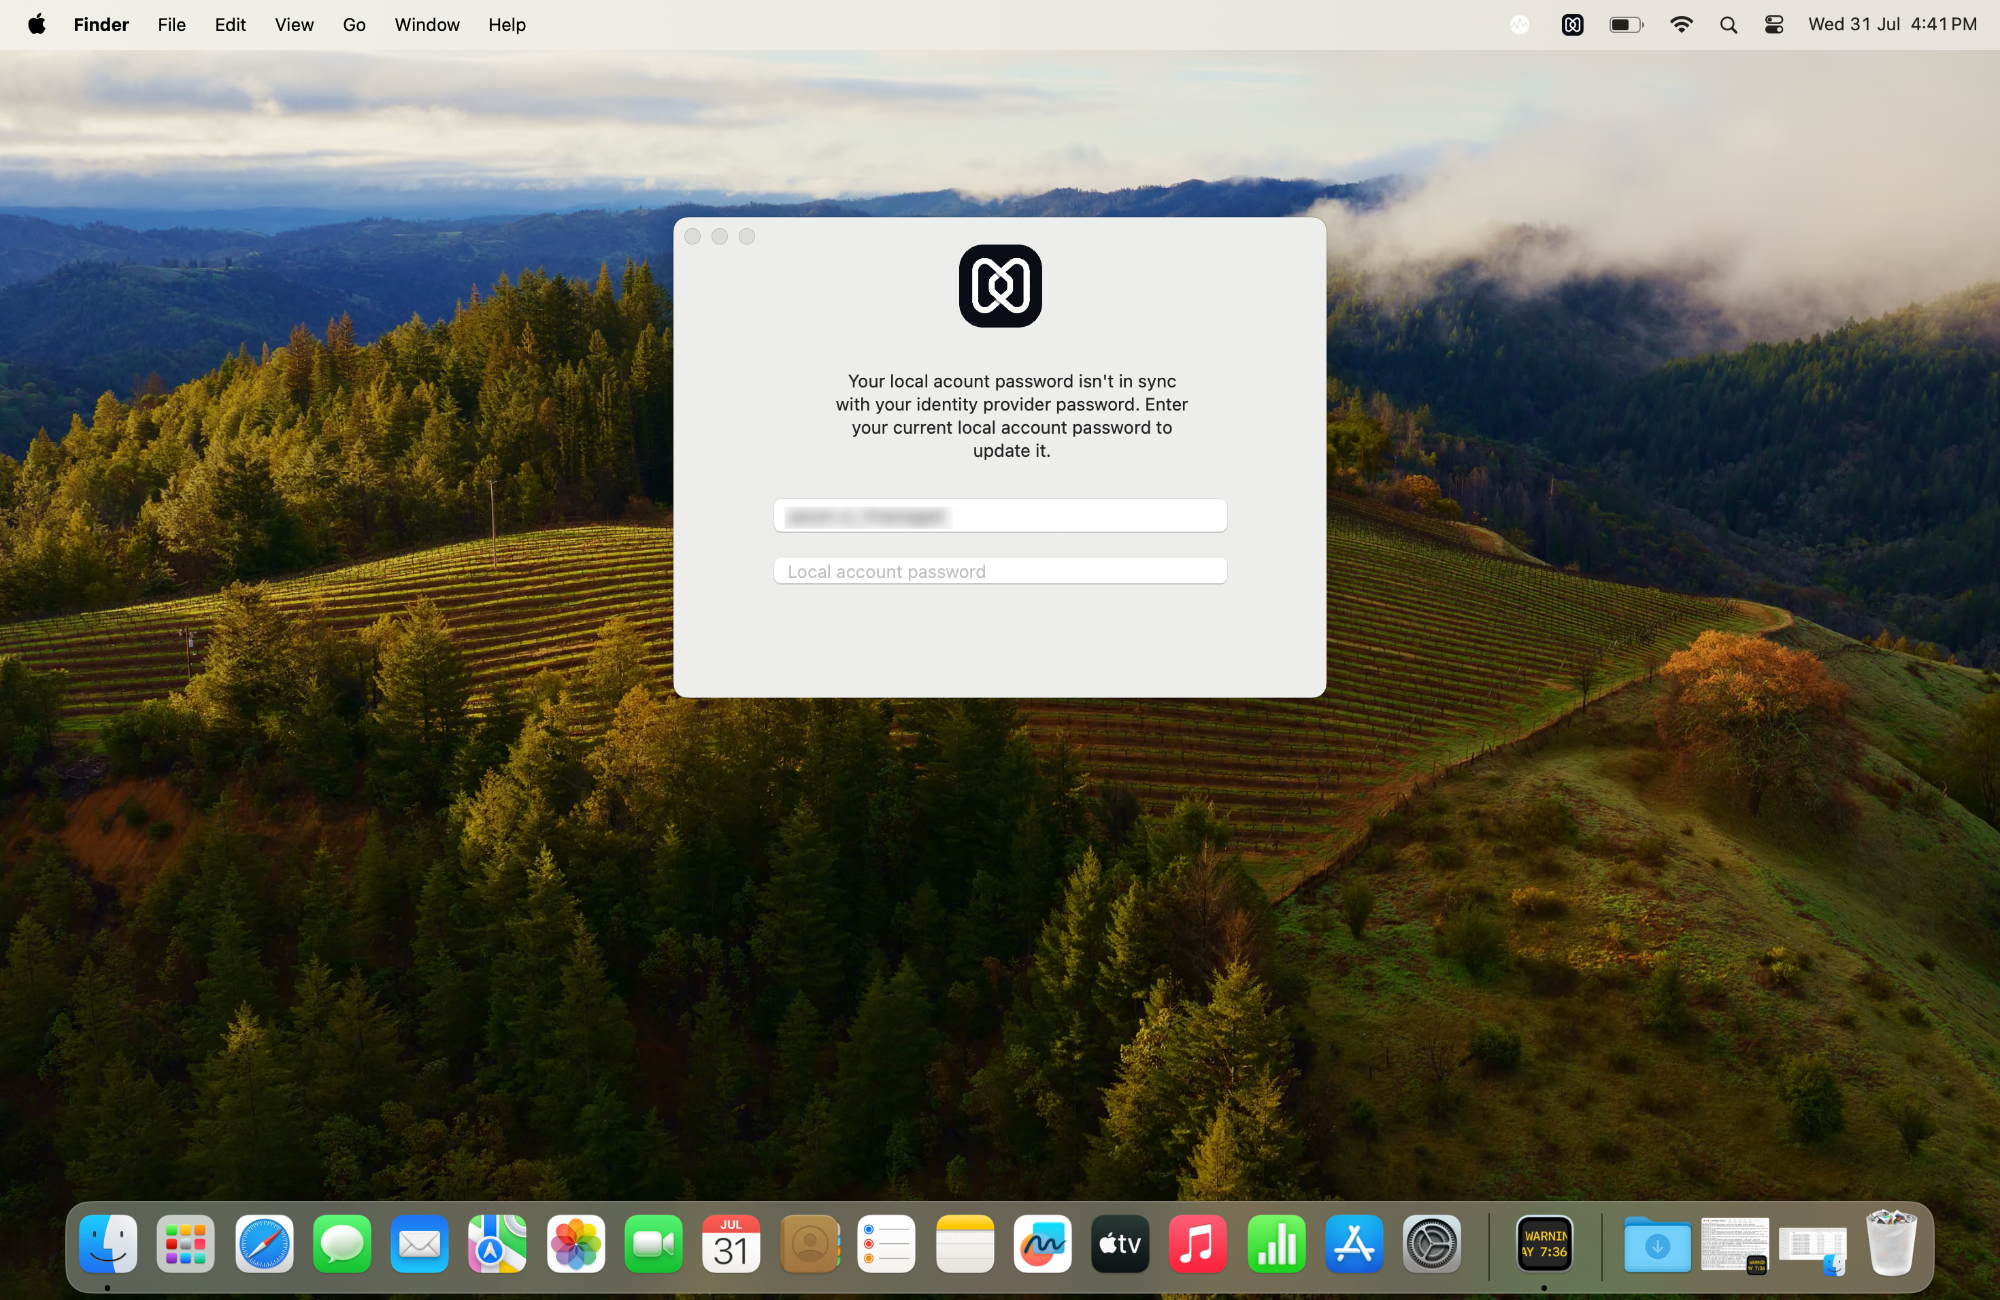
Scenario 1: When the local account password is changed
A prompt to update the local account password appears when there is a mismatch between the local account and Cloud IdP password. To sync with the Cloud IdP, users must authenticate using the updated local account password.
Scenario 2: When the Cloud IdP password is changed
When the Cloud IdP account password is modified through the cloud console, the device screen will display a prompt, instructing the user to update their Cloud IdP password.
Scenario 3: When the Cloud IdP password is expired
If the Cloud IdP password has expired, a prompt to update the password will appear on the device screen.
