Category filter
Implementing 5G Network Slicing on iOS devices
5G Network Slicing on iOS devices is a feature of 5G networks that allows multiple virtual networks to be created on top of a common shared physical infrastructure. Each virtual network, or “slice”, can be customized to meet specific requirements for different use cases, such as low latency, high bandwidth, or high security.
Hexnode UEM allows enterprises to assign customized 5G network slices, provided by the carrier, to managed devices. This ensures that each app gets the necessary network resources to meet their business needs. It will direct all data traffic from specified managed apps to dedicated network slices on your 5G Standalone (SA) network.
Configure 5G Network Slicing
To configure 5G Network Slicing for an app on an iOS device, follow these steps:
- Log in to your Hexnode UEM console.
- Navigate to the Policies tab. You can either create a new policy by clicking on the New Policy button or edit an existing one.
- If you’re creating a new policy, provide a suitable name and an optional description for the policy.
- Go to iOS > Network > Network Slicing > Configure.
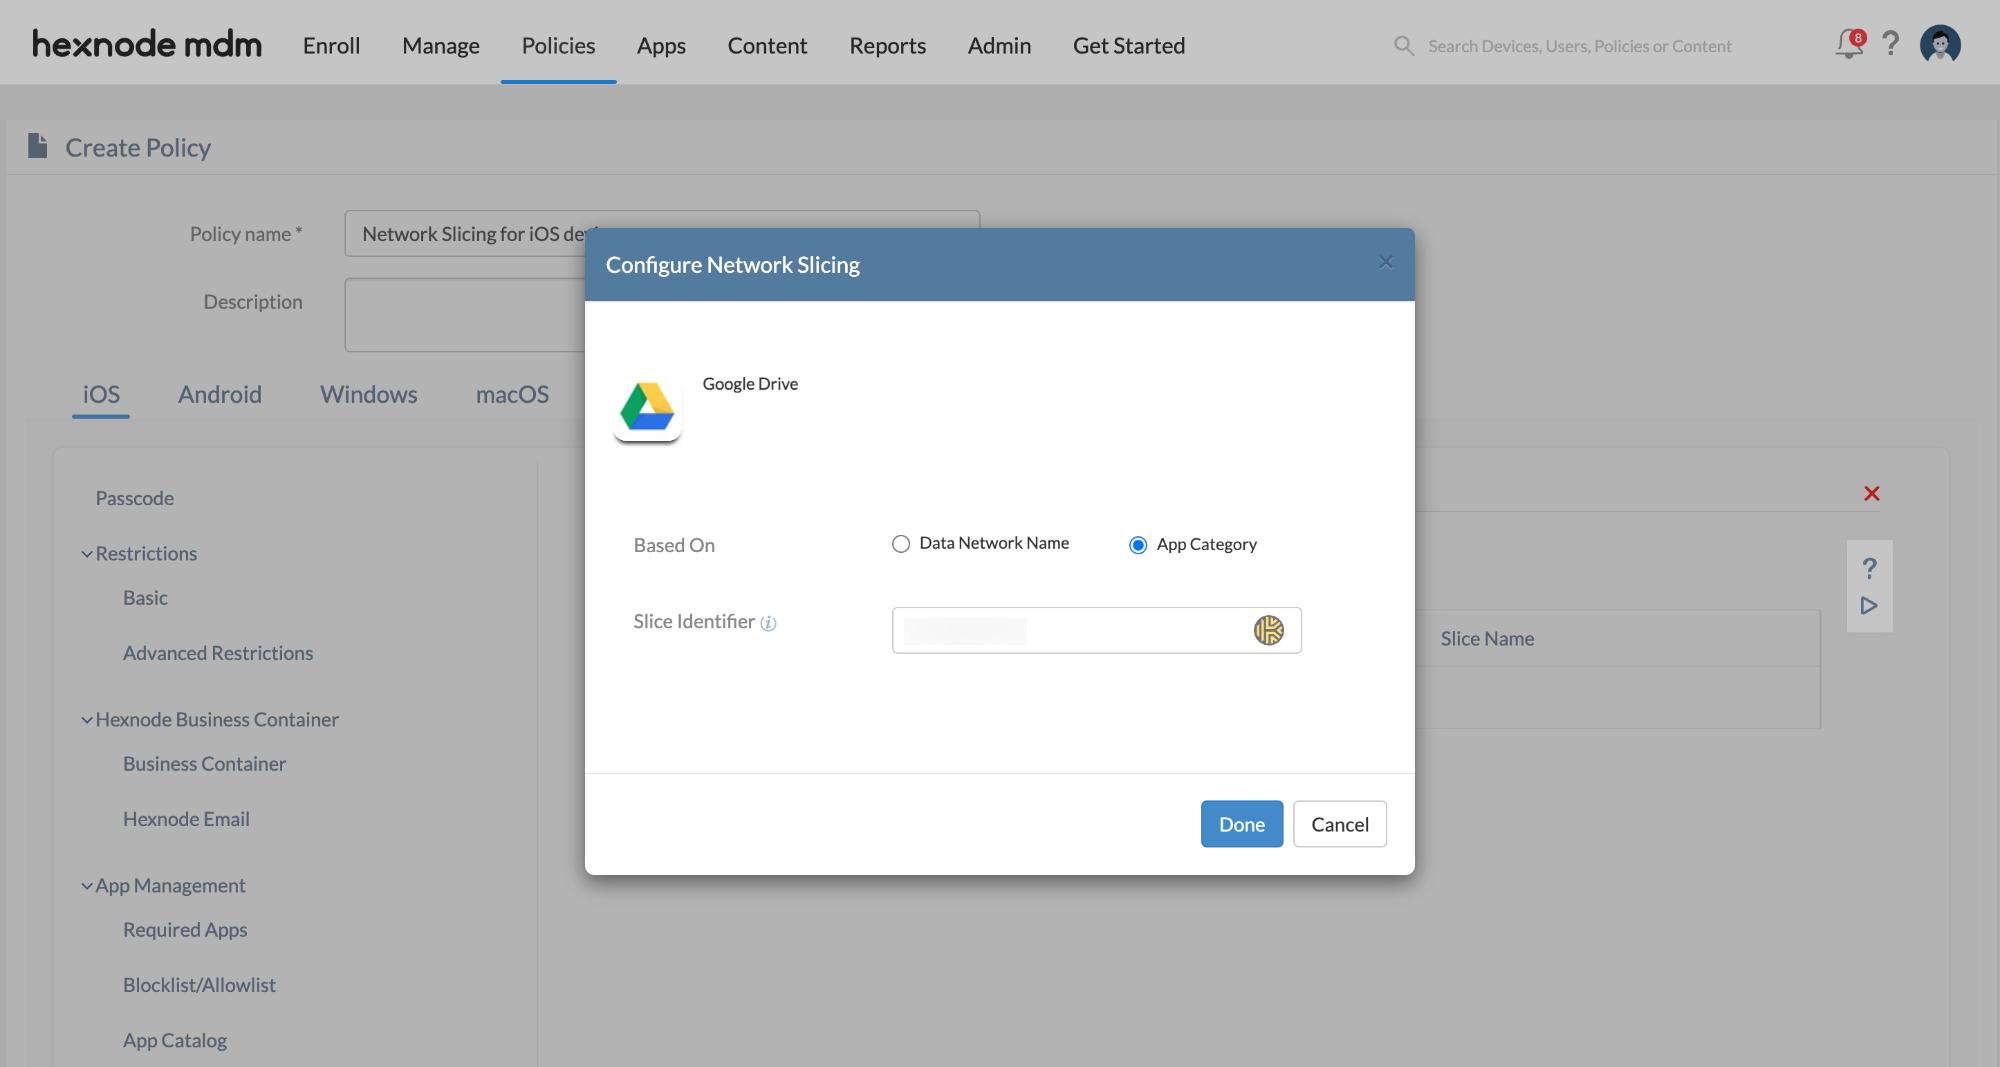
- Click on the + Add Network Slice button to choose the app for which you want to configure Network Slicing and click on Select.
- Configure Network Slicing using either DNN or App Category based on your preference and enter the Slice Identifier provided by your network carrier.
- For DNN (Data Network Name): Use DNN:name, where name is the carrier-provided DNN name. This helps route all traffic from the device through the network slice.
- For App Category: Use AppCategory:category, where category is a carrier-provided string. This helps route traffic from specific sets of apps on the device through the network slice.
After configuring the Network Slicing, click on Done and then Save.
- Navigate to Policy Targets to associate the configured policy with target entities. Select the required Devices, Users, Device Groups, User Groups, or Domains with which the policy is to be associated.
- Click on Save.


