Category filter
How to setup Hexnode Email app for iOS devices?
Email is a crucial aspect of any workplace, and email management on your employees’ work devices is mandatory as well. With the Hexnode Email app for iOS devices, IT admins can easily set up and manage multiple email accounts on an iOS device. Its advanced security features ensure data security. The app features a clean, intuitive interface that makes it easy to use and simple to switch between your email accounts. Hexnode Email app also allows you to set up custom email signatures, enable screen capture, and manage contacts directly from your iOS device.
Pre-configuring the Hexnode Email app not only reduces initial setup time but also boosts employee’s productivity as they can easily access the app to manage emails on the go. It also ensures that all employees have the same settings and access to features, promoting a consistent and standardized work environment. Learn how to configure the Hexnode Email app on your iOS devices to effectively manage email accounts in less time.
Configure Hexnode Email account settings on iOS via policy
To configure email settings via policy,
- Log in to your Hexnode UEM portal.
- Navigate to Policies > New Policy. Assign a suitable name and description (optional) for the policy. You can also choose to continue with an existing policy.
- Go to iOS > Hexnode Business Container > Hexnode Email. Click Configure.
- Under App settings, you can check or uncheck the option, Allow users to add and manage accounts to allow or deny access for the users to add or manage email accounts manually on the device end.
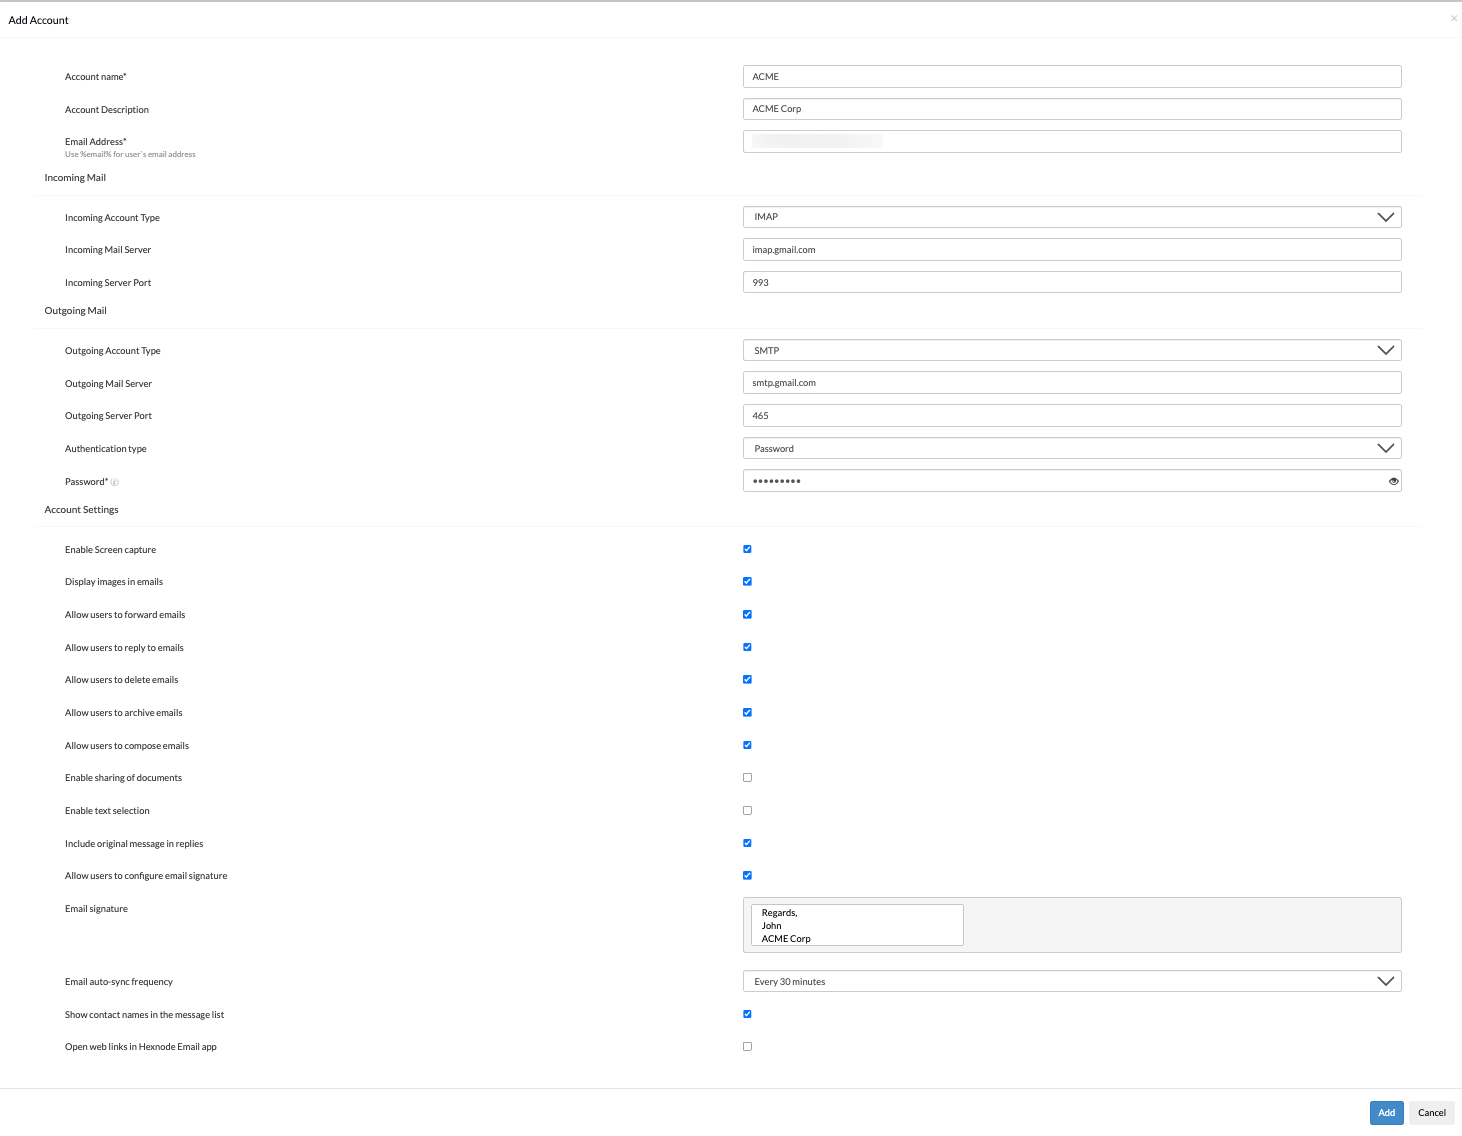
- Click on +Add more to configure a Hexnode Email account.
| Add Account Settings | Description |
|---|---|
| Account name | The name to be displayed for a user. |
| Account Description | Provide a display name for the email account. Use any name as this is used for distinguishing between email accounts. |
| Email Address | Enter the email address for the account. This field also supports the use of the %email% wildcard. |
Incoming Mail Settings
| Incoming Mail Settings | Description |
|---|---|
| Incoming Account Type | IMAP (default): IMAP stores every email on the server, and the device syncs with the server to display the emails on the device. |
| Incoming Mail Server | Specify the server address of the incoming email server. |
| Incoming Server Port | Enter the port number of the incoming email server. The default port number is 143. |
Outgoing Mail Settings
| Outgoing Mail Settings | Description |
|---|---|
| Outgoing Account Type | SMTP(default): SMTP protocol is mainly used to send emails to the servers or for email communications between servers. |
| Outgoing Mail Server | Specify the server address of the outgoing email server. |
| Outgoing Server Port | Enter the port number of the outgoing email server. The default port number is 587. |
| Authentication type | Select an authentication type to authenticate with the outgoing mail server. The available types include:
|
Account Settings
| Account Settings | Description |
|---|---|
| Enable Screen capture | Checking this option allows the users to capture the screen while using the Hexnode Email app. This option is disabled by default. |
| Display images in emails | Checking this option allows the users to view images in incoming emails. This option is disabled by default. |
| Allow users to forward emails | Checking this option allows the users to forward emails. This option is disabled by default. |
| Allow users to reply to emails | Checking this option allows the users to reply to emails. This option is disabled by default. |
| Allow users to delete emails | Checking this option allows the users to delete emails. This option is disabled by default. |
| Allow users to archive emails | Checking this option allows the users to archive emails. This option is disabled by default. |
| Allow users to compose emails | Checking this option allows the users to compose new emails. This option is disabled by default. |
| Enable sharing of documents | Checking this option allows the users to enable sharing of documents and attachments. This option is disabled by default. |
| Enable text selection | Checking this option allows the users to select text in emails. This option is disabled by default. |
| Include original message in replies | This option allows the user to view the previous messages in addition to the recent replies in emails. This option is enabled by default. |
| Enable adding signatures below messages | Checking this option allows the users to add a customized email signature to all their emails. This option is disabled by default. |
| Email signature | The user can specify the email signature in this field. |
| Email auto-sync frequency | The user can set the frequency at which the emails should be synced with the server. The frequency can take the following values:
|
| Show contact names in the message list | Checking this option displays the contact list while entering the recipient’s name in the email. This option is disabled by default. |
| Open web links in Hexnode Email app | Checking this option allows the users to open web links mentioned in the emails in the Hexnode Email app. |
Associate policy with Target Devices
If the policy has not been saved,
- Navigate to Policy Targets > +Add Devices.
- Choose the target devices and click Ok. Click Save. You can also associate the policy to Device Groups, Users, User Groups, or Domains from the left pane of the Policy Targets tab.
If the policy has been saved,
- Go to Policies and choose the desired policy.
- Click on the Manage drop-down and select Associate Targets.
- Choose the target entities and click Associate.
What happens at the device end?
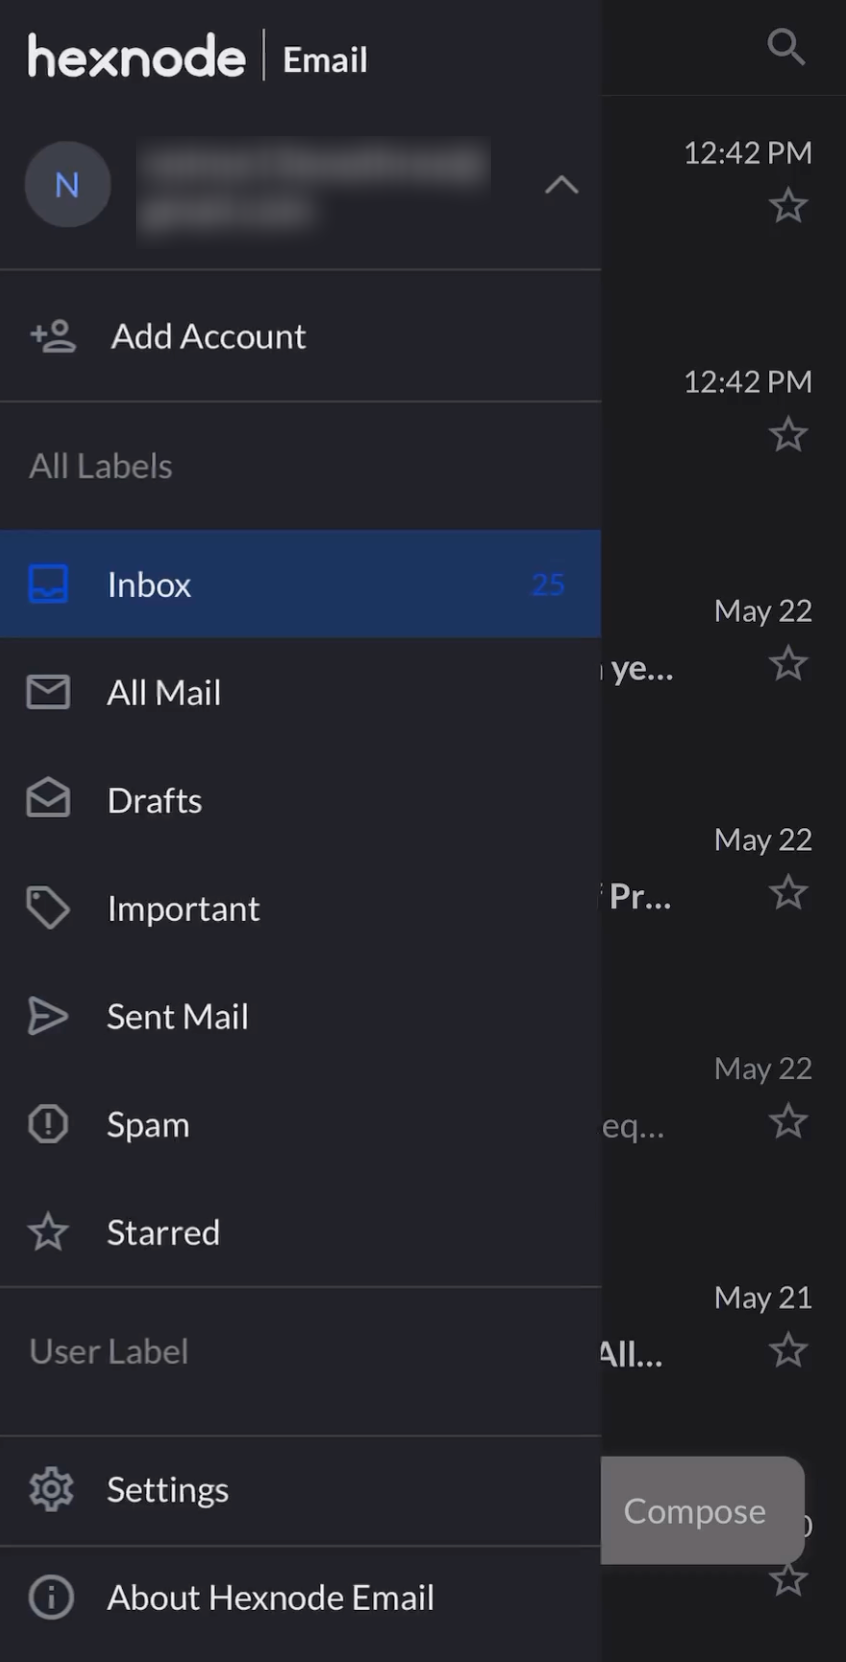
Once the policy is successfully deployed with valid configurations to the device, the account will be added to the native Hexnode Email app and listed under Configured Accounts.


