Category filter
How to set up Wi-Fi for Linux devices?
Wi-Fi is necessary for seamless internet connectivity in enterprise environments. With Hexnode UEM, administrators can remotely configure and deploy Wi-Fi settings to devices. The Wi-Fi policy ensures that managed devices connect securely to the corporate Wi-Fi networks configured by the administrator. By managing Wi-Fi settings remotely from the UEM portal, users remain unaware of the Wi-Fi password, preventing unauthorized password sharing and enhancing network security through controlled network access. Here’s how you set up a Wi-Fi configuration on Linux devices from the Hexnode UEM console.
Wi-Fi configurations for Linux devices
To configure the Wi-Fi network on Linux devices,
- Log in to the Hexnode UEM portal.
- Navigate to the Policies tab.
- Click the New policy button to create a new blank policy or continue with an existing policy.
- Provide a suitable name and description for the policy in the required fields.
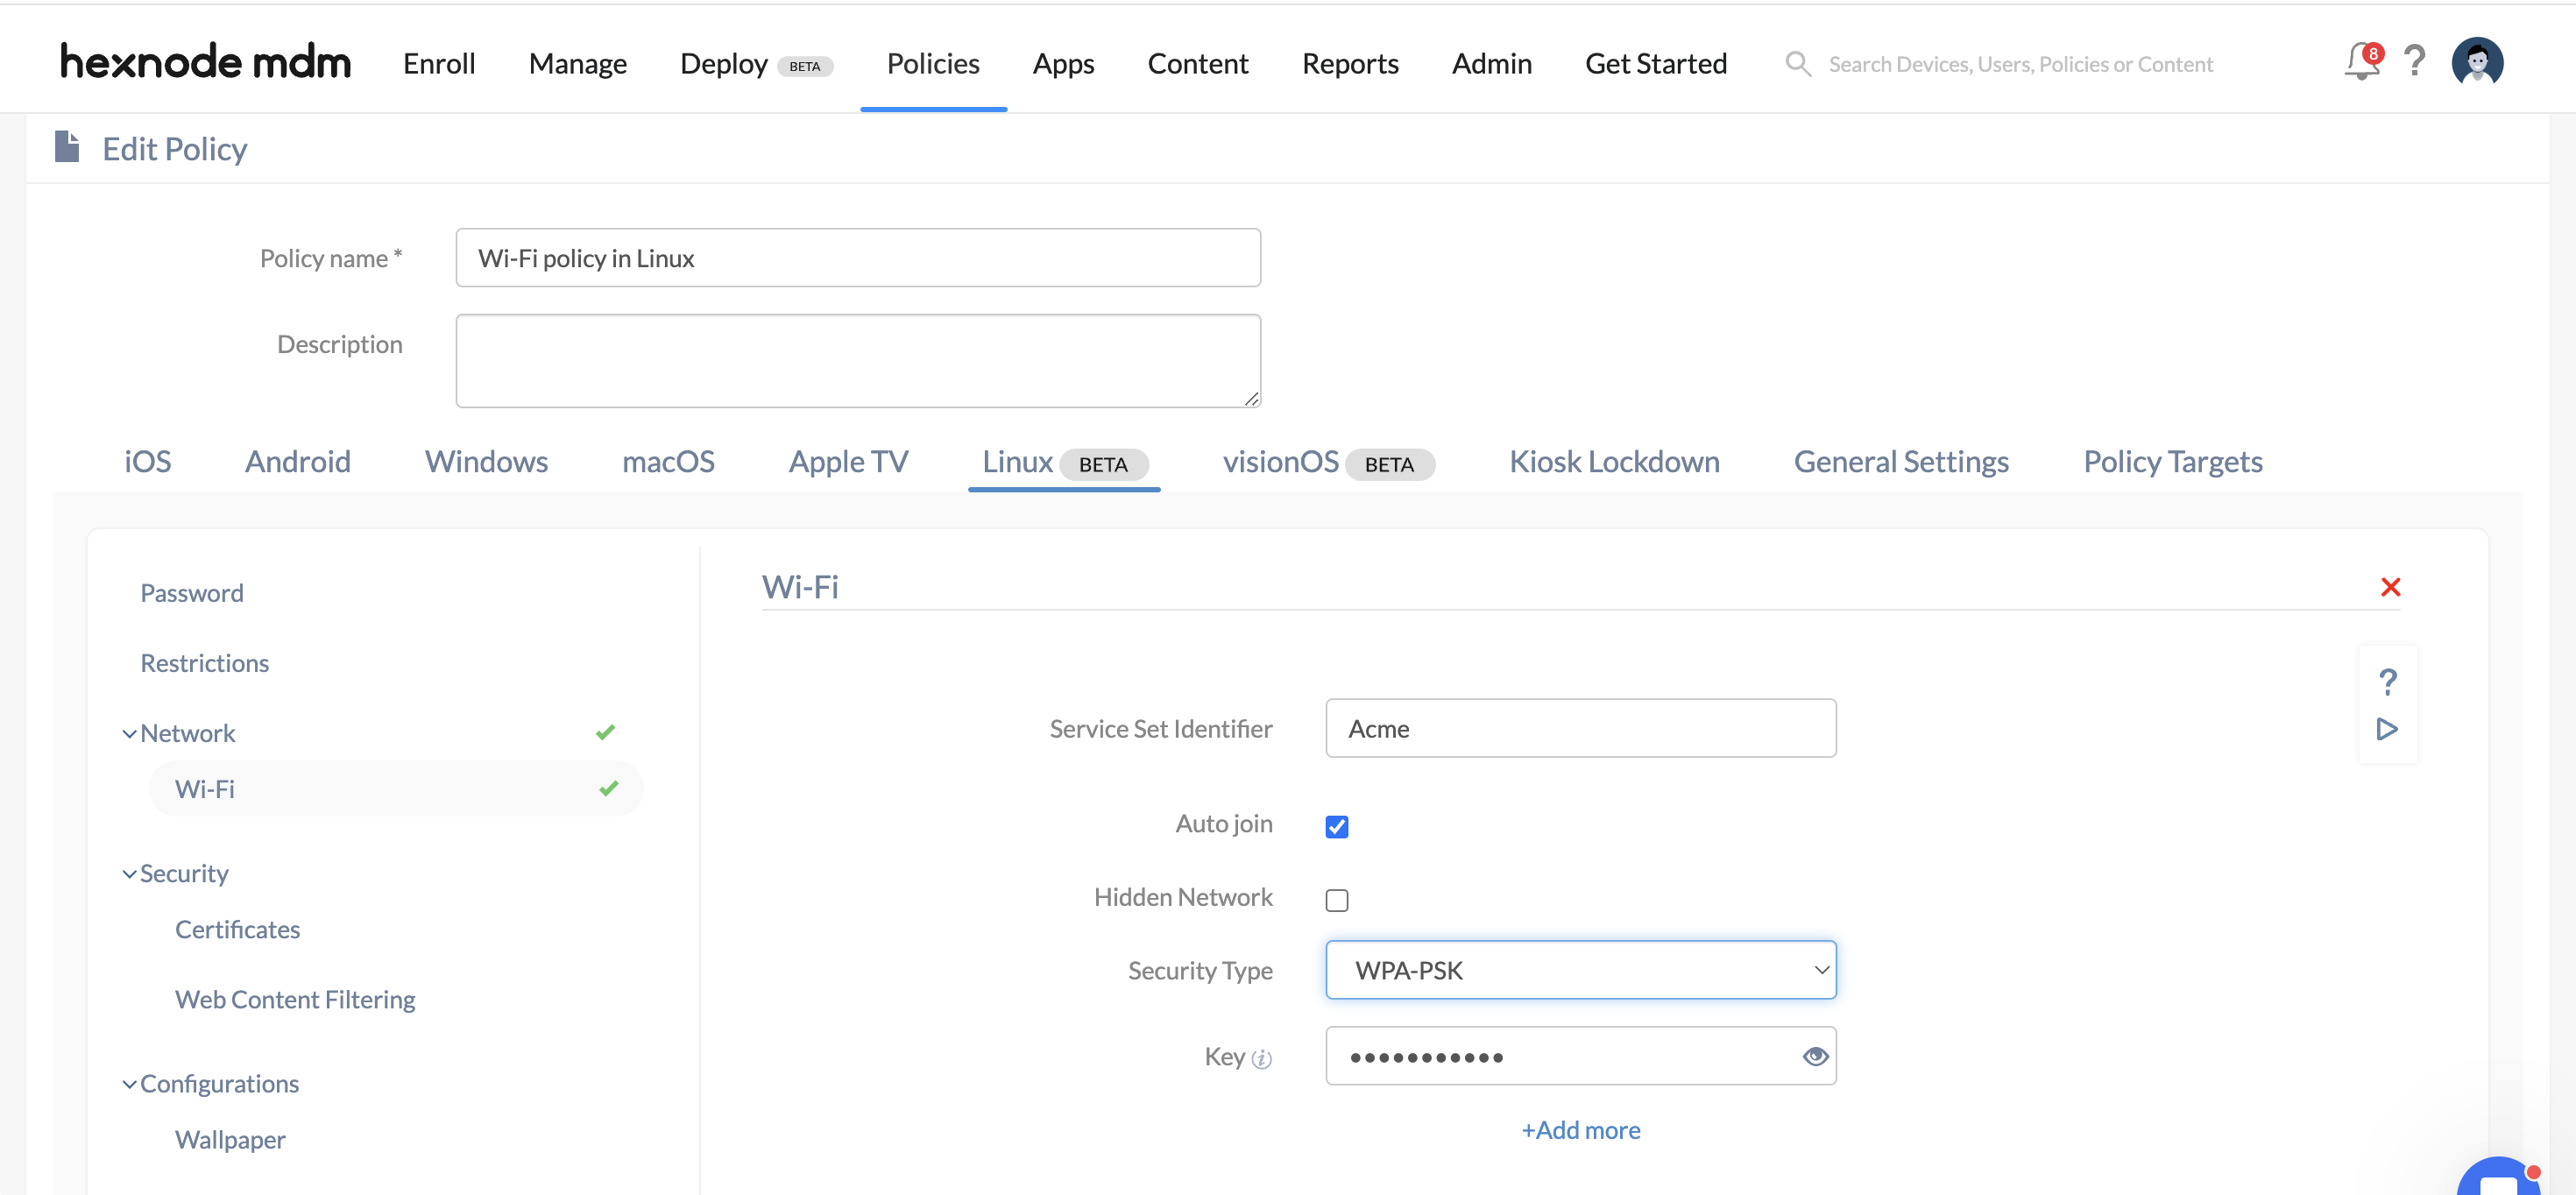
- Select Linux. Go to Network > Wi-Fi settings.
- Click Configure to set up the Wi-Fi network settings.
| Wi-Fi settings | Description |
|---|---|
| Service Set Identifier | The name of the Wi-Fi network is denoted by the Service Set Identifier (SSID). |
| Auto-join | When enabled, the device will automatically connect to the configured Wi-Fi network whenever it is within range, without requiring user intervention. |
| Hidden network | When enabled, the device connects to hidden networks that don’t broadcast their SSID. Hidden networks will not appear in the list of available networks. |
| Security type | Security type specifies the type of Wi-Fi security protocols. The available security type includes None, WEP, WPA-PSK, Dynamic WEP (802.1x), and WPA-Enterprise. |
| Key | Specify the key for authentication. If the key is 64 characters long, it should contain only hexadecimal characters. If not, the key must contain ASCII characters that are between 8 and 63 characters long. | Key type | The key type specifies the type of key used for encryption of data. WEP uses two keys for encryption: Hex/ASCII key and Passphrase. Select any one key from the list.
|
Dynamic WEP (802.1x) and WPA-Enterprise Settings
| Available Options | Description |
|---|---|
| Accepted EAP methods | Select the required authentication framework. The available EAP methods include TLS, LEAP, TTLS, FAST, PEAP, and PWD. |
| Identity | The username that is used for authenticating with the network. |
| CA certificate | Choose the CA certificate to be used for authentication. For this, the CA certificate must be uploaded under Security > Certificates. |
| User certificate (When TLS is selected) | Choose the user certificate to be used for authentication. For this, the user certificate must be uploaded under Security > Certificates. |
| Password | Enter the password corresponding to the username provided in the identity field to authenticate with the network. |
| Allow automatic PAC provisioning | Allow automatic PAC provisioning enables the seamless distribution of Protected Access Credentials (PAC) to managed devices during the setup process. The available options include disallow, anonymous, authenticated, and both. |
| Phase 2 authentication | Select a phase 2 authentication method. The available options include MSCHAPv2, and GTC. MSCHAPv2 is the second version of MSCHAP that uses mutual authentication, where both the client and the server verify each other’s identities. GTC (Generic Token Card) is an EAP (Extensible Authentication Protocol) method that supports token-based credentials or one-time passwords (OTPs) for user authentication. |
| Outer identity | The outer identity refers to the username sent through the secure tunnel before passing the original username and password during authentication. |
| PAC file (When FAST is selected) | The PAC file is uploaded to establish a secure and efficient authentication tunnel. |
How to associate the policies with device/groups?
There are two ways by which you can associate restrictions to the devices in bulk.
If the policy hasn’t been saved yet,
- Navigate to Policy Targets.
- Click on + Add Devices.
- Browse and select the devices from the list of devices.
- Press OK to save the devices.
Apart from devices, you can also associate the policies with Device Groups, Users, User Groups, or Domains from Policy Targets.
If the policy is already saved,
- Select the required policy from the list of policies.
- Click on Manage > Associate Targets.
- Add the device(s)/device group(s)/user(s)/user group(s)/domain(s) to which the policy needs to be associated.
- Click on Associate.
What happens at the device end?
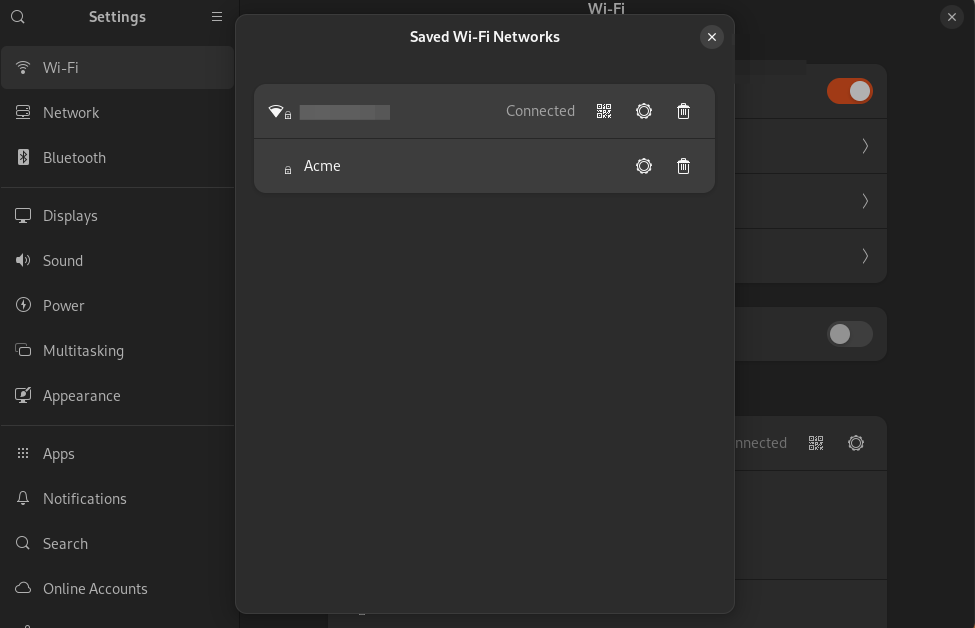
The Wi-Fi network configuration will get saved on the device under Settings > Wi-Fi > Saved Networks when the policy gets successfully associated.


