Category filter
How to enroll Fire OS devices?
Enrollment is the process of adding devices to the UEM console for device administration. Hexnode supports various device platforms, and there are numerous platform-specific enrollment methods. The organization can use any method to enroll their devices based on the enrollment criteria, such as the total number of devices enrolled, the company’s scalability, user authentication, security preferences, etc. The following are the different methods of enrolling Fire OS devices:
- Enrollment without authentication
- Authenticated enrollment
- QR Code enrollment
- Pre-Approved enrollment
- Bulk enrollment
1. Enrollment without authentication
This is the easiest and quickest enrollment technique that involves no user authentication; any device can be enrolled by entering the server name. The devices enrolled using this method will be assigned to a default user. However, you may change the device owner from the Hexnode portal after the enrollment.
In Hexnode UEM Portal:
- Navigate to Enroll > All Enrollments > Quick > Open Enrollment > Change enrollment method.
- Choose the user Domain. Only the user from the selected domain can be chosen as the default user.
- Select a Default User. You can also create a new user by clicking on +Add New User to assign the devices.
- Enter a password in the Default password field. Though it has nothing to do with enrolling Fire OS devices, it is mandatory for proceeding with open enrollment. This password is used for Windows device enrollment.
- Based on the type of ownership to be chosen for enrolling the device, you can select either Corporate or Personal under the Ownership option.
- Click Continue.
At the device end:
- Open Amazon Appstore.
- Download and install the Hexnode UEM application.
- Open the app and enter the server name, which will be similar to: yourportal.hexnodemdm.com
- Enable the Device administration, Usage access and Notification access.
- Click Next.
- Your device will now be enrolled on Hexnode UEM.
2. Authenticated Enrollment
Authenticated enrollment enforces user authentication while enrolling devices. This enrollment mode enables users to enroll their devices using the enrollment credentials sent by the administrator. Device enrollment with authentication guarantees that only valid users add their devices to the Hexnode UEM console. There are two different methods of authenticated enrollment:
- Email or SMS enrollment
- Self enrollment
Email or SMS enrollment
User can enroll their devices with the enrollment credentials sent via an enrollment mail. This mail will contain a username and password required to authenticate the device enrollment.
In the Hexnode Console:
- Navigate to Enroll > All Enrollments > Invite > Email/QR Code/SMS.
- Select the type of users to be enrolled via the Enrollment Request.
- Choose the Ownership from Corporate, Personal, Let the user choose or Choose it later options.
- Click Continue.
- A message, “Enrollment settings successfully updated” will be displayed.
- Choose the Domain.
- You can send enrollment requests to either a single user or bulk users. To send the enrollment request to a Single User, choose a user to assign the devices. If you want to send requests to a number of users, toggle the button to Bulk User and select a CSV file containing the necessary details.
- Click Send.
At the device end:
- Open Amazon Appstore.
- Download and install the Hexnode UEM application.
- Open the app and enter the server name, which looks like yourportal.hexnodemdm.com.
- Click Next.
- On the next page, choose how to authenticate the enrollment.
- For local users, select Authenticate with Hexnode. Choose the Domain as ‘local’ and enter the username and password.
- For AD users, click on Authenticate with Hexnode. Choose your AD domain from the Domain drop-down and type in the username and password.
- For Microsoft Entra ID users, click on Authenticate with Microsoft and enter the Microsoft Entra ID username and password.
- For Google users, click on Authenticate with Google and enter the Google Workspace username and password.
- For Okta users, click on Authenticate with Okta and complete the on-screen procedure.
- Click Next.
- Enable the following permissions: Device administration, Usage access and Notification access. Click Next.
- Your device will now be enrolled in Hexnode UEM.
Self enrollment
Self-enrollment allows the users to enroll devices using their Active Directory/ Microsoft Entra ID/ Google/ Okta user credentials. For other users, the admin can create a default user and a dedicated password manually and send it to them via email.
In the Hexnode Portal:
- Navigate to Enroll > All Enrollments > Invite > Email/QR Code/SMS.
- Select the type of users to be enrolled via Self Enrollment.
- Choose the Ownership from Corporate, Personal, Let the user choose or Choose it later options.
- Click Continue.
- A message, “Enrollment settings successfully updated” will be displayed.
- Choose the Domain.
- You can send enrollment requests to either a single user or bulk users. To send the enrollment request to a Single User, choose a user to assign the devices. If you want to send requests to a number of users, toggle the button to Bulk User and select a CSV file containing the necessary details.
- Click on Send.
At the device end:
- Open Amazon Appstore.
- Download and install the Hexnode UEM application.
- Open the app and enter the server name, which looks like yourportal.hexnodemdm.com.
- Click Next.
- On the next page, choose how to authenticate the enrollment.
- For local users, select Authenticate with Hexnode. Choose the Domain as ‘local’ and enter the username and password.
- For AD users, click on Authenticate with Hexnode. Choose your AD domain from the Domain drop-down and type in the username and password.
- For Microsoft Entra ID users, click on Authenticate with Microsoft and enter the Microsoft Entra ID username and password.
- For Google users, click on Authenticate with Google and enter the Google Workspace username and password.
- For Okta users, click on Authenticate with Okta and complete the on-screen procedure.
- Click Next.
- Enable the following permissions: Device administration, Usage access and Notification access. Click Next.
- Your device will now be enrolled on Hexnode UEM.
3. QR Code Enrollment
Sometimes, device enrollment using the portal name, username and password becomes quite tiring. To tackle this, Hexnode UEM lets you enroll the devices by merely scanning the QR code.
Quick Enrollment
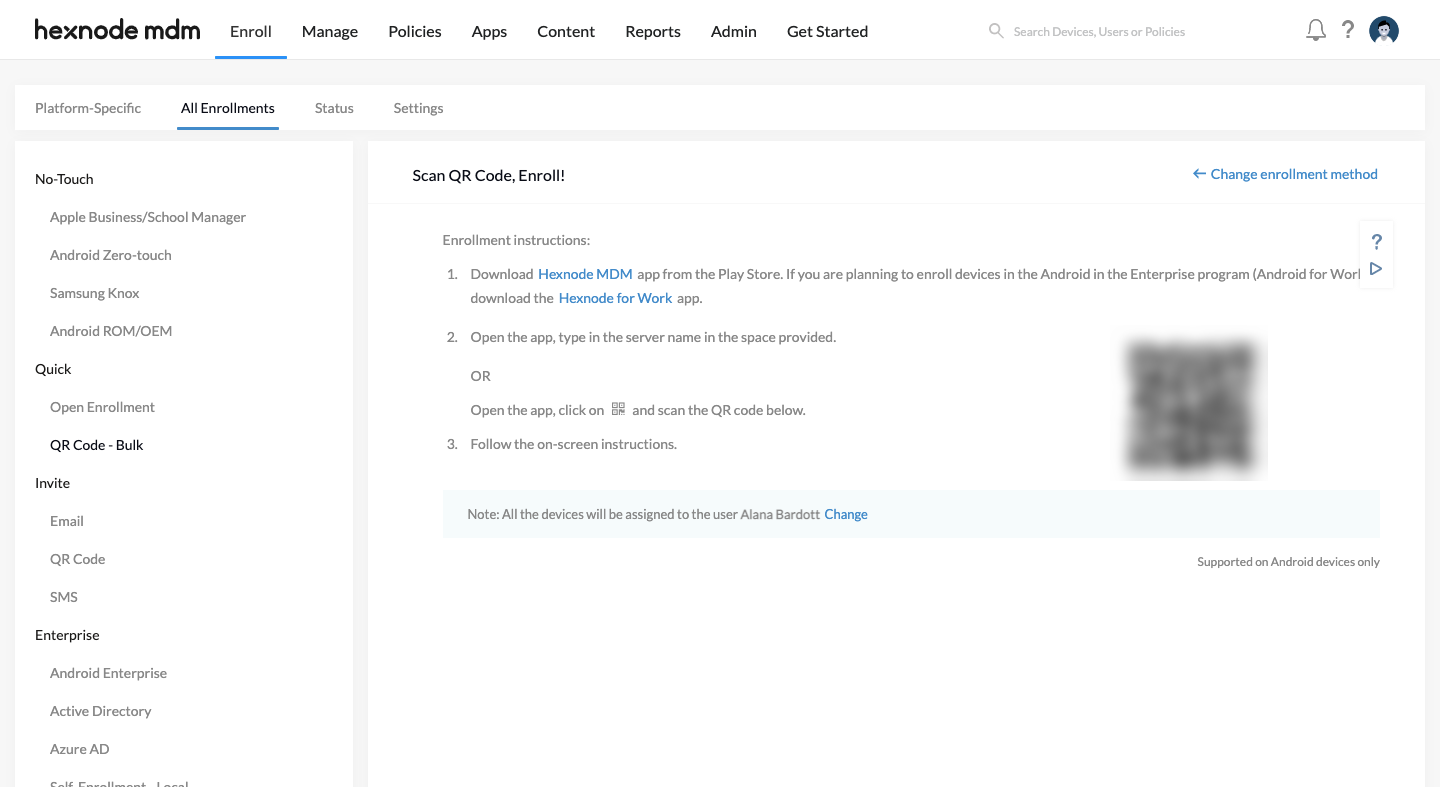
Open Enrollment permits you to enroll the devices quickly by entering the enrollment URL or scanning a QR code from the device.
-
- Login to your Hexnode UEM portal.
- Navigate to Enroll > All Enrollments > Quick > QR Code – Bulk.
-
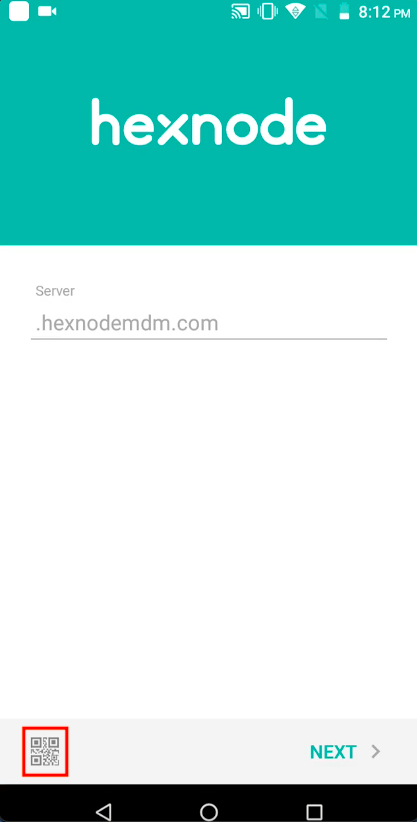
- Download the Hexnode UEM app on the device from the Amazon Appstore.
- Open the app and tap on the QR code icon at the bottom left of the screen.
- Scan the QR code displayed on the Hexnode portal and follow the on-screen instructions to complete the enrollment process.
QR Code Enrollment with Authentication
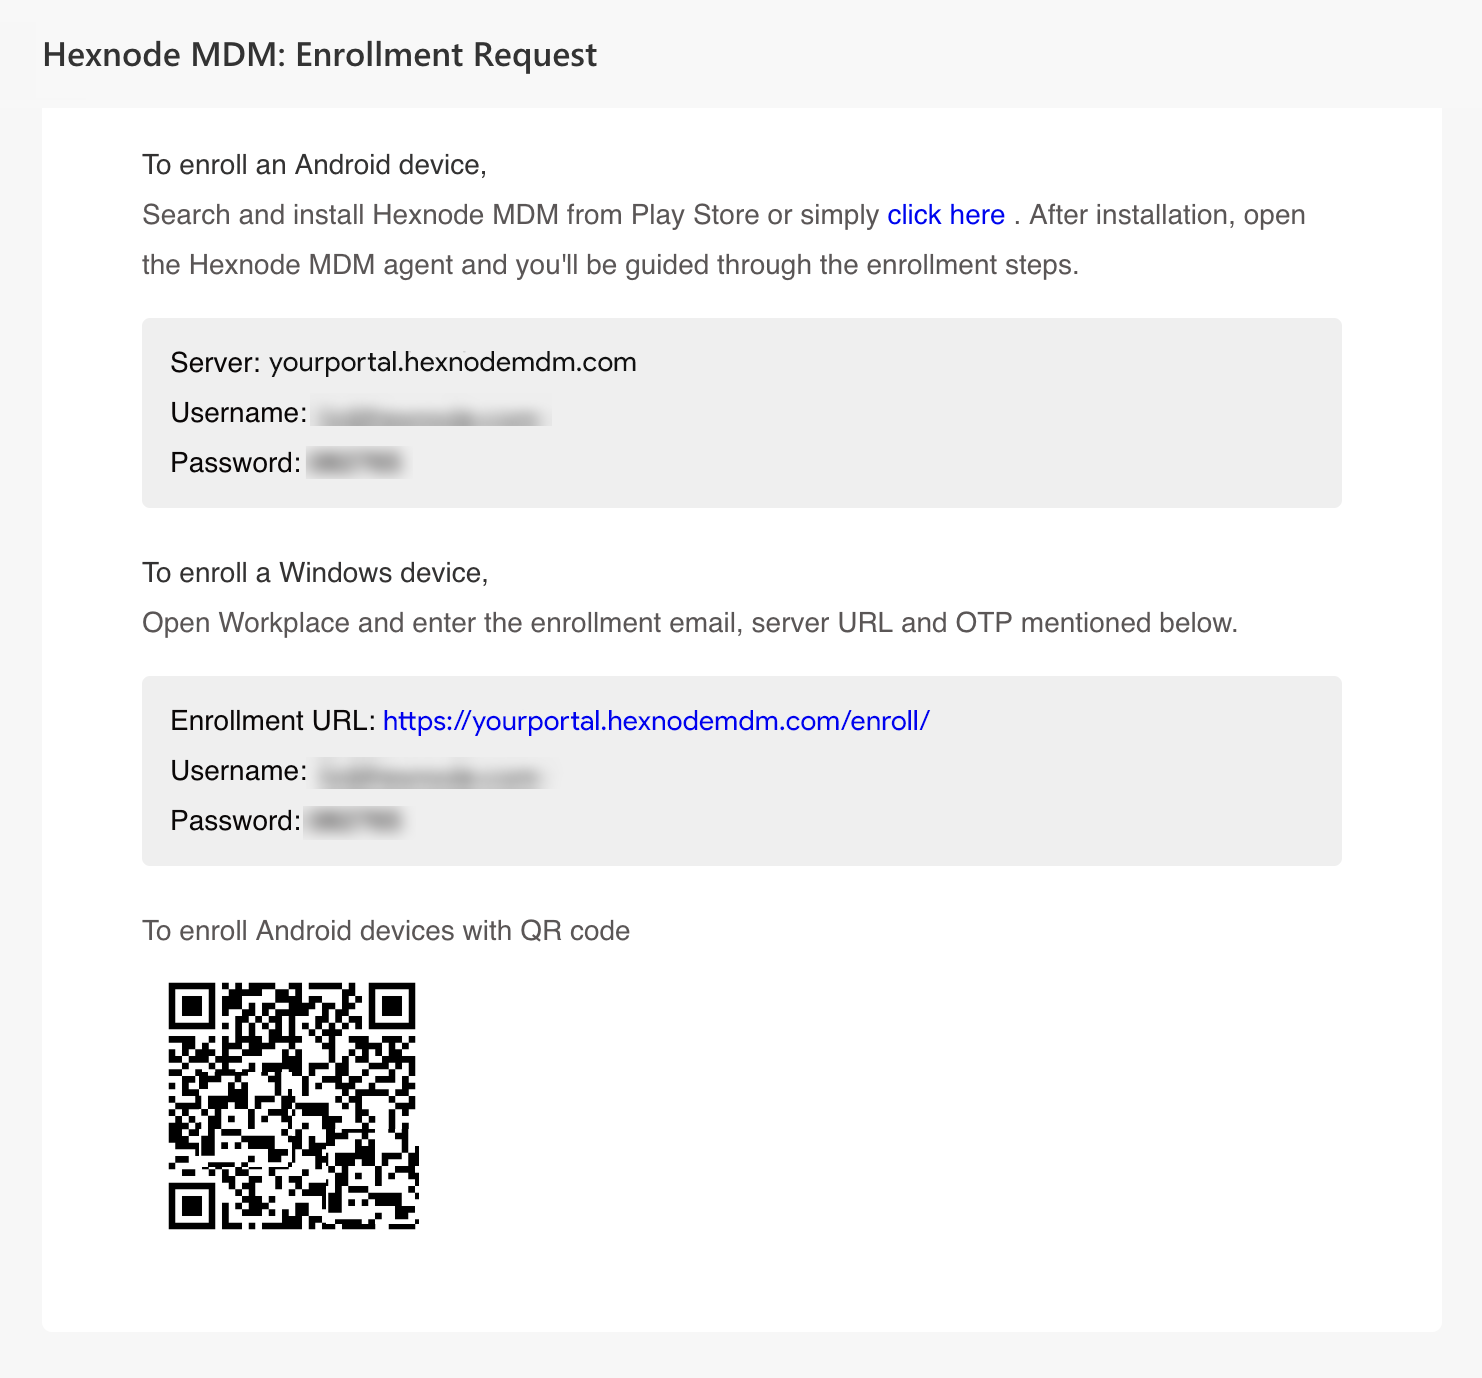
In this method, the QR code required for the enrollment process will be sent to the user via email.
To Send Enrollment Request
- Login to your Hexnode UEM portal.
- Navigate to Enroll > All Enrollments > Invite > QR Code.
- Select the types of users to be enrolled.
- Change the Ownership to Corporate, Personal, Let the user choose or Choose it later option.
- Click Continue.
- A message, “Enrollment settings successfully updated” will be displayed.
- Choose the Domain.
- Select the user to assign the device and send the enrollment request.
- Click Send.
An enrollment request mail containing the QR code will be sent to the user.
At the device end:
- Open Amazon Appstore.
- Download and install the Hexnode UEM app.
- Open the app, click on the QR Code icon at the bottom left of the screen and scan the QR code received via mail.
- Click on Agree.
- Enable Device administration, Usage access and Notification access permissions.
- Your device will now be enrolled on Hexnode UEM.
4. Pre-Approved Enrollment
Pre-Approved Enrollment is a bulk enrollment technique that lets you import devices into Hexnode UEM, even before the enrollment is completed from the user end.
- Navigate to Enroll > All Enrollments > Enterprise > Pre-approve.
- Select the Domain.
- Download the sample CSV file by clicking on Download sample CSV file. Either create a new file like the sample or edit the sample file accordingly.
- Click on Choose file and upload the CSV file containing the mandatory information such as name, email, ownership, serial number and platform. For FireOS devices, the platform can be set to Android.
- Click Next.
- If there are mistakes in the data included in the CSV file, an error message will be shown. You may correct the CSV file and re-upload it.
- Hexnode will automatically identify these keys: name, email, mobile, ownership, device name, Serial Number and platform. If there is any mistake in mapping, you have to map the keys manually.
- The data uploaded in the CSV file will be displayed. Click Next.
- Choose the option to Send enrollment requests to users via Email / SMS and click on Send.
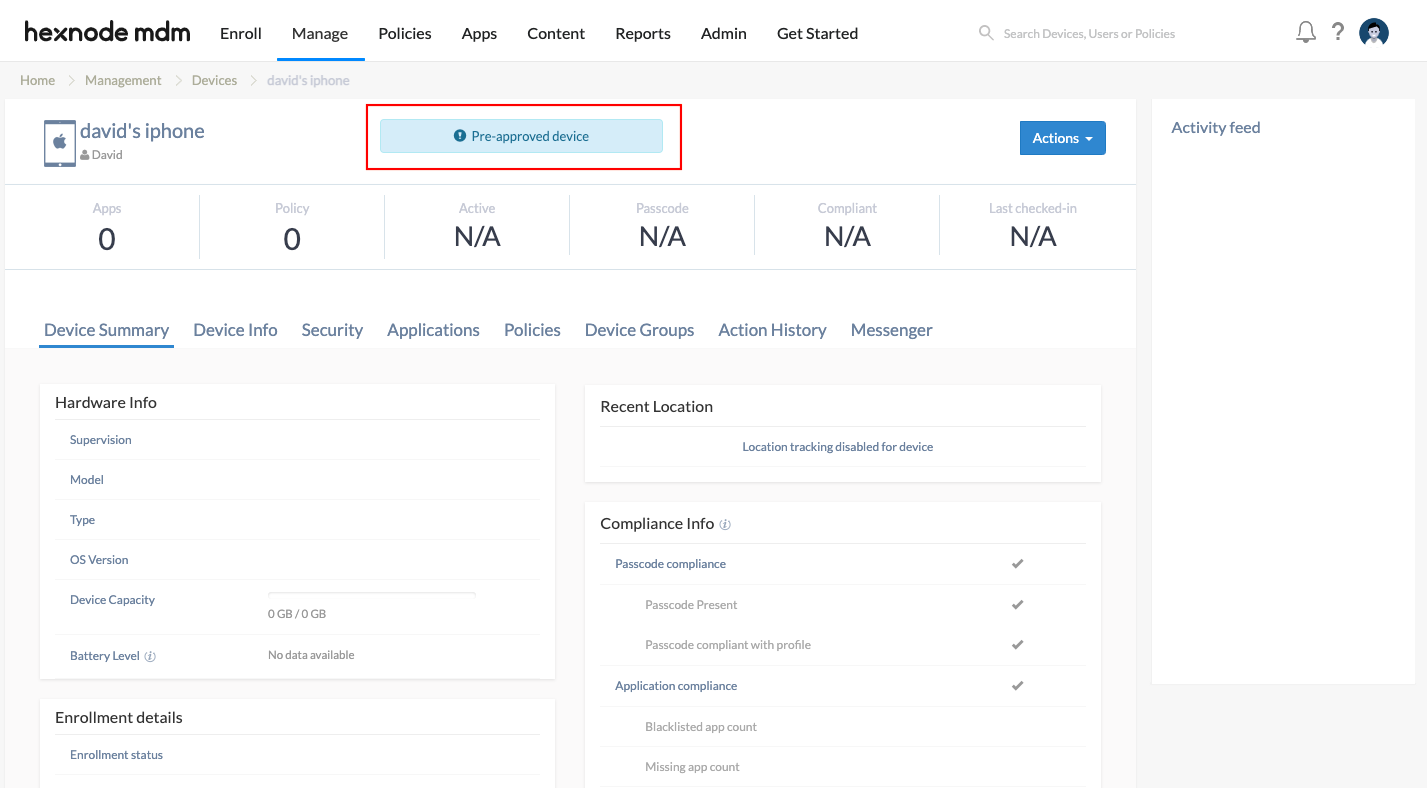
All the pre-approved devices get listed in the Hexnode portal once the enrollment request is sent. The devices retain a ‘Pre-approved device’ banner until the user initiates the enrollment from the device end.
5. Bulk Enrollment
We had already discussed how authenticated enrollment enforces user authentication while enrolling devices. The user can enroll their devices with the enrollment credentials sent via enrollment mail. When you want to enroll many devices, sending enrollment requests individually to each user becomes a tiring job for the administrator. You can import a CSV file containing all the users and their details into the Hexnode UEM portal with bulk enrollment. It sends enrollment requests to each user specified in the file in one go.
-
- Go to Enroll > All Enrollments > Invite > Email.
- Under Send enrollment request to option, switch the button to Bulk User.
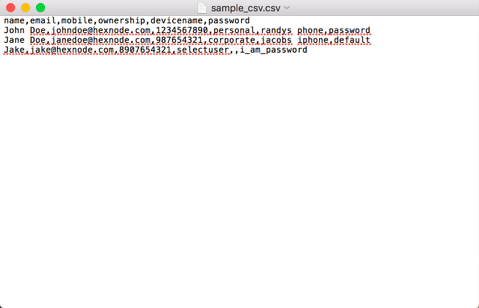
- Upload the CSV file with all the users and their details. You can get a sample CSV file by clicking on Download sample CSV file. You need to provide the following details regarding the user to send bulk enrollment requests.
A Sample CSV file is of the following format.
| Field Name | Description |
|---|---|
| Name | Description |
| Name | Provide the name of the user. |
| Provide the email address of the user to send the enrollment request. | |
| Mobile Number | Provide the mobile number of the user to which enrollment request is to be sent. |
| Ownership | Specify the device ownership type either as Personal or Corporate owned device. |
| Device Name | Provide a suitable name to identify your device. |
| Password | Set the password required for authentication. |
- Click on Next and verify the details of the CSV uploaded.
- Choose the mode through which the enrollment requests are to be sent and then click on Send.
Once the enrollment request is received:
- Open Amazon Appstore on the device.
- Download and install the Hexnode UEM application.
- Open the app and enter the server name, which will look similar to yourportal.hexnodemdm.com.
- Click Next.
- Enter the username and password included in the enrollment mail or SMS.
- Enable the following permissions: Device administration, Usage access, and Notification access. Click Next.
- Your device will now be enrolled on Hexnode UEM.
