Category filter
How to configure location tracking for Mac
The location tracking feature for Mac enables you to locate the managed macOS devices enrolled in the Hexnode UEM portal. It includes fetching real-time locations, fetching complete location history traversed by the devices, tracking lost or stolen devices, and so on. Hexnode fetches the geographical location of a macOS device only if the Hexnode UEM app is installed on the device.
With Hexnode’s location tracking for Mac, you can achieve live tracking of your users’ devices. Hexnode also allows you to export the location details of your devices in PDF/CSV format. You can also create geofences and impose restrictive policies on those devices which are out of geofences.
Enable periodic location tracking on macOS devices
To enable periodic location tracking on a macOS device, you have to associate a location tracking policy with that device. To do so,
- Navigate to the Policies tab on your Hexnode UEM portal.
- Click on New Policy to create a new one or click on any policy to edit an existing one. Enter the Policy Name and Description in the provided fields.
- Go to General Settings > Location Tracking > Configure.
- Select the option Enable Location Tracking to enable location tracking on your device.
- Select an appropriate Location Update Interval that indicates how frequently the location data needs to be updated. The time interval ranges from 15 minutes to 24 hours.
- Navigate to Policy Targets and select the required Devices/Device Groups/Users/User Groups/Domains to which the policy is to be associated.
- Click on Save.
Instantaneous location tracking of macOS devices
The instantaneous location of a device can be obtained only if a location tracking policy is attached to the device. To fetch the location of a Mac using the Hexnode UEM portal at any particular instant, execute the following steps mentioned below:
- Navigate to the Manage tab on your Hexnode UEM portal.
- Select the macOS device(s) and click on Actions > Scan Device Location.
Or
- Navigate to the Manage tab.
- Click on the macOS device you want to track the location. This will take you to the device summary page.
- Now, click on Actions > Scan Device Location to fetch the most recent location of your device.
Hexnode UEM also provides a location push button for the users to send their current location details to the UEM server manually. To do so, the user has to perform the following steps:
- Open the Hexnode UEM app on your Mac.
- Click on the Send Location button at the bottom left corner. A popup arises where you can add any additional notes and then click on Send.
The location details will then be sent to the UEM server. To view the location notes from the console, navigate to Reports tab > select Location Reports > Location History.
Viewing device location of macOS devices
Hexnode UEM allows you to view the location details of all location-enabled devices on the portal. You can view the locations of your macOS devices through the following sections:
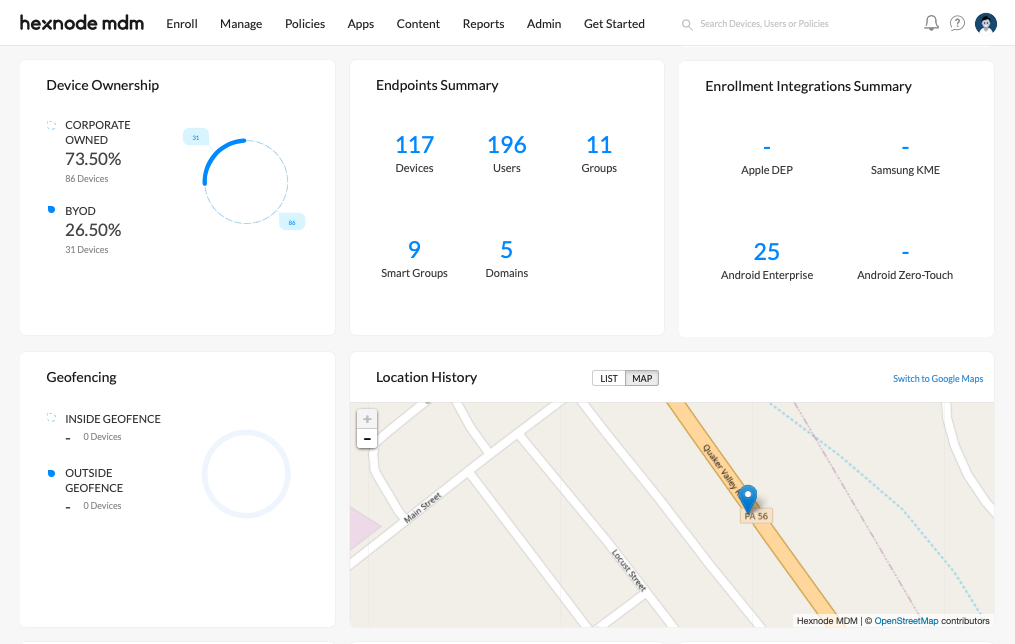
- Dashboard – The Hexnode dashboard displays the locations of all location-enabled devices enrolled in the portal. The locations can be viewed either through maps or as a list containing all the location details.
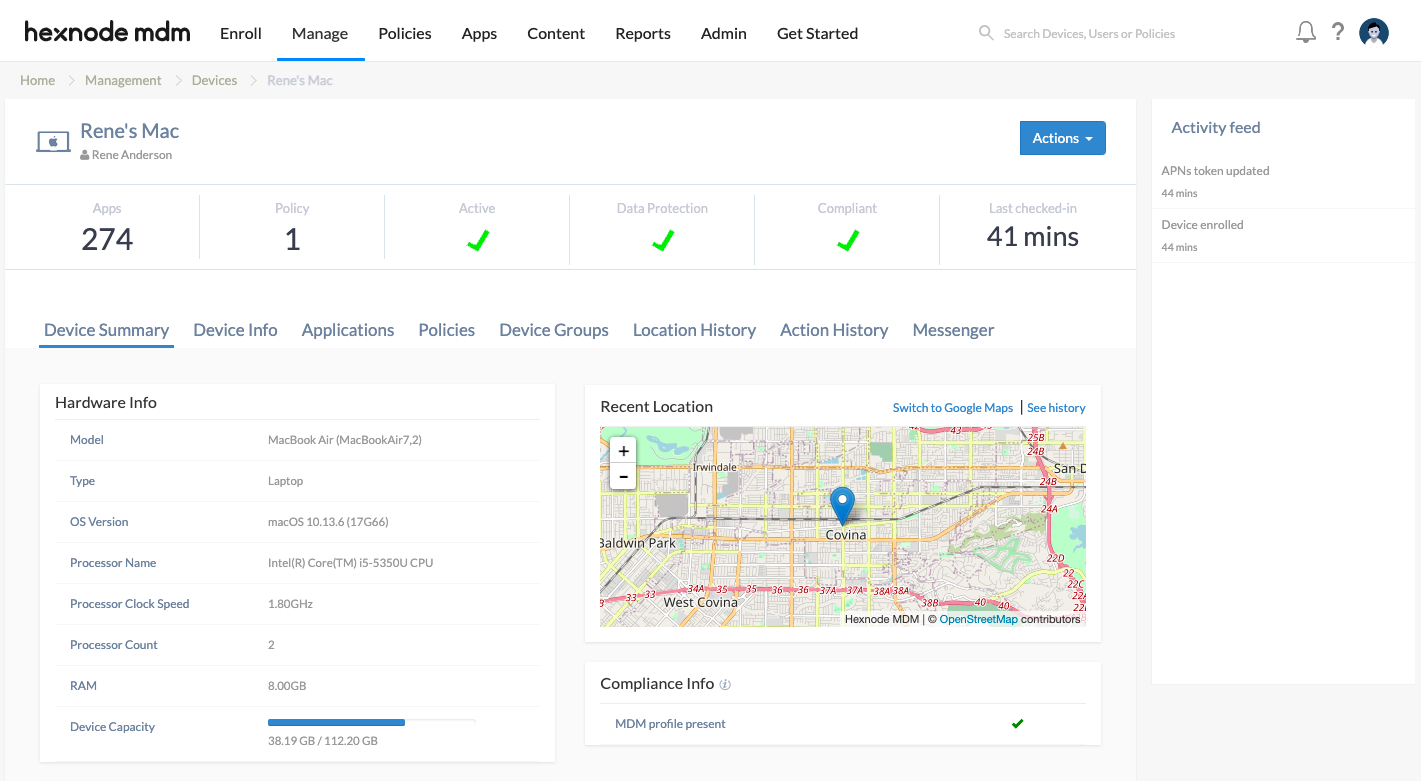
- Recent Location – The most recent location of the device will be mapped in the Recent Location tab under the Device Summary page. (Manage > Device > select a device > Device Summary). It shows the last reported location of a location-enabled device from the UEM console. You may choose to view it using the default map or switch to Google Maps. The See History button enables a complete view of the locations traversed, date & time of location fetch, etc.
- The Location History tab under Manage > Device > select a device > Device Summary page also gives a view of all the locations traversed, last check-in, and total check-in status of that device.
- Users/Device Groups/User Groups from Manage tab – Hexnode also allows you to view the locations of macOS devices from the ‘Locations’ sub-tab under Users/Device Groups/User Groups.


