Category filter
How to Add Certificates for Mac devices
A digital certificate added to a device allows a person to access corporate resources securely over the internet. There is a growing need for digital certificates in an enterprise since securing corporate data has always been an essential and high-priority task for Mac administrators.
With the help of a Mobile Device Management solution like Hexnode UEM, administrators can remotely distribute and install certificates to Mac devices. A digital certificate can secure network connections (VPN and Wi-Fi) and makes sure that only the specified users or devices have access to corporate data.
Once the certificates are added to the Hexnode portal via policies, you can make use of these certificates in every other macOS functionality that requires a certificate.
Add Certificates for Mac devices via Hexnode Policies
To add certificates on your Mac via policy,
- Log in to your Hexnode MDM portal.
- Navigate to Policies > New Policy. Assign a suitable name and description (optional) for the policy. You can also choose to continue with an existing policy.
- Go to macOS > Security > Certificates. Click Configure.
- Tap on the Add Certificate button to import a new credential certificate profile from your device. You can add as many certificates as you need.
To remove a certificate, click on the ‘x’ button at the top-right corner of each certificate listing. The added certificate will display the following options:
- Credential Name– Credential name refers to the display name of the certificate. This field becomes visible once you upload a certificate by clicking Add Certificate. Even though this field will already be filled, you can change it if necessary.
- Credential Details– You can click on the ‘+’ button adjacent to Credential Details to view the subject, issuer name, and the expiry date. Click on ‘–’ to collapse the details section.
Associate policy with devices/groups
If the policy has not been saved,
- Navigate to Policy Targets > +Add Devices.
- Choose the target devices and click Ok. Click Save
- You can also associate the policy with device groups, users, user groups, or domains from the left pane of the Policy Targets tab.
If the policy has been saved,
- Go to the Policies tab and choose the desired policy.
- Click on Manage drop-down and select Associate Targets.
- Choose the target entities and associate the policy.
What happens at the device end?
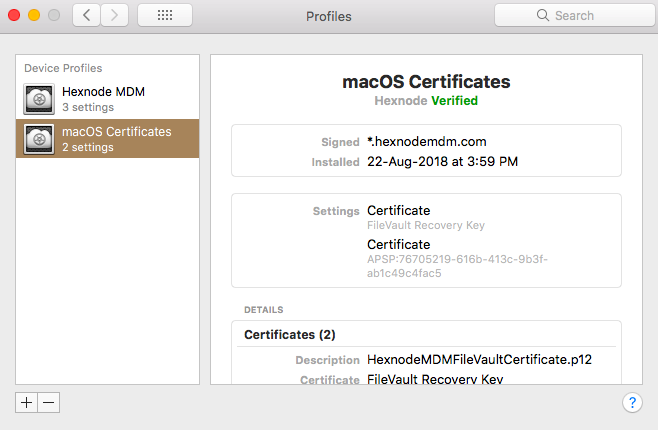
The certificates will get added on the system keychain and, user can find it listed on the Keychain Access app on their Mac. The certificates associated via the policy can also be viewed under System Preferences > Profiles > [Select certificate policy].


