Category filter
Fix common issues while executing custom scripts on Mac
Case 1:
Unable to execute scripts. Argument values are not parsed as expected.
While executing the scripts, the argument values are not parsed to the corresponding variables used in the shell scripts. Hence, the scripts are not executed successfully.
Reason:
Failed to parse the argument value as a single entity as it is enclosed in quotes when passed from the Hexnode portal.
For instance,
The shell script to add a user to the device:
|
1 2 3 |
#!/bin/ksh sysadminctl -addUser "Admin User" -fullName "$1" -password "$2" -hint "$3" |
And, if a value “Adam Johns” is passed as $1, it is not considered a single component but two different components, “Adam” and “John”. Hence, the values might not be parsed correctly.
Solution:
Always enclose the argument value in single quotes if it contains two or more words separated by spaces while passing.
Running the Homebrew commands as scripts from the Hexnode portal generates the error “Running Homebrew as root is extremely dangerous and no longer supported. As Homebrew does not drop privileges on installation, you would be giving all build scripts full access to your system.”
Reason:
By default, Hexnode executes the script command at the root level.
Solution:
Homebrew commands need not be executed at the root level. In cases where you do not want specific commands to be run at the root level, you can explicitly execute them at the user level. The following command helps to get the logged-in details of the current user on the device:
currentUser=$( echo "show State:/Users/ConsoleUser" | scutil | awk '/Name :/ { print $3 }' )
Include the above command on the script. Then proceeding with the necessary operation as the currentUser helps you run it at the given user level.
For example, the below command changes the default dock orientation of the given user to the value Left.
currentUser=$( echo "show State:/Users/ConsoleUser" | scutil | awk '/Name :/ { print $3 }' )
sudo -u "$currentUser" defaults write com.apple.dock orientation left
Case 3:
Homebrew command raises the “Command not found” error.
Reason:
There might be an issue with the Homebrew path variable.
Solution:
Specify the full path (default location of Homebrew) for the path variable in the scripts.
For example:
|
1 2 3 4 5 |
#!/bin/sh currentUser=$( echo "show State:/Users/ConsoleUser" | scutil | awk '/Name :/ { print $3 }' ) brew=/usr/local/bin/brew $brew -v sudo -u "$currentUser" $brew list |
Case 4:
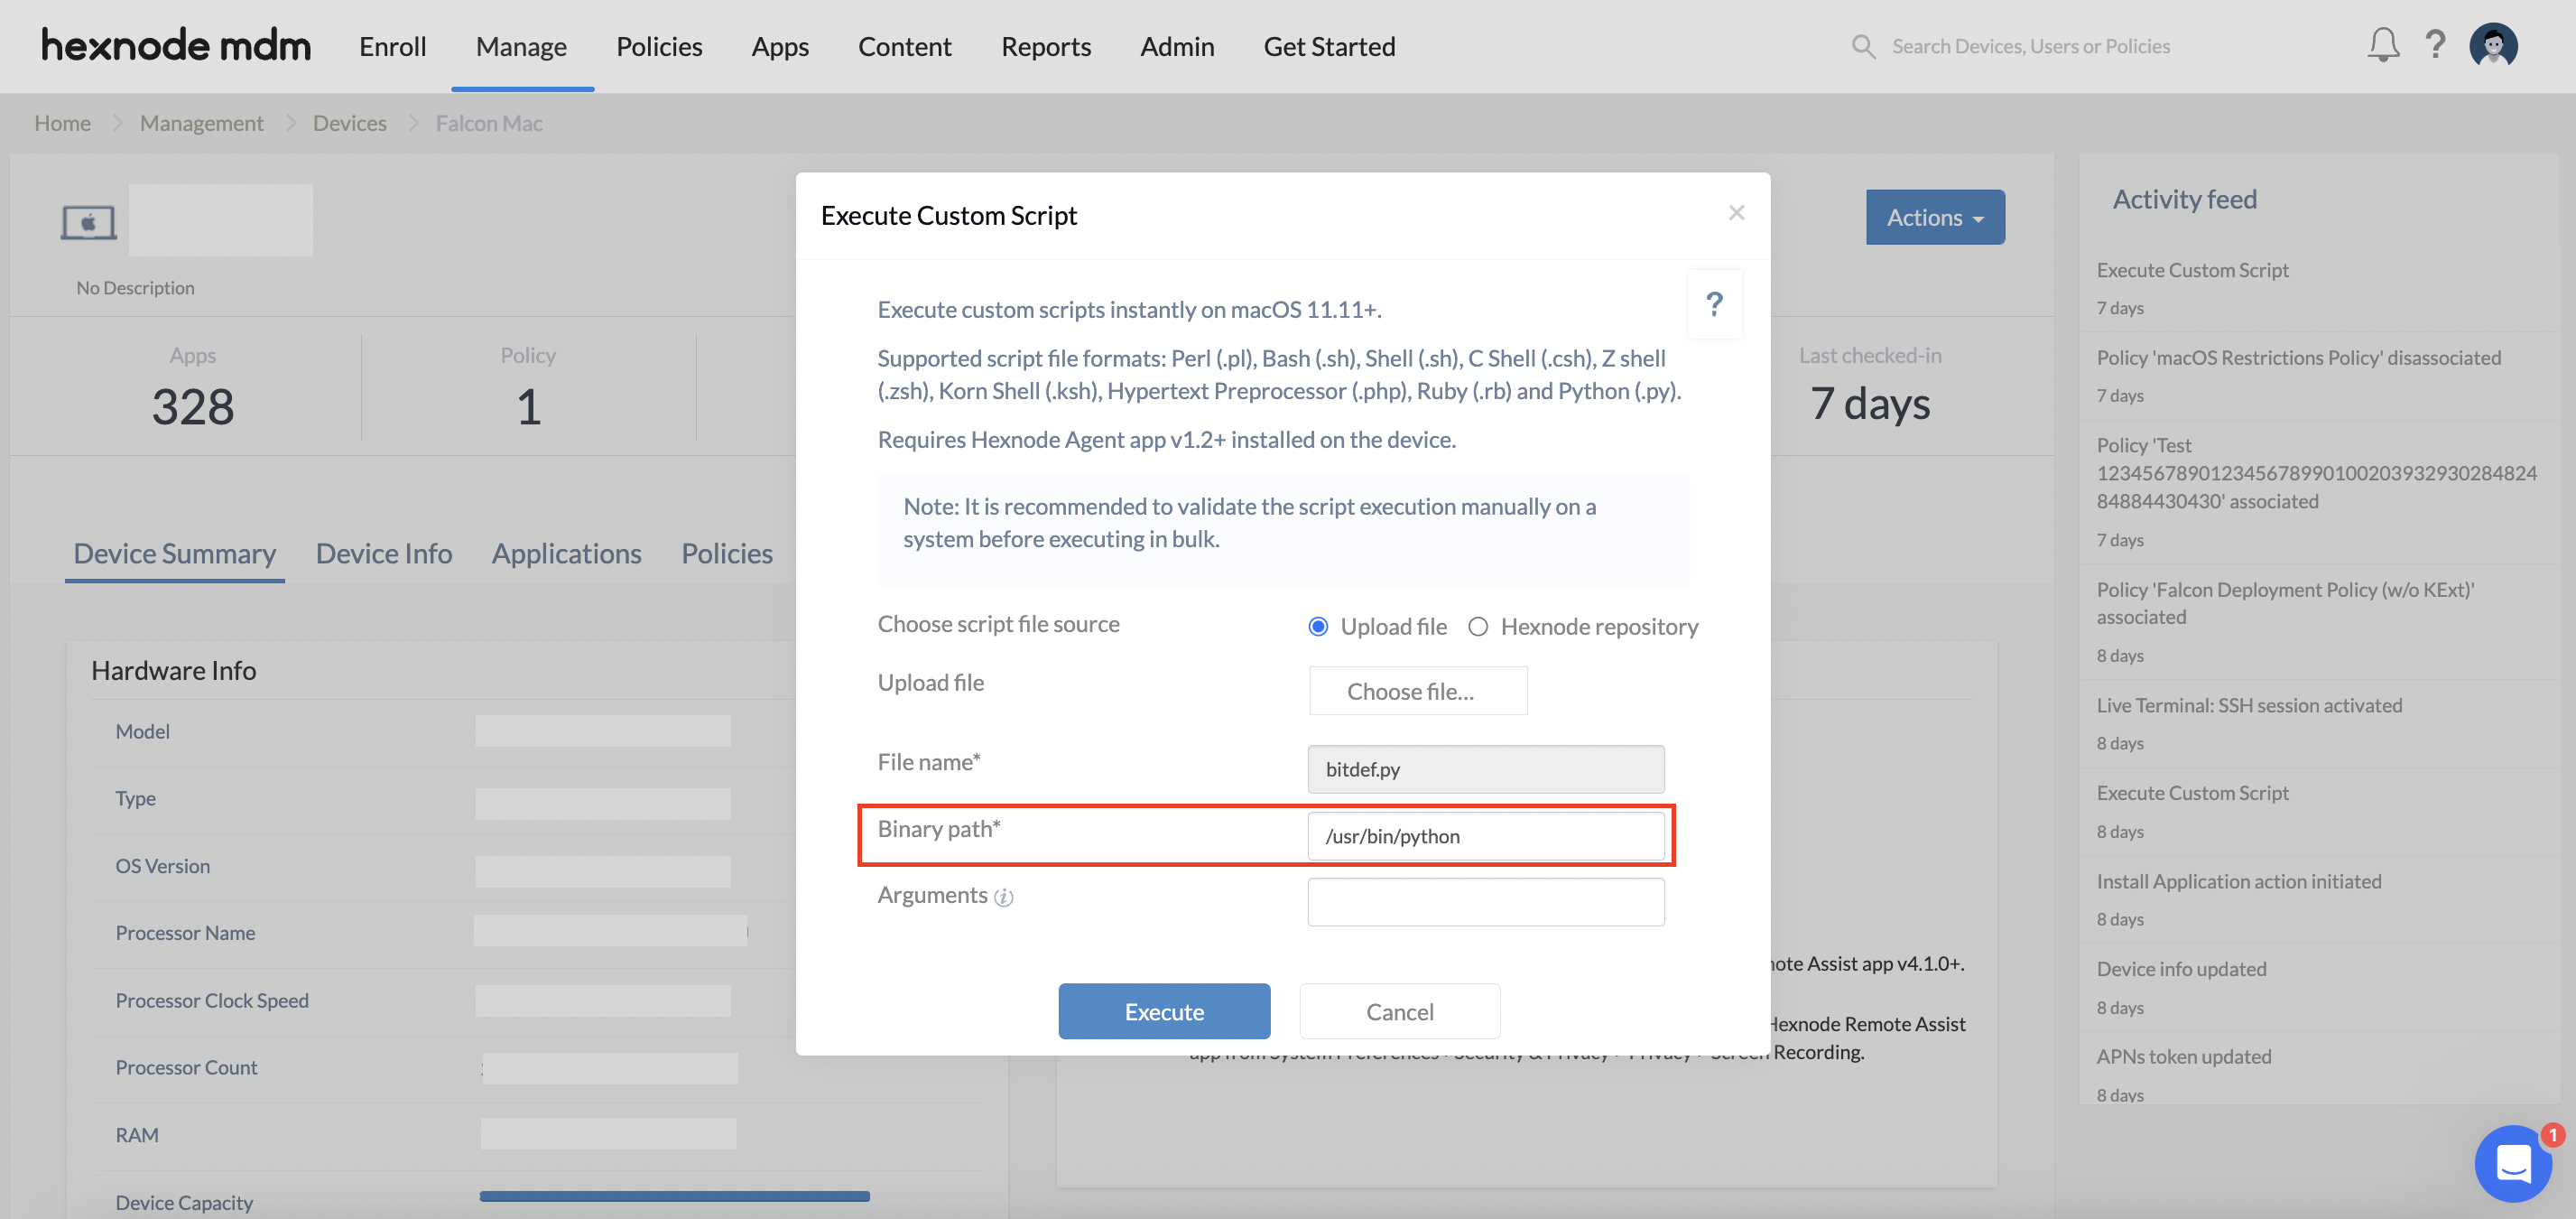
When a Python script is executed on macOS devices, the error “Script execution failed. Verify the binary path and try again!” may be produced.
Reason:
When choosing a script file to be executed, the Binary path field is auto-filled according to the format of the file. When a Python file is uploaded or selected from the Hexnode repository, /usr/bin/python is auto-filled as the binary path. This path may be insufficient in some instances.
Until macOS version 12.3, Macs used to have Python pre-installed in them. In later versions, Python has to be manually installed in order to execute a Python script on the device. But when installed manually, the binary path will be different.
Solution:
Execute the following command to get the required binary path:
|
1 |
which python |
Re-execute the Python script after replacing the auto-filled Binary path with the output of this command.
Case 5:
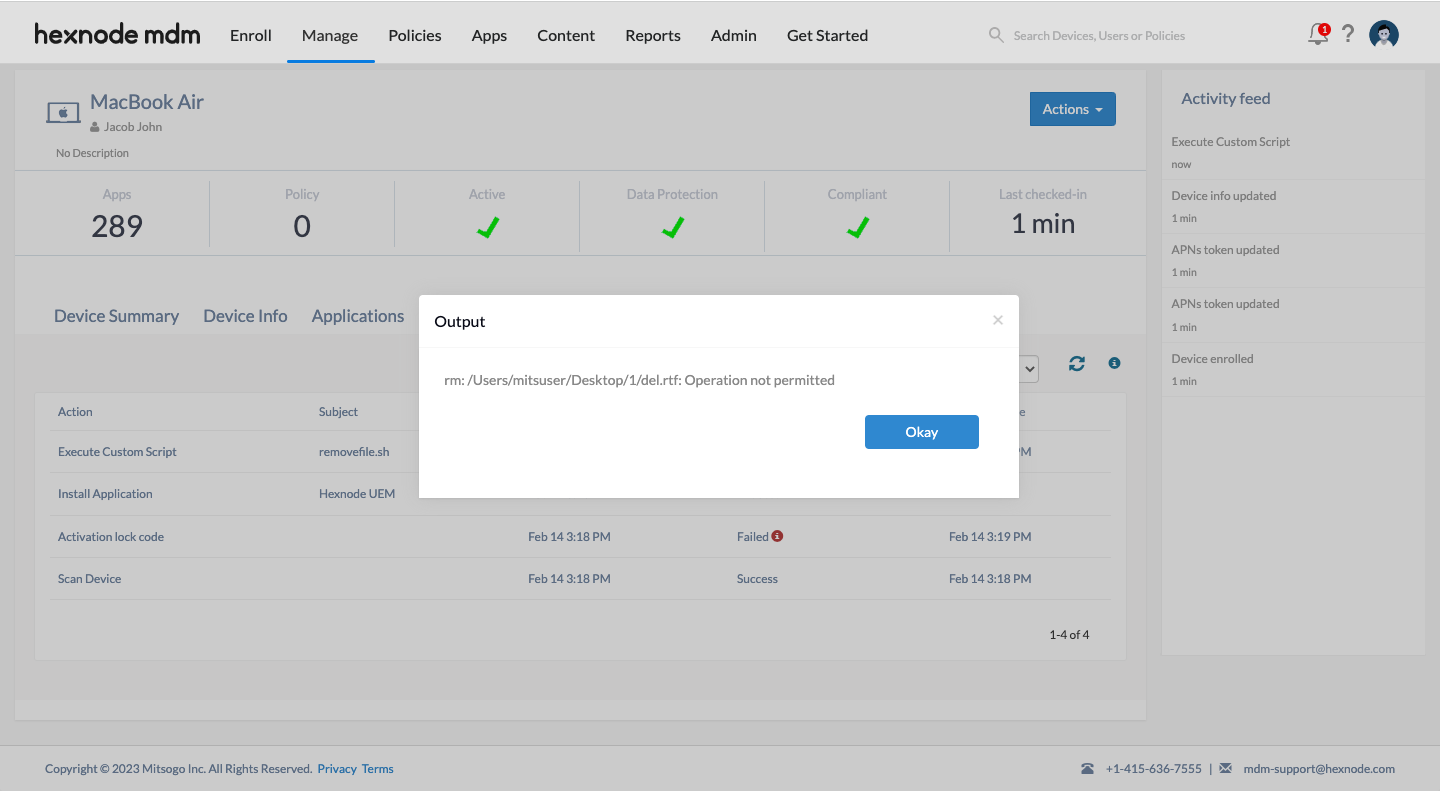
Executing the script generates the error “Script execution failed. Validate the script and try again!” and produces the output “Operation not permitted”.
Reason:
If the script attempts to access/modify the files and folders on the device, the Hexnode agent app on the device requires certain permissions to access them. Otherwise, the script execution can lead to the error “Script execution failed. Validate the script and try again!” and generate the output “Operation not permitted”.
Solution:
You can grant the required permissions for the Hexnode agent app to access files and folders in the following ways:
- Use the Privacy Preferences policy from the portal
You can grant permissions to the Hexnode agent app from the portal by deploying the Privacy Preferences policy.
Here, you can grant permission to a specific folder (such as Desktop, Downloads, Documents, etc.) in which the file is present. Otherwise, you can grant permission to All files. To deploy a PPPC profile, follow these steps:
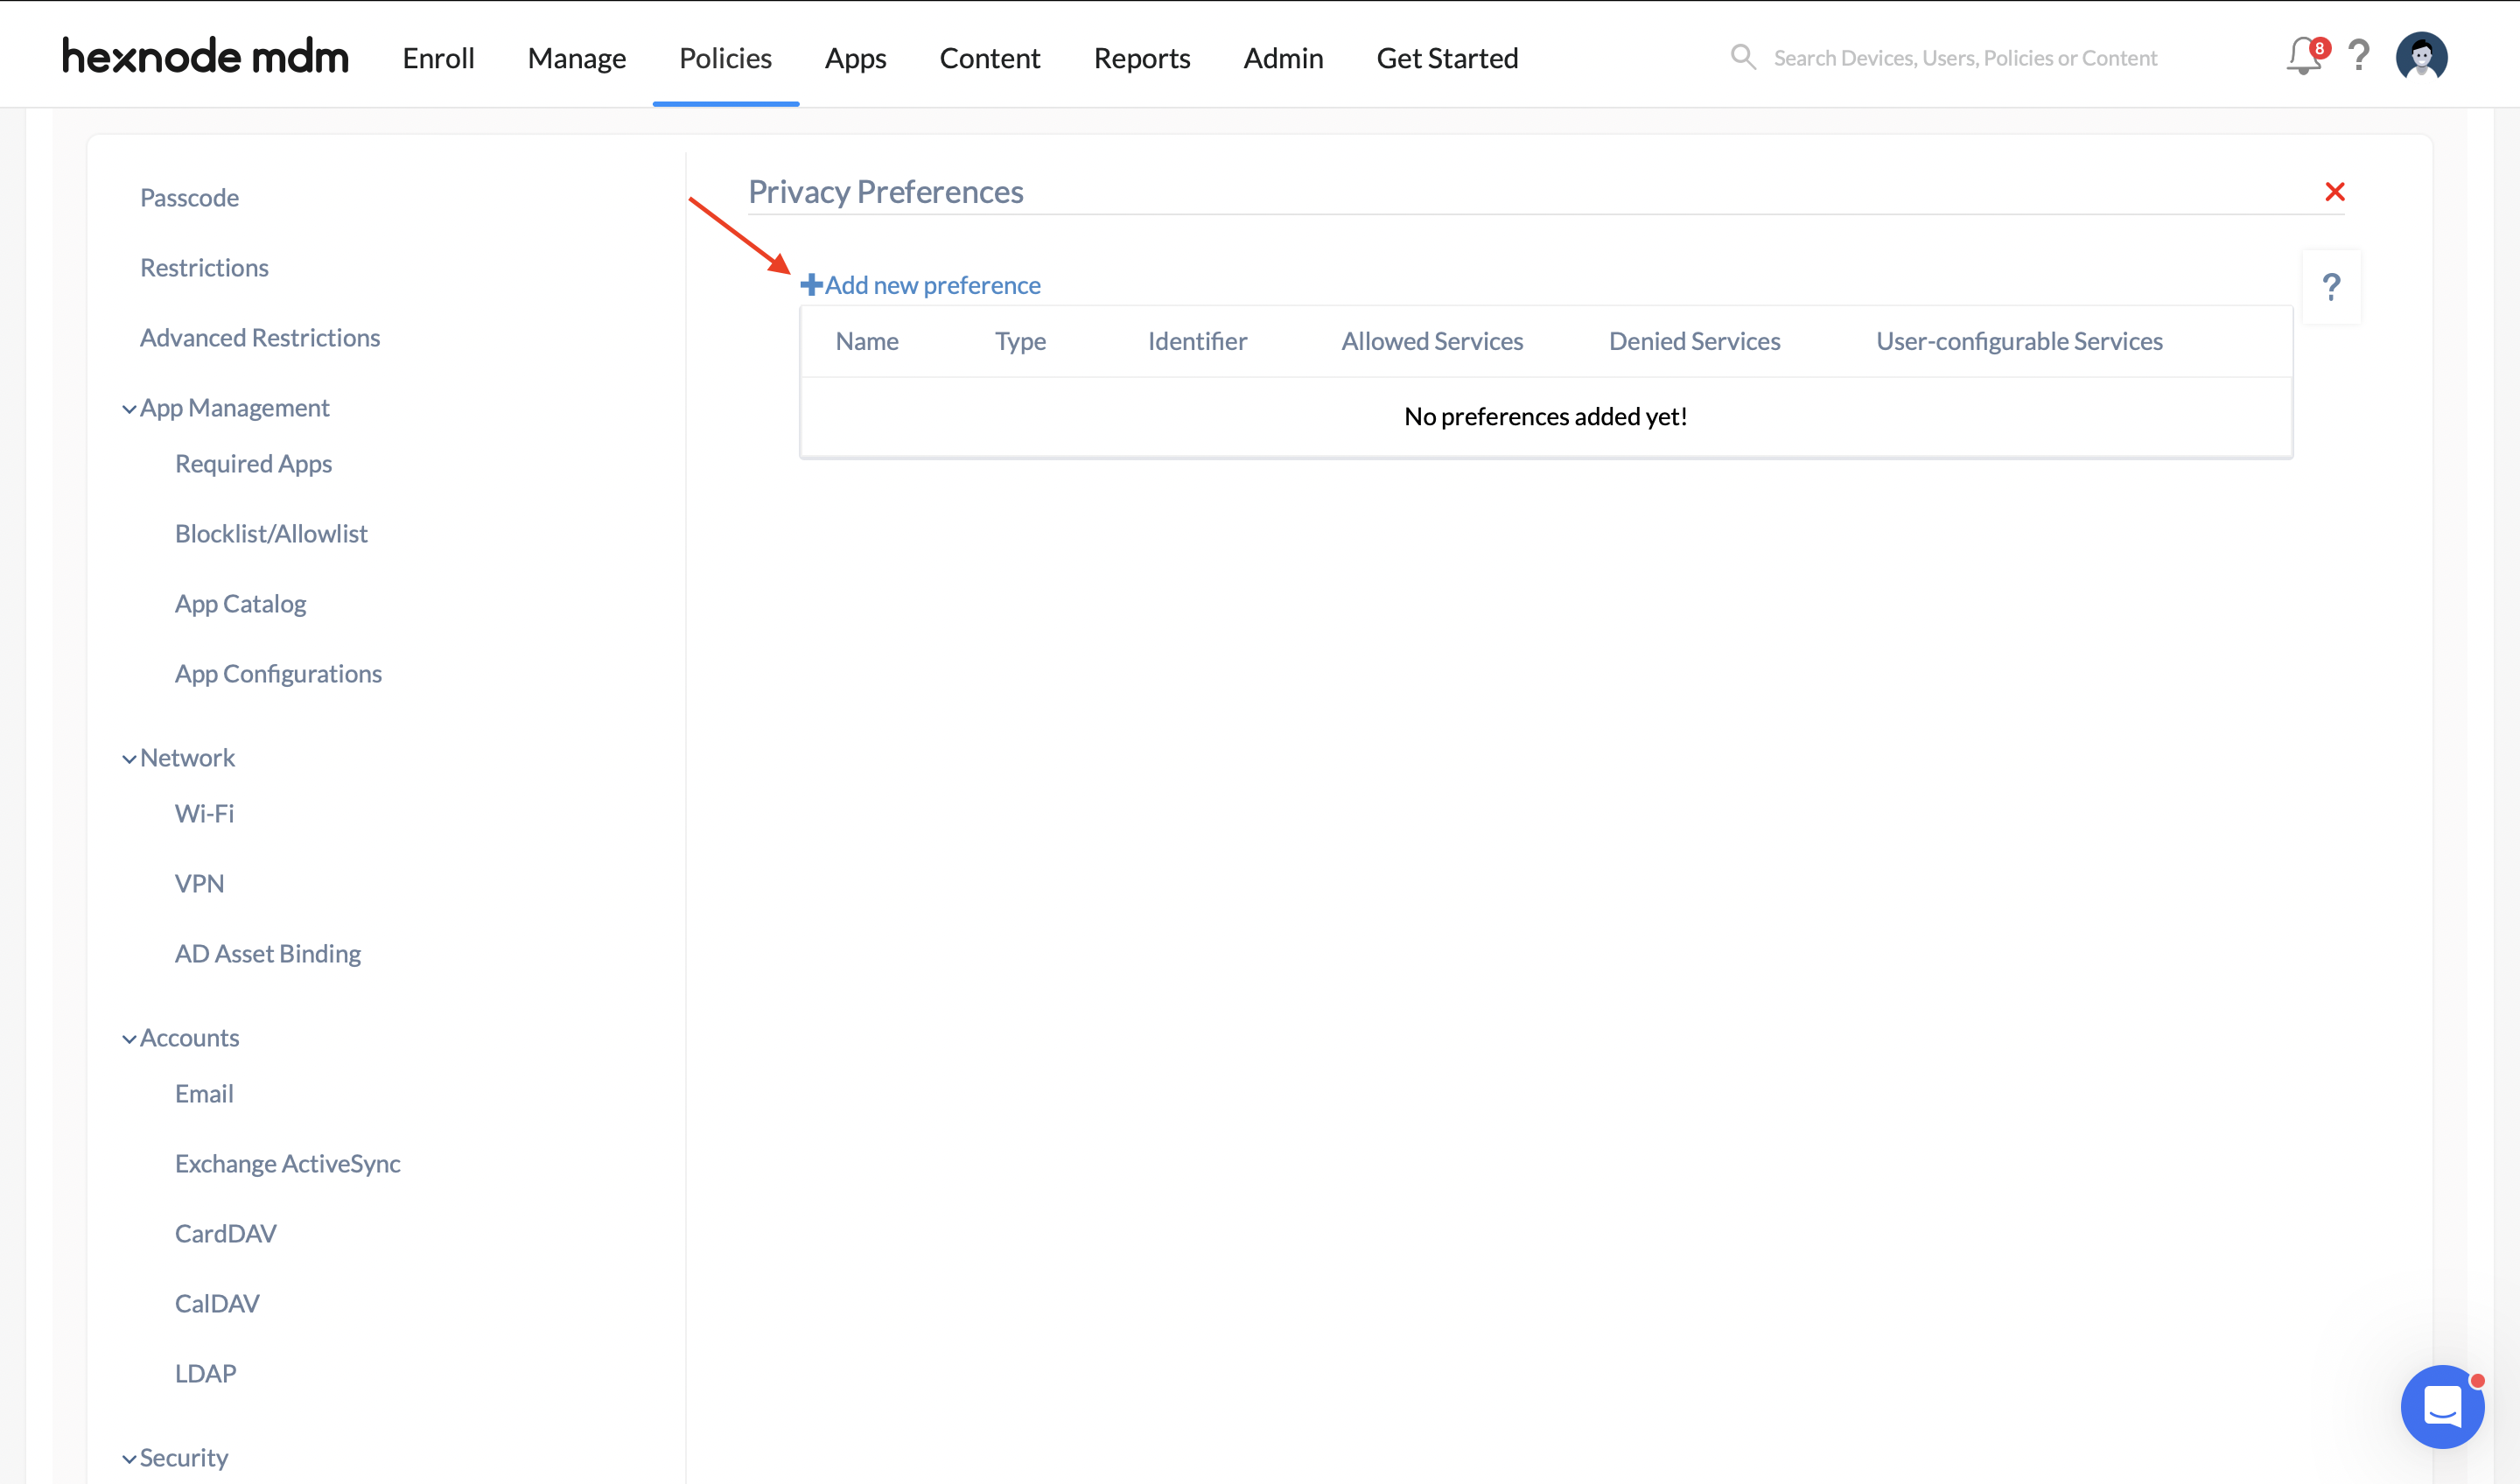
- Navigate to Policies > macOS > Privacy Preferences.
- Click on Add new preference.
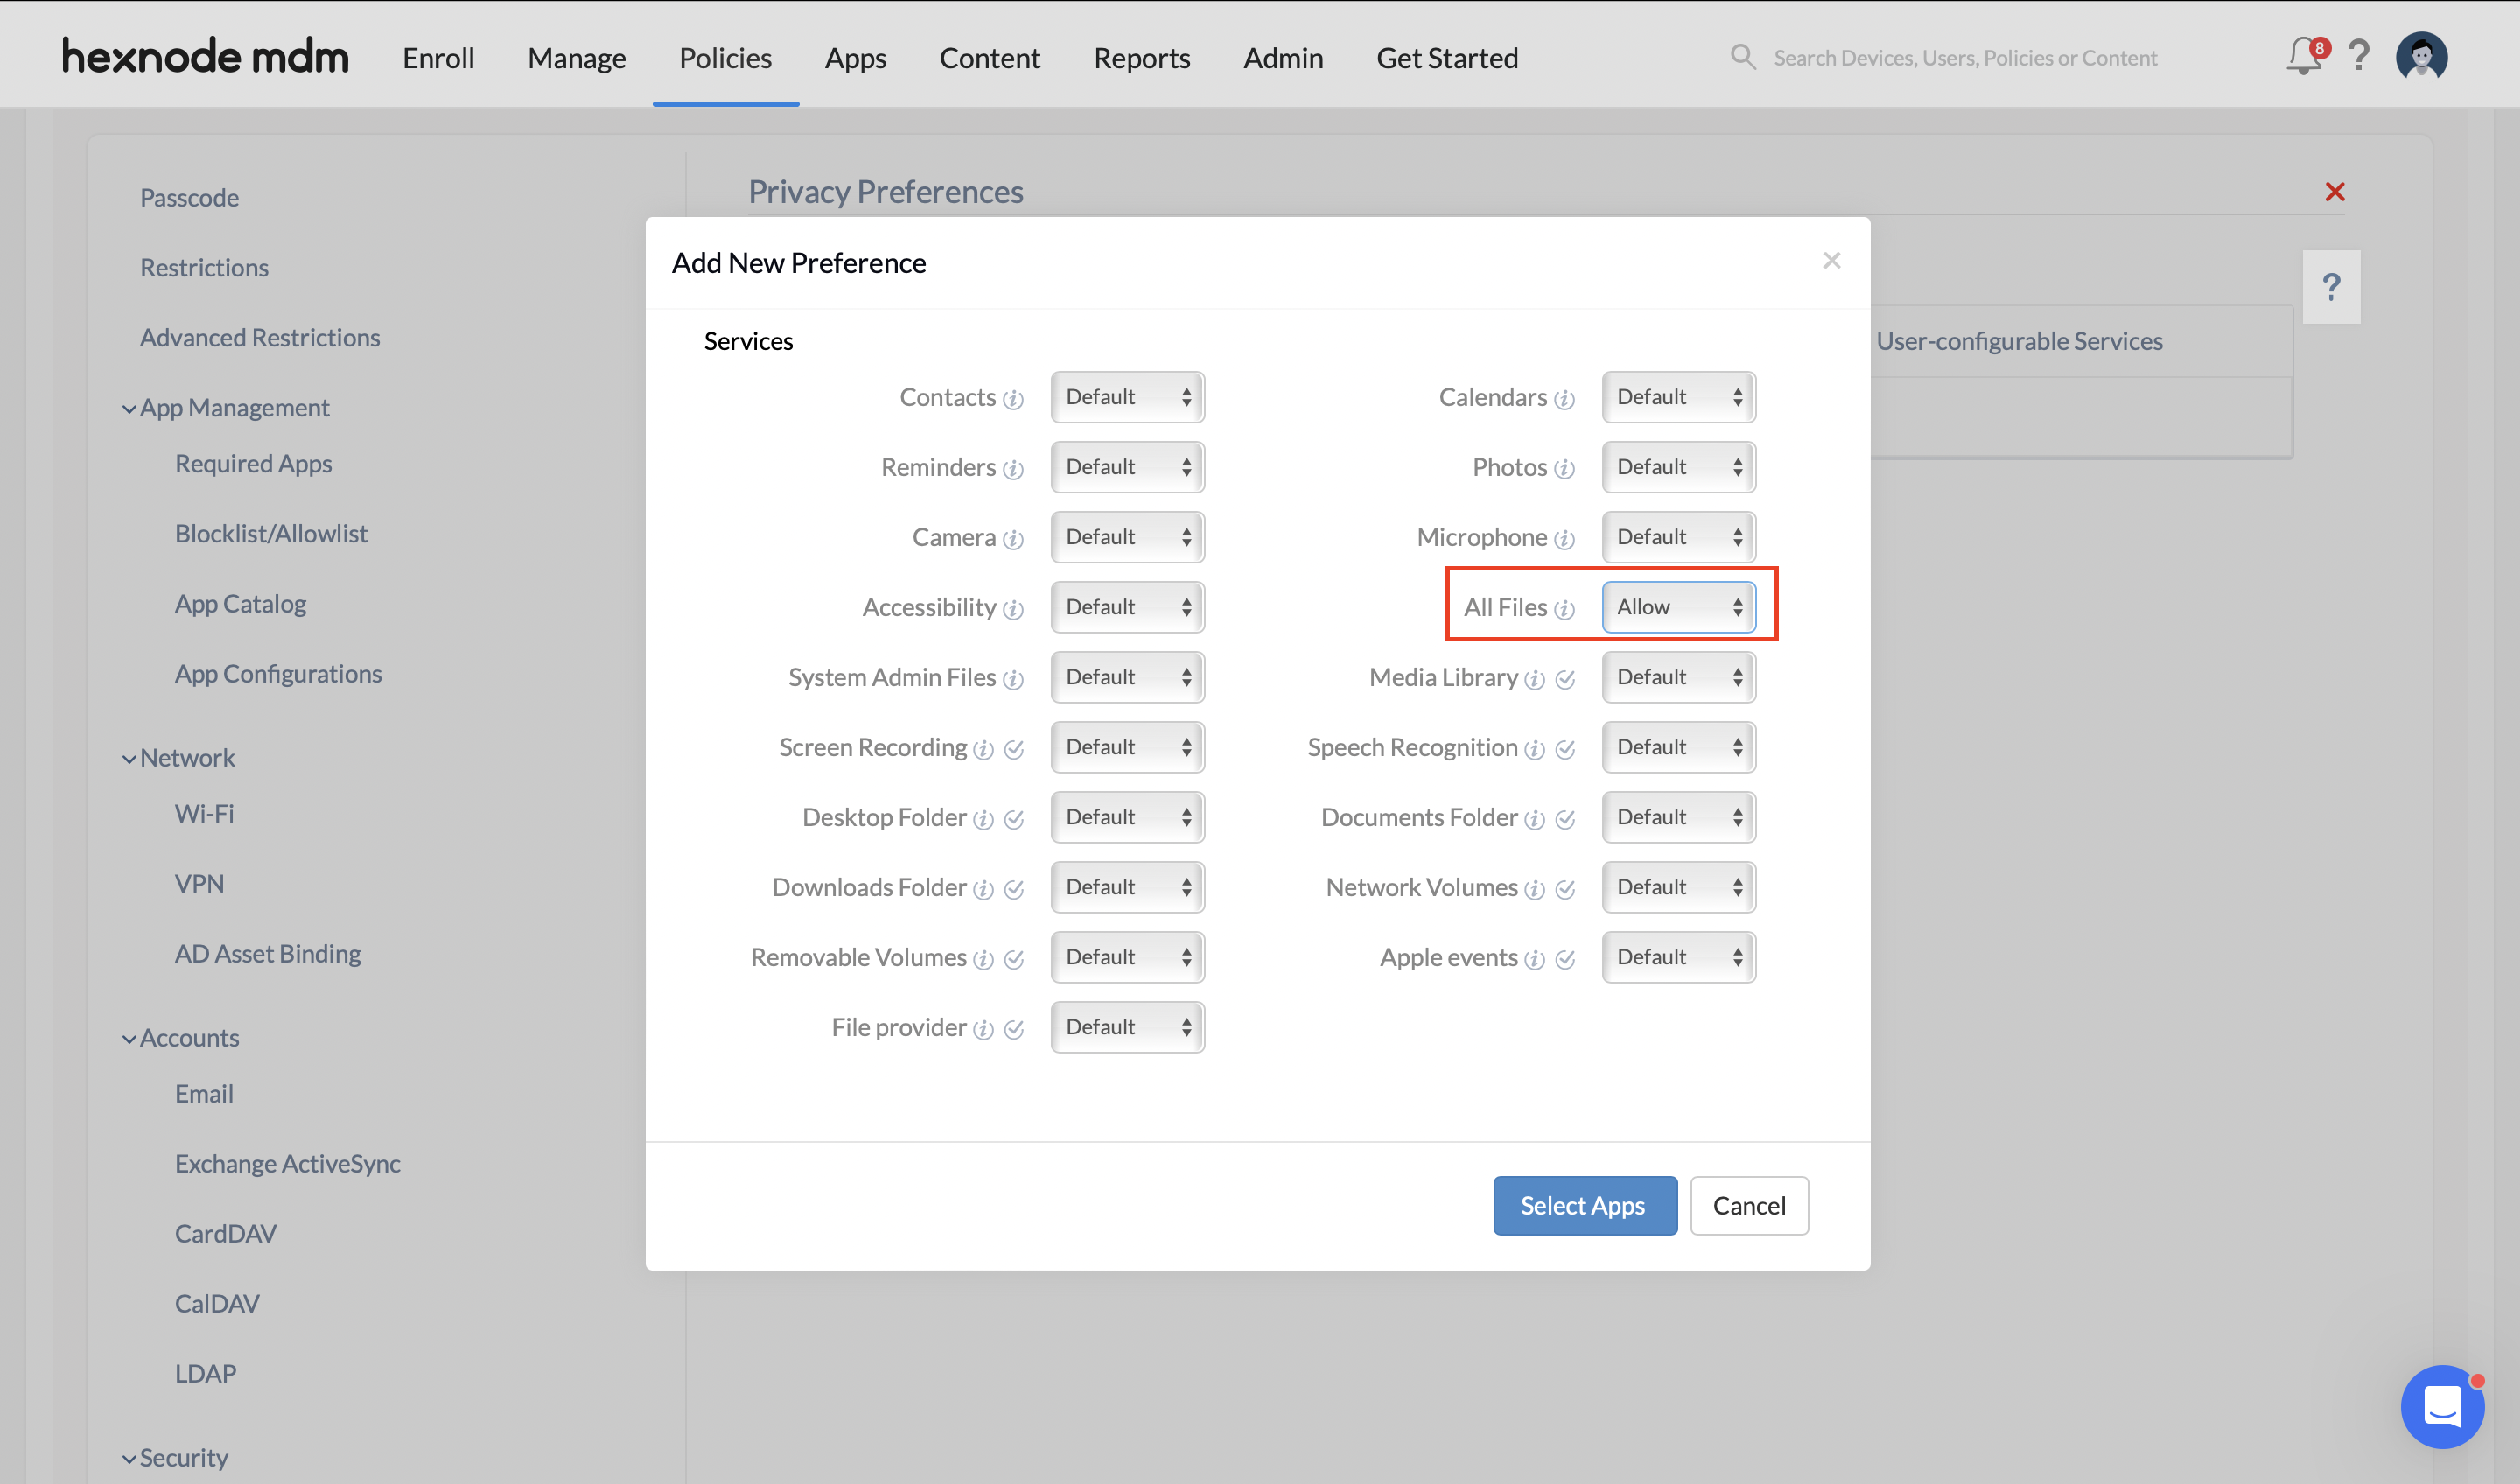
- Select Allow from the drop down for All files (or to the specific folder where the file is stored).
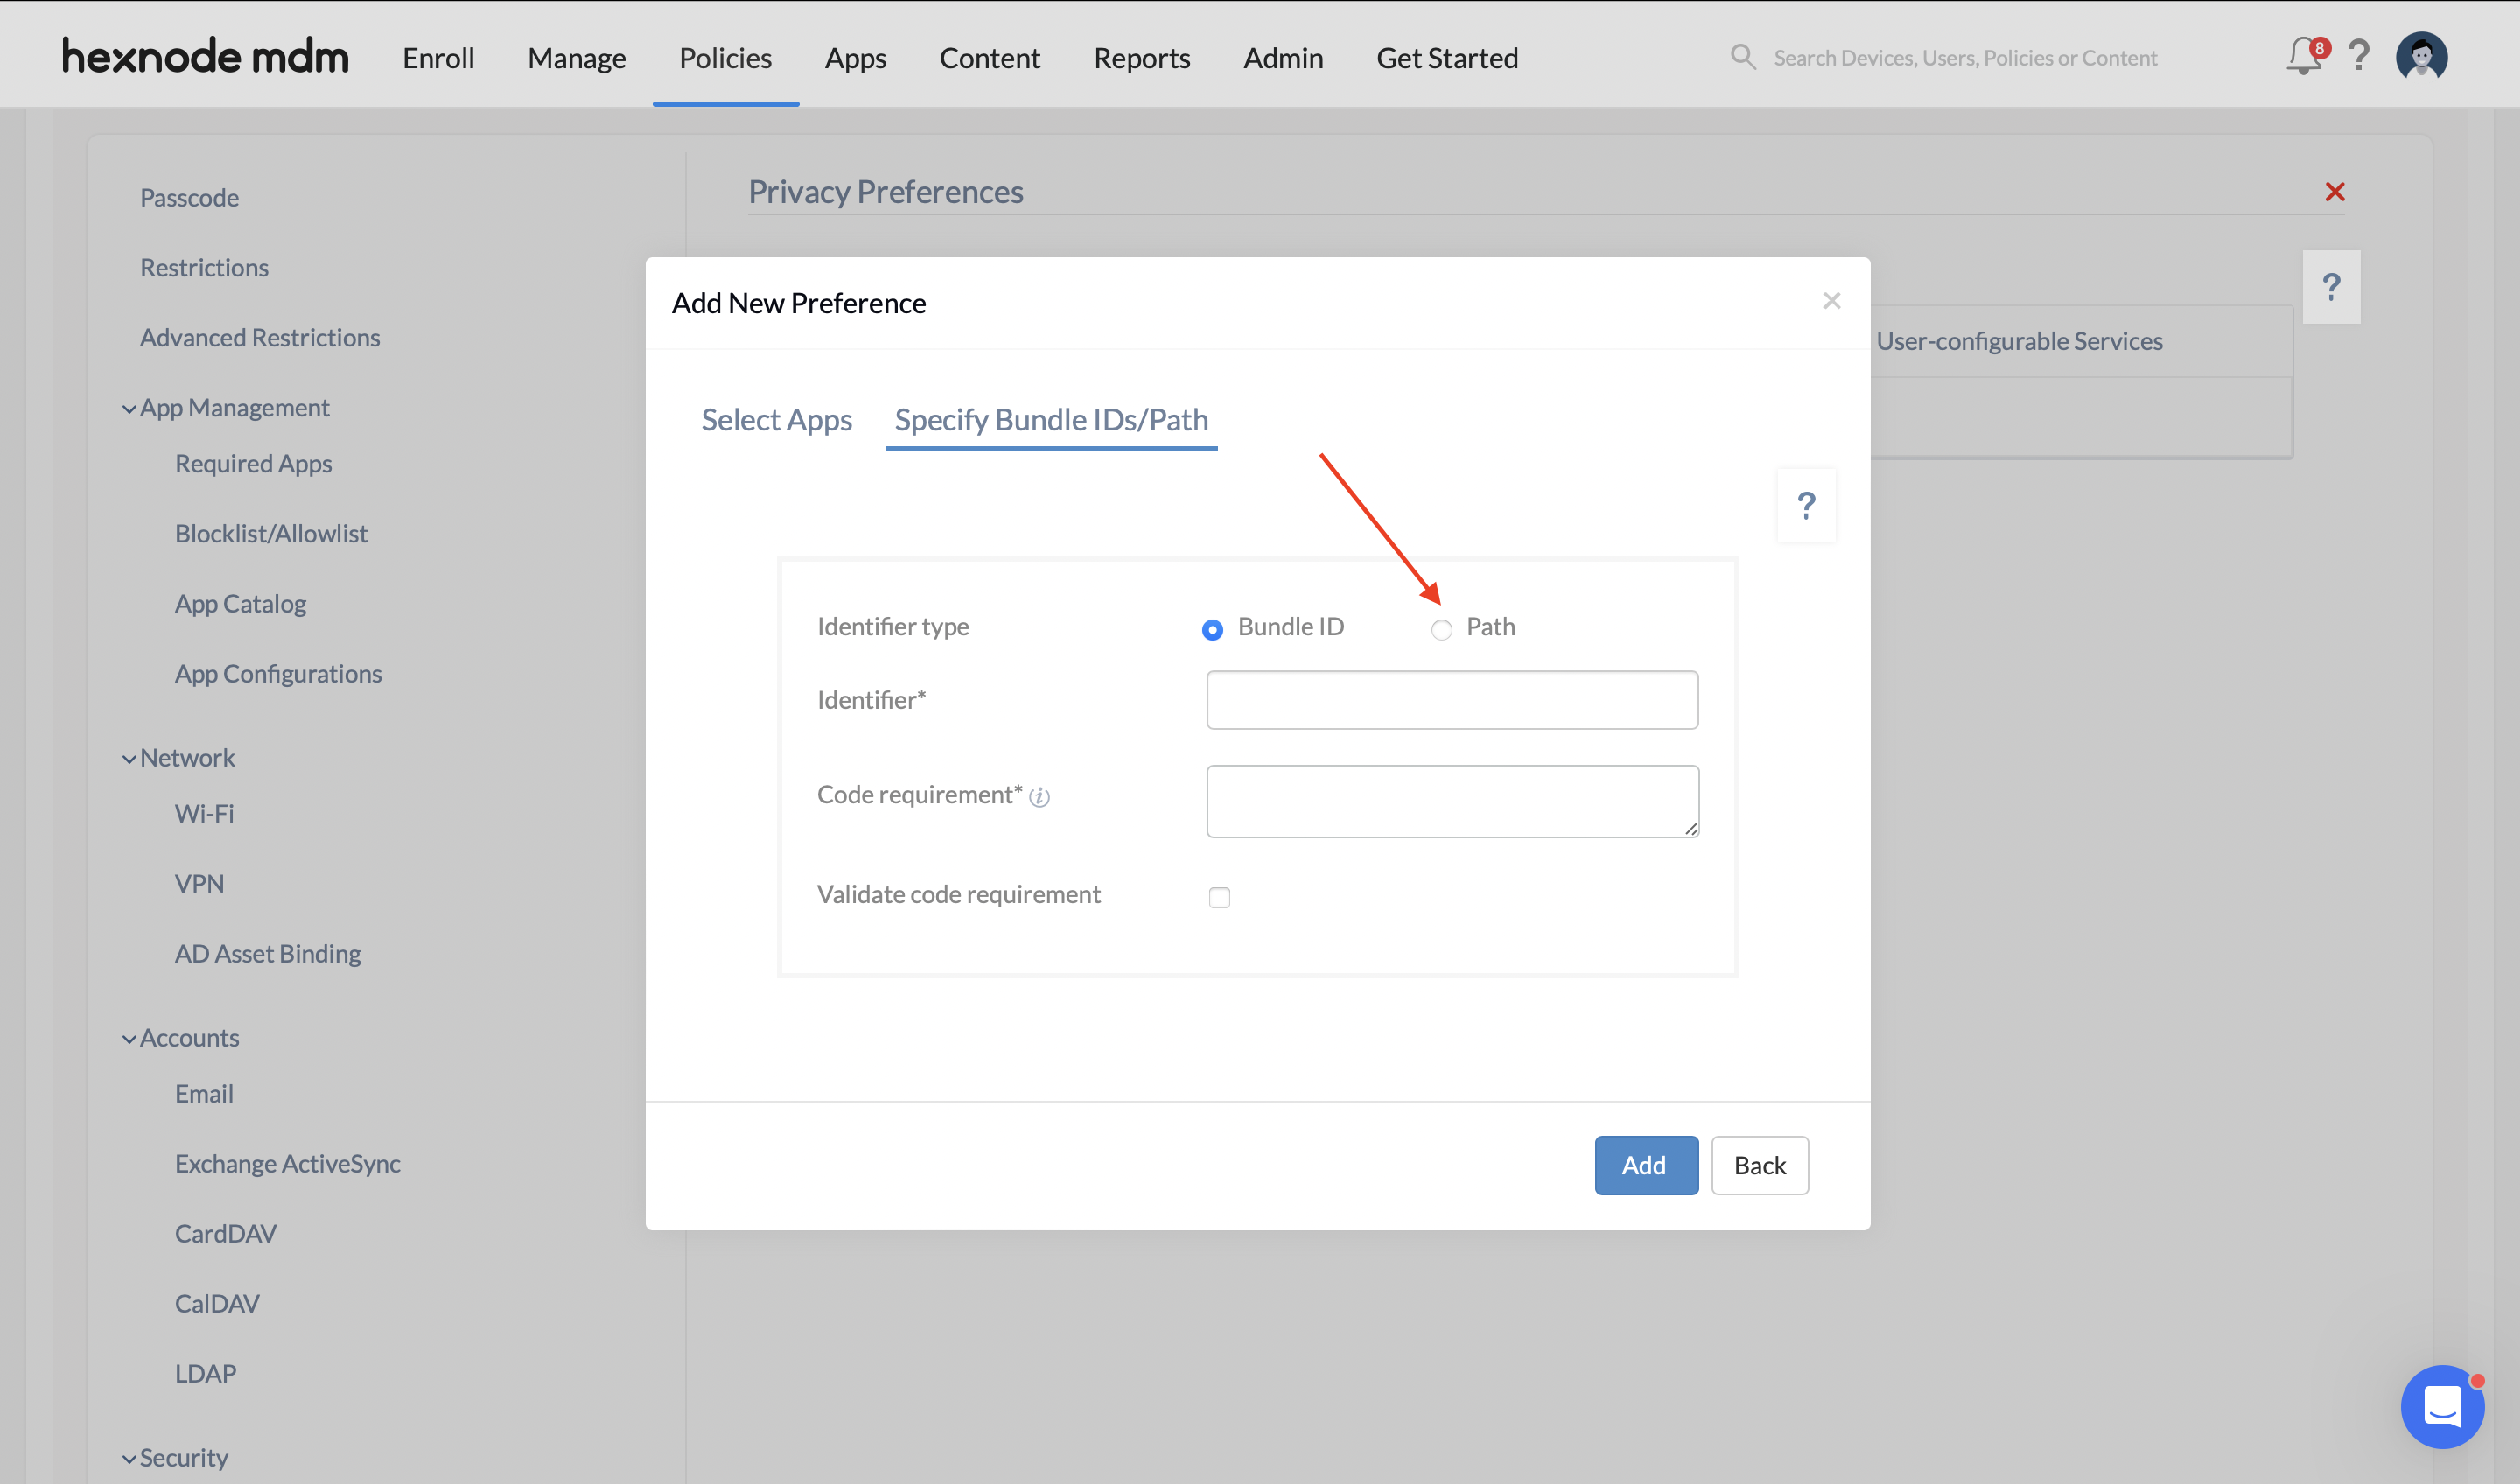
- Click on Select Apps.
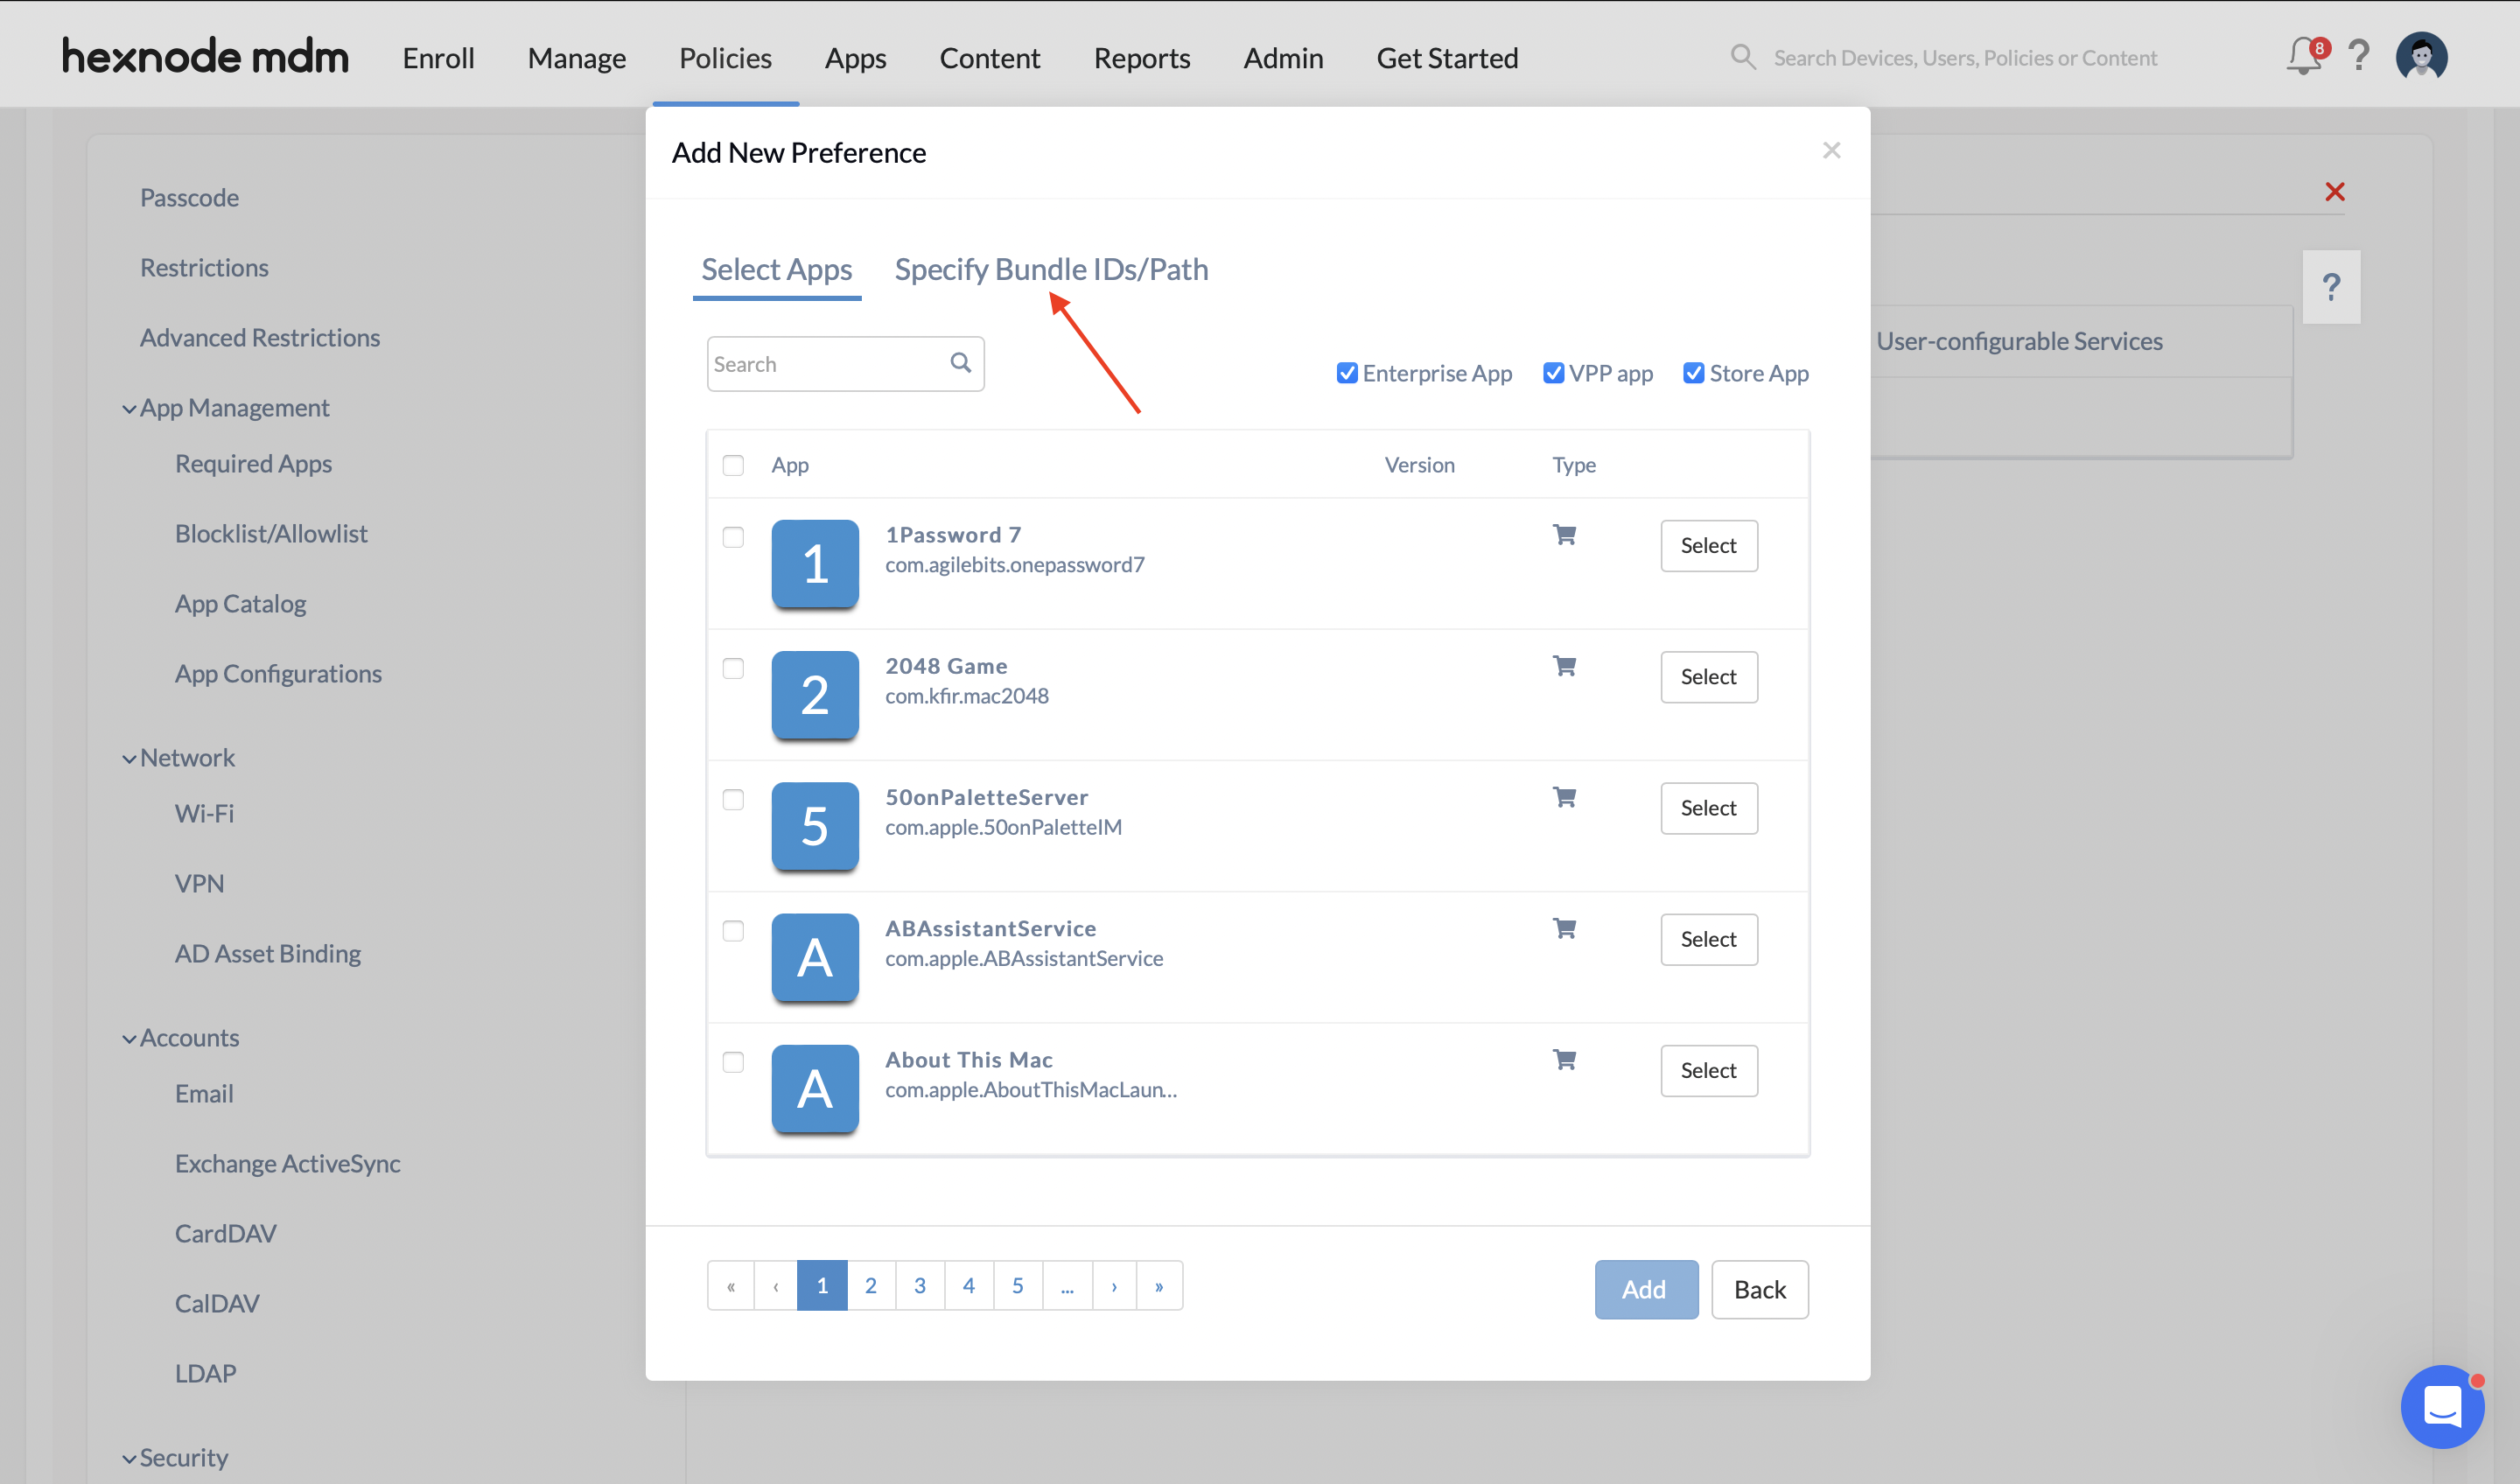
- Click on Specify Bundle IDs/Path.
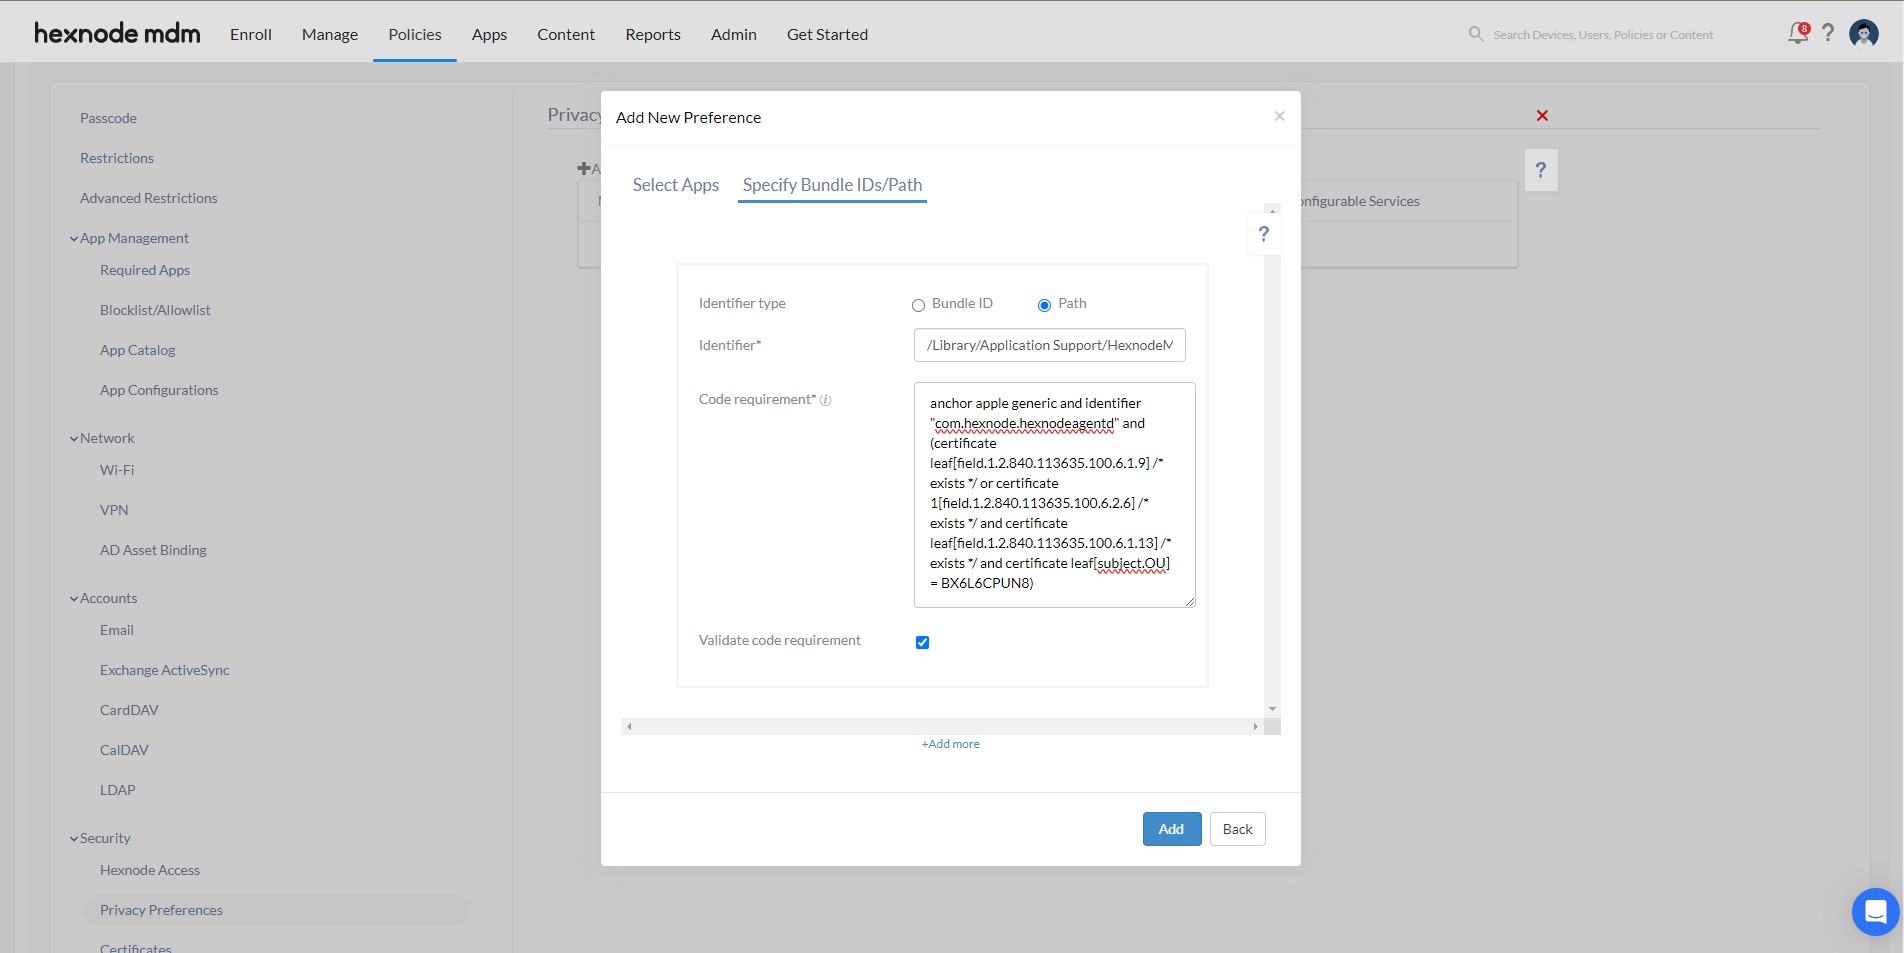
- Select Identifier type as Path.
- Provide Identifier as:
- Provide code requirement as:
- Enable the Validate code requirement checkbox. It statically validates the code requirement of the app.
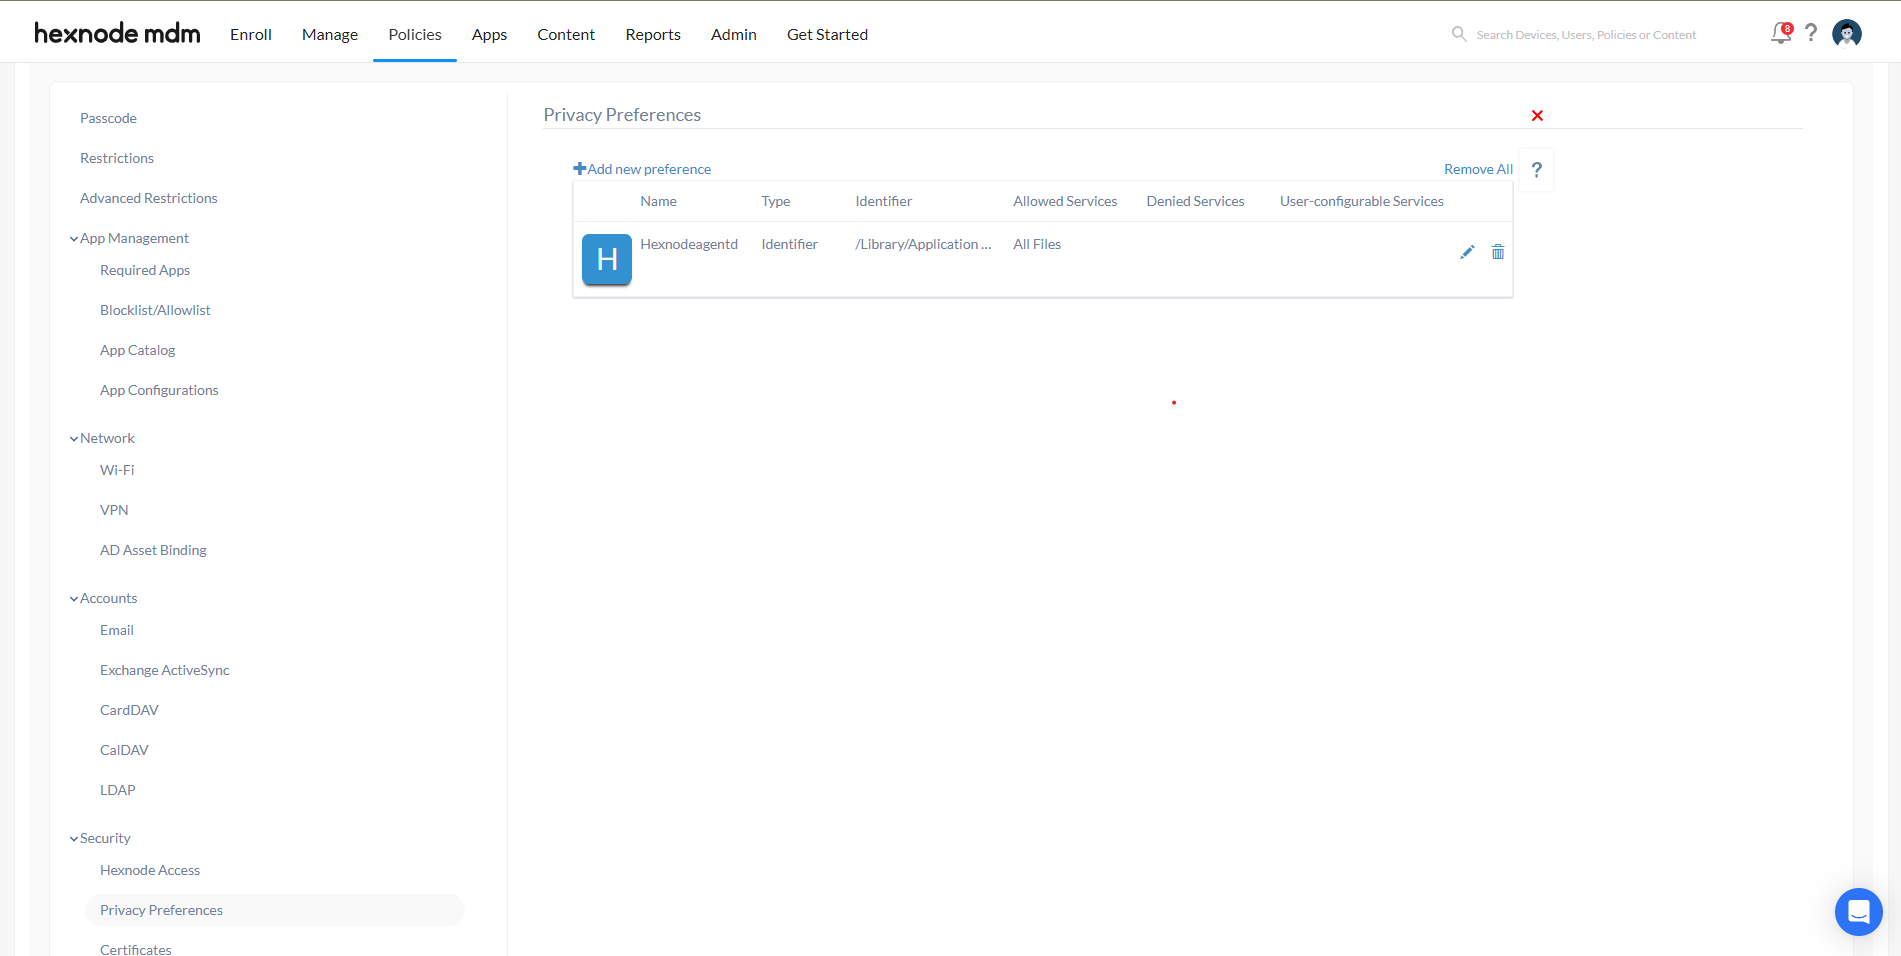
- Click Add to add the preference to the policy.
/Library/Application Support/HexnodeMDM/hexnodeagentdanchor apple generic and identifier "com.hexnode.hexnodeagentd" and (certificate leaf[field.1.2.840.113635.100.6.1.9] /* exists */ or certificate 1[field.1.2.840.113635.100.6.2.6] /* exists */ and certificate leaf[field.1.2.840.113635.100.6.1.13] /* exists */ and certificate leaf[subject.OU] = BX6L6CPUN8)Deploy the policy to your target devices. You can execute the custom scripts successfully once the policy is associated.
- Modify the Security & Privacy preference on the device.
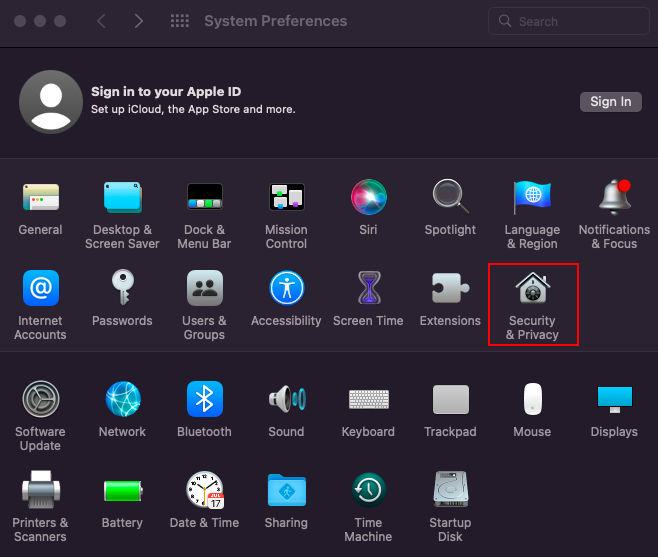
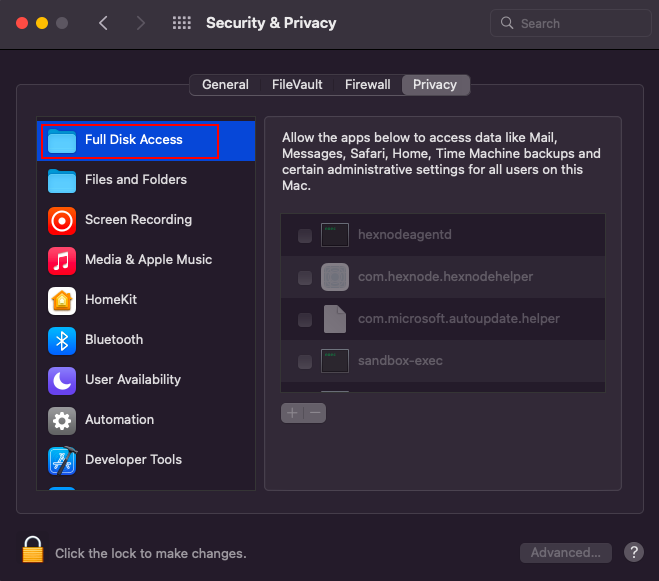
You need to provide the Hexnode agent app with Full Disk Access to be able to modify files and folders. Follow these steps to grant access to the Hexnode agent app from the device.
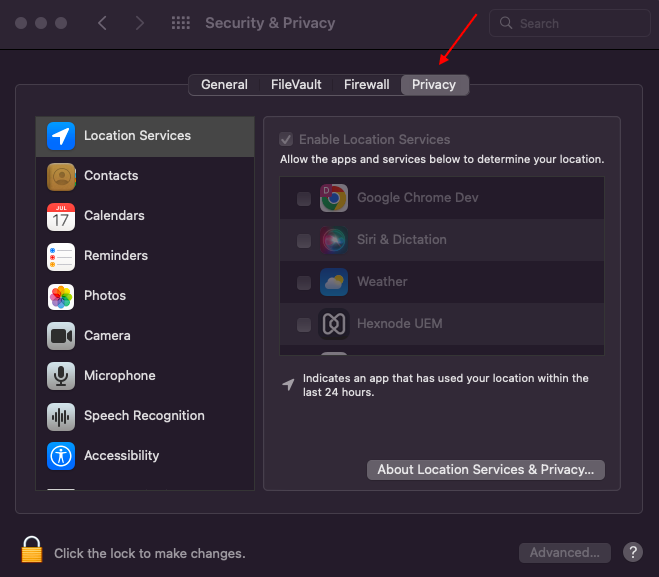
- Navigate to System Preferences > Security & Privacy > Privacy > Full Disk Access.
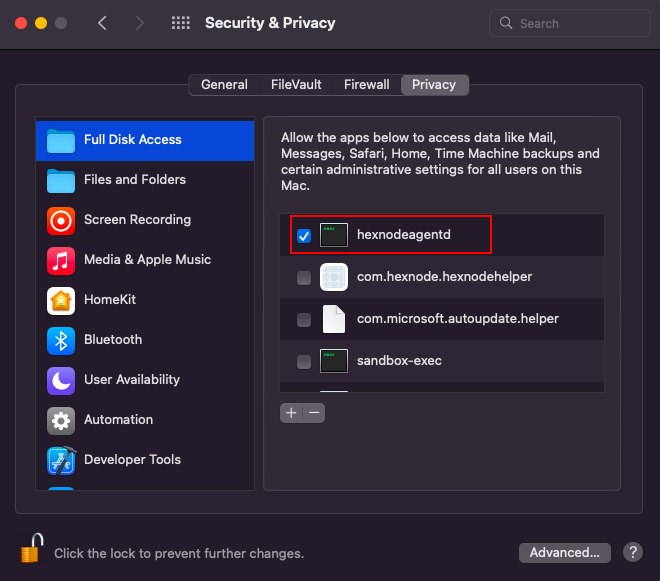
- Click on the Lock Icon to make changes.
- Enter the Administrator’s username and password.
- Click on hexnodeagentd to grant full disk access.
Once the permission is granted, you can execute the custom script from your Hexnode portal.
