Category filter
Deploy scripts to automate app deployment on macOS devices
App deployment is a critical aspect of any organization, and with an UEM like Hexnode in place, apps can be remotely deployed to endpoints using various app management features. However, certain apps may require manual intervention to configure settings or provide permissions. And at times, installations may fail if the device doesn’t meet the prerequisites. In these cases, customized scripts can be utilized to check system requirements and set up basic configurations and settings, reducing the need for manual intervention. Activities that should be initiated on macOS devices before or after the app installation can be performed using scripts like Pre-install, Post-install, or Audit scripts. This ensures seamless app installation. Learn how to deploy scripts to automate app deployment for enterprise and VPP app installation on macOS devices using the Required Apps policy in Hexnode.
How to use scripts to automate app deployment?
Customized scripts can be created to serve specific app deployment needs. These scripts can be tailored to check for dependencies before and after the deployment process, install post-requisites, and provide necessary permissions for the application. By incorporating customized scripts into the app deployment process, IT administrators can establish a standardized deployment process that minimizes the need for manual intervention.
The three types of scripts that can be used in app deployment automation are Pre-install, Post-install, and Audit scripts. Depending on the requirements, one or all three scripts can be configured for the same application.
Pre-install scripts are executed before the package installation. These scripts are used to verify if the system meets the application’s requirements and to perform any custom actions before installation. Failure of the pre-install script can cancel the installation attempt.
Post-install scripts are executed after an application is installed on the system. These scripts are used to configure application settings, provide necessary permissions or install additional components or plugins. Failure of the post-install script can log error, but the installation will be considered complete as the script is executed after the installation is completed.
Audit scripts can check for files, folders, apps, and settings to gather information about the installed application on the system. This ensures that the application is configured correctly. Failure of the audit script triggers re-installation if the audit script is customized in such a manner. However, the app installation is successful.
If one or all these scripts are configured for an app, then the app installation will be processed in the following order,
- Execute Pre-install Script.
- Execute Install Application action.
- Execute Post-install Script.
- Execute Audit Script.
If there are no scripts configured in the policy, the app will be installed silently according to the Required Apps policy, without any pre/post installation activities.
Configuring Required Apps policy with scripts
Apps can be added to macOS devices in bulk via the Required Apps policy.
- From the Hexnode UEM dashboard, navigate to Policies > New Policy. Assign a suitable name and description for the policy, or you can choose to continue with an existing policy.
- Choose macOS > App Management > Required Apps. Click Configure.
- Click +Add to either add an app or an app group from the local app repository.
- Choose the required app from the list and click Done.
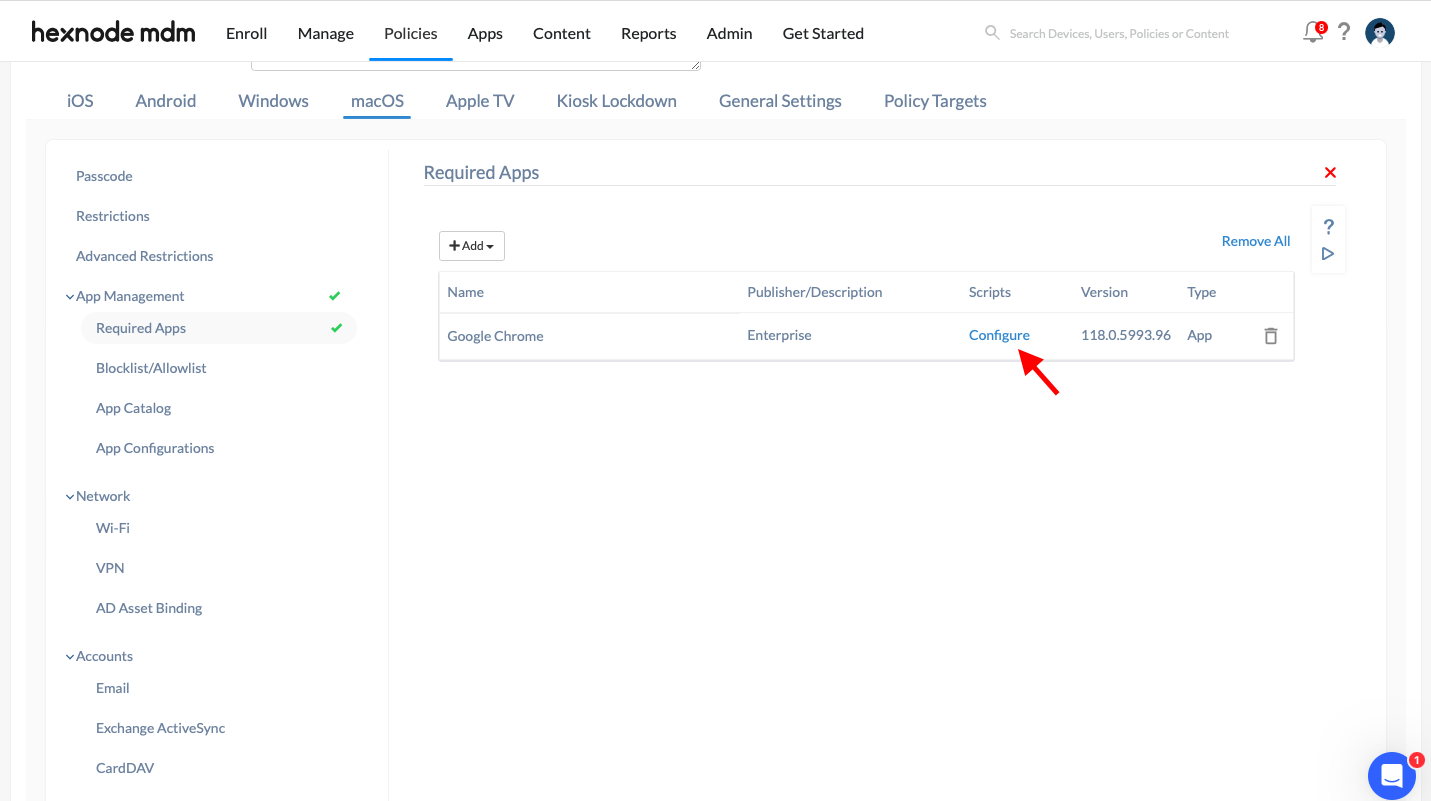
- Once the app is added, click Configure next to the app under the Scripts column.
- You can add pre-install script, post-install script or audit script to customize app deployment based on the requirements.
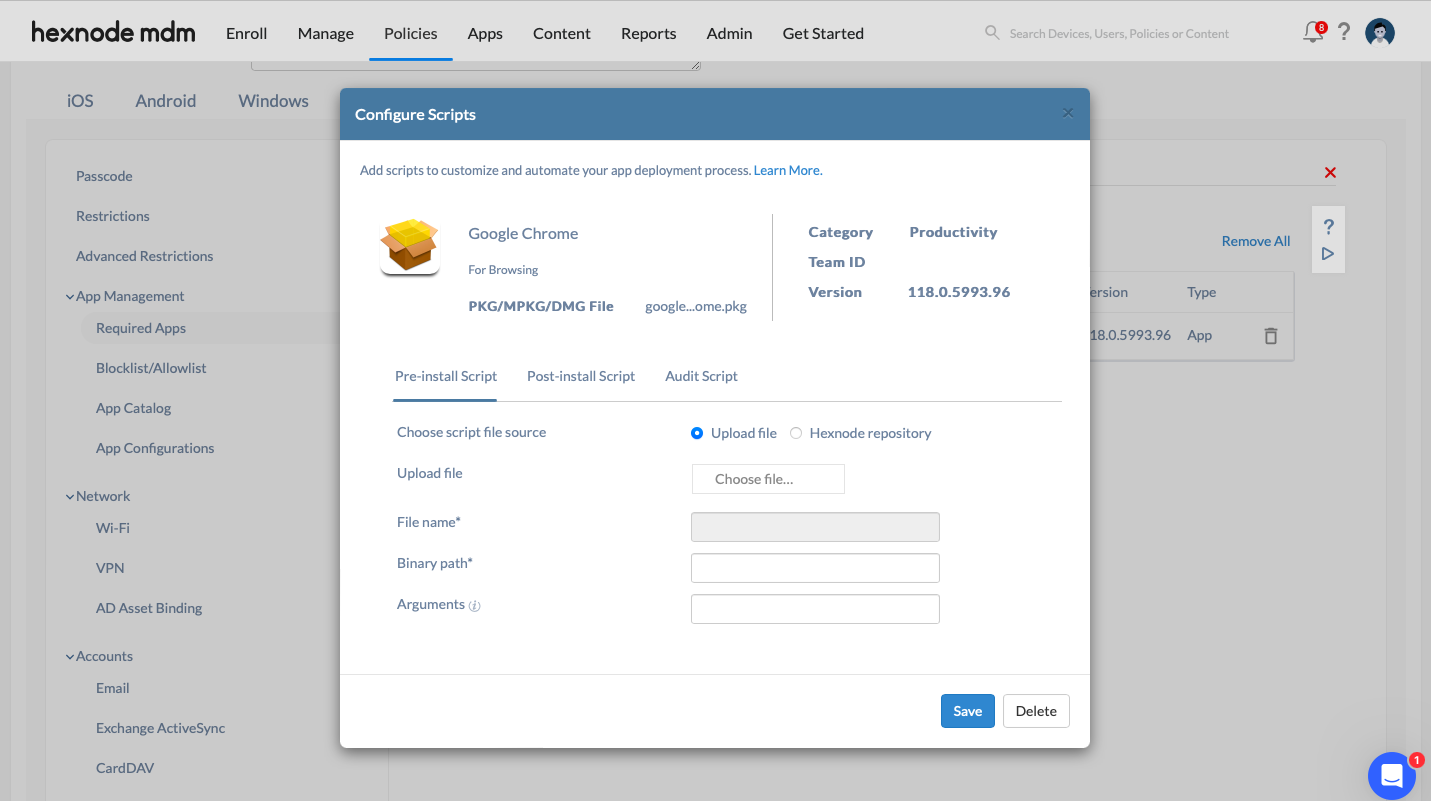
- For example, if you want to add a pre-install script for an app, click on “Configure”. The Configure Scripts dialog box will appear.
- The dialog box initially shows the Pre-install Script tab, but you can switch to other script tabs as required.
- You will have the option to upload a script file from either your device or the Hexnode repository.
- The File name & Binary path fields will be auto-filled based on the uploaded file.
- If your added script requires any arguments, you can include them in the Arguments field. This field also supports the use of wildcards.
- Once you have added the required script, click on Save.
- Next, associate the policy with the target device by clicking on Policy Targets > +Add Devices.
- Choose the target device and click OK to confirm.
- Click Save.
Associating Policies with target devices
If you are editing an existing policy and wish to associate the policy to more targets,
- Navigate to the Policies tab, select the policy and click on Manage > Associate Targets.
- Add the target entities and click Associate.
You can also associate the policy from the Manage tab, in two ways.
- Select the devices and click on Manage > Associate Policy.
- Click on the target device, Actions > Associate Policy.
As soon as the policy gets associated with the device, the app gets installed silently, without any user intervention. The installation process is determined by the scripts that have been configured in the policy.
How to check the app deployment status via Hexnode UEM portal?
The Action History tab on the device details page (Management > Devices > Select your device) displays the status of the app installation and the script execution for every Required Apps policy that includes scripts.
If a script execution fails, the action is marked as “Failed” in the Action History tab. A message is displayed next to the Failed status corresponding to the action, prompting the admin to validate the script and try again.
When a pre-install script fails, both the Execute Pre-install Script and Install Application actions will be marked as Failed in the Action History tab of the device. In contrast, if a post-install script or an audit script fails, the Install Application action will be marked as successful, while the Execute Post-install/Execute Audit Script actions will be marked as Failed actions in the Action History tab. If there are no errors regarding the scripts and the app package, then both the Install Application and the execute script actions will be shown as success.
Editing an existing Required Apps policy
If you want to replace the scripts that you have already configured in a Required Apps policy,
- Navigate to the Policies tab and select that policy.
- Choose macOS > App management > Required Apps.
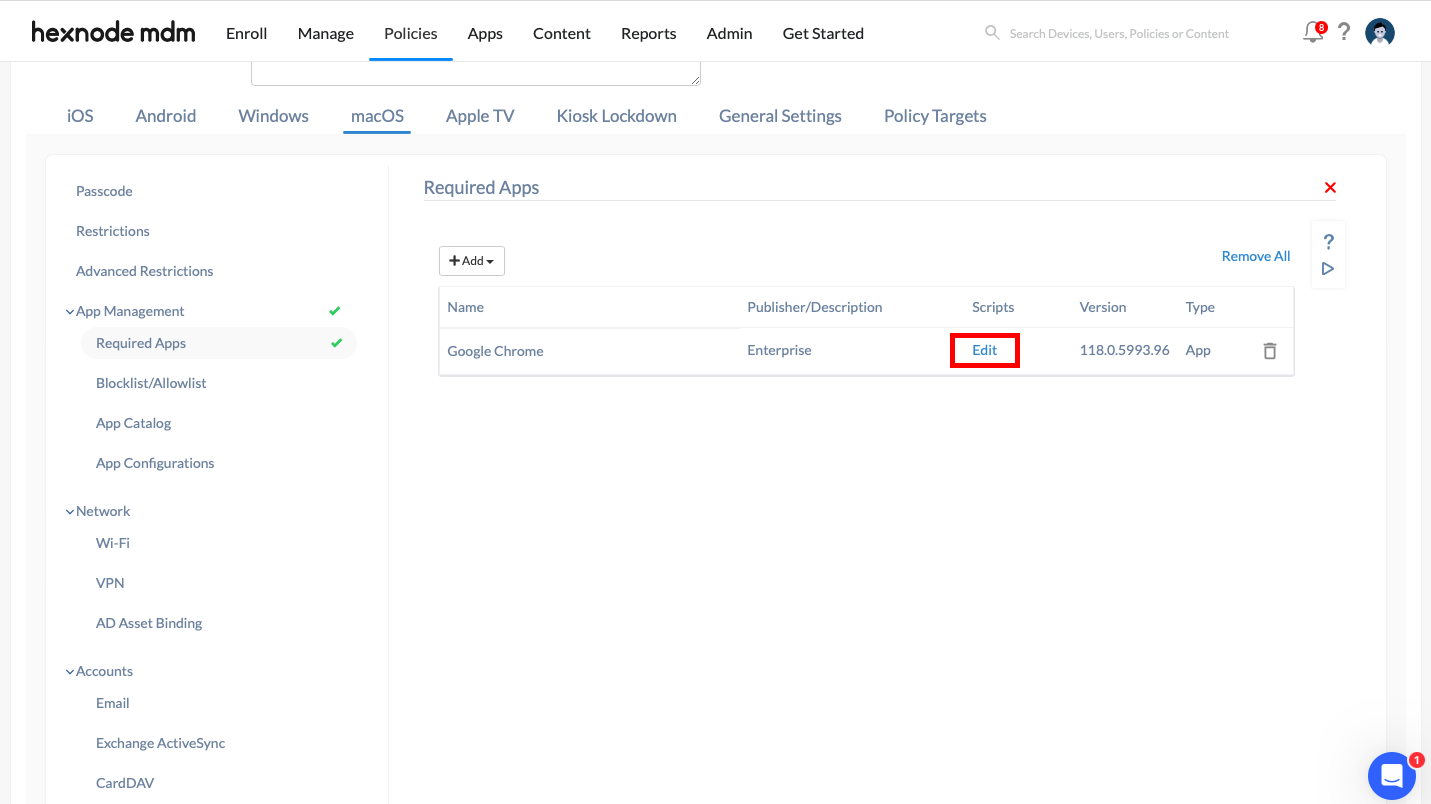
- If the scripts are already configured for the app, an “Edit” option will be shown next to the app.
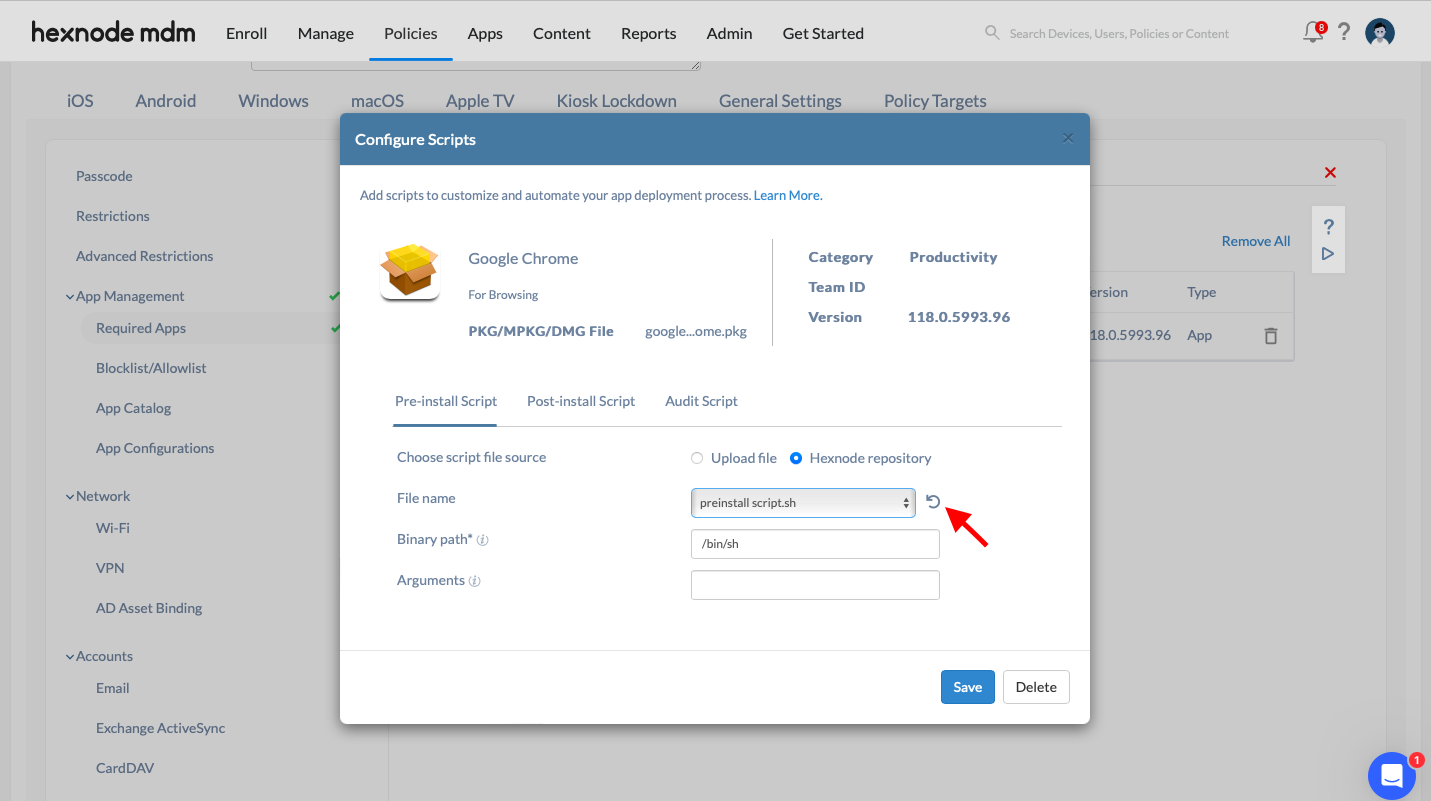
- Click on “Edit” to view the Configure Scripts dialog box. The script that was previously added will be displayed here. You can click on the reset button next to the “Upload file” field to remove the script.
- Once the script file has been removed, you can add the required script according to your needs and associate the policy to the target devices as explained earlier.


