Category filter
Create custom configuration profiles for Windows
This document will help you create custom configuration profile for Windows devices.
Hexnode UEM offers a comprehensive set of policies to help IT administrators manage and enforce settings on Windows endpoints. However, there are scenarios where these standard policies do not cover specific organizational needs. In such cases, IT administrators can create custom configuration profiles to address these requirements.
With the ability to create custom configuration profiles using payloads, admins can define specific settings and deploy them across managed Windows devices using the Hexnode’s Deploy Custom Configuration feature.
Creating custom configuration profile
To create a custom configuration profile for Windows via policy,
- Log in to the Hexnode UEM console.
- Navigate to Policies > New Policy.
- Provide a policy name and description (optional).
- Go to Windows > Configurations > Deploy Custom Configuration and click on Configure.
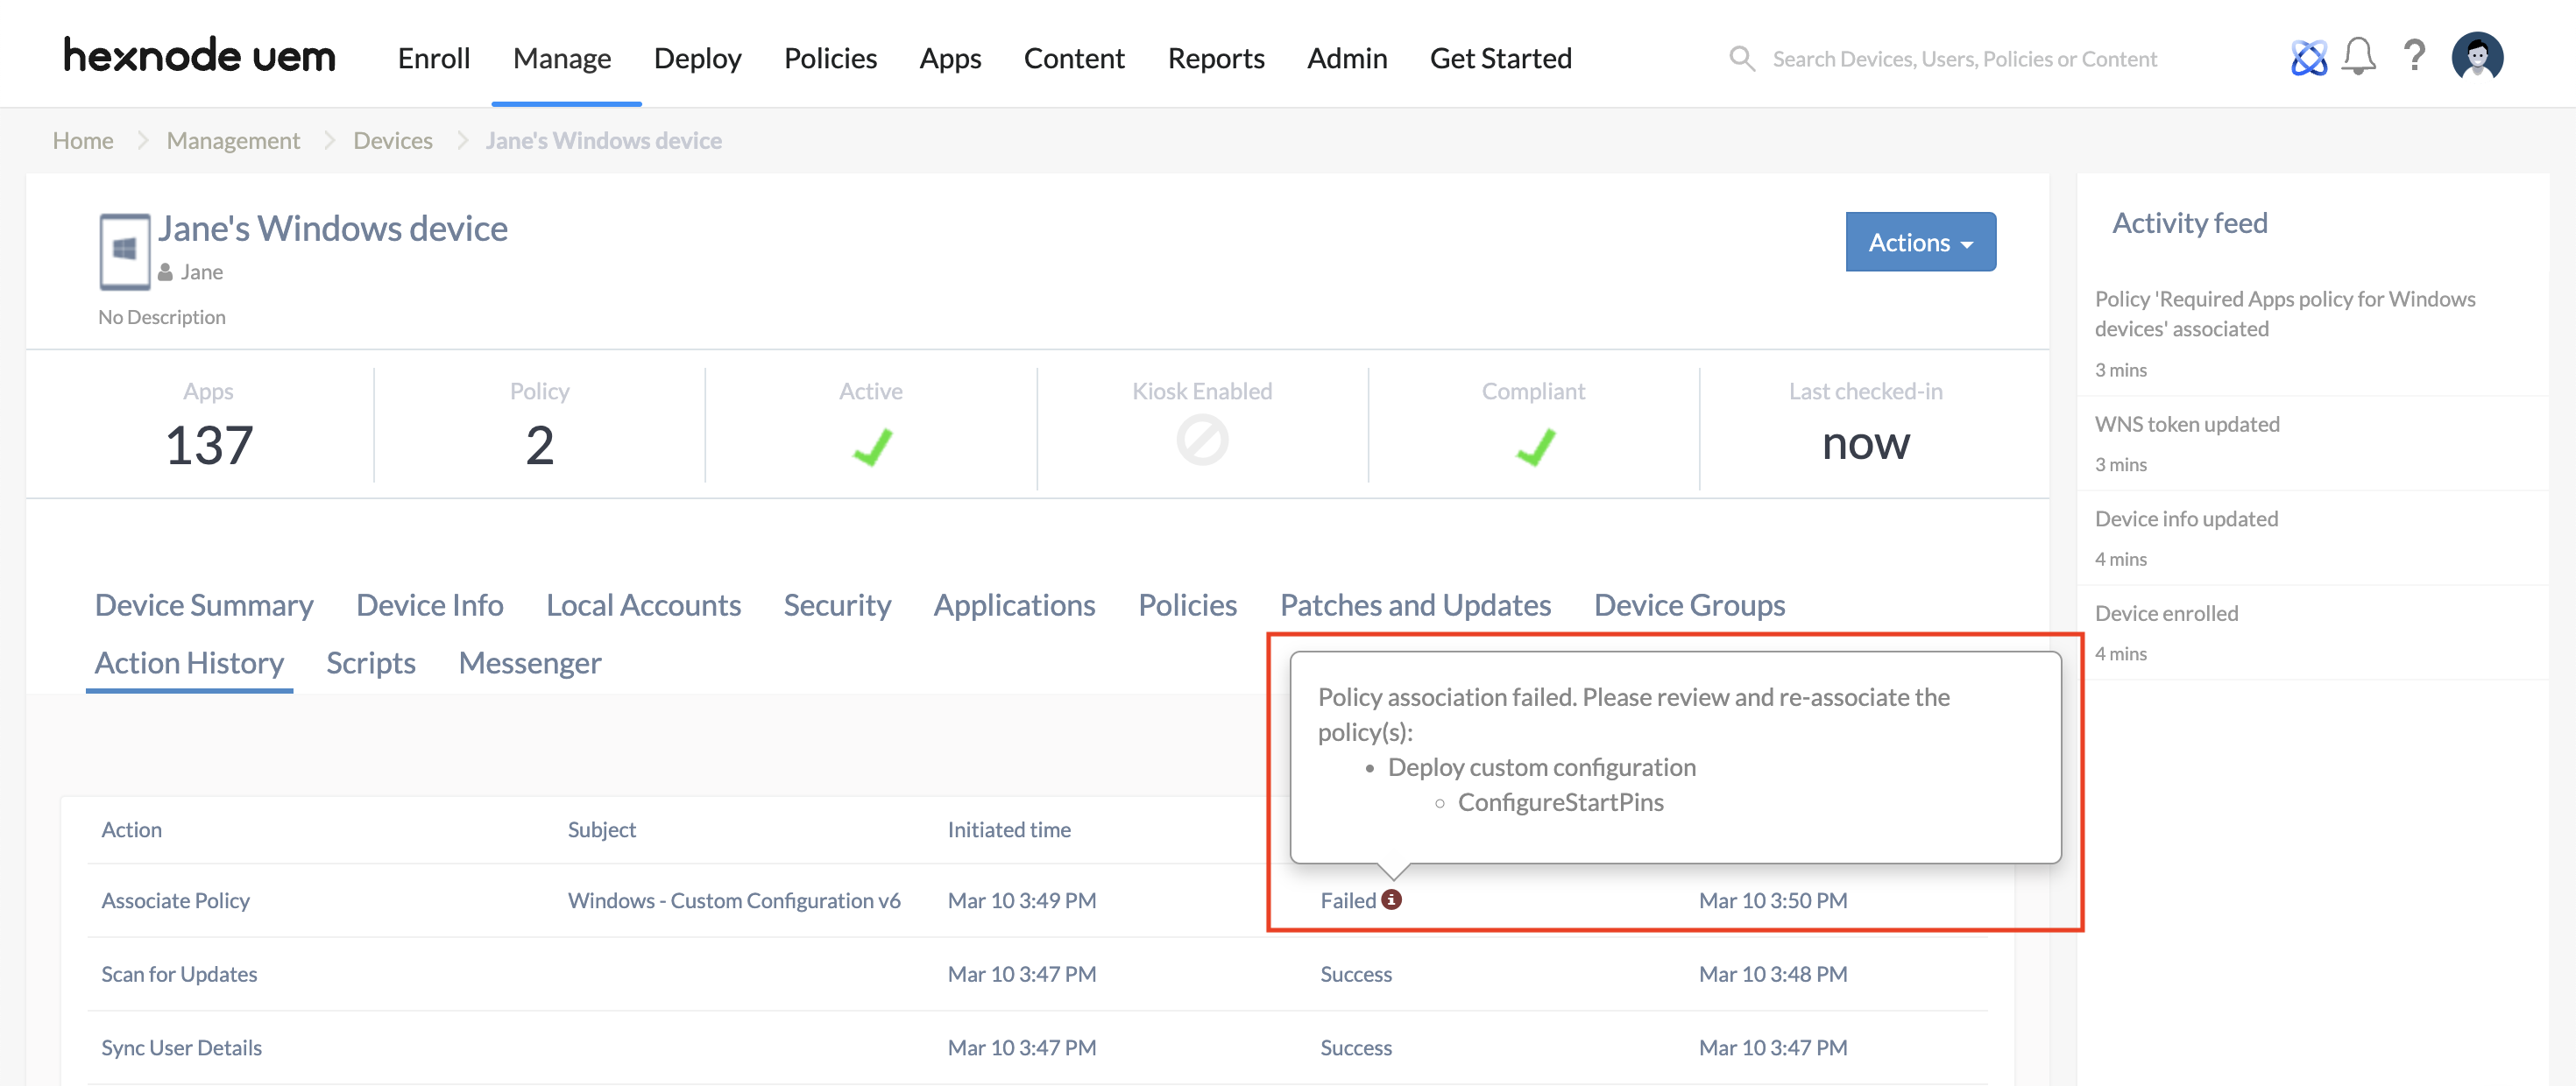
- Click on Enable atomic execution to ensure that the policy is not partially applied.
When this setting is enabled, all payloads within the policy will either be successfully applied together or fail as a unit. If a failure occurs, the policy will be marked as Failed in the Action History, with an information icon indicating the payload causing the error.
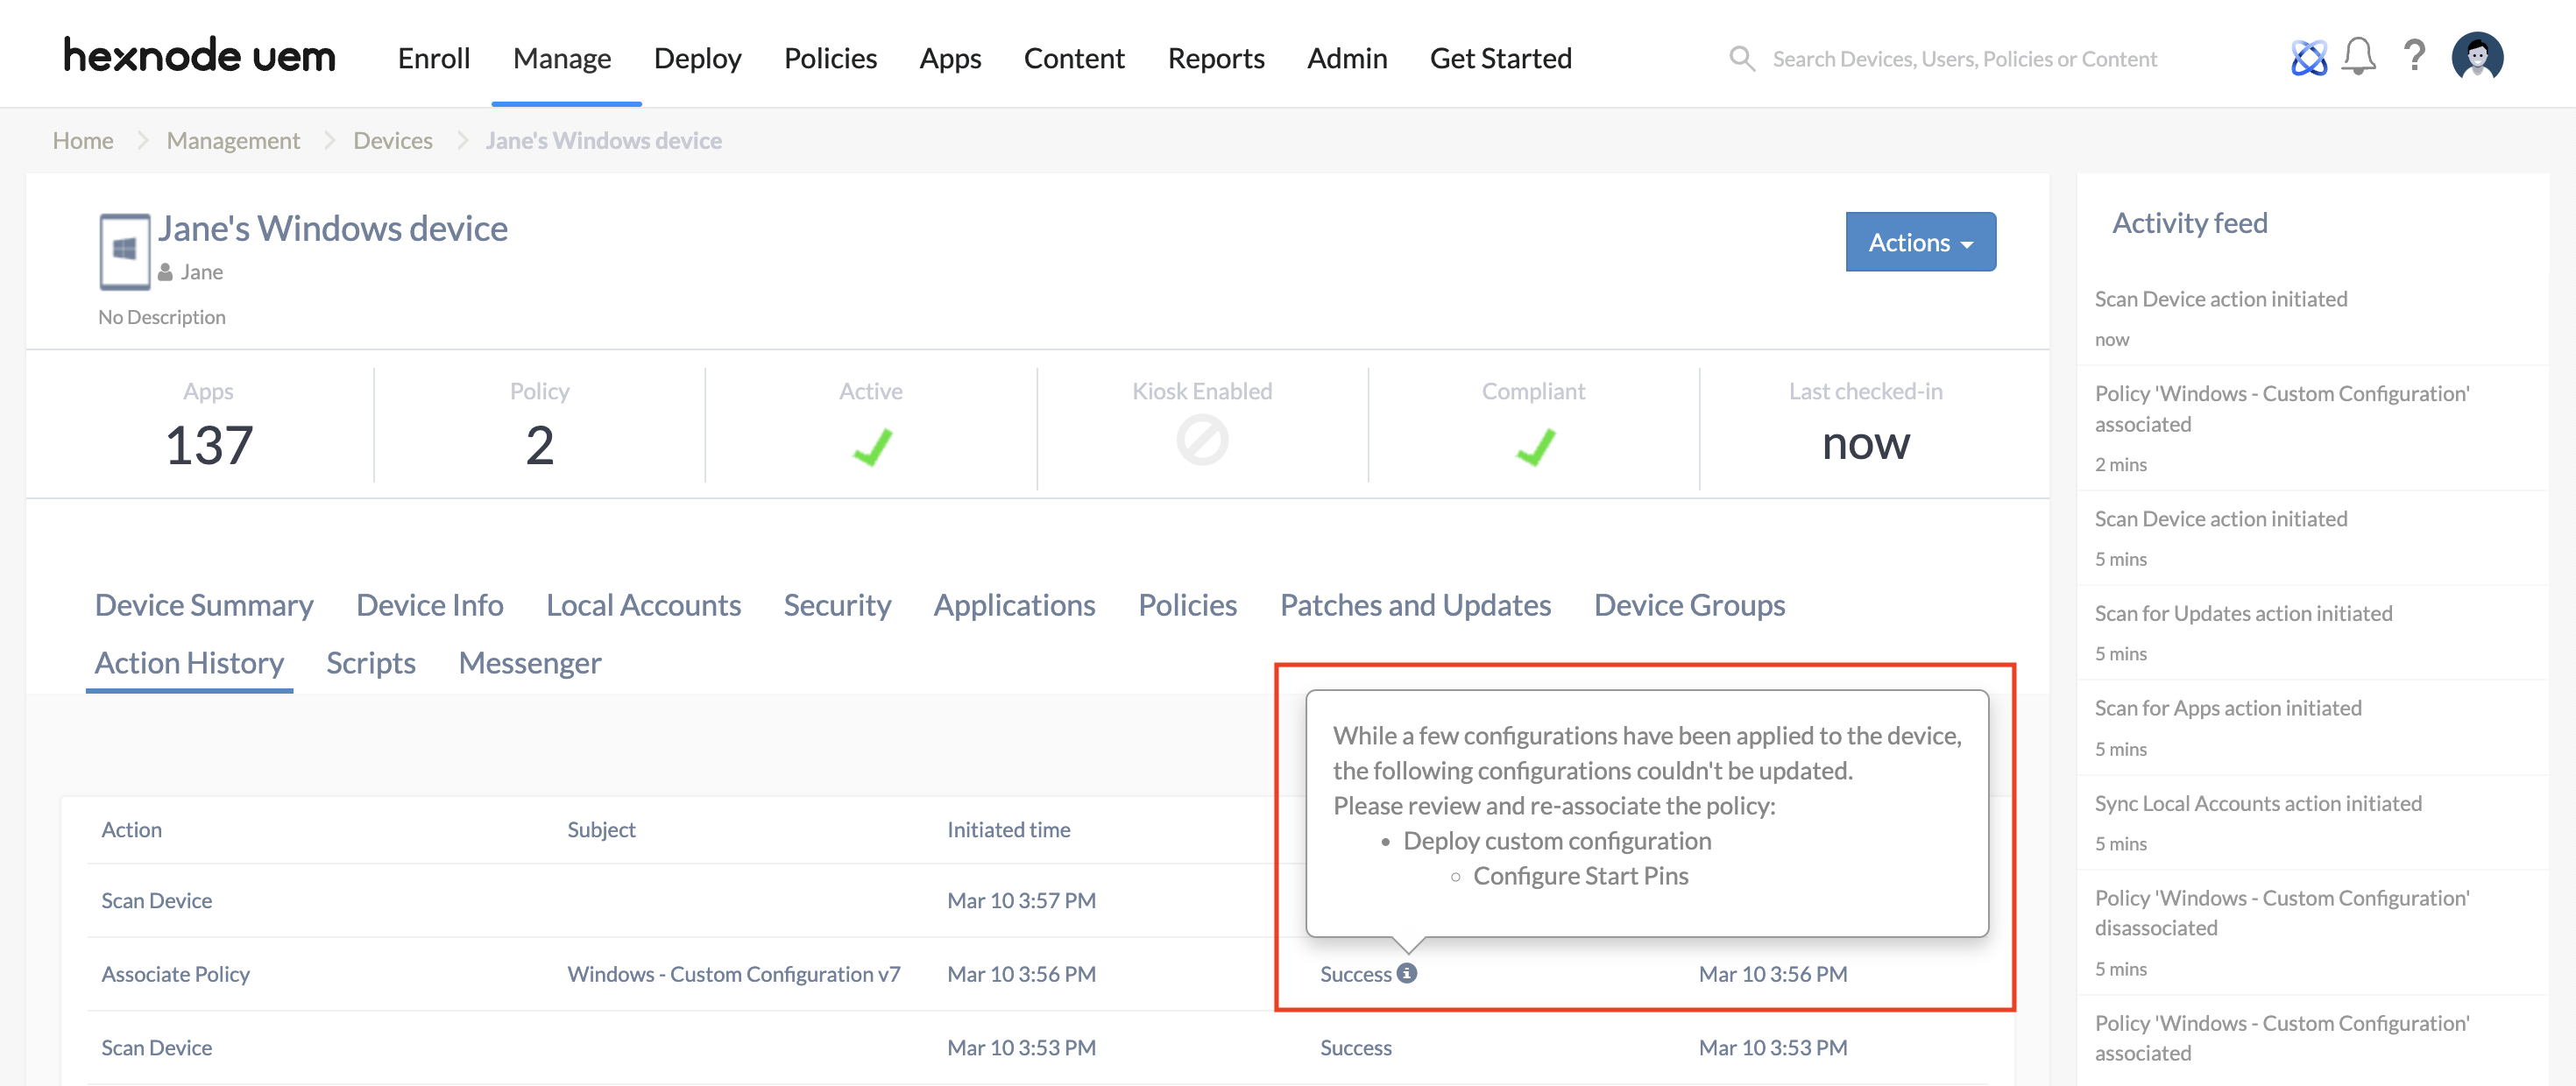
When the setting is disabled, and if any failure occurs, the action will be marked as Success in the Action History with an information button mentioning the payload causing the error. Only the payload having the error will fail, rest of the payloads will be successfully applied.
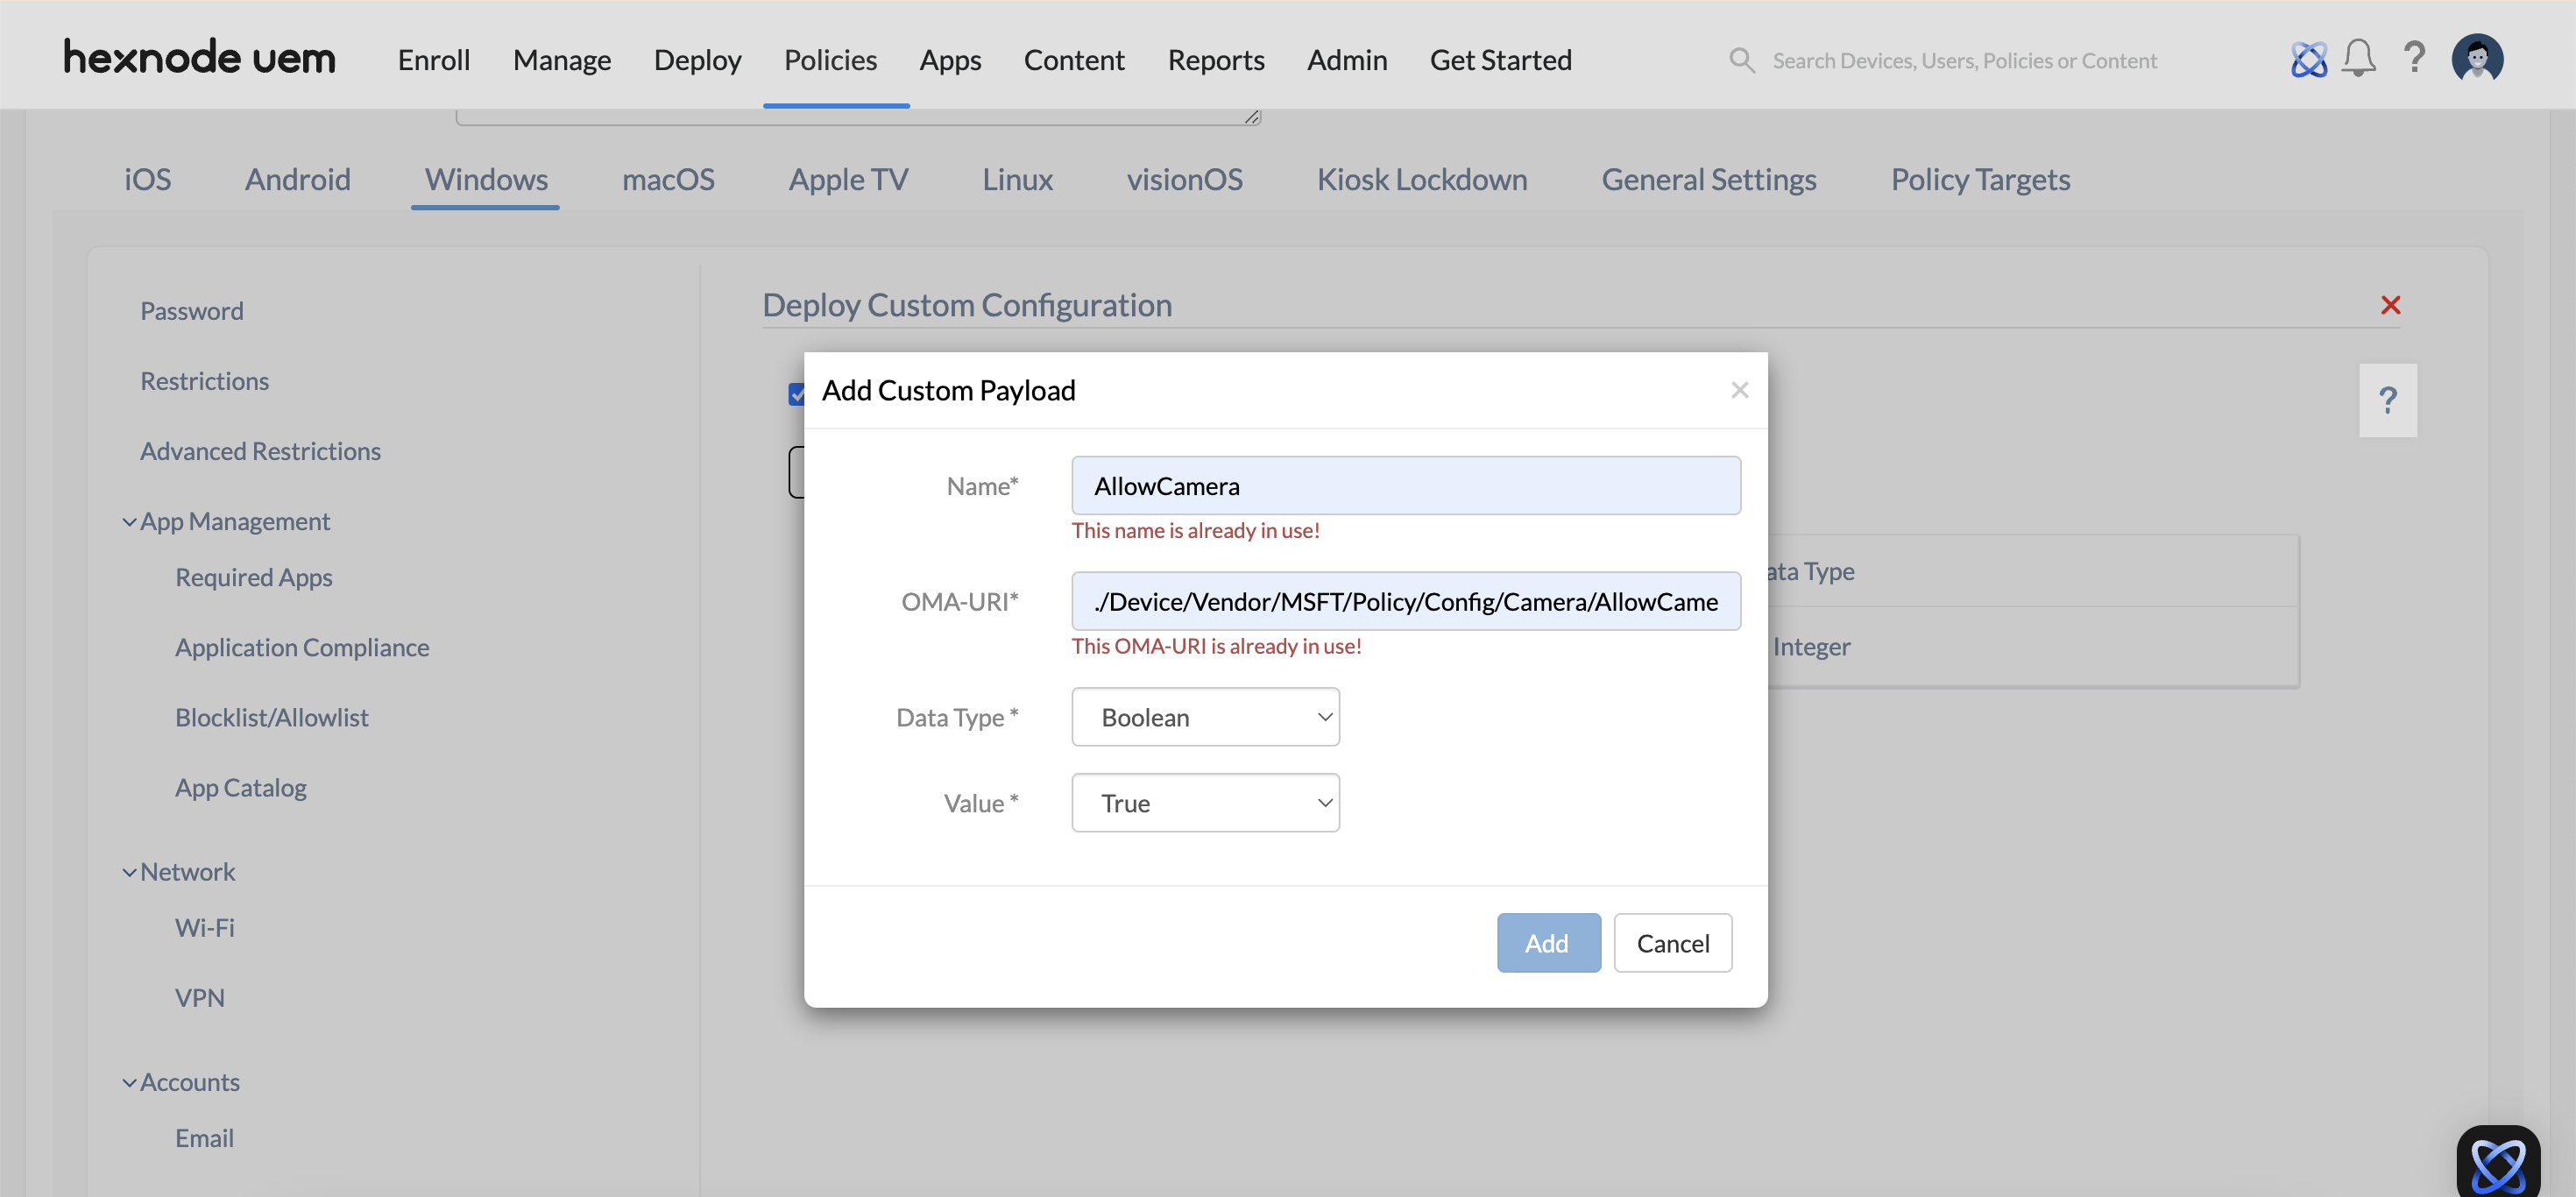
- Click on Add Payload to add custom payload and configure the settings below.
- Name: Provide a name for the custom payload. This is a required field.
- OMA-URI: Specify the OMA-URI (Open Mobile Alliance – Uniform Resource Identifier), which is a distinct path to a configuration setting supported by a CSP. This is a required field.
For example, the OMA-URI for the usage of camera on the device would be, ./Device/Vendor/MSFT/Policy/Config/Camera/AllowCamera.
- Data Type: Choose the data type for the custom payload. Options include Boolean, String, String (XML), or Integer formats.
- Value: Enter a value based on the selected data type format. This field is required.
- For Boolean, choose between True or False.
- For String, input a custom value.
- For String (XML), upload an XML file.
- For Integer, provide a numeric value.
For example, the value for integer data type for the usage of camera would be, 1 for allowed, and 0 for not allowed.
What happens at the device end?
The specific payload that has been configured will take effect on the device. For example, if the payload is set to disable camera access, the camera will be disabled on the Windows device.


