Category filter
Configure SCEP on Windows devices
Simple Certificate Enrollment Protocol (SCEP) is a standardized protocol for managing certificates and enforcing certificate-based authentication. This document provides a guide for IT administrators to configure SCEP on Windows devices to set up certificate-based authentication for network services such as Wi-Fi, VPN, and email.
Configuring SCEP automates the process of requesting and obtaining digital certificates from a Certificate Authority (CA). SCEP manages secure communication between the Certificate Authority (CA) and the device to request certificates from a CA and deploy them to the device. This process involves the device generating a certificate signing request (CSR), which is sent to the CA. The CA processes the request and securely issues a certificate back to the device without any manual intervention.
Organizations can prevent unauthorized access to their network services for Windows users by configuring SCEP profile settings from the Hexnode UEM console. This setup enforces certificate-based authentication for network services such as Wi-Fi, VPN, and email.
SCEP configuration
To configure SCEP on Windows via policy,
- Log in to your UEM portal.
- Navigate to Policies > New Policy. Assign a suitable name and description (optional) for the policy. You can also choose to continue with an existing policy.
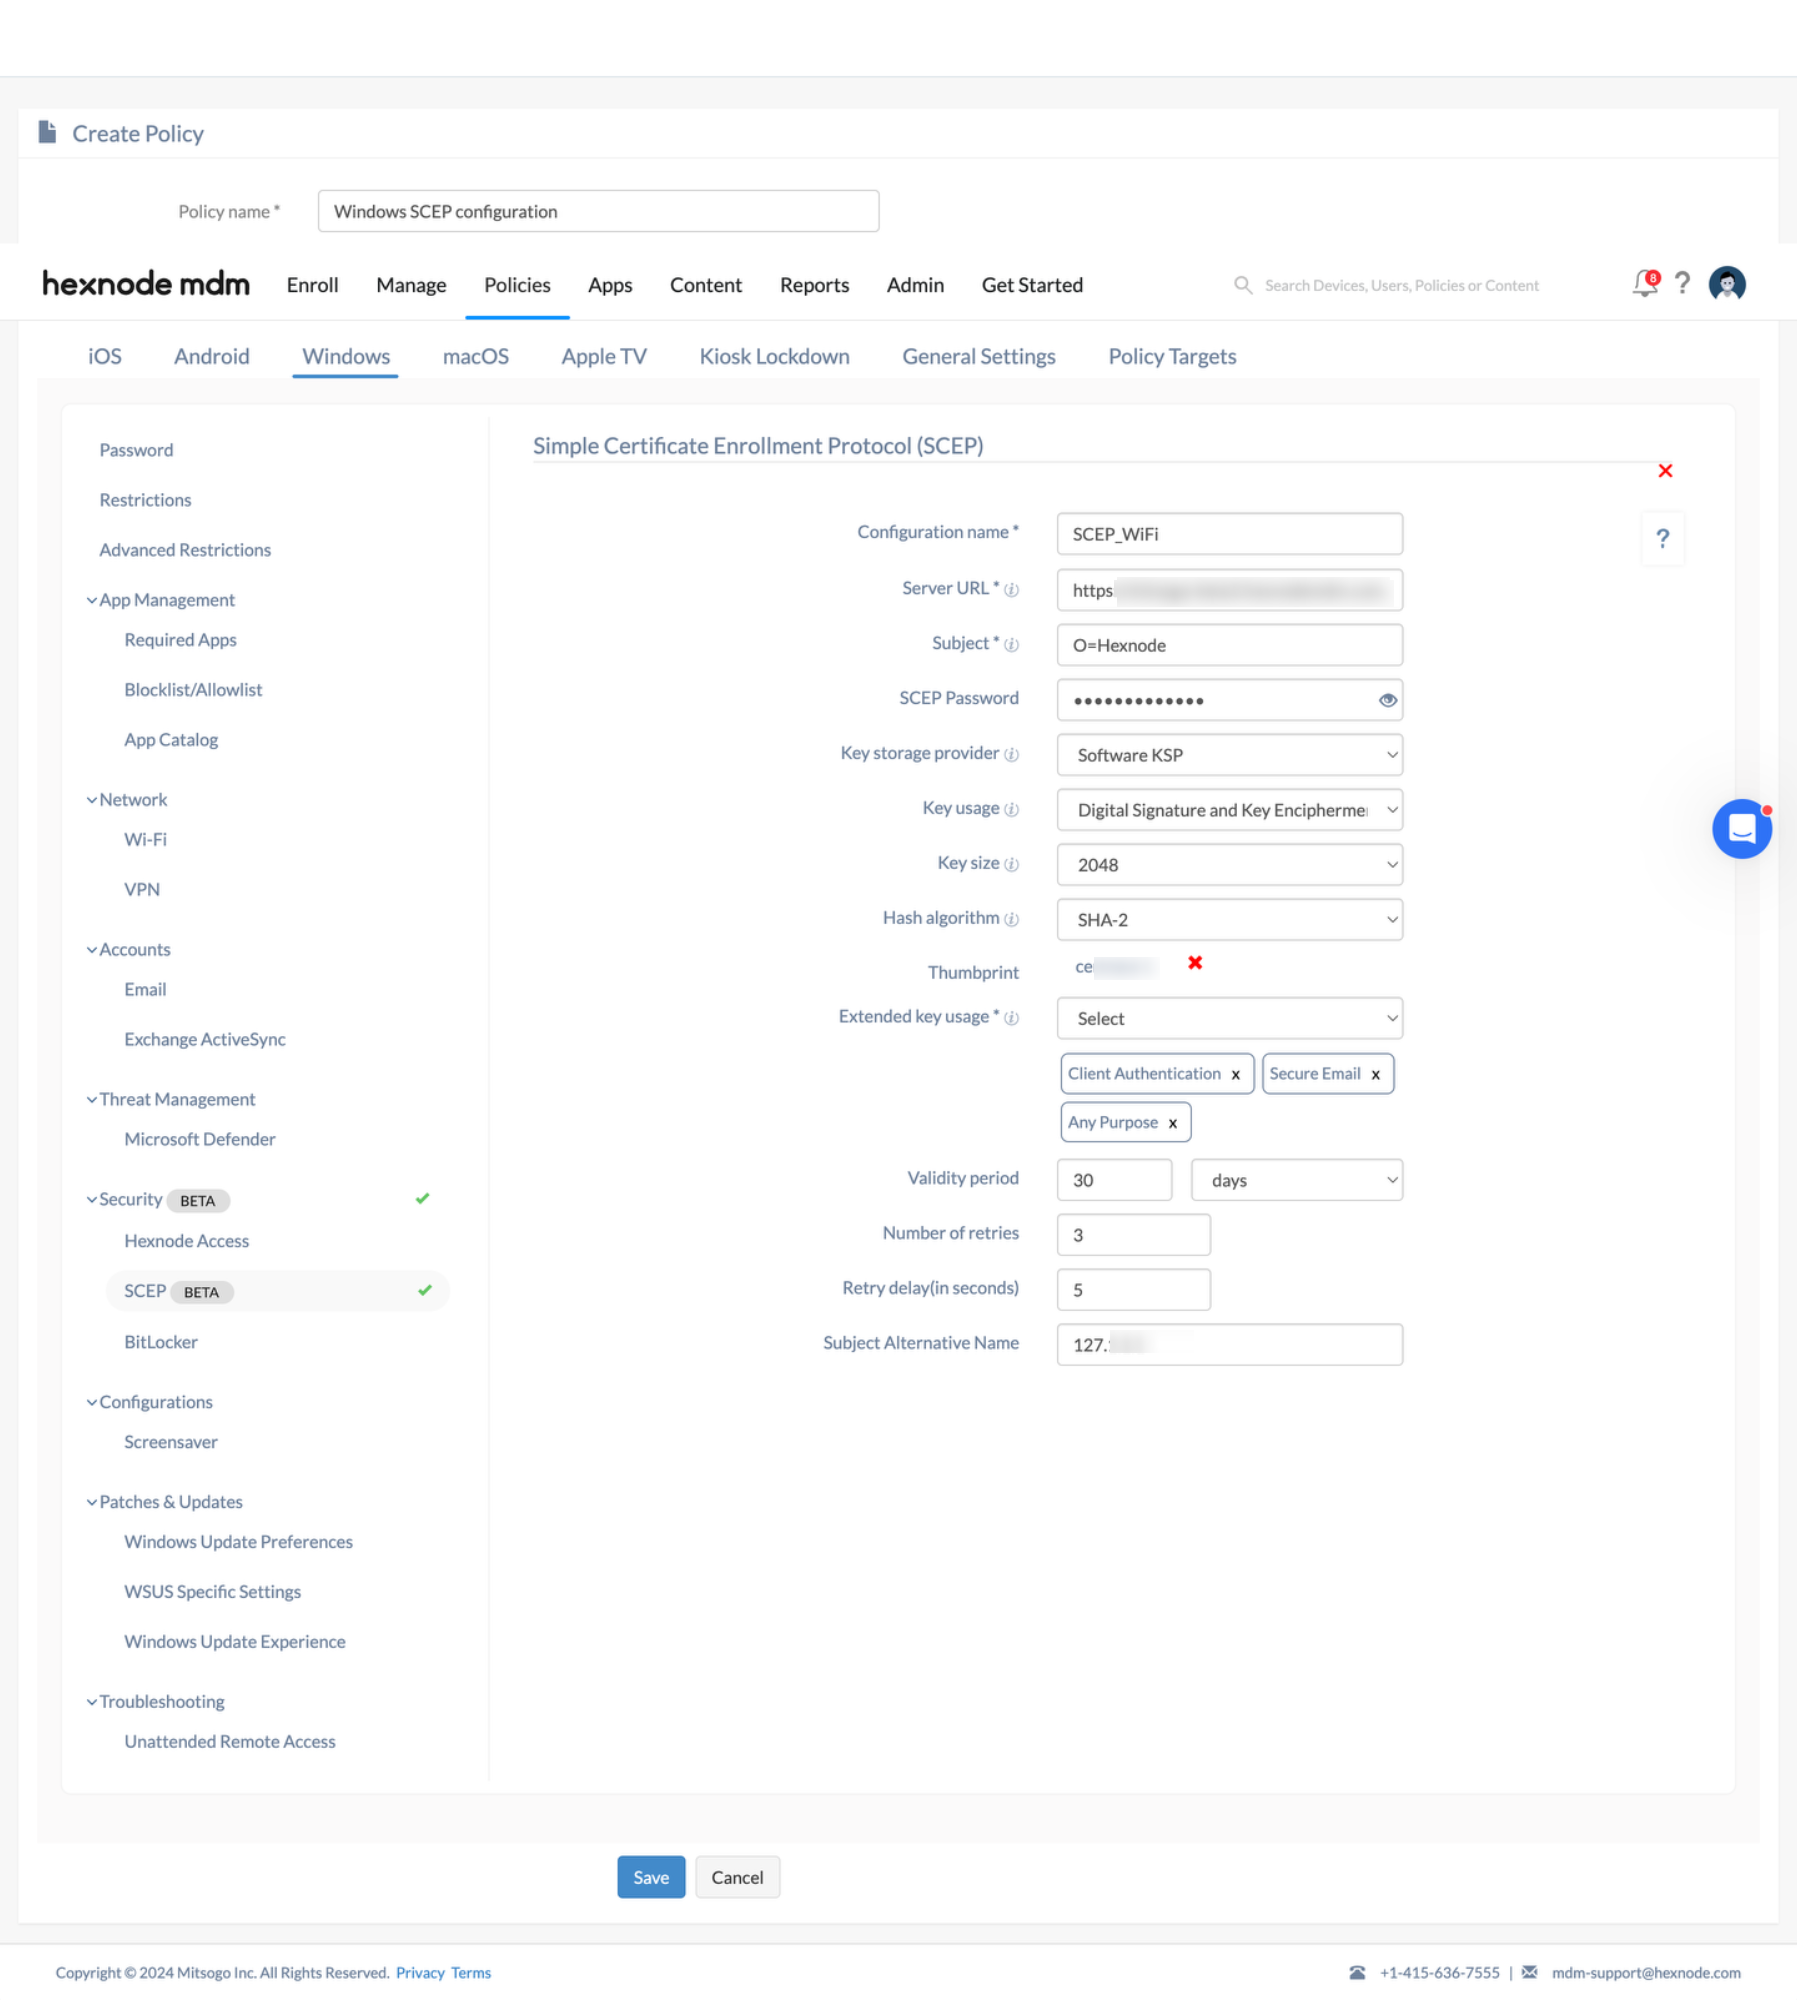
- Go to Windows > Security > SCEP. Click Configure.
Configure SCEP certificate profiles on Windows devices
Configure the following options to create SCEP certificate profiles:
| Configuration | Description |
|---|---|
| Configuration name | When you configure SCEP for Windows devices, you will have to enter a name for the configuration in this field. |
| Server URL | Specify the server URL through which the devices request the NDES server to issue certificates to the devices via SCEP. |
| Subject | Configure the subject to include identifying information in the Certificate Signing Request (CSR) sent to the SCEP server. Use the representation of an X.500 name to identify entities. For example, you can use shortcuts such as C=Country, L=Locality, ST=State, O=Organization Name, CN=Common Name, OU=Organizational Unit, etc. |
| SCEP Password | Specify a password that the SCEP server uses to verify a certificate request from a user to the Certificate Authority (CA). |
| Key storage provider | Specify the location where the private key for the certificate is to be stored from the following options:
|
| Container name (Available only when the option ‘Windows Hello for Business’ is selected) | Specify a container name for Windows Hello for Business. |
| Key usage | Specify the cryptographic action to be used for the key exchange:
|
| Key size | Choose the number of bits supported in the key from the following options: 1024, 2048, or 4096. Note that for Windows Hello for Business, 2048 is the only supported key size. |
| Hash algorithm | Specify the secure hash algorithm to be used to encrypt the certificate. Choose from SHA-1 or SHA-2, or use both SHA-1 and SHA-2 if required. Note that SHA-2 is the only supported hash algorithm for the Windows Hello for Business option. |
| Thumbprint | Upload a CA certificate in this field to save its thumbprint. The device uses this thumbprint to verify the authenticity of the CA’s response during certificate enrollment with the CA server. The following certificate formats are supported:
|
| Extended key usage | Specify the intended purpose of the certificate based on the SCEP server configuration. You can select one or multiple values from the following options: Client Authentication, Secure Email, and Any Purpose. |
| Validity period | Specify the validity period for the certificate in days, months, or years. The certificate will expire after this period. |
| Number of retries | Specify the number of retry attempts when the server response is pending. |
| Retry delay (in seconds) | Specify the time interval, in seconds, between subsequent retries. |
| Subject Alternative Name | Specify one or more Subject Alternative Names (SANs) for the certificate, separated by a semicolon. |
Associating the policy to configure SCEP on Windows
If the policy is not saved,
- Navigate to Policy Targets > Devices > +Add Devices.
- Choose the target devices and click OK. Click Save.
- You can also associate the policy with device groups, users, user groups or domains from the left pane of the Policy Targets tab.
If the policy is already saved,
- Go to Policies and choose the desired policy.
- Click on the Manage drop-down and select Associate Targets.
- Choose the target entities and click Associate.
What happens at the device?
When the policy is associated, certificate-based authentication is enforced on the managed Windows devices. This provides a secure authentication method for network services such as Wi-Fi, VPN, and email. With this policy in effect, access to network services is granted using certificates. The digital certificates distributed via SCEP enhance the security of the authentication process.


