Category filter
Configure OpenVPN for macOS devices
A Virtual Private Network (VPN) allows users to connect to the corporate network from a remote location, ensuring secure access to company resources.
OpenVPN is one such open-source SSL VPN built on the market-proven OpenVPN protocol. By combining advanced network security, remote access, and content filtering into a virtualized secure network, OpenVPN provides the best of VPN, SD-WAN, SASE, and ZTNA security.
Hexnode UEM assists enterprises in establishing data security strategies to prevent accidental data loss. As part of one such strategy, IT administrators can channel sensitive data through configured VPNs minimizing threats due to data interceptions. By setting up robust VPN configurations using the Hexnode portal, you can ensure that your organization’s sensitive data is bound to the safety of your corporate devices.
Hexnode UEM with OpenVPN provides flexible solutions to secure data communications and access to cloud data centers by deploying VPN configurations to iOS and macOS devices. Once the VPN policies are associated successfully with the device, users can connect to them when required.
Set up OpenVPN for macOS devices with Hexnode
To setup OpenVPN for macOS devices, login to your Hexnode UEM portal and follow the steps mentioned below:
- Continue with an existing policy or create a new policy by navigating to Policies > New Policy.
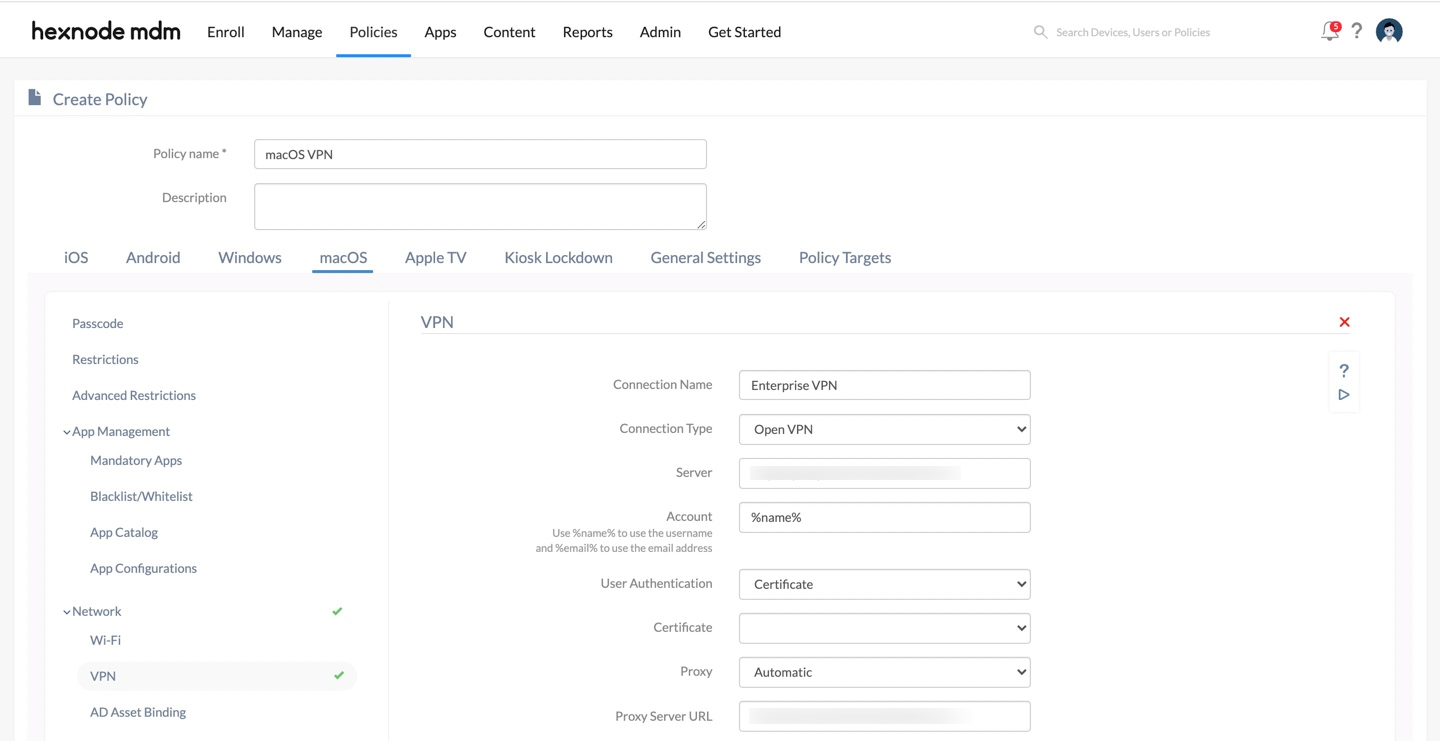
- Go to macOS > Network > VPN and select Configure.
- Provide a Connection Name to be shown on the devices and choose the Connection Type as Open VPN.
- In the Server field (Required), enter the IP address or fully qualified domain name (FQDN) of the VPN server to connect with the devices.
- In the Accounts field, provide the username required to be connected the VPN server. Wildcards such as %name% and %email% can be used to automatically collect username and email data respectively.
- Next, select one among the two methods of authentication:
- Password (Default) – Enter the password needed to connect to the VPN server.
- Certificate – Choose a credential certificate from the ones added in macOS > Security > Certificates.
- For added security, you can set up a Proxy server automatically or manually or select None (fault) to skip the process.

Proxy Settings
As an additional layer of security, you can set up a proxy server while configuring the VPN policy to hide the actual IP address of macOS devices. Within the Hexnode portal, you can select whether the proxy server must be setup manually, automatically or skip the process altogether.
- None – If you don’t want to set up a proxy server.
- Manual – To set up proxy manually by providing the details of Server, Port, Authentication and Password.
- Automatic – To set up proxy automatically by providing the proxy server URL.
How to deploy the OpenVPN policy to Devices/Groups?
After configuring the OpenVPN settings,
- Navigate to Policy Targets and click on +Add Devices.
- Select the desired targets (devices, device groups, users, user groups or domains) from the left pane and click OK.
- Save the policy by clicking Save.
What happens at the device end?
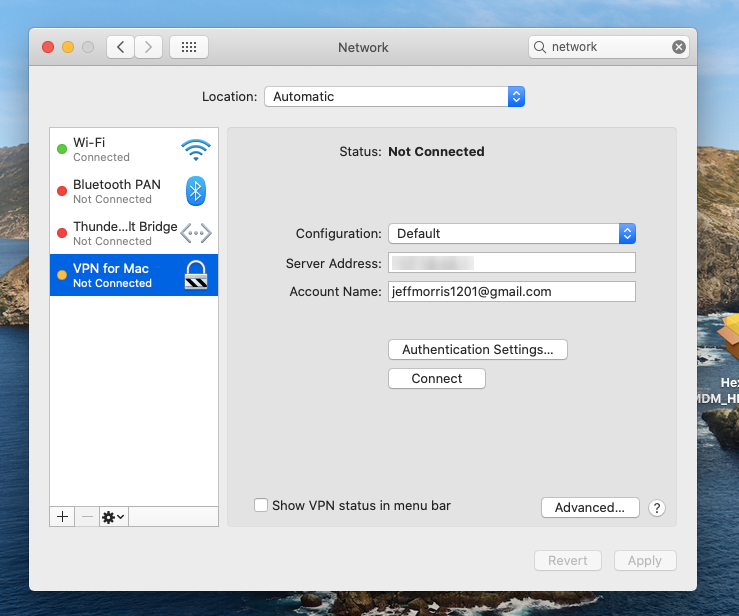
Once the VPN server configurations have been associated successfully with the macOS device, you can view the deployed VPN configurations among the available networks (System Preferences > Network). Users can manually connect to this VPN when required.
For further details on configuring VPN for macOS devices via Hexnode UEM, refer to macOS VPN Settings.


