Category filter
Configure iOS network relays to tunnel traffic thru relay servers
This article will guide you to configure iOS network relays to tunnel traffic via Hexnode.
Network relays are a type of proxy designed to facilitate remote access to organizational/internal resources. They provide secure and transparent tunneling of traffic on iOS devices, allowing IT administrators to configure secure access to internal resources without the need for traditional VPNs.
Network relays operate by utilizing secure HTTP/3 or HTTP/2 relay to proxy all TCP and UDP traffic. Multiple relays can be used simultaneously, including a combination of configured network relays with iCloud Private Relay. The relay configuration is domain-based. It applies specifically to traffic directed towards certain internet domains or subdomains. This relay configuration can be applied to managed apps, specific internet domains, or the entire device.
Configure iOS network relay settings
To configure iOS network relay to tunnel traffic via policy,
- Login to your Hexnode UEM portal.
- Navigate to Policies > New Policy. Assign a suitable name and description (optional) for the policy. You can also choose to continue with an existing policy.
- Go to iOS > Network > Network Relay. Click Configure.
- Navigate to Policy Targets.
- Select the target of the policy (Devices, Device Groups, Users, User Groups, Domain).
- Click on +Add Devices.
- Select the devices you want to apply the policy to and click OK.
- Click Save to apply the policies to the selected devices.
- Go to the Policies tab.
- Select the policy you want to associate with devices.
- Click on Manage > Associate Targets.
- Select the devices or device groups to which you want to apply the policy.
- Click Associate to apply the policy to the selected devices.
| Settings | Description |
|---|---|
| Relay UUID | A globally unique identifier for the relay configuration. This UUID routes Managed Apps through the configured relay servers. |
| Relays | An array of dictionaries that define one or more relay servers, which can be chained together. This is a required field.
Click on +Add to add a new relay to the configurations. |
| Match domains | A list of domain names that determine which connections are routed through the configured relay servers. Any connection that exactly matches or is a subdomain of a listed domain will use the relay servers. If no domains are listed, all traffic, except those matching an excluded domain, will be routed through the relay servers. |
| Excluded Domains | A list of domain names that should not be routed through the relay servers. Any connection that exactly matches or is a subdomain of a listed domain will bypass the relay servers. |
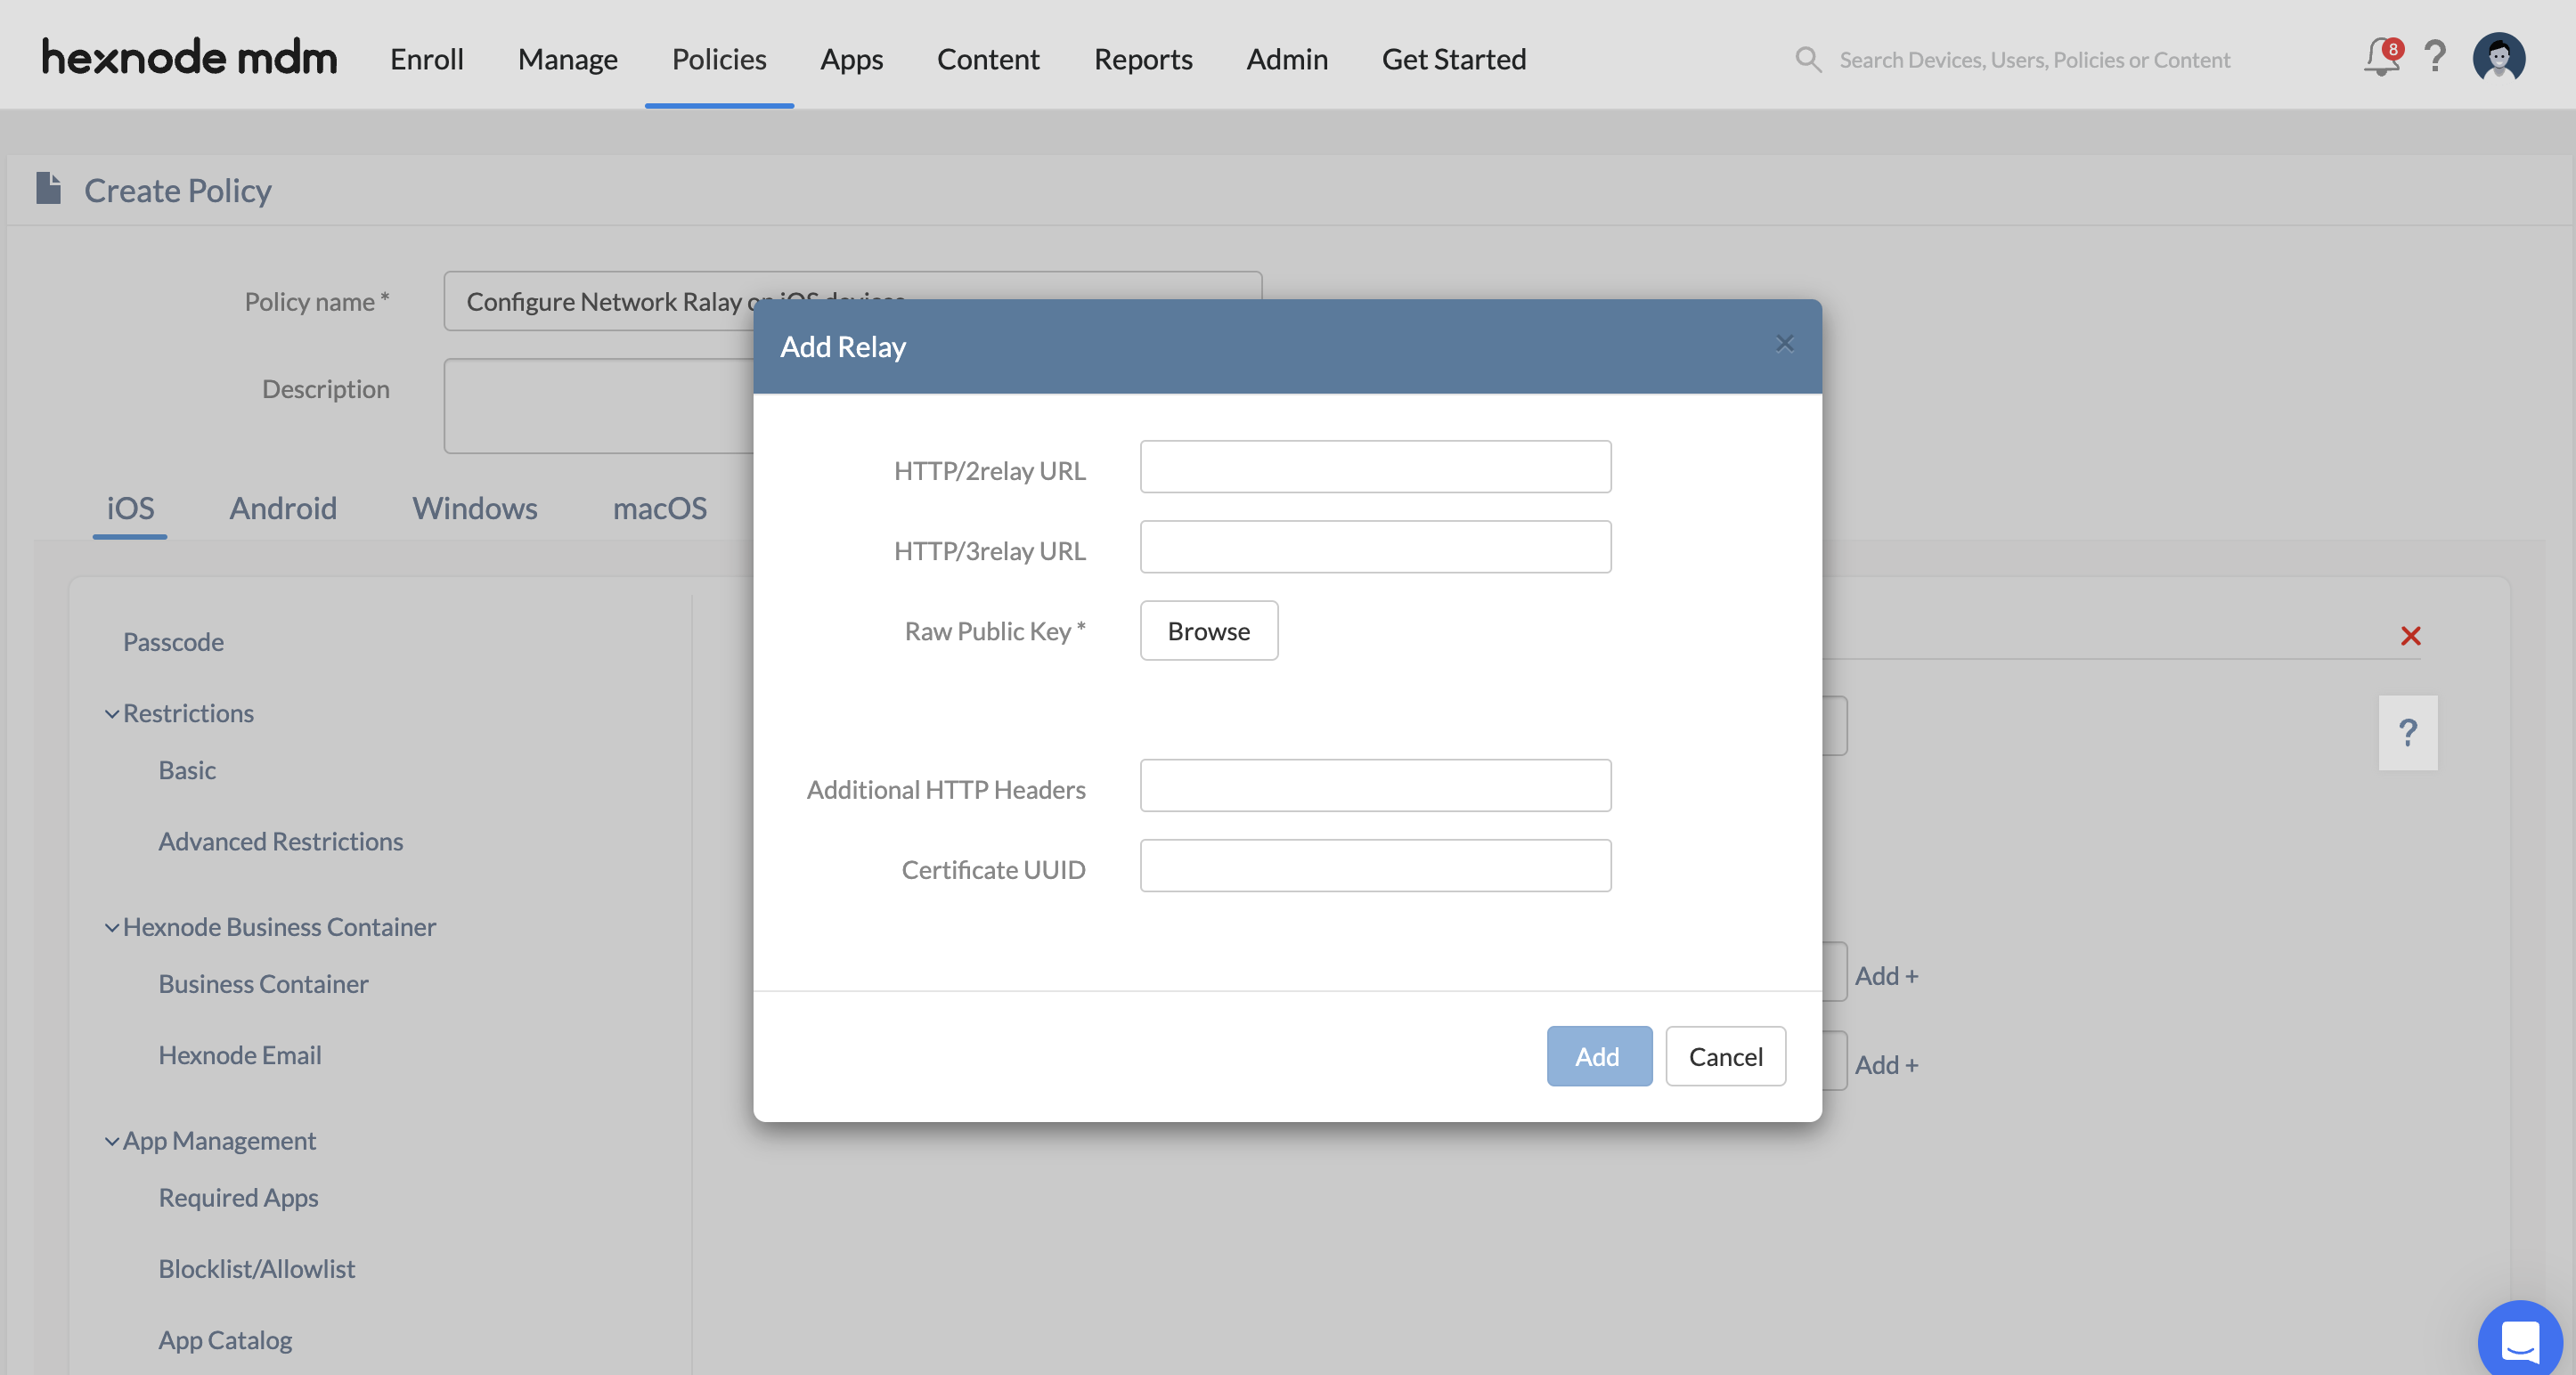
Configure settings to add Relays
| Settings | Description |
|---|---|
| Http/3 relay URL | This is the URL for the relay server that supports HTTP/3 protocol. |
| Http/2 relay URL | This is the URL for the relay server that supports HTTP/2 protocol. |
| Raw public keys | This is an array of TLS raw public keys that the relay server can present during the TLS handshake. These keys are used to establish a secure connection between the device and the relay server. |
| Additional HTTP Headers | A dictionary of additional HTTP headers to send as part of CONNECT requests to the relay. |
| Certificate UUID | This is a unique identifier for the certificate used by the relay server. |
Associating the policy with devices
If the policy has not yet been saved:
If the policy has already been saved:


