Category filter
How to configure CalDAV on macOS devices?
CalDAV (Calendaring Extensions to WebDAV) is a service that syncs multiple calendars, reminders, events, and notifications from various CalDAV supported calendar servers to your device. This facilitates remotely setting up organizational calendars on the workforce’s devices yourselves with zero or no assistance from the workforce.
Configure CalDAV account settings via policy
To configure CalDAV via policy,
- Login to your Hexnode UEM portal.
- Navigate to Policies > New Policy. Assign a suitable name and description (optional) for the policy. You can also choose to continue with an existing policy.
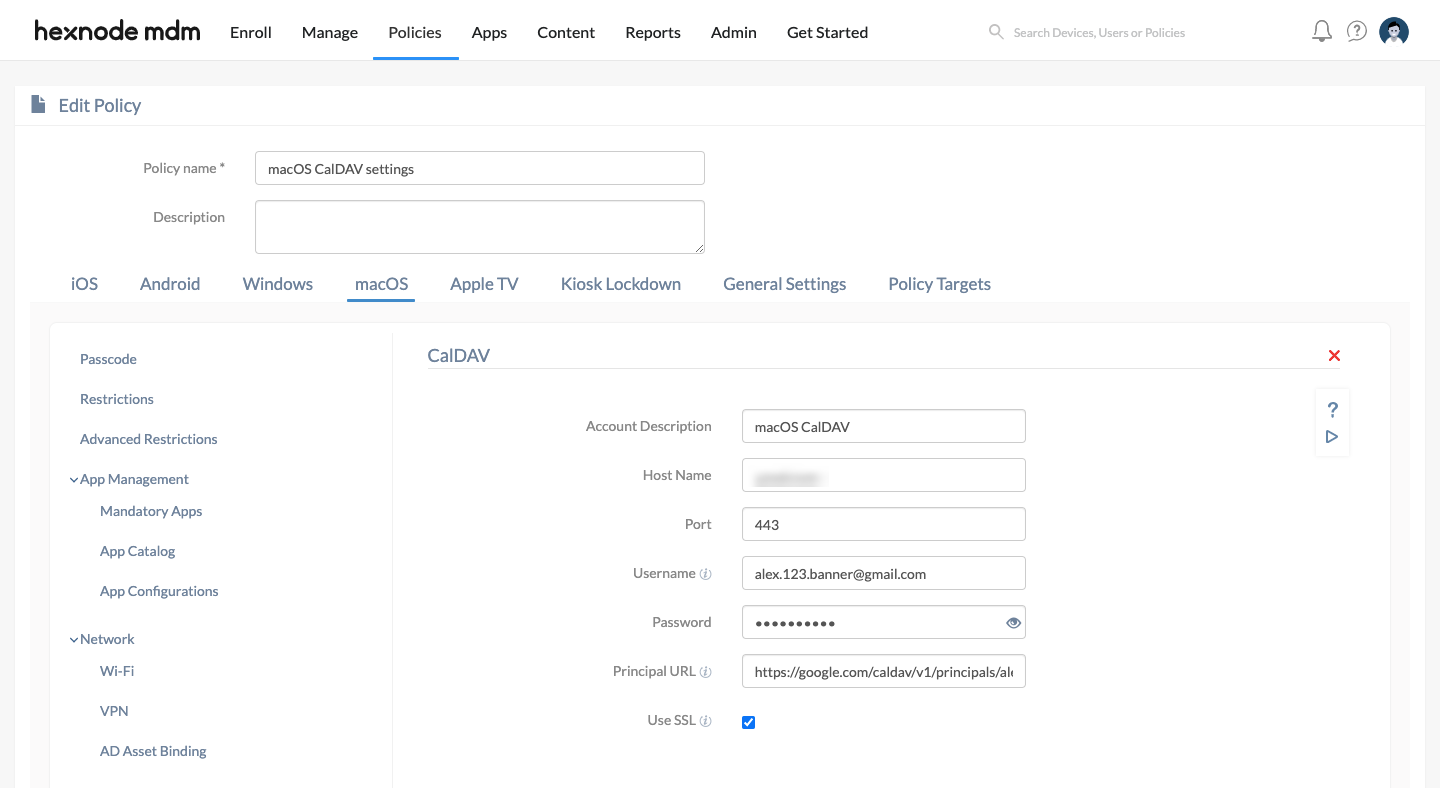
- Go to macOS > Accounts > CalDAV. Click Configure.
| CalDAV Settings | Description |
|---|---|
| Account Description | When there is more than one configuration, a description would be helpful to distinguish. However, this field is optional. |
| Host Name | The IP address or the Fully Qualified Domain Name (FQDN) of the CalDAV server. |
| Port | The port number assigned for communication with the CalDAV server. The default port number is 8443. |
| Username | Provide the username of the account. This field supports the use of wildcards. The supported wildcards are
|
| Password | Password associated with the username provided above. |
| Principal URL | The principal URL provides information regarding a user’s CalDAV accounts. No separate principal URLs are available for multiple calendars of the same user. The Principal URL is mandatory if the password is not provided by the user, else the auto-recovery of the service will fail, and the account will not be created. |
| Use SSL | SSL makes the connection between you and the CalDAV server more secure by encrypting the data sent to the server. Enabled by default. |
Associate policy with macOS devices or users
To associate the policy with the target entity,
- Navigate to Policy Targets > +Add Devices. Choose the target device and click Ok. Click Save.
- You can also associate the policy with Device Groups, Users, User Groups, or Domains from the left pane of the Policy Targets tab.
- Alternatively, the policy can be associated from the Manage drop-down of the Policies tab. Click Manage > Associate Targets. Choose the target entity and click Associate.
What happens at the device end?
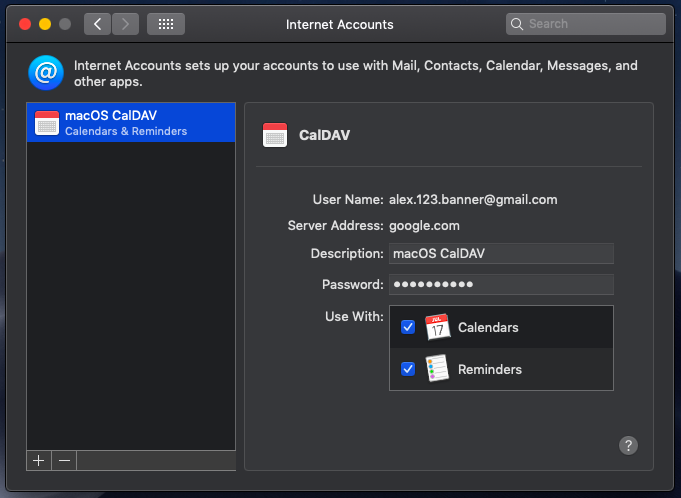
Once the policy is associated successfully, the CalDAV account will be added and gets synced with the device. All the calendars associated with the configured account can be accessed from the Calendar app on your macOS device.


