Category filter
CardDav settings for iOS
CardDAV (vCard Extensions to WebDAV) is an address book protocol that allows users to sync corporate contacts from the CardDAV server to their managed devices. Hexnode lets you remotely add and remove contacts from your managed iOS devices without the need for any user interaction. The synced contacts get saved to the Contacts app inside the iOS device.
Configure CardDAV settings for iOS devices
To configure CardDAV settings via policy,
- Log in to your Hexnode UEM portal.
- Navigate to Policies > New Policy. Assign a suitable name and description (optional) for the policy. You can also choose to continue with an existing policy.
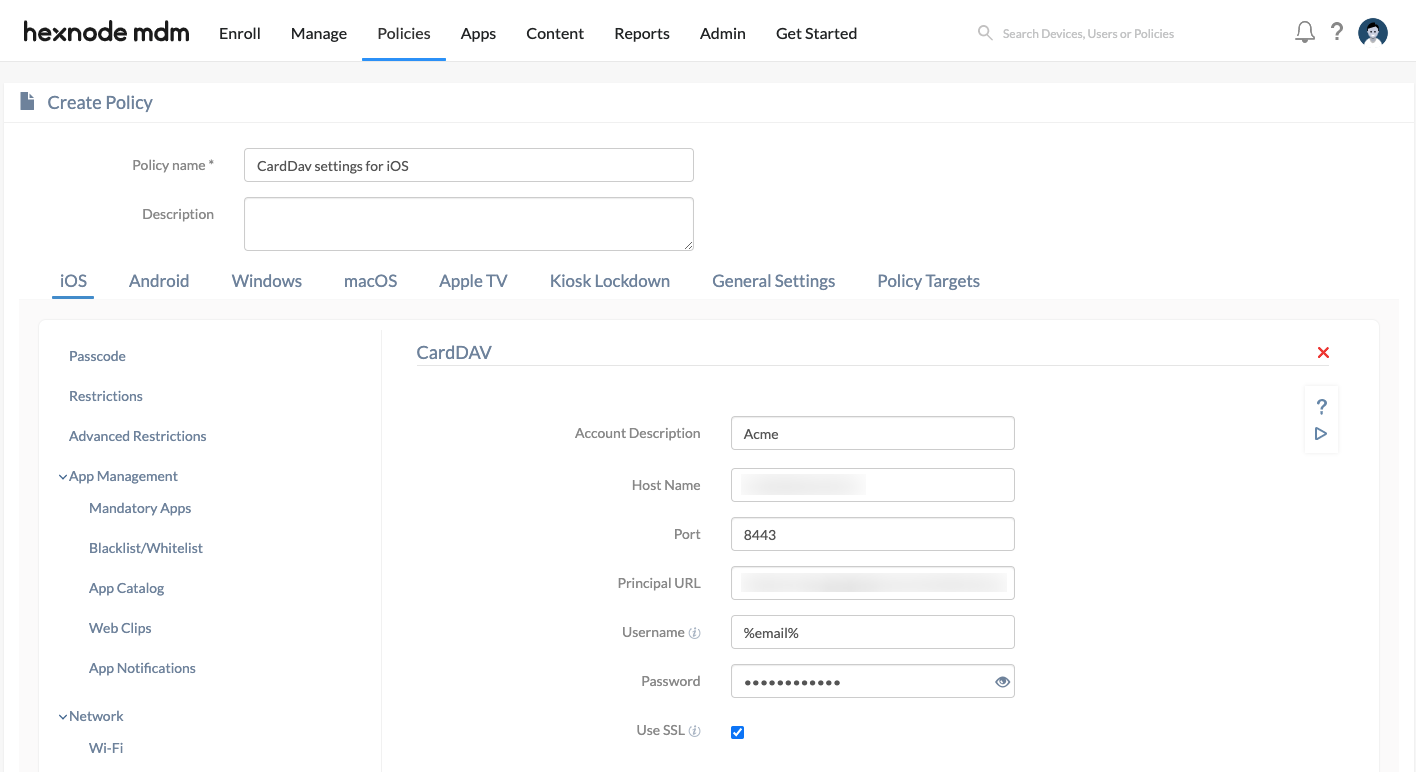
- Go to iOS > Accounts > CardDAV. Click on Configure. You will be presented with several options to configure the CardDAV settings.

| Settings | Description |
|---|---|
| Account Description | The display name of the CardDAV account to distinguish the account in case of multiple accounts. |
| Host Name | The hostname of the server where the contacts are stored. Either the IP address or Fully Qualified Domain Name (FQDN) of the CardDAV server must be entered. This field is mandatory. |
| Port | The port number of the CardDAV server in use. By default, it is 8443. This field is mandatory. |
| Principal URL | The URL which provides information about the user’s CardDAV and CalDAV accounts. A user will have a single principal URL. For example, the Google CardDAV API supports the following URL: https://www.googleapis.com/carddav/v1/principals/userEmail. |
| Username | The email address of the account from which contacts are to be synced. This field is mandatory to be filled. Hexnode supports the use of the wildcards in this field. The %email%, %alternateemail% and %username% wildcards are valid entries. |
| Password | The password associated with the CardDAV account. |
| Use SSL | SSL provides a secure (encrypted) connection between the iPhone/iPad and the server. Enabled by default. |
How to associate targets to a policy?
Method 1: If the policy has not been saved,
- Navigate to Policy Targets > Devices > +Add Devices.
- Choose the target devices and click OK. Click Save.
The policy can also be associated with Device Groups, Users, User Groups and Domain by selecting any one of the above from the Policy Targets tab.
Method 2: If the policy has been saved,
- Go to the Policies tab and choose the desired policy.
- Click on the Manage tab and select Associate Targets.
- Choose the target entities and click Associate.
What happens at the device end?
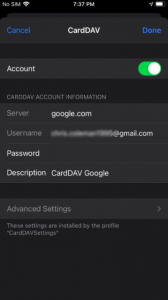
Once the policy has been associated with the device, the configured CardDAV account will get added to the device. The synchronized contacts can be accessed from the Contacts app on the iOS device.
To check whether the CardDAV account has been successfully configured to your iOS device, head to Settings -> Contacts -> Accounts -> Click on the CardDAV account that you have configured from the Hexnode portal. The CardDAV account details will be shown on the device.
