Category filter
How to add Email Accounts to macOS devices?
This article will help you add email accounts to macOS devices via UEM.
There are times when an administrator needs to set up an email account on Mac remotely. Some cases may involve hundreds of macOS devices that are to be configured with the corporate email accounts. Attending to all these devices manually can be a herculean task for many administrators. After all, the whole process is tiring, frustrating, and unnecessary.
Organizations find it highly beneficial if they can add email accounts to macOS devices remotely to get their users ready for action. With the powerful device management solution Hexnode UEM, one can seamlessly configure email accounts to enable users to send and receive emails with their corporate email accounts.
With Hexnode, the admins can configure POP or IMAP mail accounts on Macs, set up incoming and outgoing mail server settings, select different user authentication types, and much more. The admin can make use of the wildcard functionality to auto-populate various data such as usernames or email addresses based on the details provided while enrolling devices in Hexnode UEM.
Add mail accounts to macOS devices via UEM
To set up email accounts via policy,
- Log in to your Hexnode UEM portal.
- Navigate to Policies > New Policy. Assign a suitable name and description (optional) for the policy. You can also choose to continue with an existing policy.
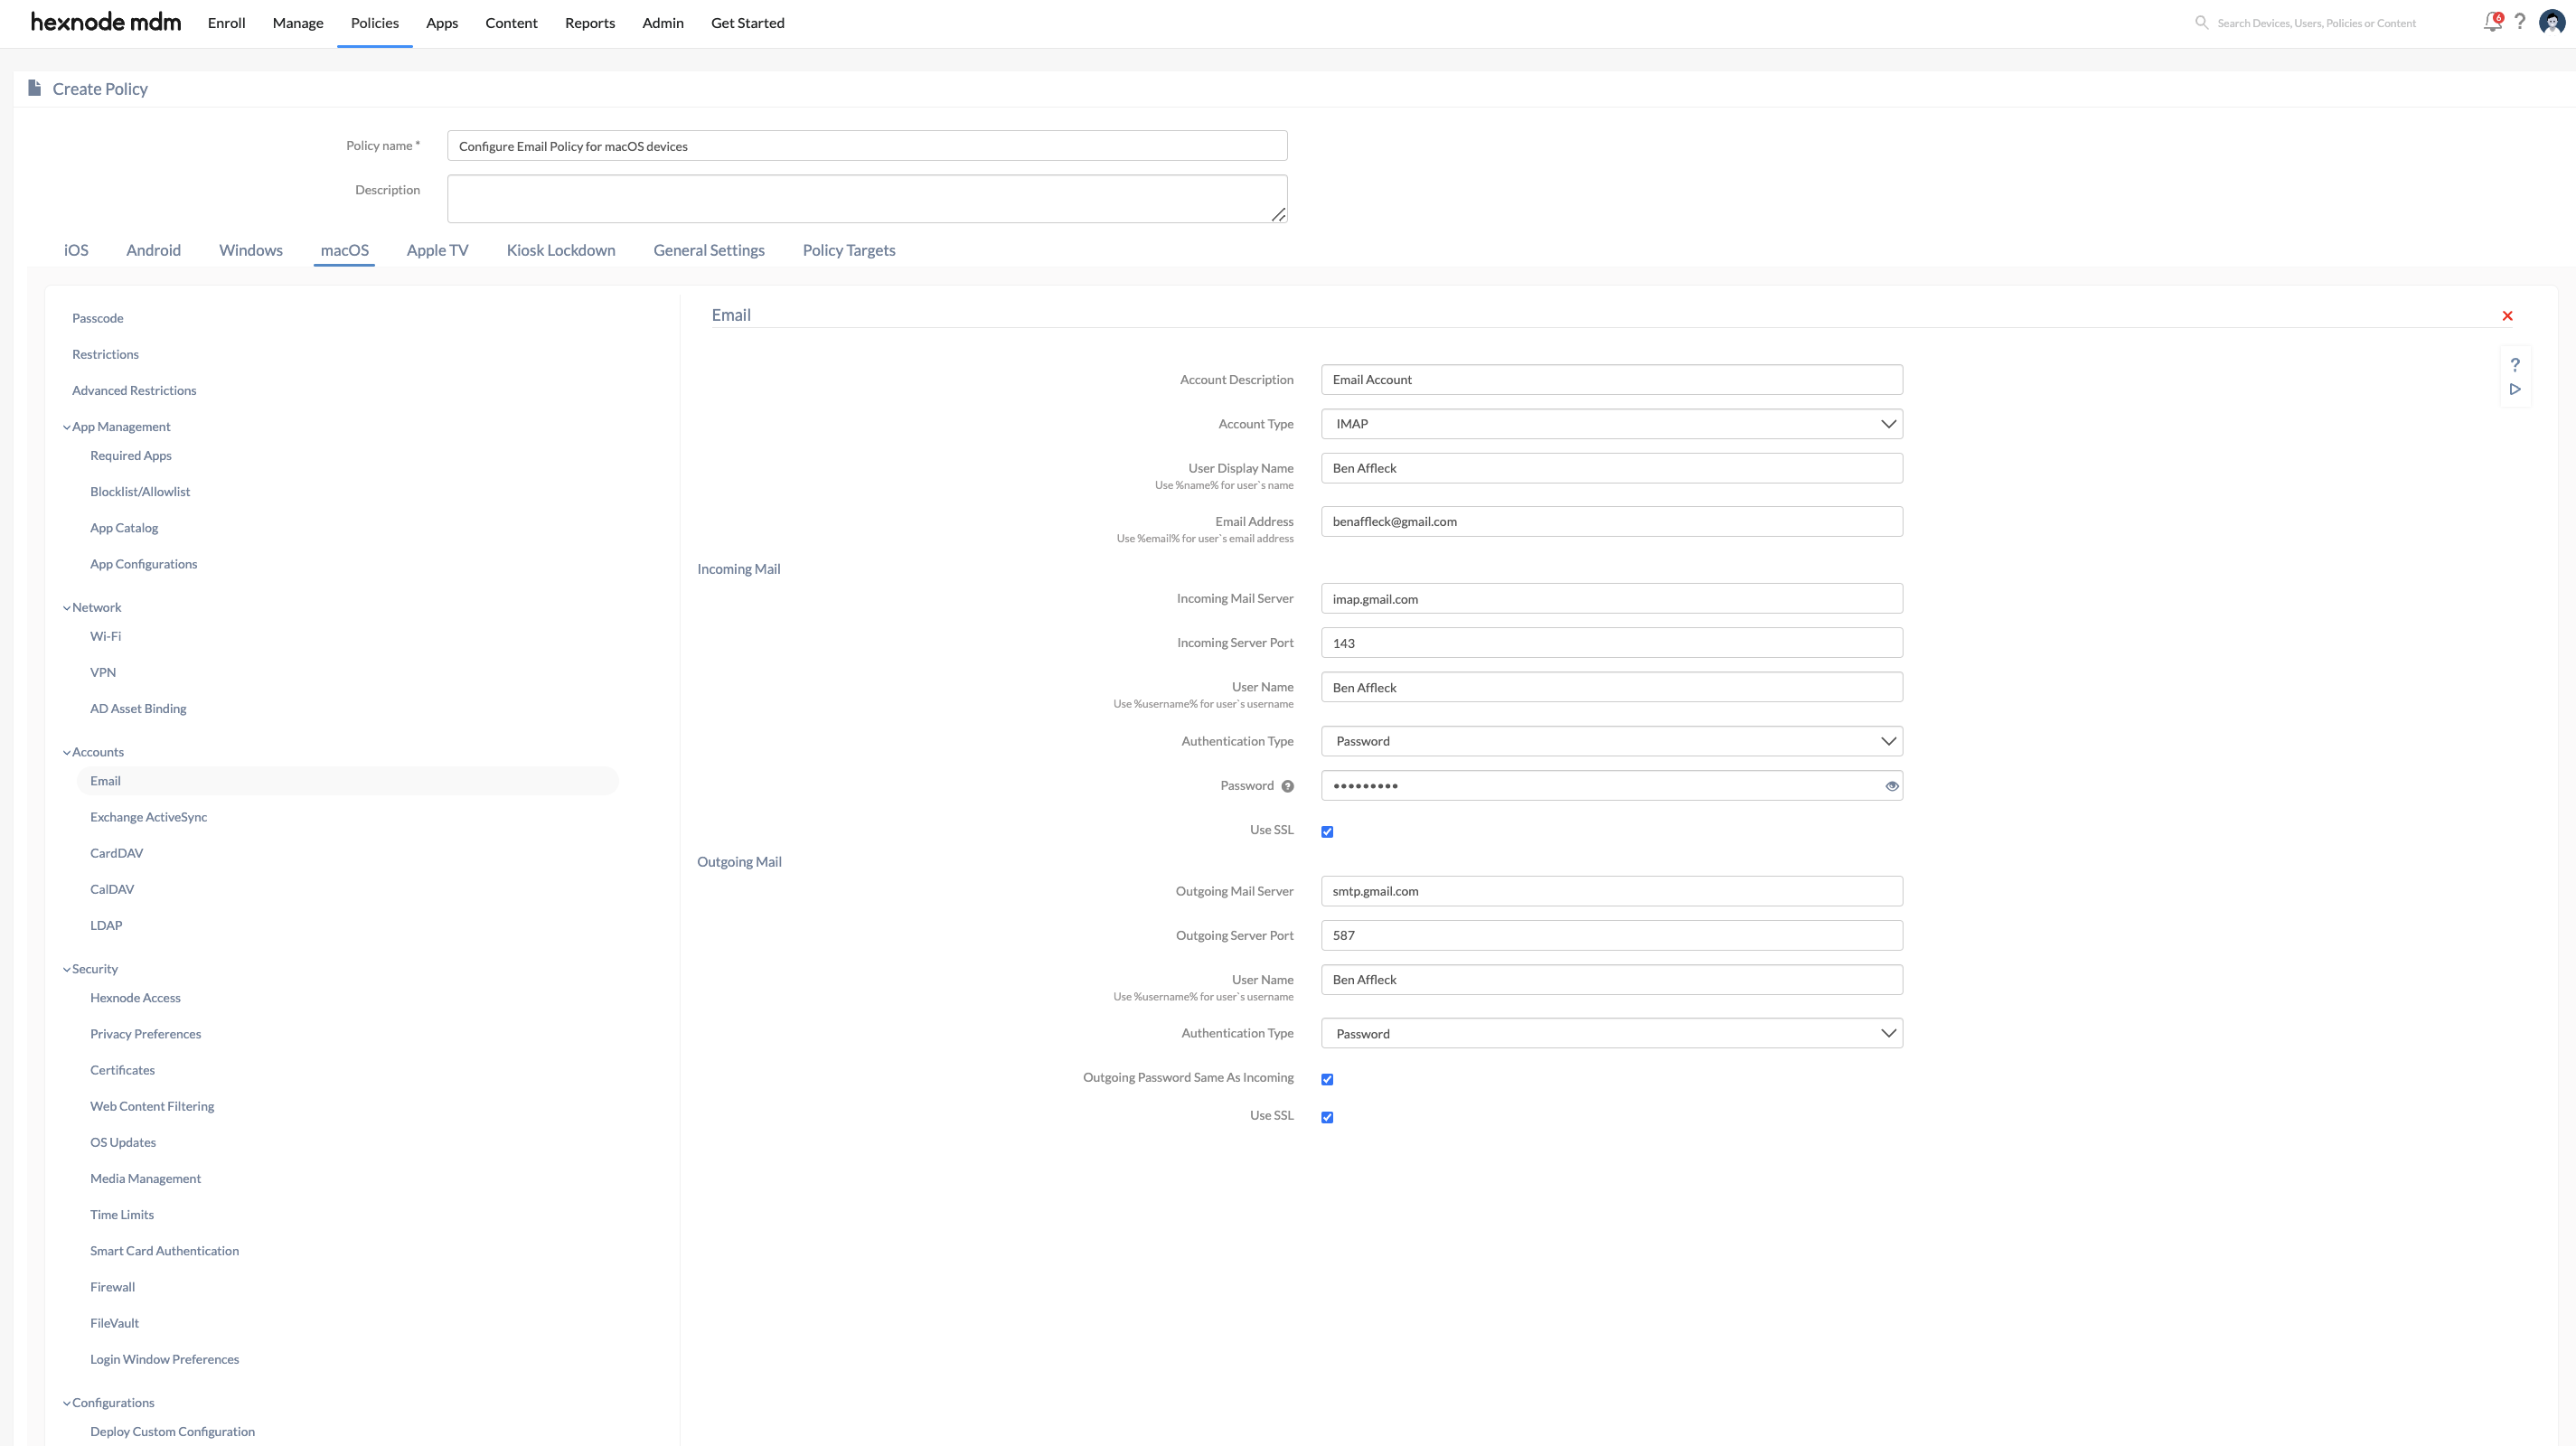
- Go to macOS > Accounts > Email. Click Configure.
| Settings | Description |
|---|---|
| Account Description | Enter a proper display name for the email account, as this name is used to differentiate between multiple email accounts. |
| Account Type | Define the protocol to be used for the email account. The available protocols are:
|
| User Display Name | Enter the full user name for the account. This name is shown in the sent messages. Use the wildcard %name% to auto-populate the user’s name mapped to the device in Hexnode UEM. |
| Email Address | Enter the email address for the account. Use the wildcard %email% to fetch the email addresses of users mapped to the device in Hexnode UEM. |
Set Up Incoming Emails
| Settings | Description |
|---|---|
| Incoming Mail Server | Enter the IP address or fully qualified domain name (FQDN) of the incoming mail server. |
| Incoming Server Port | Provide the port number of the incoming email server. |
| User Name | Enter the username used to connect to the incoming email server. Use the wildcard %username% to fetch the data dynamically from the UEM console. |
| Authentication Type | Select the authentication type of the incoming mail. The available values are:
|
| Password | If ‘Authentication Type’ is set to any option other than ‘None,’ you must provide a password for authenticating to the incoming email server. |
| Use SSL | Use SSL to establish an encrypted connection between the incoming mail server and the Mac devices. SSL is enabled by default. |
Set up Outgoing Emails
| Settings | Description |
|---|---|
| Outgoing Mail Server | Specify the IP address or fully qualified domain name (FQDN) of the outgoing mail server. |
| Outgoing Server Port | Enter the port number of the outgoing email server. |
| User Name | Provide the username used to connect to the outgoing email server. Use the wildcard %username% for Hexnode UEM to automatically fetch data from the user information. |
| Authentication Type | Select the type of authentication required for the outgoing mail server. You can choose from:
|
| Outgoing Password Same As Incoming
(If ‘Authentication Type’ is set to any option other than ‘None’) |
Specify whether the passwords for the incoming and outgoing emails are the same. If this option is checked, the outgoing ‘Password’ field will be hidden. This option is checked by default. |
| Password
(Available if ‘Outgoing Password Same As Incoming’ is unchecked) |
Enter the password for the outgoing mail server. |
| Use SSL | Use SSL to establish an encrypted connection between the outgoing mail server and the devices. SSL is enabled by default. |
Associate policy with target Mac
If the policy has not been saved,
- Navigate to Policy Targets > +Add Devices.
- Choose the target devices and click Ok. Click Save.
- You can also associate the policy with Device Groups, Users, User Groups, or Domains from the left pane of the Policy Targets tab.
If the policy has been saved,
- Go to the Policies tab and choose the desired policy.
- Click on the Manage drop-down and select Associate Targets.
- Choose the target entities and click Associate.
What happens at the device end?
When the policy is deployed, the email account will get added on the Mail app. The account settings can be found under System Preferences > Internet Accounts.


