Category filter
Manage user accounts on Mac
Effectively managing multiple user accounts on a single device is of utmost importance to fulfilling a company’s various security policies. Even though having multiple users on a single device can help a company allocate its resources more effectively, if not managed properly, it can lead to unauthorized logins and data breaches. Well, now with Hexnode, you can manage all user accounts on your Mac seamlessly. Create an account, change the password, grant a secure token, disable a user or keep track of the local account information, including the last login session.
How to remotely manage local users on Mac?
Hexnode UEM offers you a variety of options to manage local accounts on your Mac remotely.
Sync Local Accounts
This action helps you to sync all the user accounts on your Mac into Hexnode UEM.
- Log in to the Hexnode UEM console.
- Navigate to the Manage tab and click on the name of the macOS device whose local accounts you want to display.
- Click on Actions and choose Sync Local Accounts.
- Now click on the Local Accounts tab.
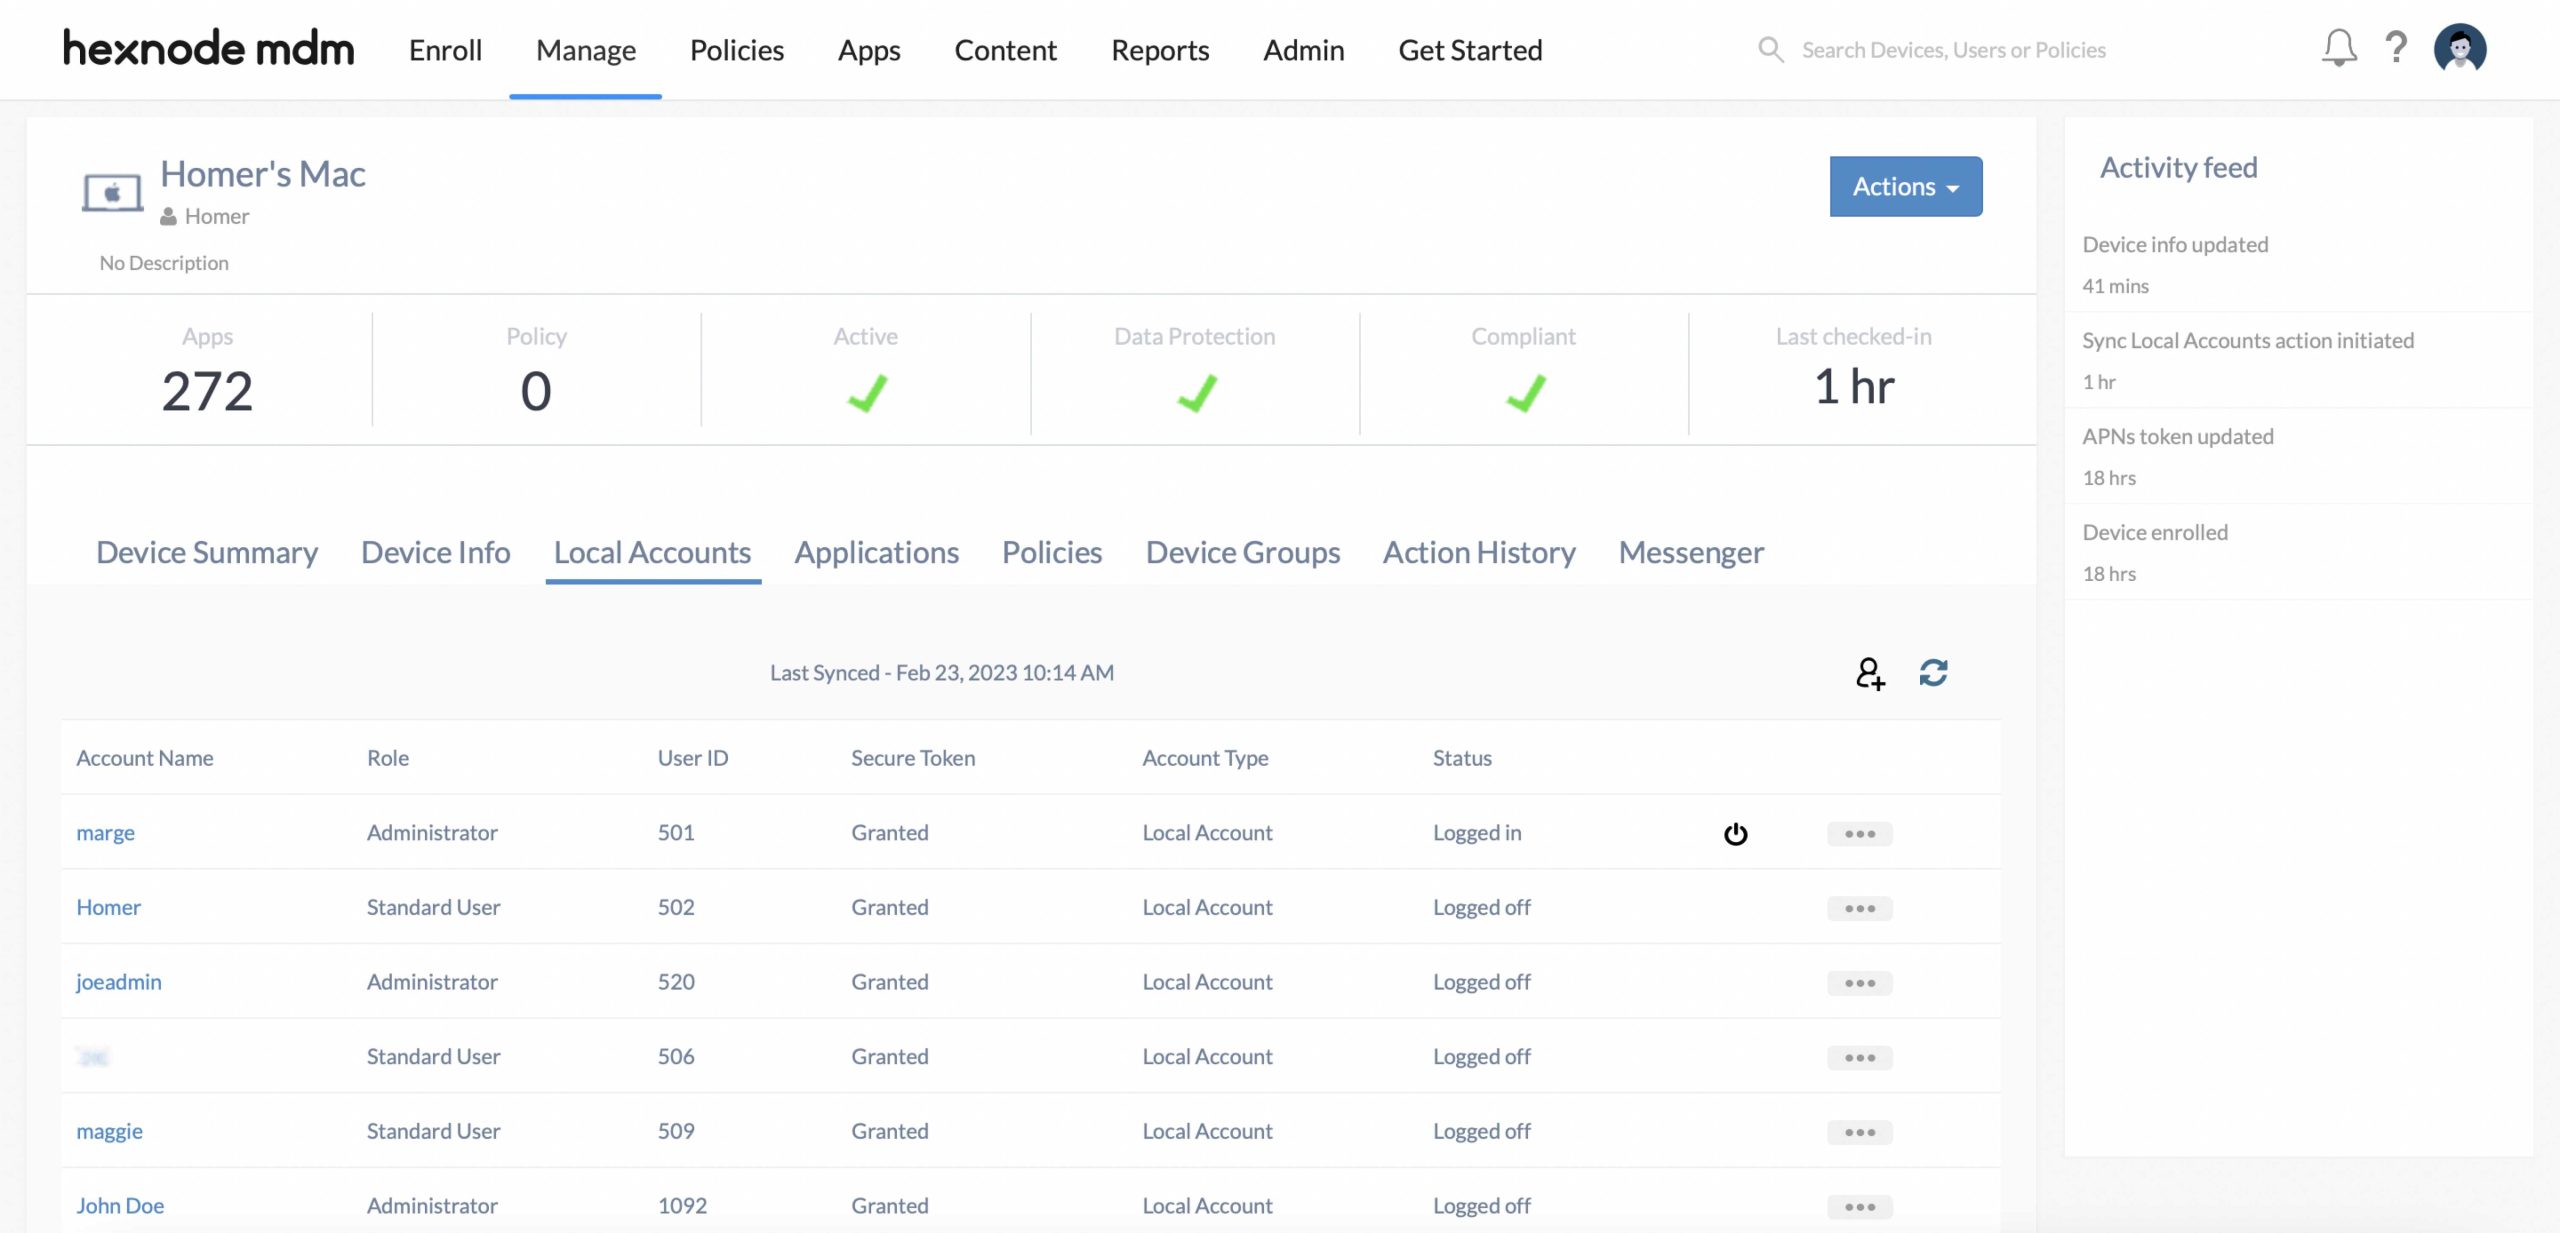
Here you can see a list of all the active users on the macOS device, along with other parameters such as:
- Role: displays whether a user is an Administrator or a Standard user.
- User ID: displays the numerical ID of a user.
- Secure Token: displays whether the Secure Token has been granted to the user.
- Account Type: displays whether the user is a local user or network user.
- Status: displays whether the user is currently logged in or logged out.
You can also view inactive or deleted users by clicking on the ‘Show Inactive/Deleted Users’ button situated at the bottom of the user accounts list.
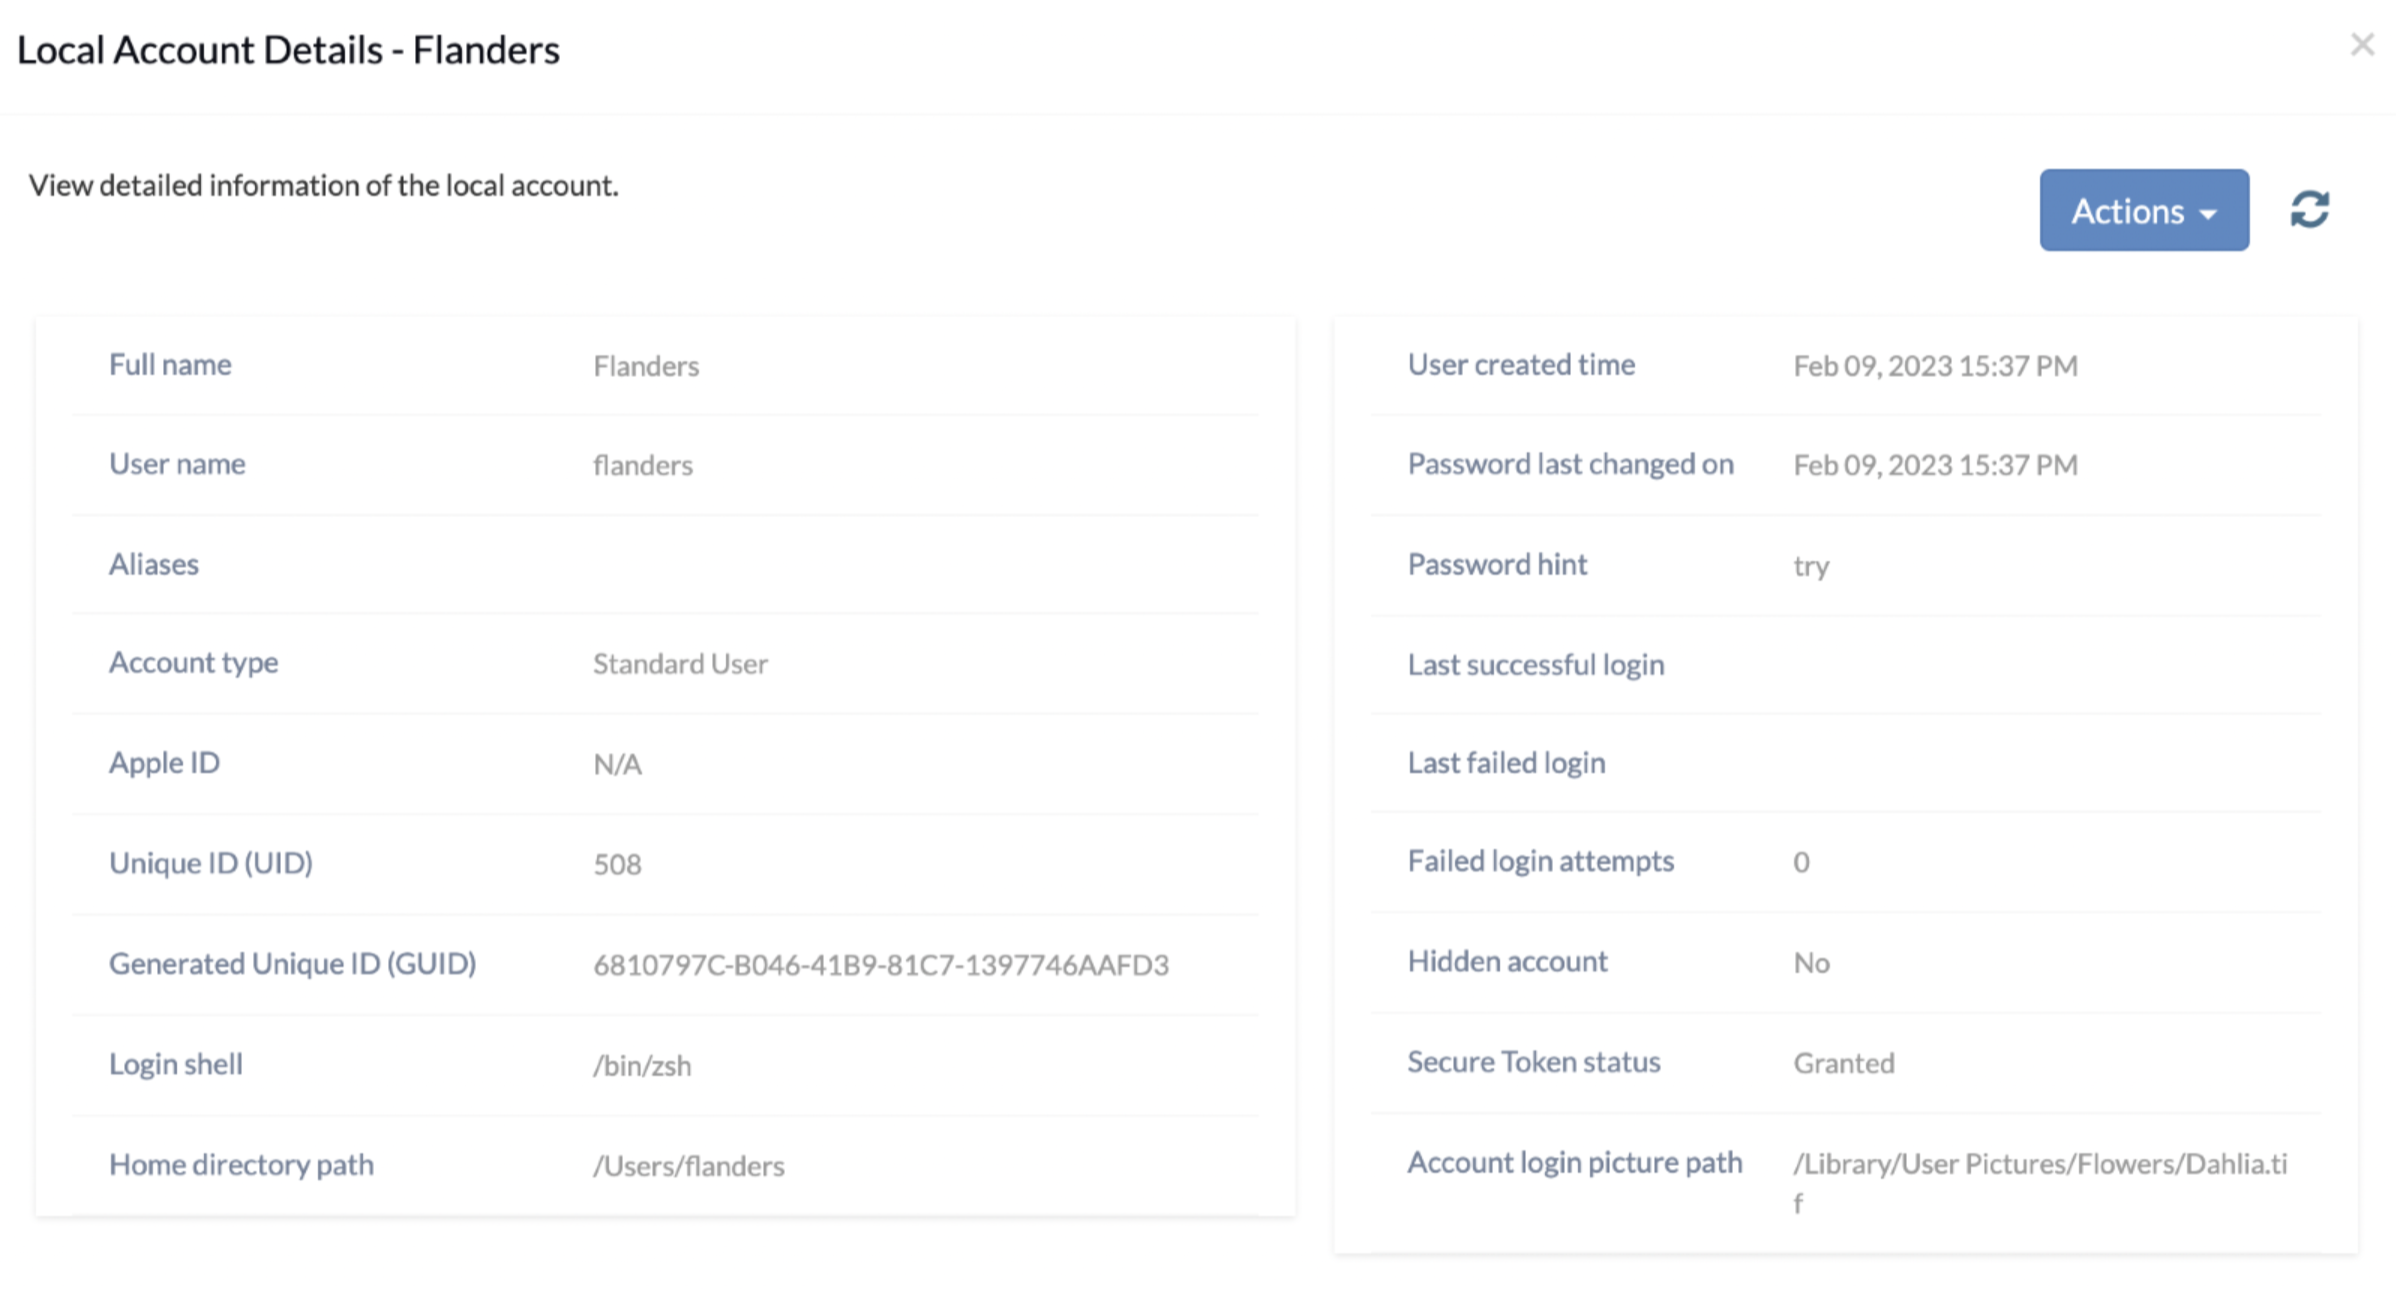
Clicking on the name of a user will give you additional details like:
- Full name: displays the full name of the user.
- User name: displays the username of the user.
- Aliases: displays the short-hand version of the user’s account name that can be used to sign in.
- Account type: specifies whether the user is an Admin user or Standard user.
- Apple ID: displays the Apple ID associated with the device.
- Unique ID (UID): displays the unique ID assigned to the user by the device.
- Generated Unique ID (GUID): displays a 128-bit identifier assigned to the Mac.
- Login shell: displays the details of the Login shell on the device.
- Home directory path: displays the location of the home folder of the user.
- User created time: displays the date and time when the user was created.
- Password last changed on: displays the date and time when the account password was last modified.
- Password hint: displays the hint of the password of the user.
- Last successful login: displays the date and time of the last successful login of the user.
- Last failed login: displays the date and time of the last unsuccessful login of the user.
- Failed login attempts: displays the number of failed login attempts that occurred after the last successful login.
- Hidden account: displays whether the account is hidden on the Mac.
- Secure Token status: displays whether the Secure Token has been granted to the user.
- Account login picture path: displays the path of the user account image.
Create User Account
This action helps you to create a new local user account on your Mac device.
- Log in to your Hexnode portal.
- Navigate to Manage > Devices.
- Select the macOS device to which you want to add a new user.
- Click the Local Accounts tab and click the Add User icon.
- A dialog box opens up. Here you can configure various settings, such as:
- Account Name
- Password
- Password Hint
- Account Type
- Secure Token
- Aliases
- Hide account from Login Window and Users & Groups
Take a look at our detailed guide on how to create user accounts on macOS devices.
OR
- Navigate to Manage > Devices.
- Select the macOS device to which you want to add a new user.
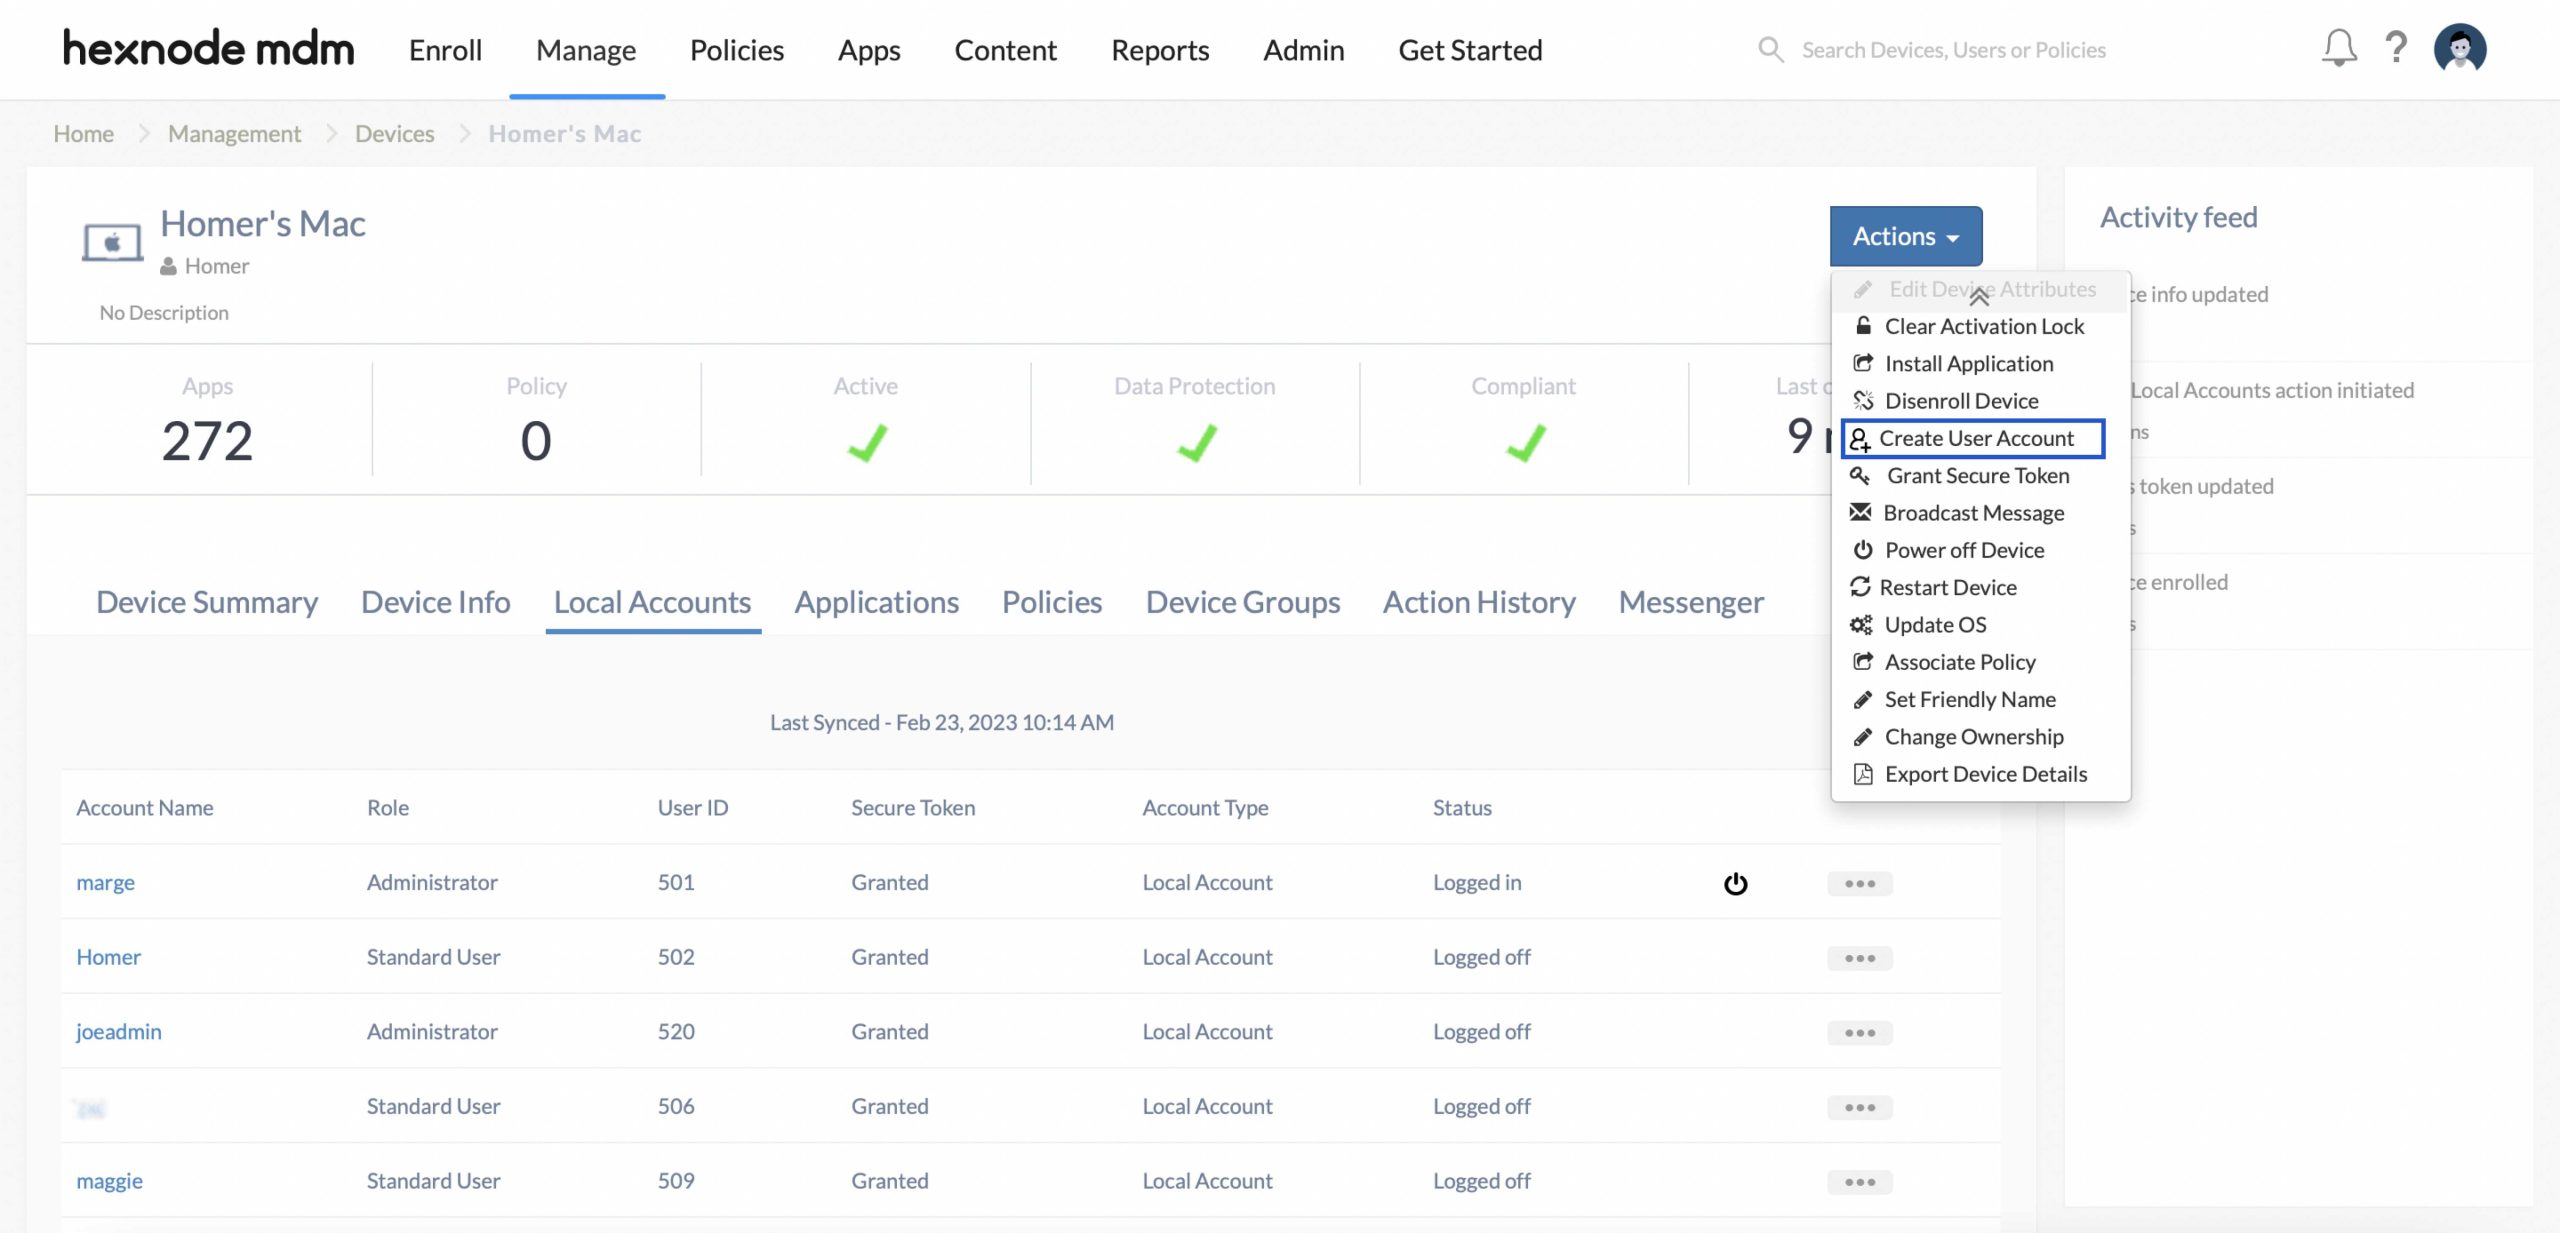
- Click Actions > Create User Account.
- Configure various settings as mentioned above.
Grant Secure Token
This action will grant the Secure Token to a user on your Mac.
- Navigate to Manage > Devices.
- Select the macOS device to whose user account(s) you want to grant the Secure Token.
- Click the Local Accounts tab.
- Locate the user to whom you want to grant the Secure Token and check if the token has already been granted under the Secure Token column.
- If not, click on the horizontal three-dot menu and choose the Grant Secure Token option.
- Under the Administrator account details, enter the credentials of the admin user account, for which the secure token has already been enabled.
- Under the Target account details, enter the password of the user account for which the Secure Token is to be enabled. You can make use of wildcards to automatically populate the corresponding fields from the data provided during device enrollment.
- Click Proceed in the confirmation dialog box.
- Click Confirm to grant the Secure Token to the user.
- Navigate to Manage > Devices.
- Select the macOS device whose user account you want to grant the Secure Token.
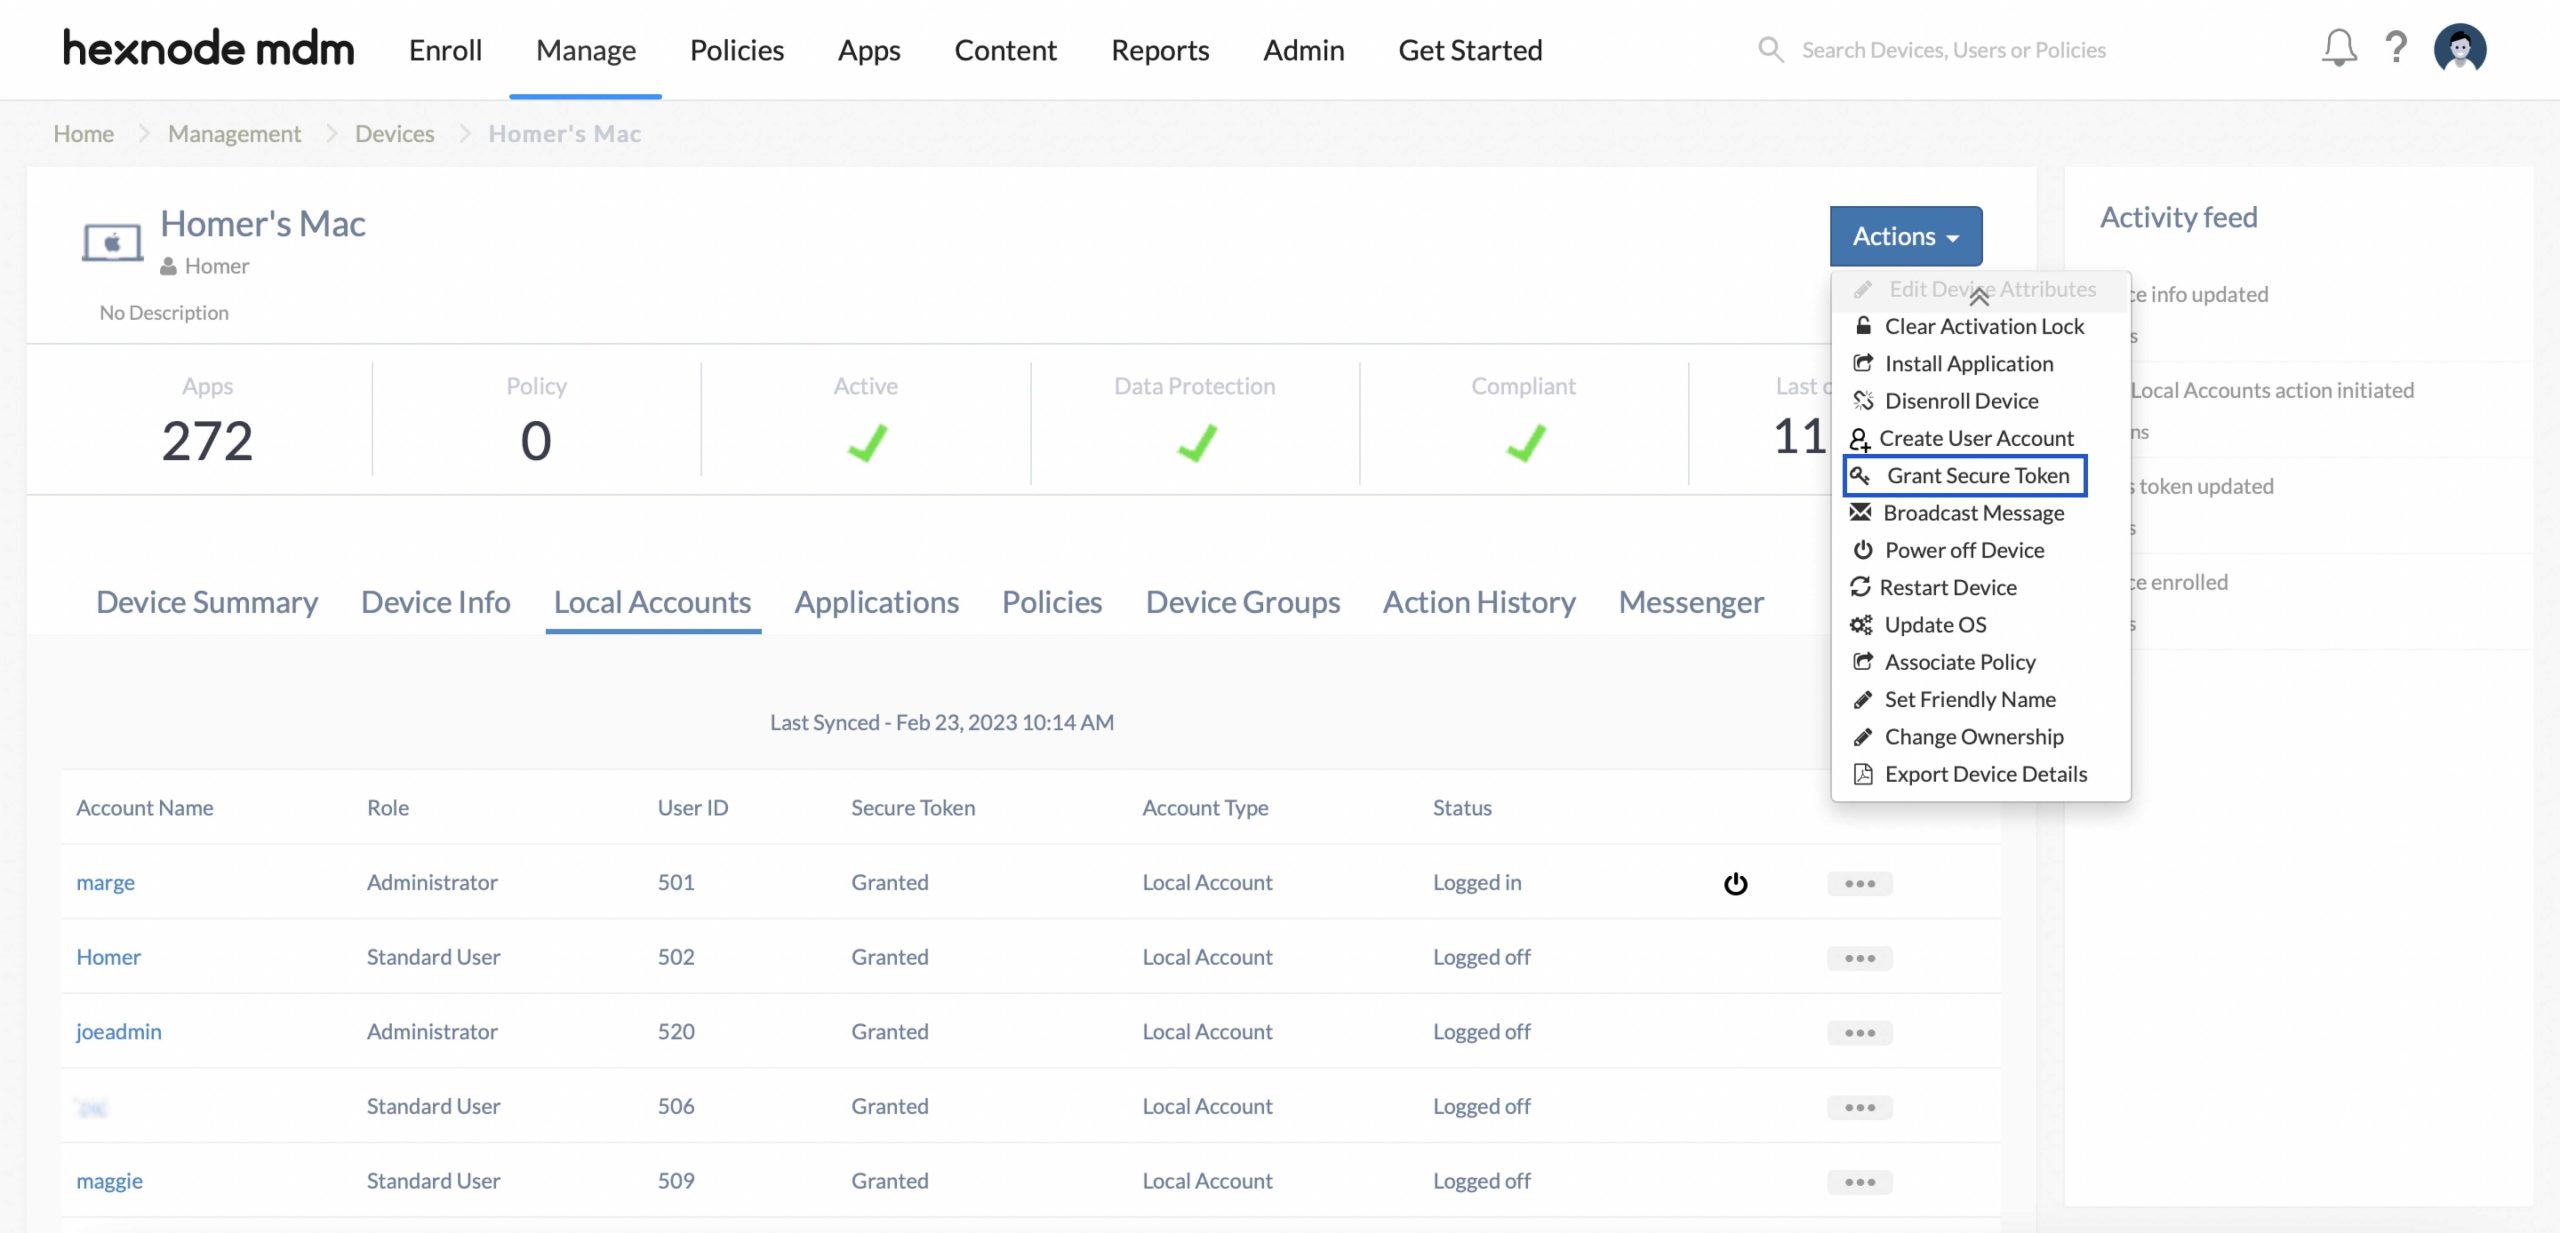
- Click the Actions tab.
- Choose Grant Secure Token.
- Under the Administrator account details, enter the credentials of the admin user account, for which the secure token has already been enabled.
- Under the Target account details, enter the credentials of the user account for which the Secure Token is to be enabled. You can make use of wildcards to automatically populate the corresponding fields from the data provided during device enrollment.
- Click on Grant Token.
Refer to this doc for more detailed information on how to grant a Secure Token to a user account on Mac.
Force Log Out User
This action will log the user out of their currently logged-in session.
- Navigate to Manage > Devices.
- Select the macOS device whose user account you want to force log out.
- Click the Local Accounts tab.
- Click the Power button icon corresponding to the user that you want to force log out which is situated to the left of the horizontal three-button menu.
- Click Proceed in the confirmation dialog box.
- Click Confirm to force log out the user.
- Navigate to Manage > Devices.
- Select the macOS device whose user account(s) you want to force log out.
- Click the Local Accounts tab.
- Click the name of the user that you want to force log out under the Local Accounts tab.
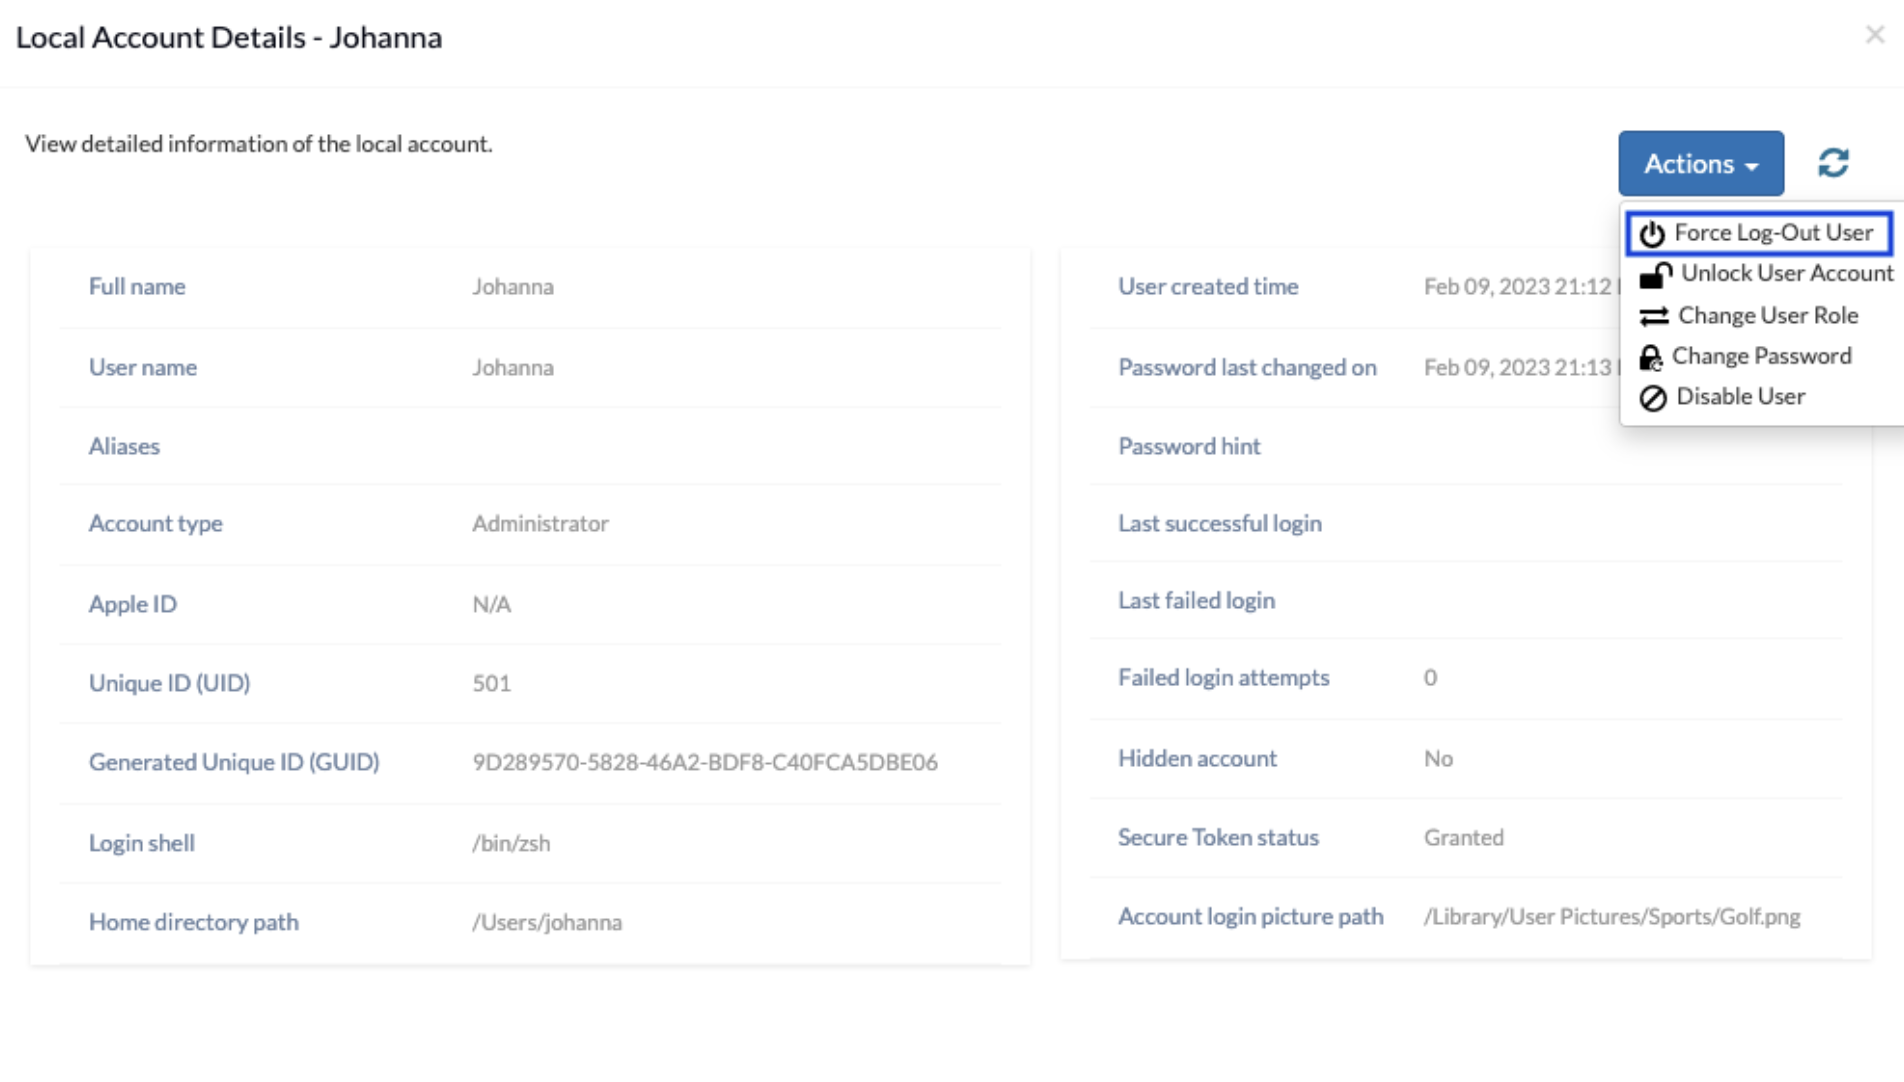
- Click the Actions button and choose the Force Log Out User option.
- Click Confirm to force log out the user.
Unlock User Account
This action helps you unlock user accounts that had been locked due to many failed password attempts.
- Navigate to Manage > Devices.
- Select the macOS device whose user account(s) you want to unlock.
- Click the Local Accounts tab.
- Click the name of the user that you want to unlock.
- Click Actions and choose the Unlock User Account option.
- Click Proceed in the confirmation dialog box.
- Click Confirm to unlock the user.
- Navigate to Manage > Devices.
- Select the macOS device whose user account(s) you want to unlock.
- Click the Local Accounts tab.
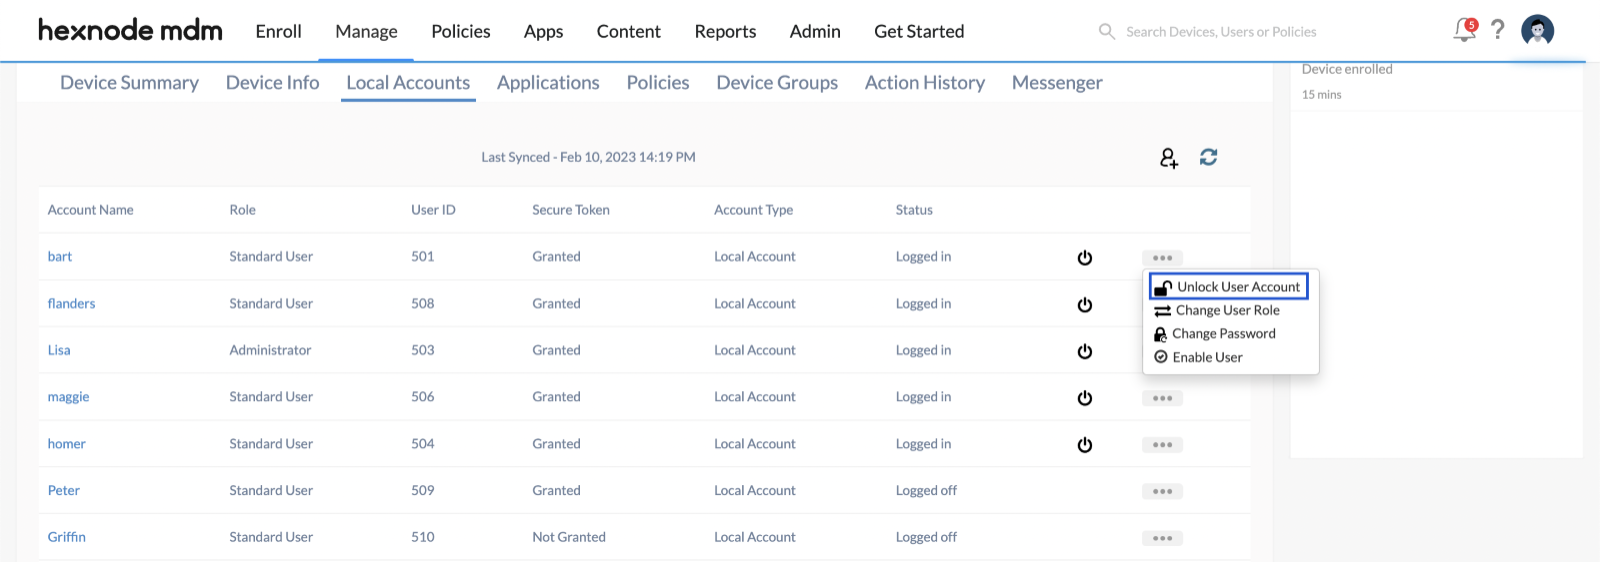
- Click the horizontal three-dot menu corresponding to the respective user.
- Click the Unlock User Account option from the drop-down menu.
- Click Proceed in the confirmation dialog box.
- Click Confirm to unlock the user.
Change User Role
This action helps you change the role of a user to an Administrator or a Standard user.
- Navigate to Manage > Devices.
- Select the macOS device whose user account(s) role you want to change.
- Click the Local Accounts tab.
- Click on the name of the user for whom you want to change the role.
- Click Actions and choose the Change User Role option.
- In the Change User Account Role page, the new role to be assigned for the user will be mentioned. You can also configure whether the change in user role is temporary by enabling the Change role temporarily checkbox. Select the duration for the temporary role change from the drop-down menu next to the Change role for option. Choose 30 minutes, 1 hour, 2 hours, 4 hours, or 12 hours. The user role automatically reverts after the specified duration. Click on Change.
- Click Confirm to change the user role.
- Navigate to Manage > Devices.
- Select the macOS device whose user account(s) role you want to change.
- Click the Local Accounts tab.
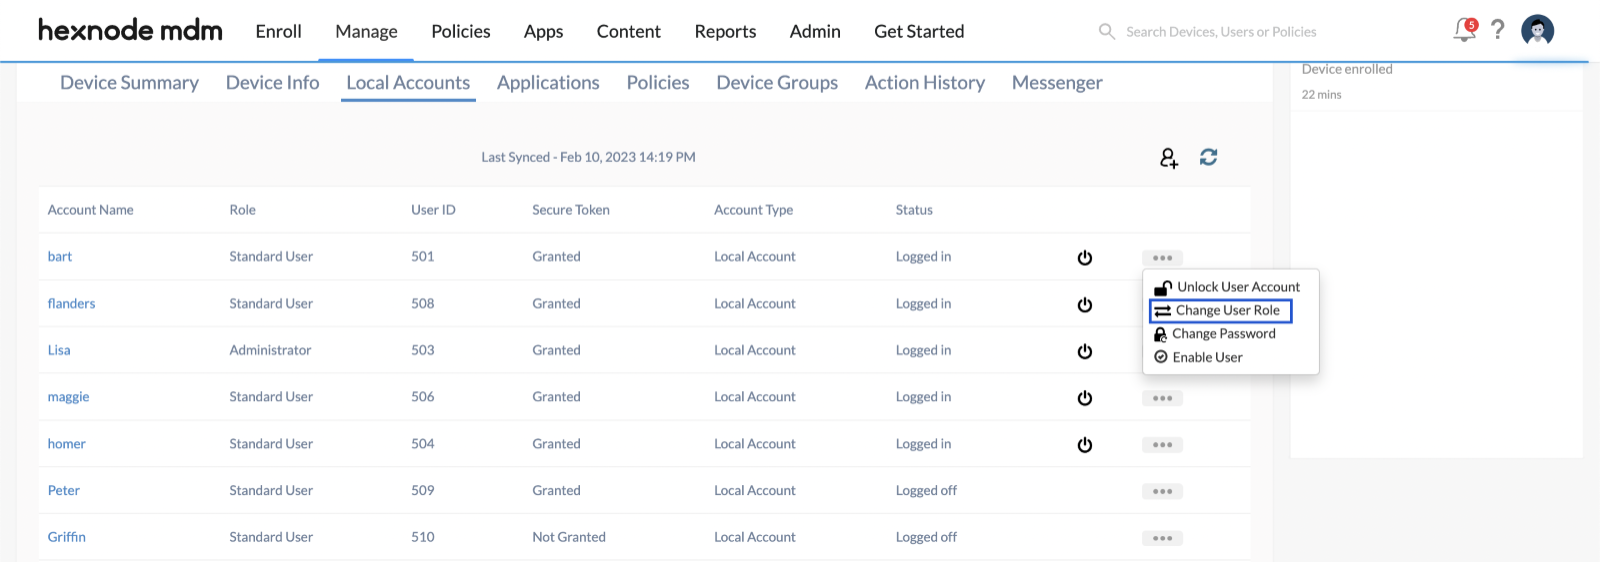
- Click the horizontal three-dot menu corresponding to the respective user.
- Click the Change User Role option.
- In the Change User Account Role page, the new role to be assigned for the user will be mentioned. You can also configure whether the change in user role is temporary by enabling the Change role temporarily checkbox. Select the duration for the temporary role change from the drop-down menu next to the Change role for option. Choose 30 minutes, 1 hour, 2 hours, 4 hours, or 12 hours. The user role automatically reverts after the specified duration. Click on Change.
- Click Confirm to change the user role.
Change Password
This action will help you change the password for the user. You will require the admin user’s credentials to execute this action.
- Navigate to Manage > Devices.
- Select the macOS device whose user account(s) password you want to change.
- Click the Local Accounts tab.
- Click the name of the user to which you want to change the password.
- Click Actions and choose the Change Password option.
- Provide the username and password of an admin user under Administrator account credentials.
- Type in your new password and password hint under Target account details and click Proceed.
- Click Confirm to change the password of the user.
OR
- Navigate to Manage > Devices.
- Select the macOS device whose user account(s) password you want to change.
- Click the Local Accounts tab.
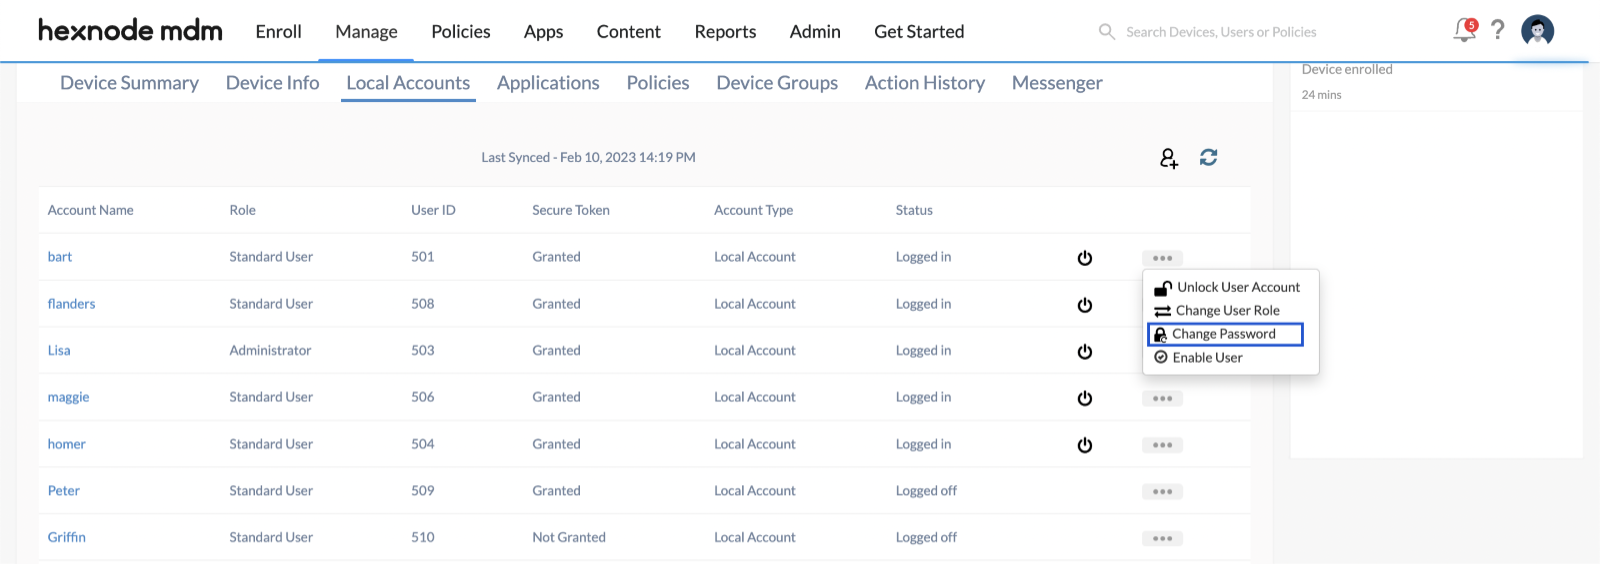
- Click the horizontal three-dot menu corresponding to the respective user.
- Choose the Change Password option from the drop-down menu.
- Provide the username and password of an admin user under Administrator account credentials.
- Type in the new password and password hint for the target user under Target account details and click Proceed.
- Click Confirm to change the password of the user.
Disable User
This action helps you disable a user temporarily from accessing the device.
- Navigate to Manage > Devices.
- Select the macOS device whose user account(s) you want to disable.
- Click the Local Accounts tab.
- Click on the name of the user that you want to disable.
- Click Actions and choose the Disable User option.
- Click Proceed in the confirmation dialog box.
- Click Confirm to disable the user.
- Navigate to Manage > Devices.
- Select the macOS device whose user account(s) you want to disable.
- Click the Local Accounts tab.
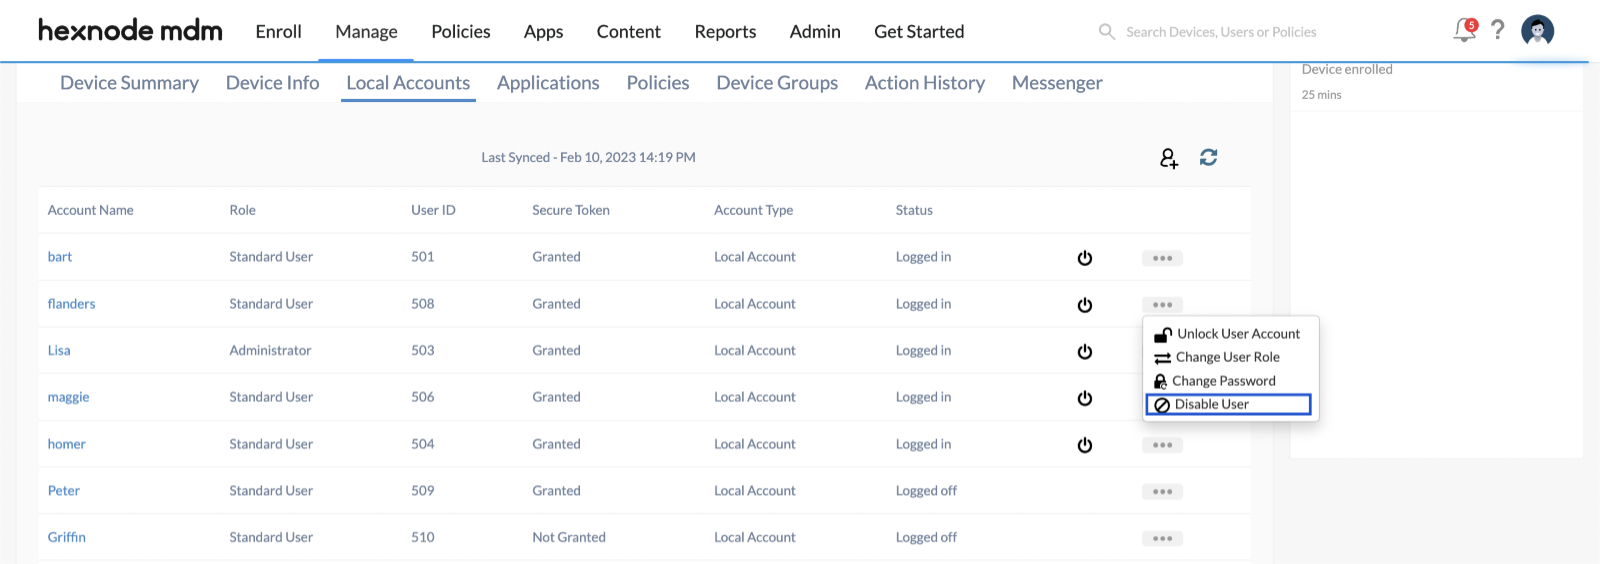
- Click the horizontal three-dot menu corresponding to the respective user.
- Click the Disable User option from the drop-down menu.
- Click Proceed in the confirmation dialog box.
- Click Confirm to disable the user.
A disabled user can access their device only if the IT Admin enables them from the portal.
Enable User
This action helps you to enable a user account that is disabled using the Disable User action.
- Navigate to Manage > Devices.
- Select the macOS device whose user account(s) you want to enable.
- Click the Local Accounts tab.
- Click on the name of the user that you want to enable.
- Click Actions and choose the Enable User option.
- Click Proceed in the confirmation dialog box.
- Click Confirm to enable the user.
OR
- Navigate to Manage > Devices.
- Select the macOS device whose user account(s) you want to enable.
- Click the Local Accounts tab.
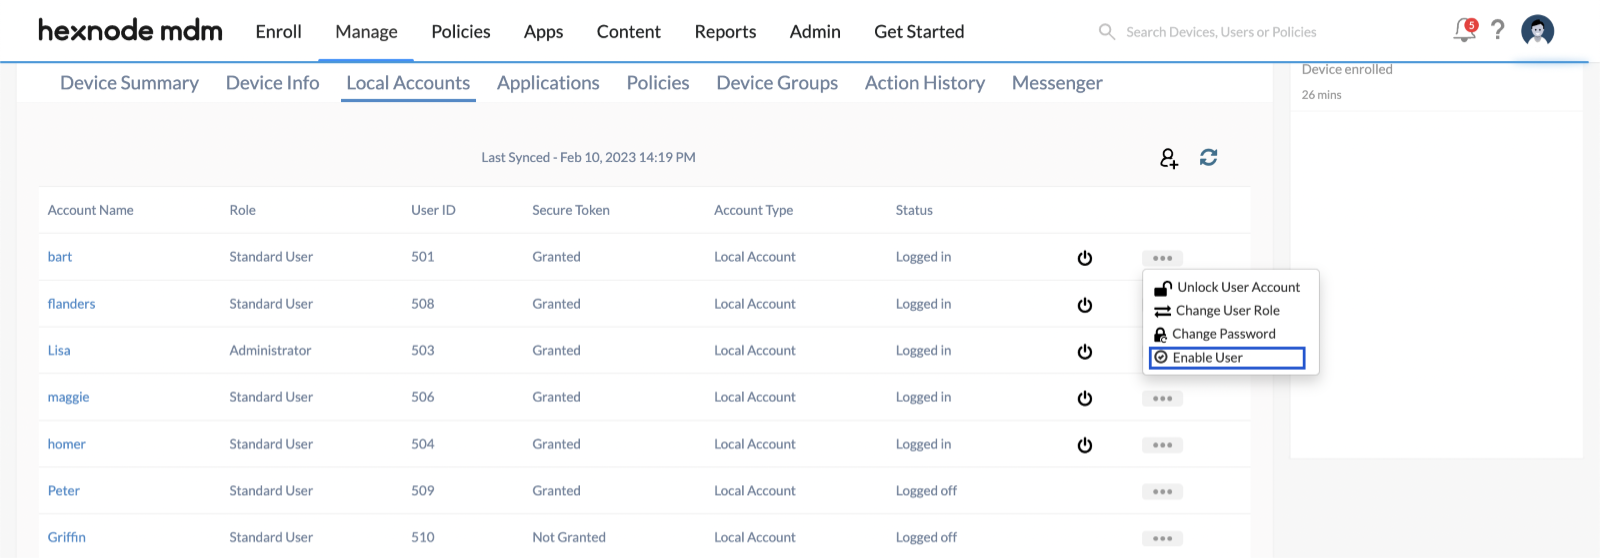
- Click the horizontal three-dot menu corresponding to the respective user.
- Click the Enable User option from the drop-down menu.
- Click Proceed in the confirmation dialog box.
- Click Confirm to enable the user.
Delete User
This action helps you delete a user on the device.
- Navigate to Manage > Devices.
- Select the macOS device whose user account(s) you want to delete.
- Click the Local Accounts tab.
- Click on the name of the user that you want to delete.
- Click Actions and choose the Delete User option.
- Click Proceed in the confirmation dialog box.
- Click Confirm to delete the user.
OR
- Navigate to Manage > Devices.
- Select the macOS device whose user account(s) you want to delete.
- Click the Local Accounts tab.
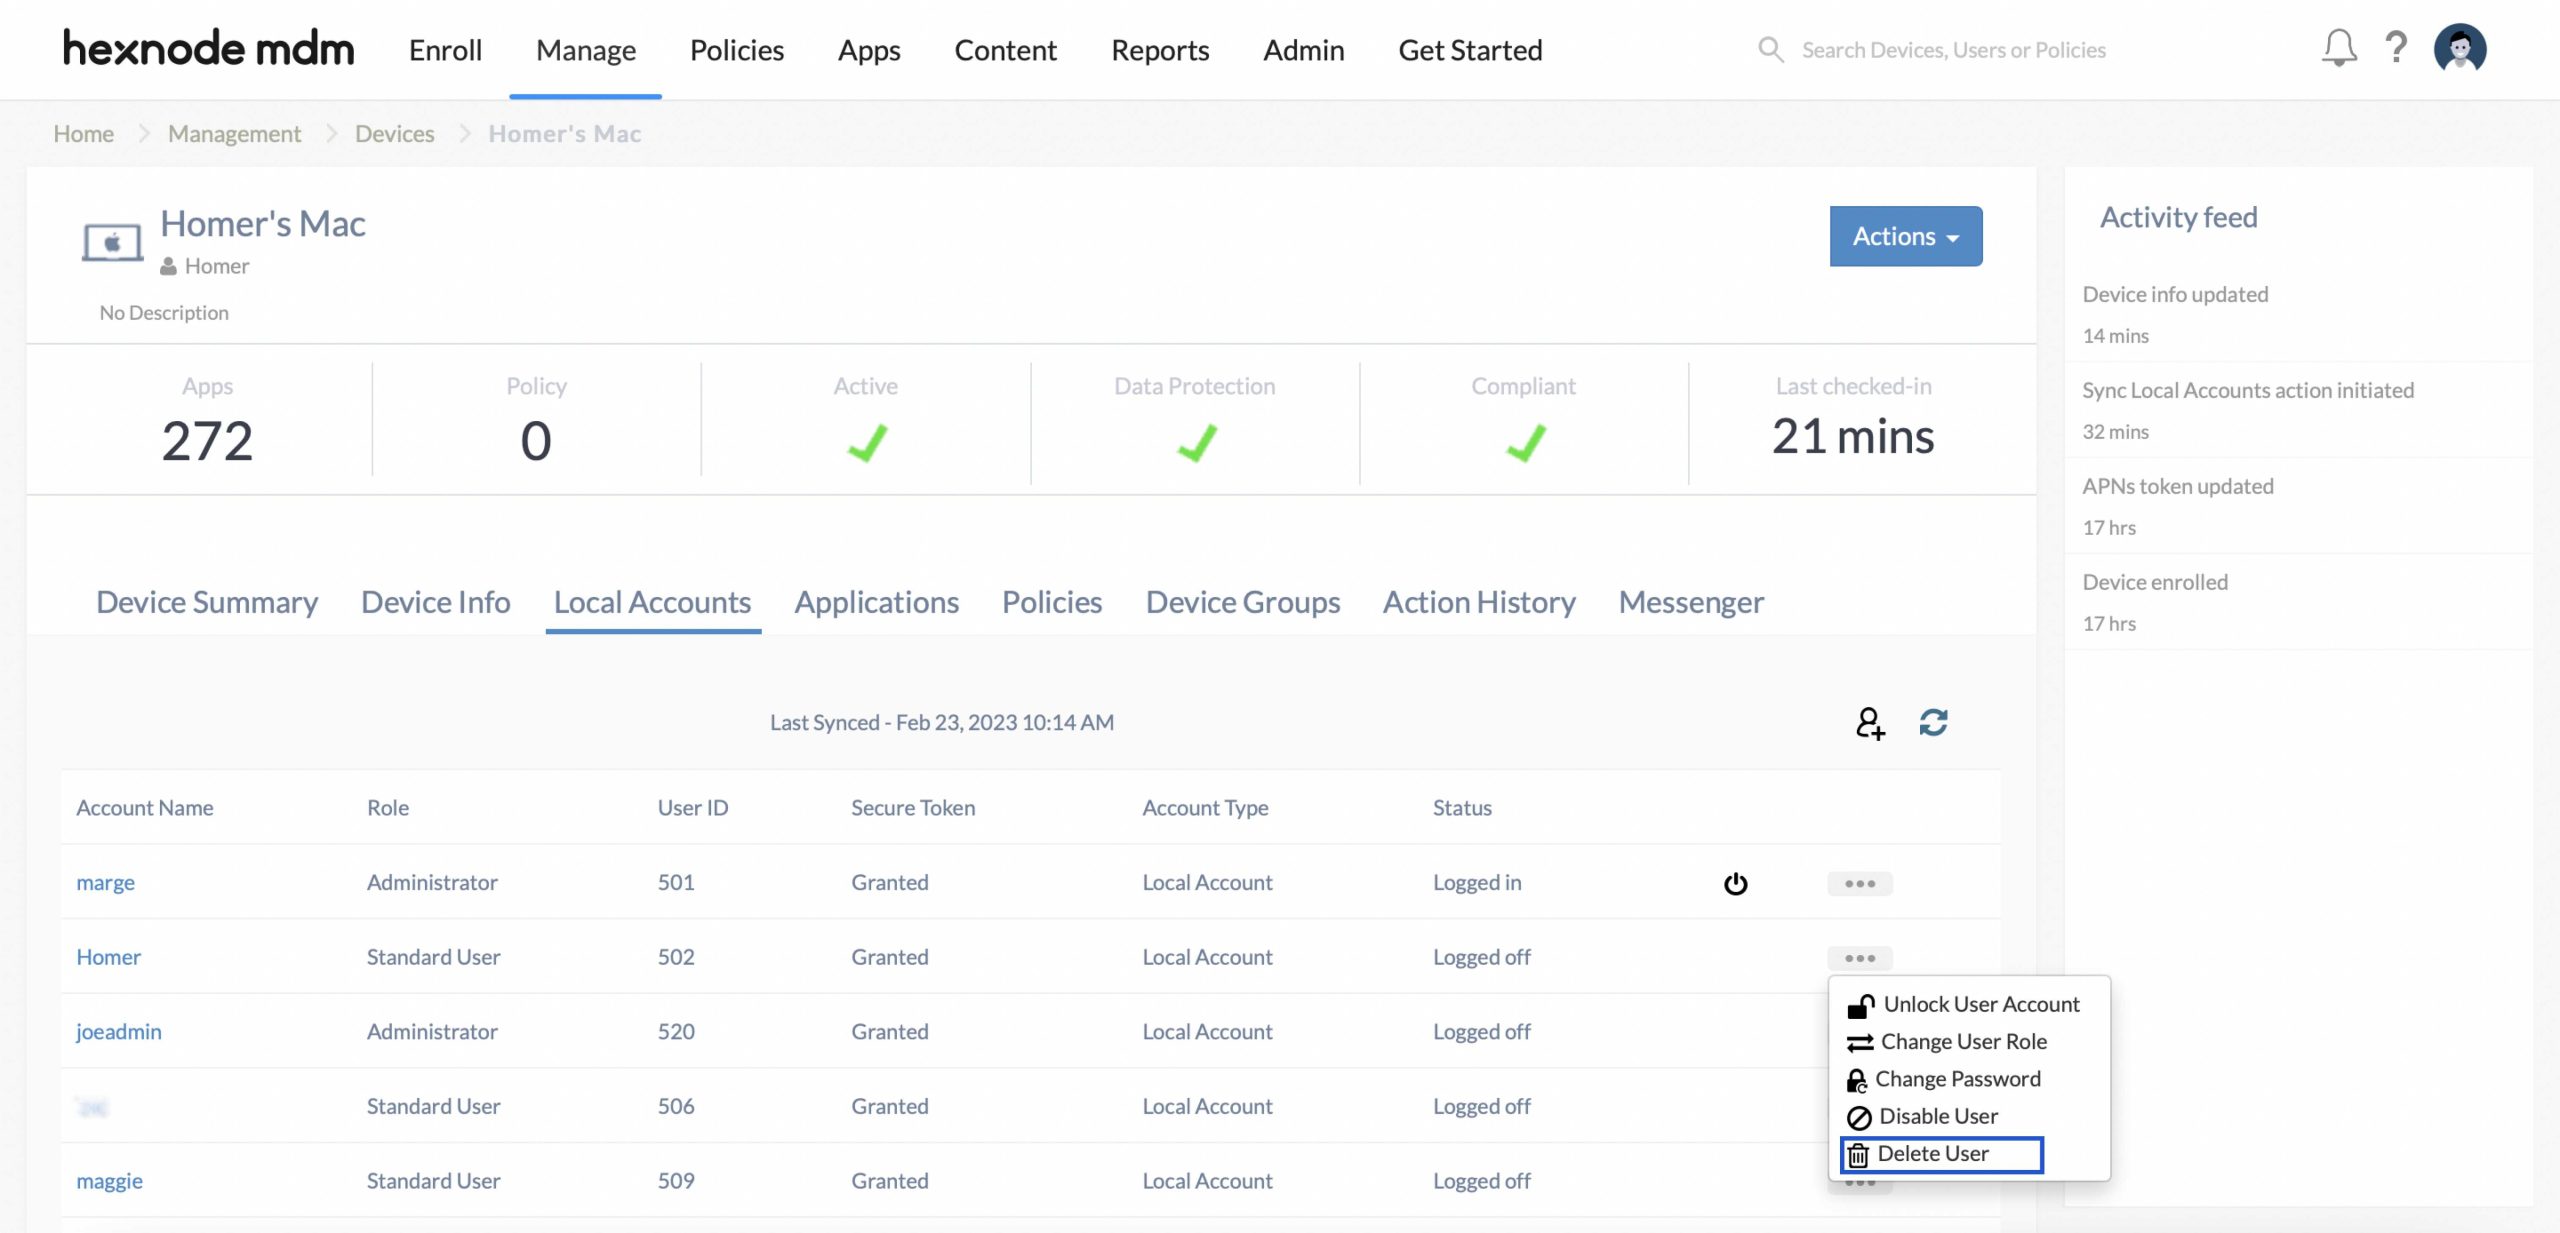
- Click the horizontal three-dot menu corresponding to the respective user.
- Click the Delete User option from the drop-down menu.
- Click Proceed in the confirmation dialog box.
- Click Confirm to delete the user.
Report of Local Accounts on macOS devices
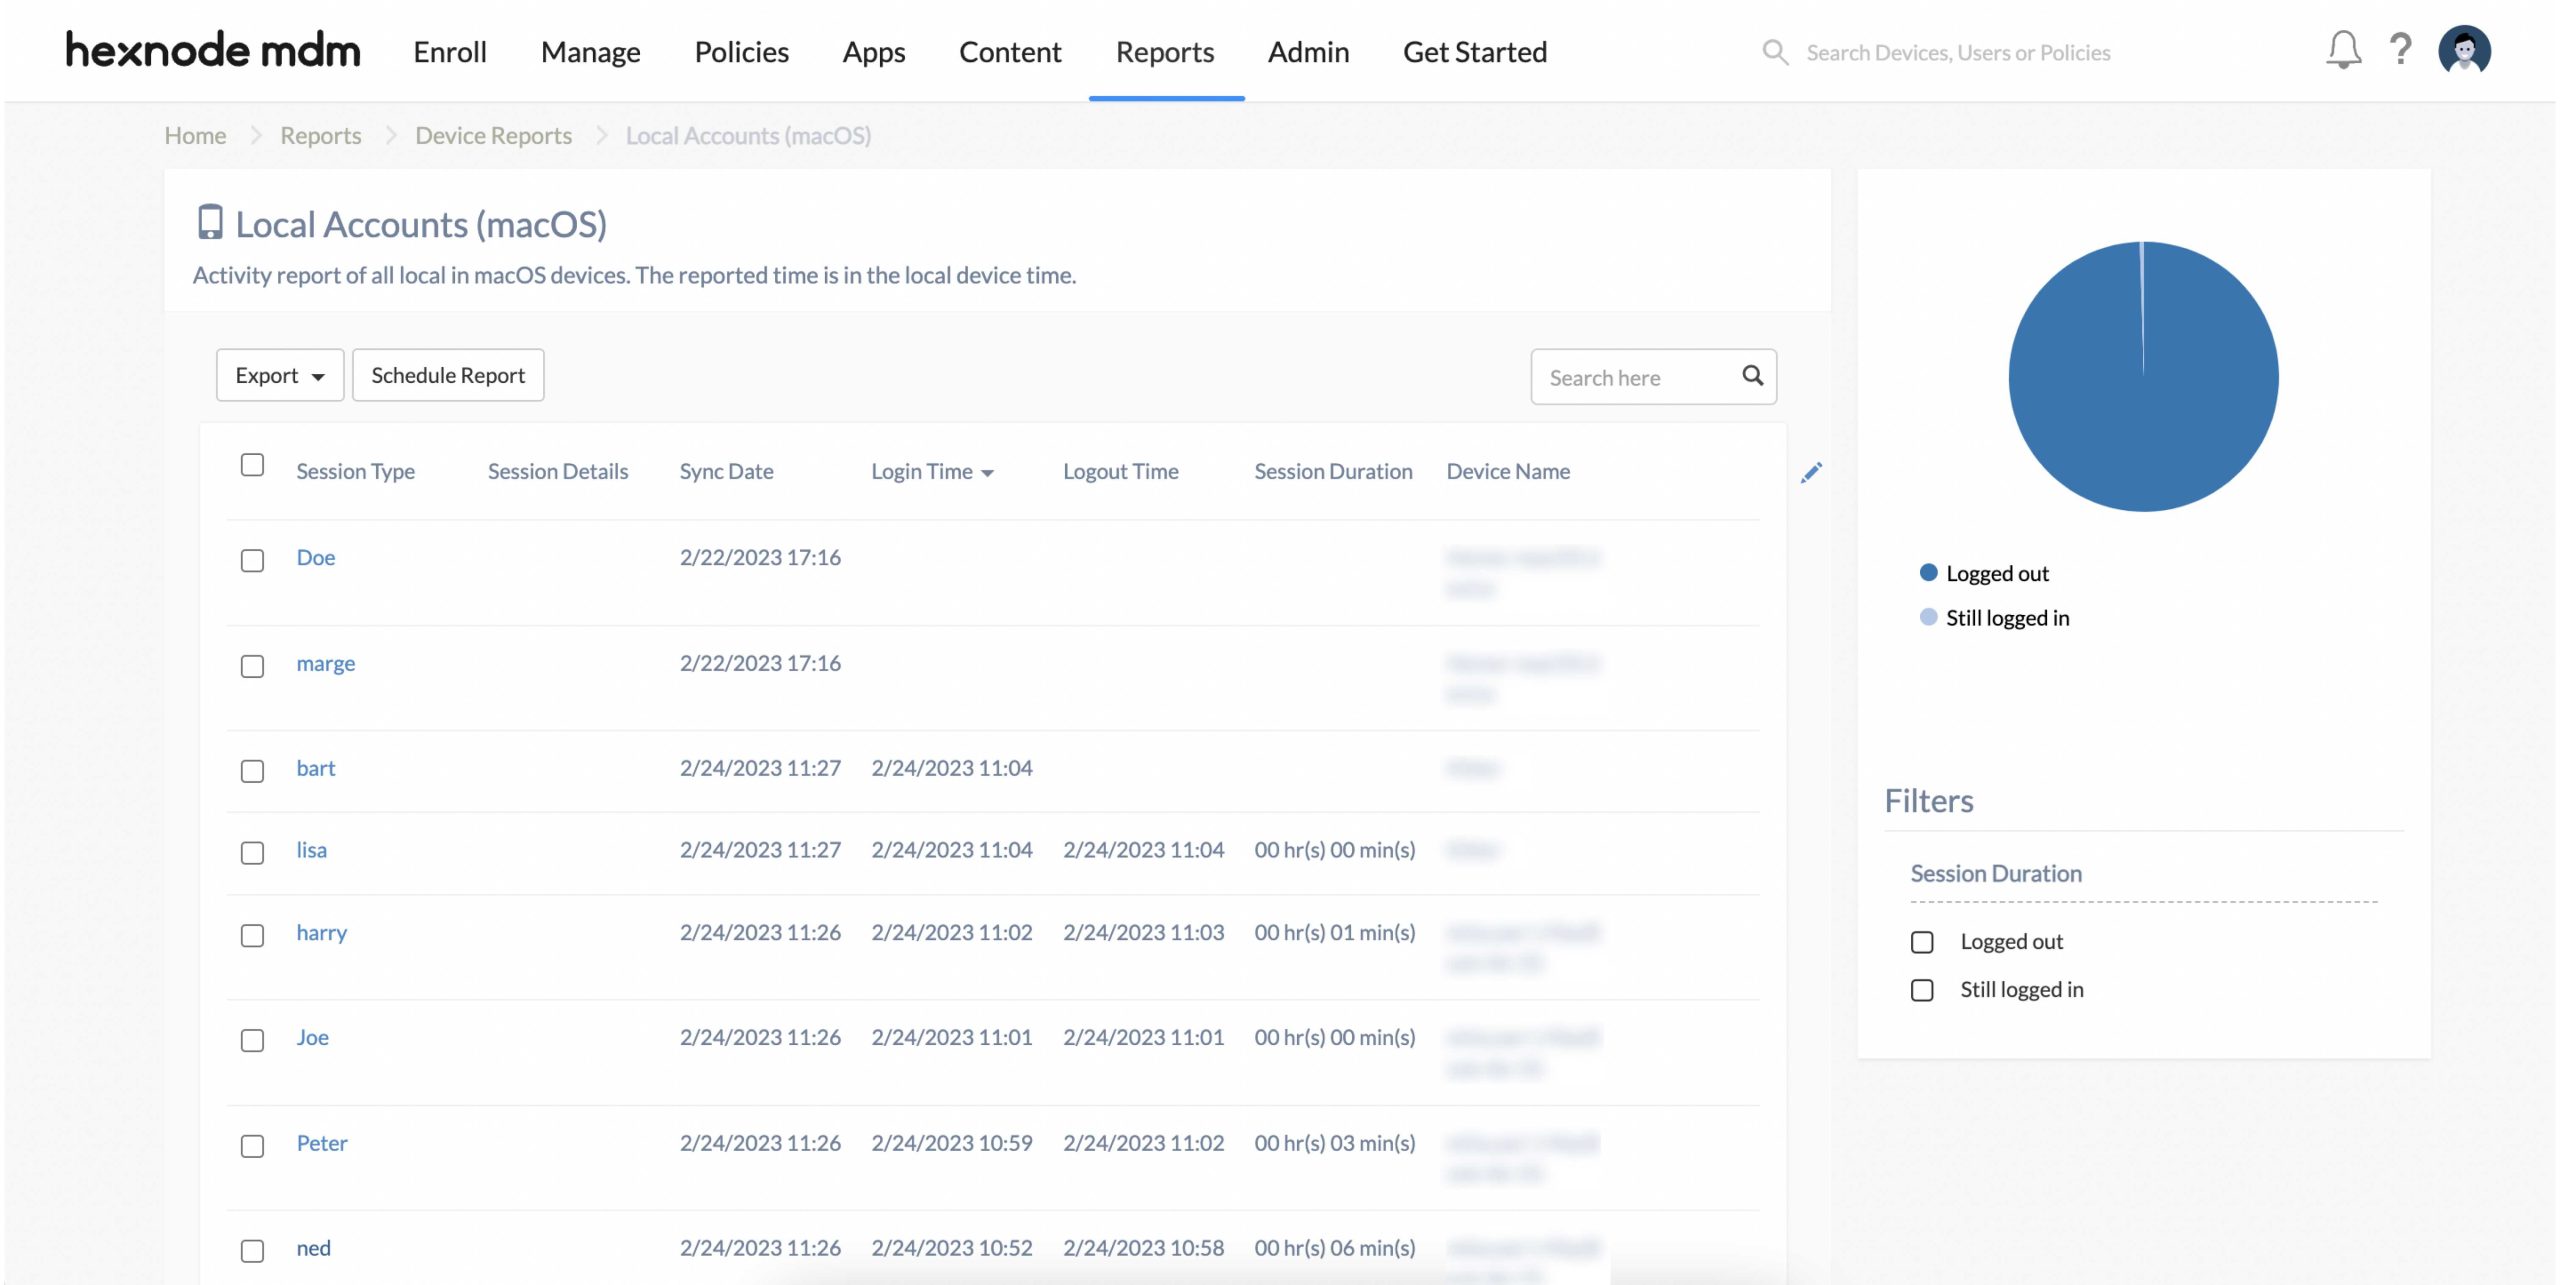
Hexnode easily enables you to fetch a report detailing all the user accounts on the different macOS devices enrolled in Hexnode UEM. It gives you insights on the session type, sync date, login and logout time, session duration, and much more about each local user account on your macOS device. You can get this report by navigating to Reports > Device Reports > Local Accounts (macOS).
