Category filter
Remove Apps from Windows Devices
Removing unused and unwanted applications from devices would help you save hard drive space, increase speed, enhance security and improve the overall device performance. With Hexnode UEM, you can uninstall apps from Windows devices, remotely.
Remove apps from devices via ‘Uninstall Application’ action
Follow the steps given below to uninstall an app from one or more devices using Hexnode UEM.
- Navigate to Manage > Devices.
- Identify and choose the devices from which you want to uninstall the app.
- Click on Actions > Uninstall Application.
- From the Uninstall Applications window, choose Windows as the platform, and then navigate to either the Select Apps tab or the Advanced Configurations tab.
- If the Select Apps tab is selected,
- Choose the apps you want to uninstall and click Next.
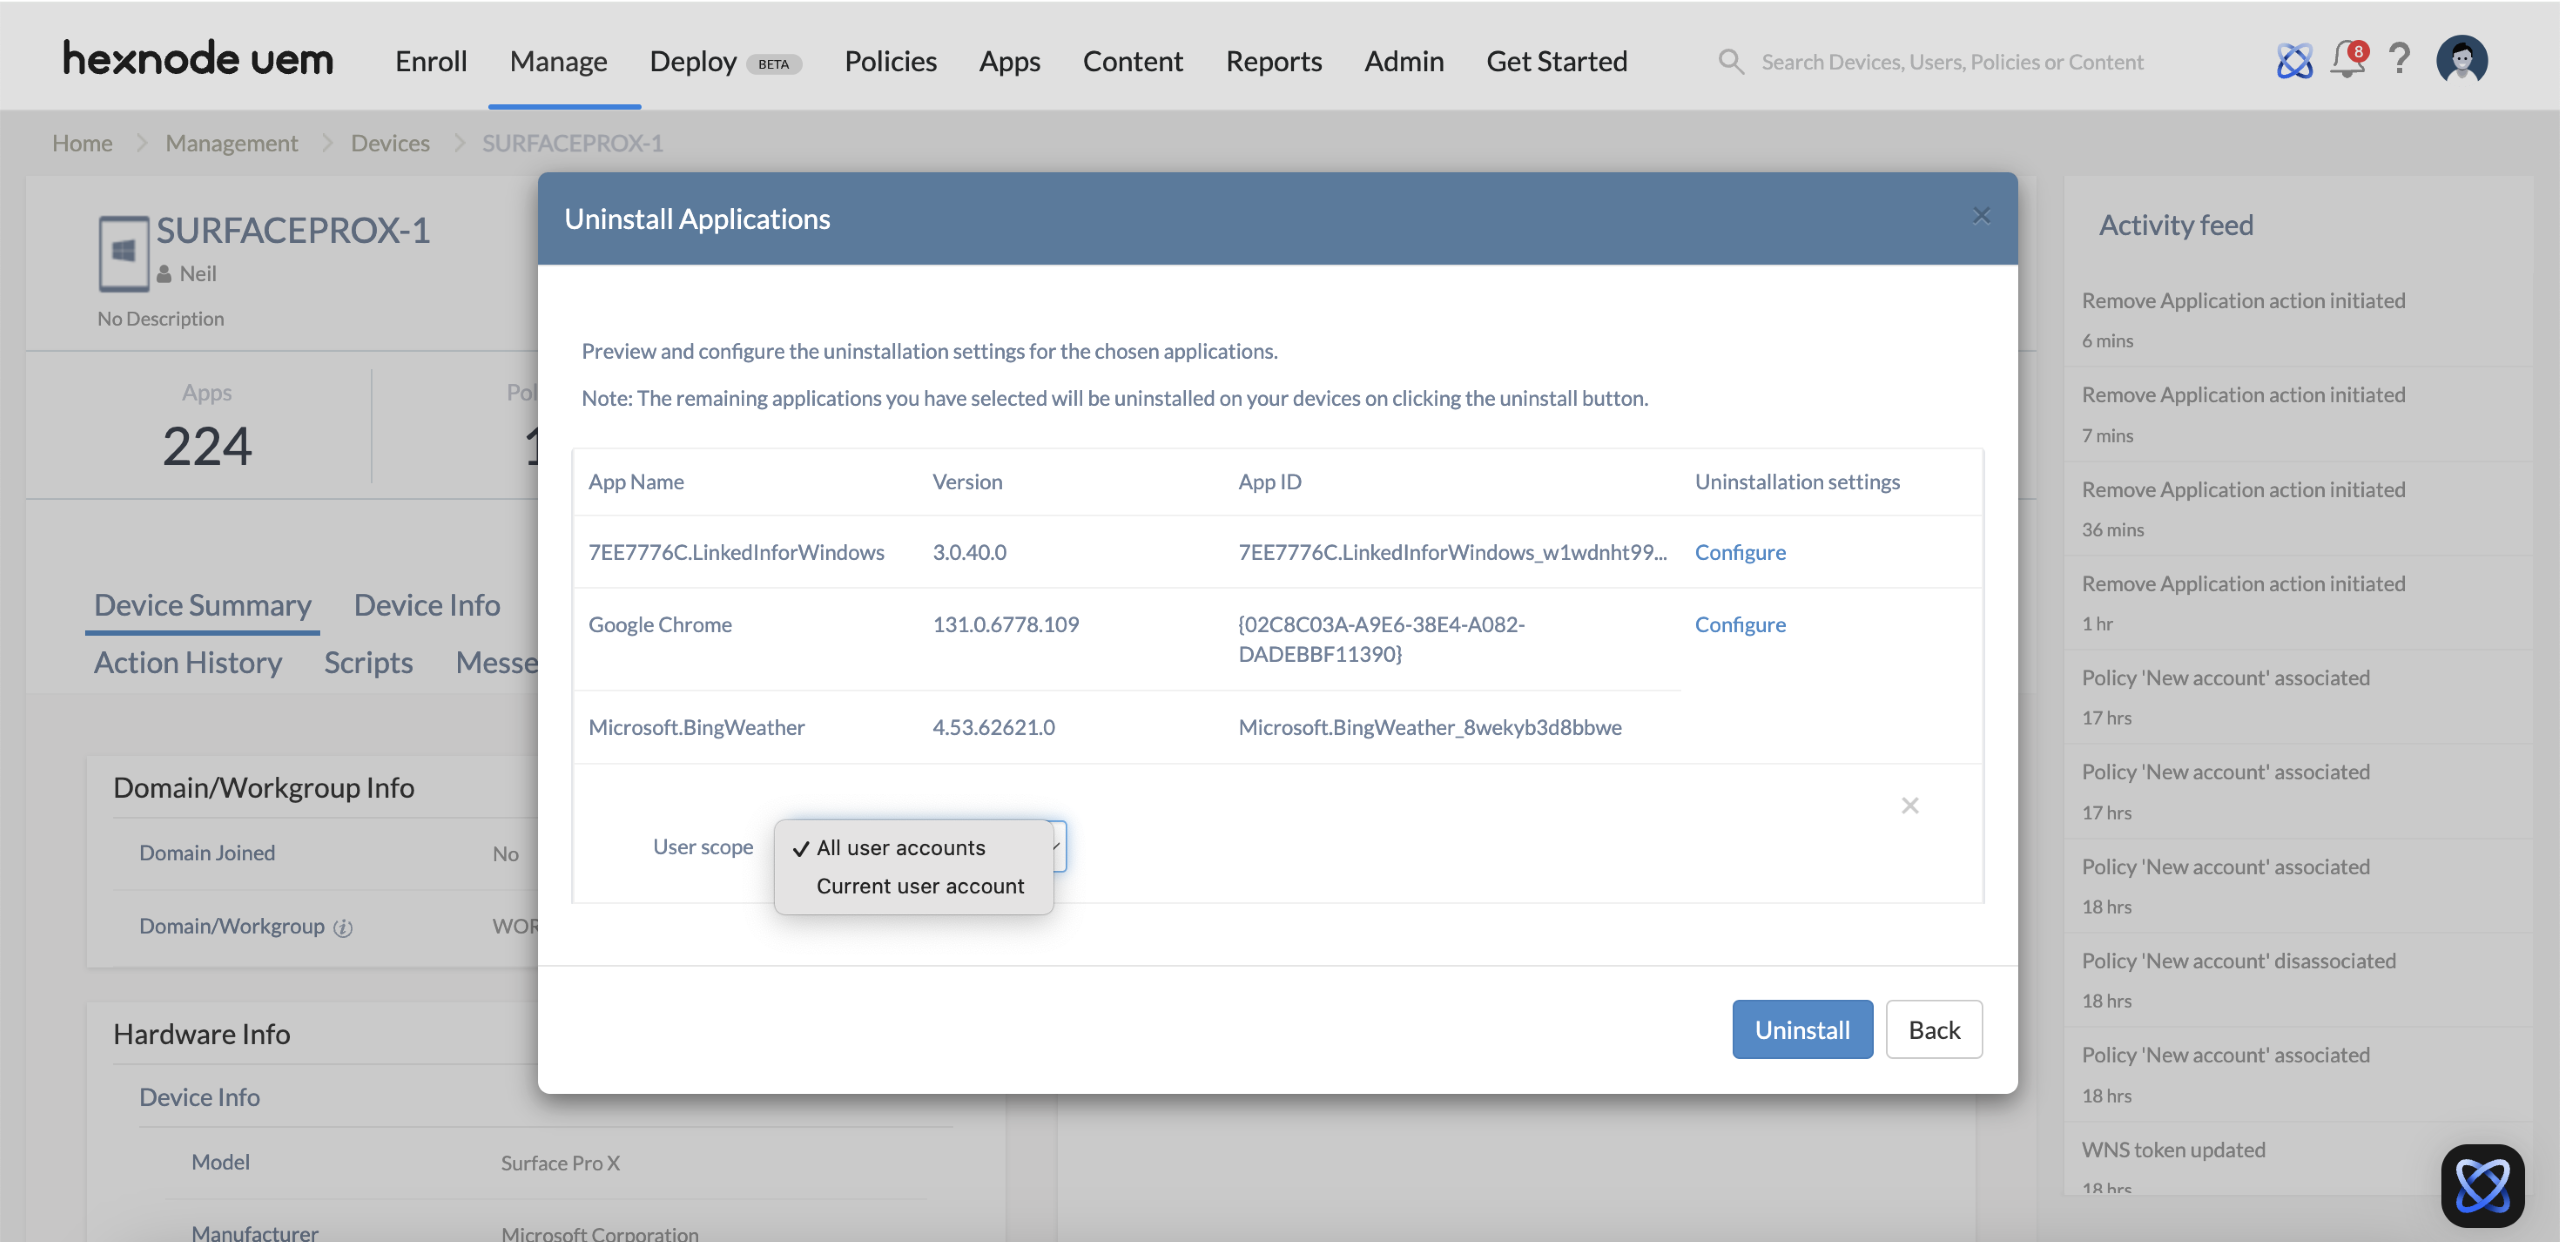
- On the next page, review the selected applications and click Configure under Uninstallation settings.
- Choose the User scope from the options (All user accounts or Current user account).
- Once the settings are configured, click Uninstall to remove the selected applications.
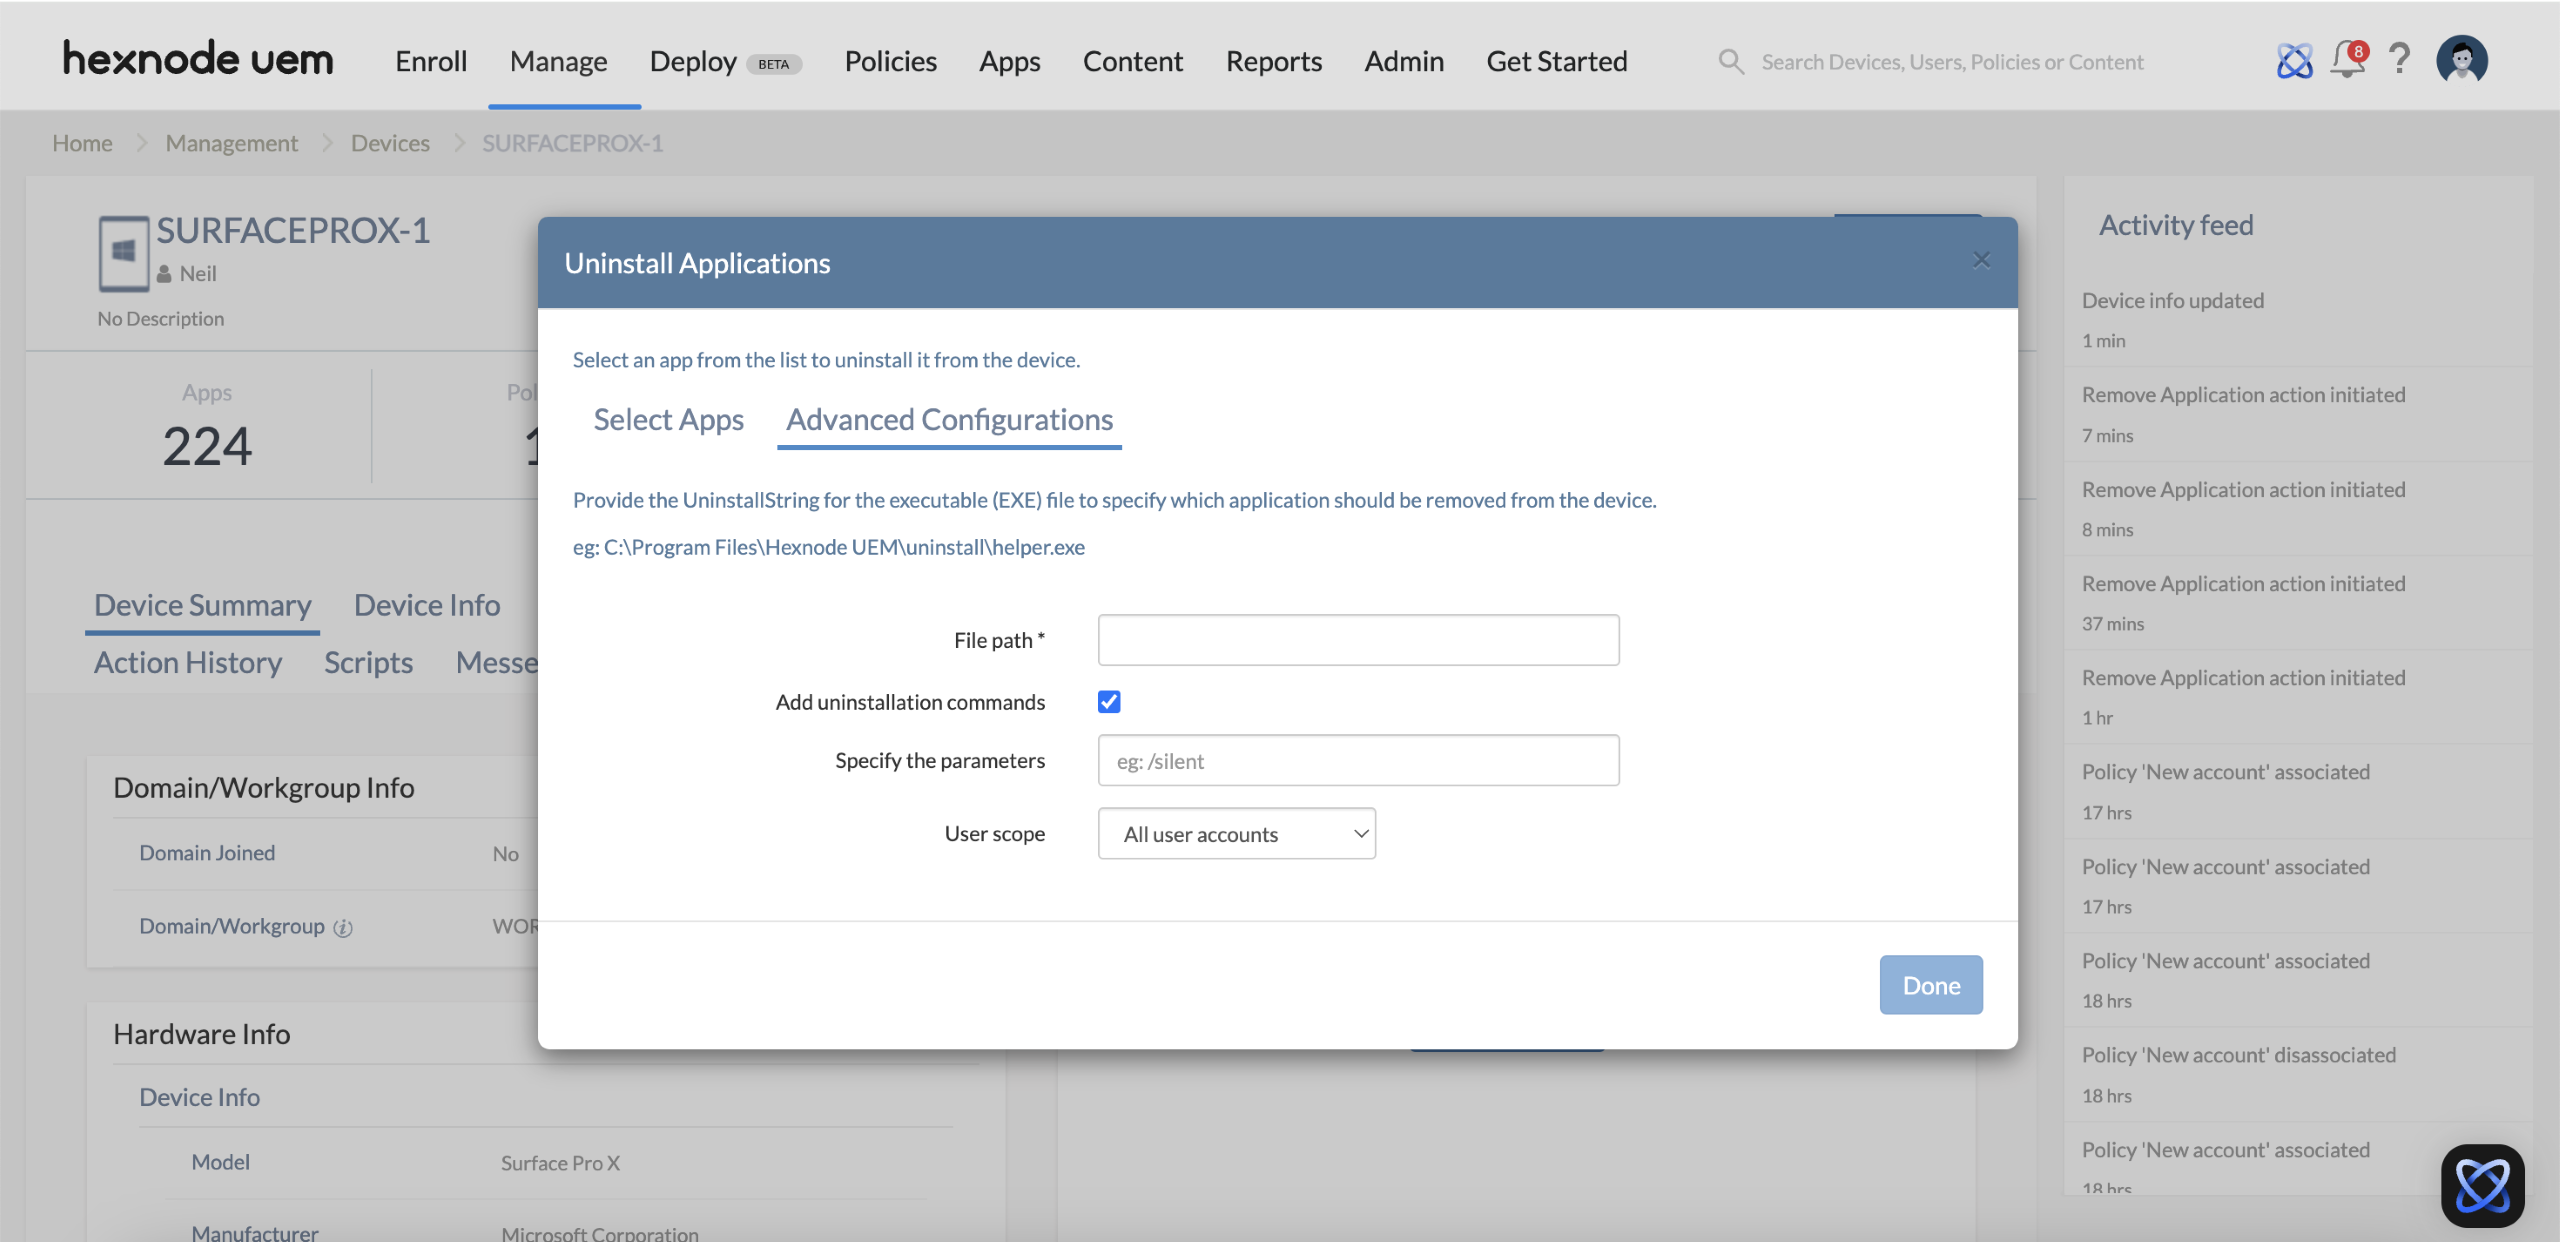
- If Advanced Configurations tab is selected,
- To specify which application should be removed from the device, provide the UninstallString for the executable (EXE) file in the File path field. For example, C:\Program Files\Hexnode UEM\uninstall\helper.exe
- If uninstallation commands are required, check Add uninstallation commands and specify the parameters.
- Select the User scope (All user accounts or Current user account) and click Done to save the configured settings.
Remove apps pushed via Required Apps policy
You can uninstall the apps pushed to devices via the Required Apps policy.
- Navigate to Policies.
- Click on New Policy to create a new one or edit an existing policy. For a new policy, provide a suitable name and description.
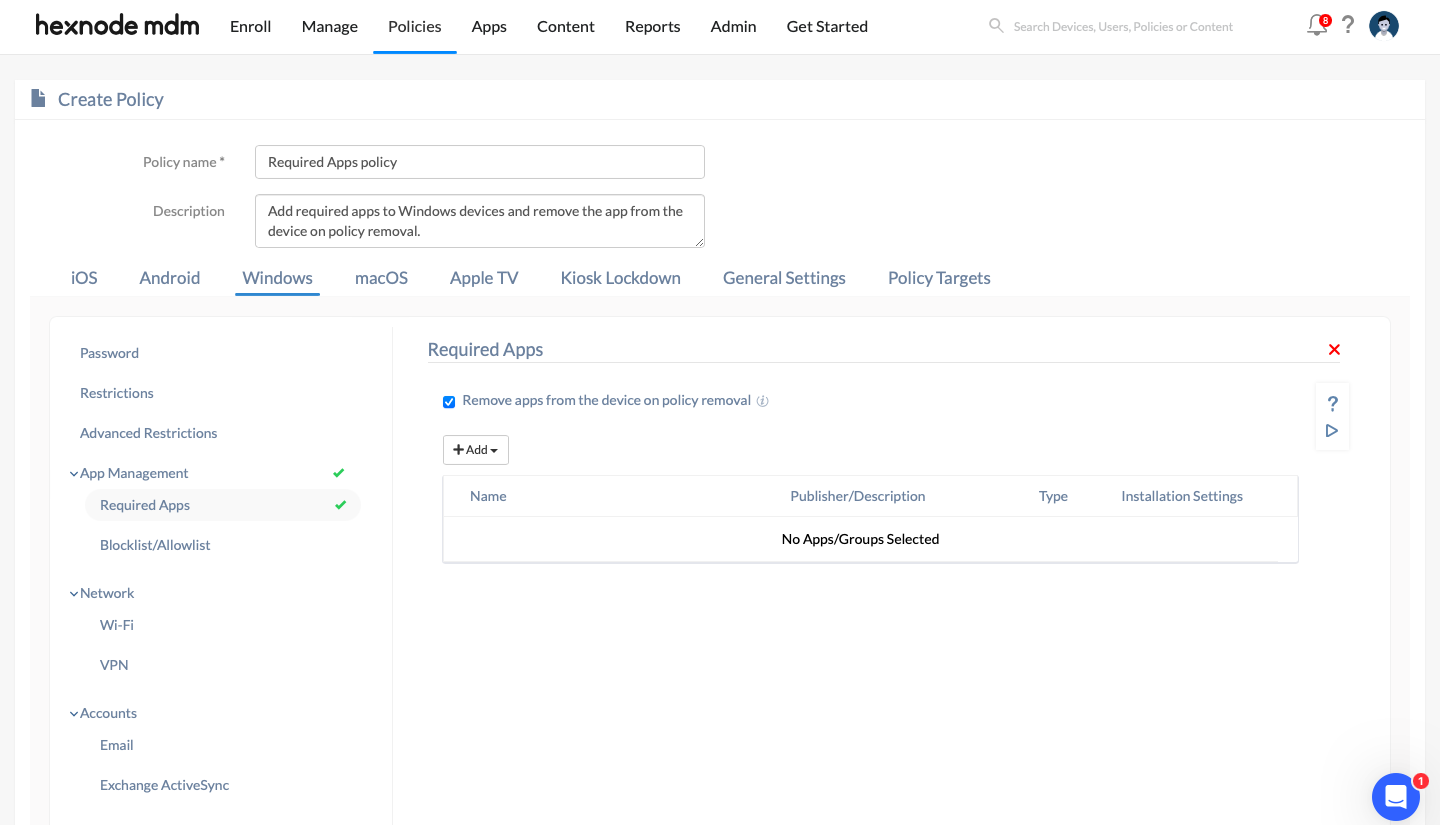
- Go to Windows > App Management > Required Apps.
- Select Configure.
- Check the option Remove apps from the device on policy removal. If this option is checked, deployed apps will be removed from the device when the policy is deleted or disassociated from it or when required apps are removed from the policy.
- Click on +Add to add the apps or app groups to be pushed to the device.
- Go to Policy Targets and associate the policy with the required target entities.
- Click on Save.
Residual elements after App uninstallation
When an MSIX/EXE app is uninstalled as a result of removing the Required Apps policy, some app-specific residual files, folders, or registry entries may remain. This can lead to the Action History displaying the error message:
“The app was uninstalled successfully, but some elements remain unremoved from the device. Learn more.”
Possible reasons for residual elements:
- Some apps require user interaction (e.g., confirmation prompts) or specific uninstallation commands (along with the File path) in the Uninstallation Settings. Without these, the uninstallation may not fully complete, leaving residual files.
- Certain files may only be removed after restarting the device.
- An incorrect app identifier or file path in the Uninstallation Settings can prevent proper uninstallation.
- Some apps inherently leave residual files even after uninstallation.
Best practices for complete uninstallation
- Along with the File path configured in the Uninstallation Settings, ensure that you add the necessary parameters for the uninstallation command.
- Restart the device to clear any remaining files.
- Double-check the app identifier, file path, and uninstallation commands for accuracy.
- Manually delete leftover files and registry entries if required.


