Category filter
Freshservice integration with Hexnode UEM
Freshservice is an award-winning, cloud-based IT service management solution that enables organizations to simplify and streamline their internal IT operations. The solution offers a user-friendly and powerful ticketing system, asset management capabilities, a self-service portal, and much more.
Freshservice can also be integrated with several third-party applications to add additional functionality to the service desk. If you use Freshservice for IT operations in your organization, you can integrate Hexnode UEM with your Freshservice instance to manage the devices enrolled in Hexnode right from the Freshservice portal itself. The integration will sync the details of all the devices associated with a ticket requester into the Freshservice portal. This will provide better visibility for technicians when handling tickets related to managed devices. On top of that, admins can also perform several remote management actions on the device without leaving the Freshservice portal.
Read on to understand the full capabilities of Freshservice integration with Hexnode UEM.
Integrating Freshservice with Hexnode UEM
- Log in to the Hexnode portal.
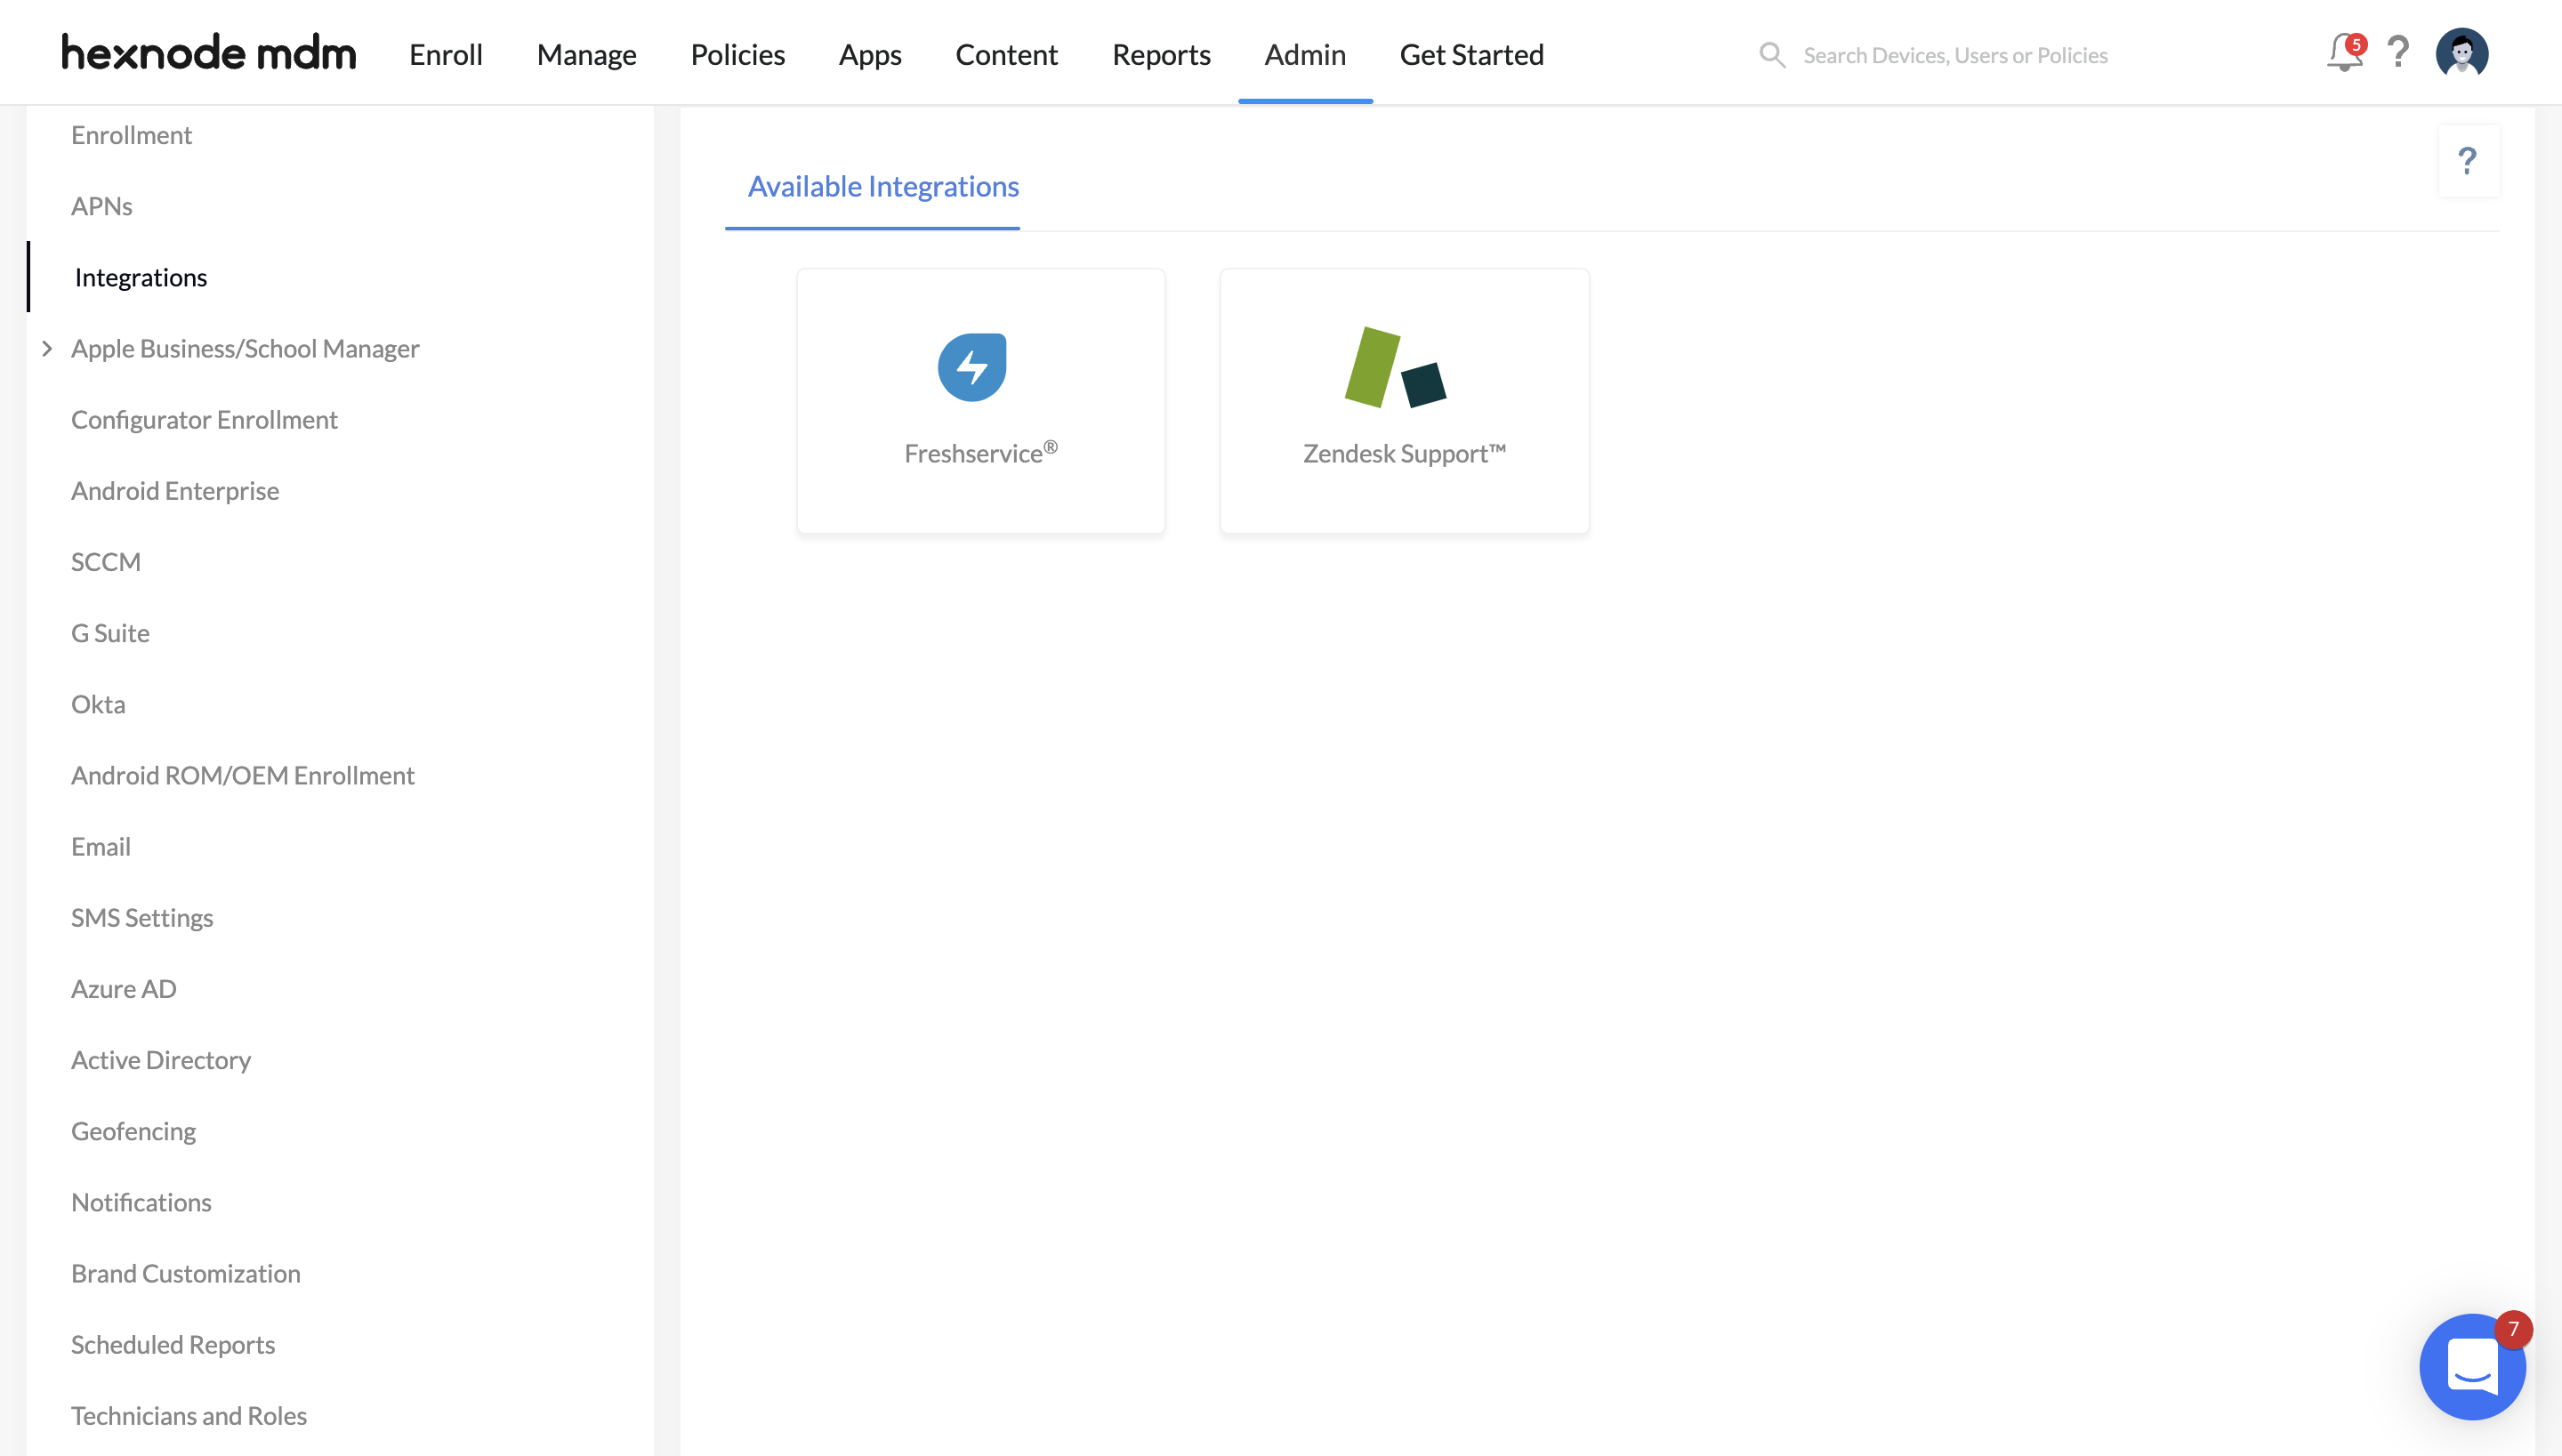
- Navigate to Admin > Integrations and select Freshservice®.
- Confirm proceeding with the integration by clicking Agree and Continue.
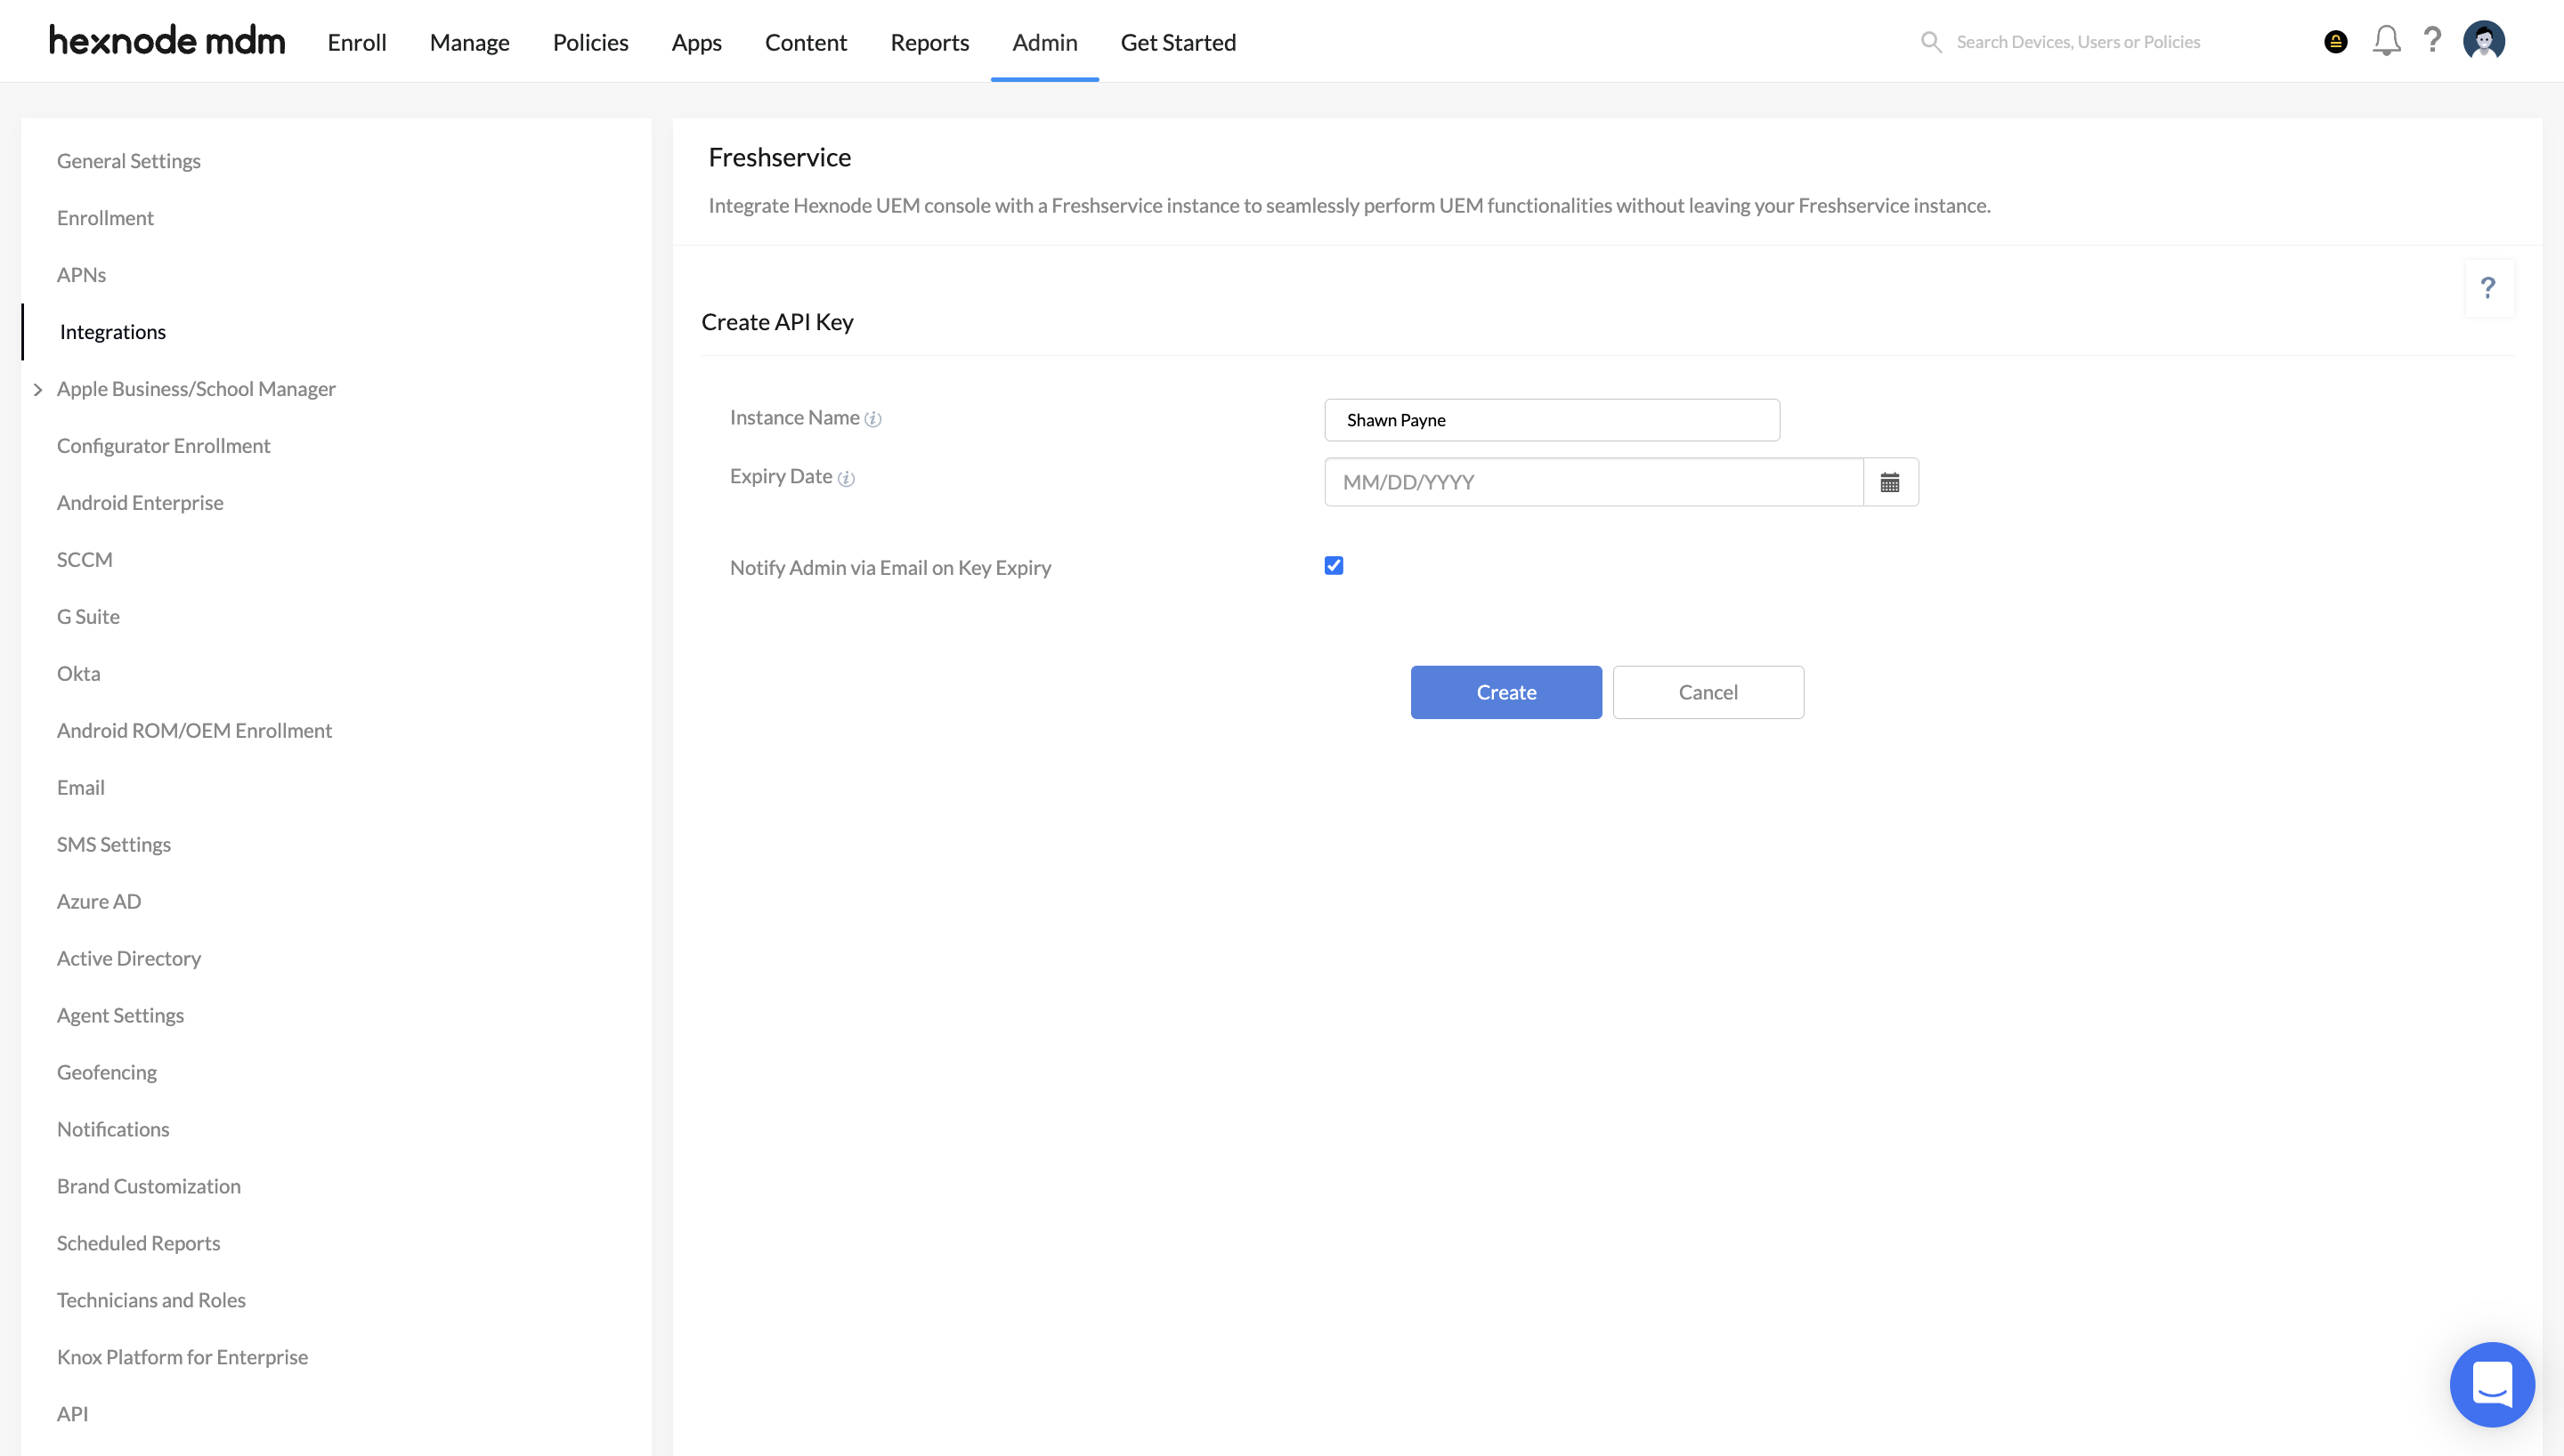
- Provide the following details to create the API key:
- Instance Name: Provide a name to identify the integration in the Hexnode portal.
- Expiry Date: Specify the date of expiration of the generated API Key. The expiry date cannot be set more than 1 year from the date of generating the API key.
- Check the Notify Admin via Email on Key Expiry option to send an email to the Hexnode technician when the API key expires.
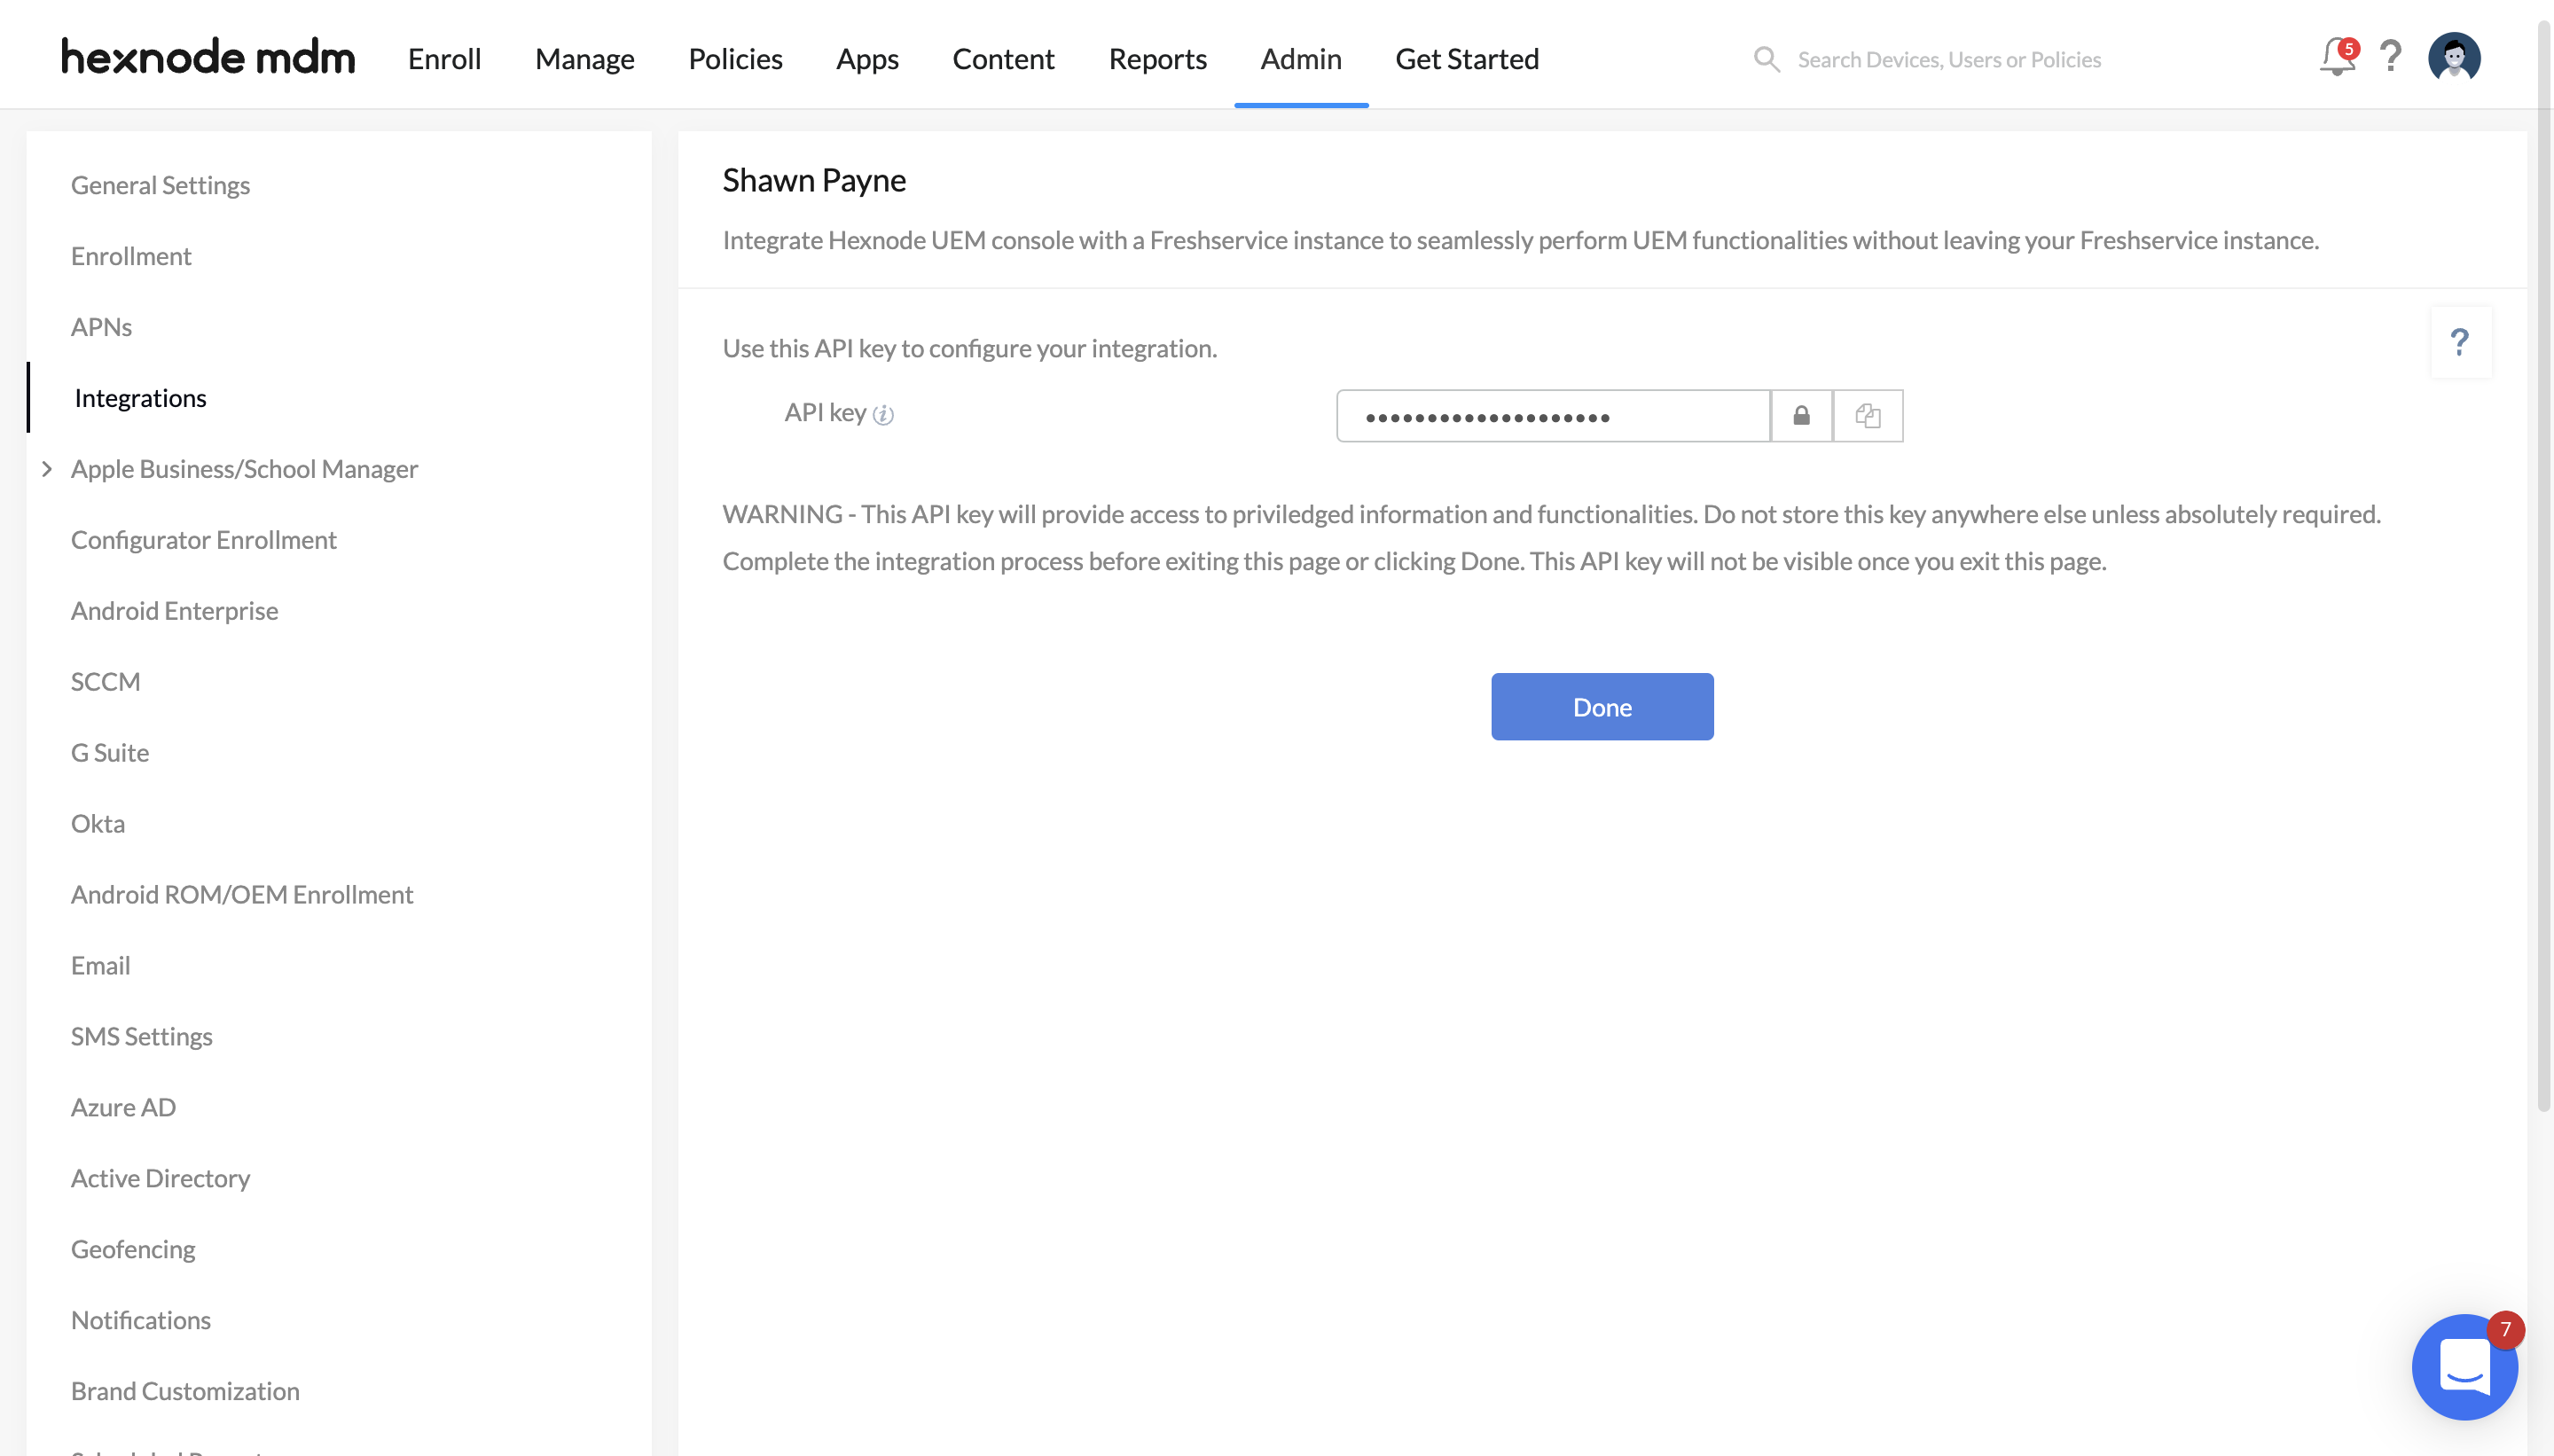
- Click Create. An API key will now be generated.
- Copy the API key and save it somewhere safe. This API key is required to configure the integration in the Freshservice portal.
- Click Done.
- Next, log in to your Freshservice portal using an administrator account.
- Navigate to the Admin tab and select Apps under the Helpdesk Productivity category.
- Search for Hexnode UEM and click on the Hexnode app icon to open the app details page.
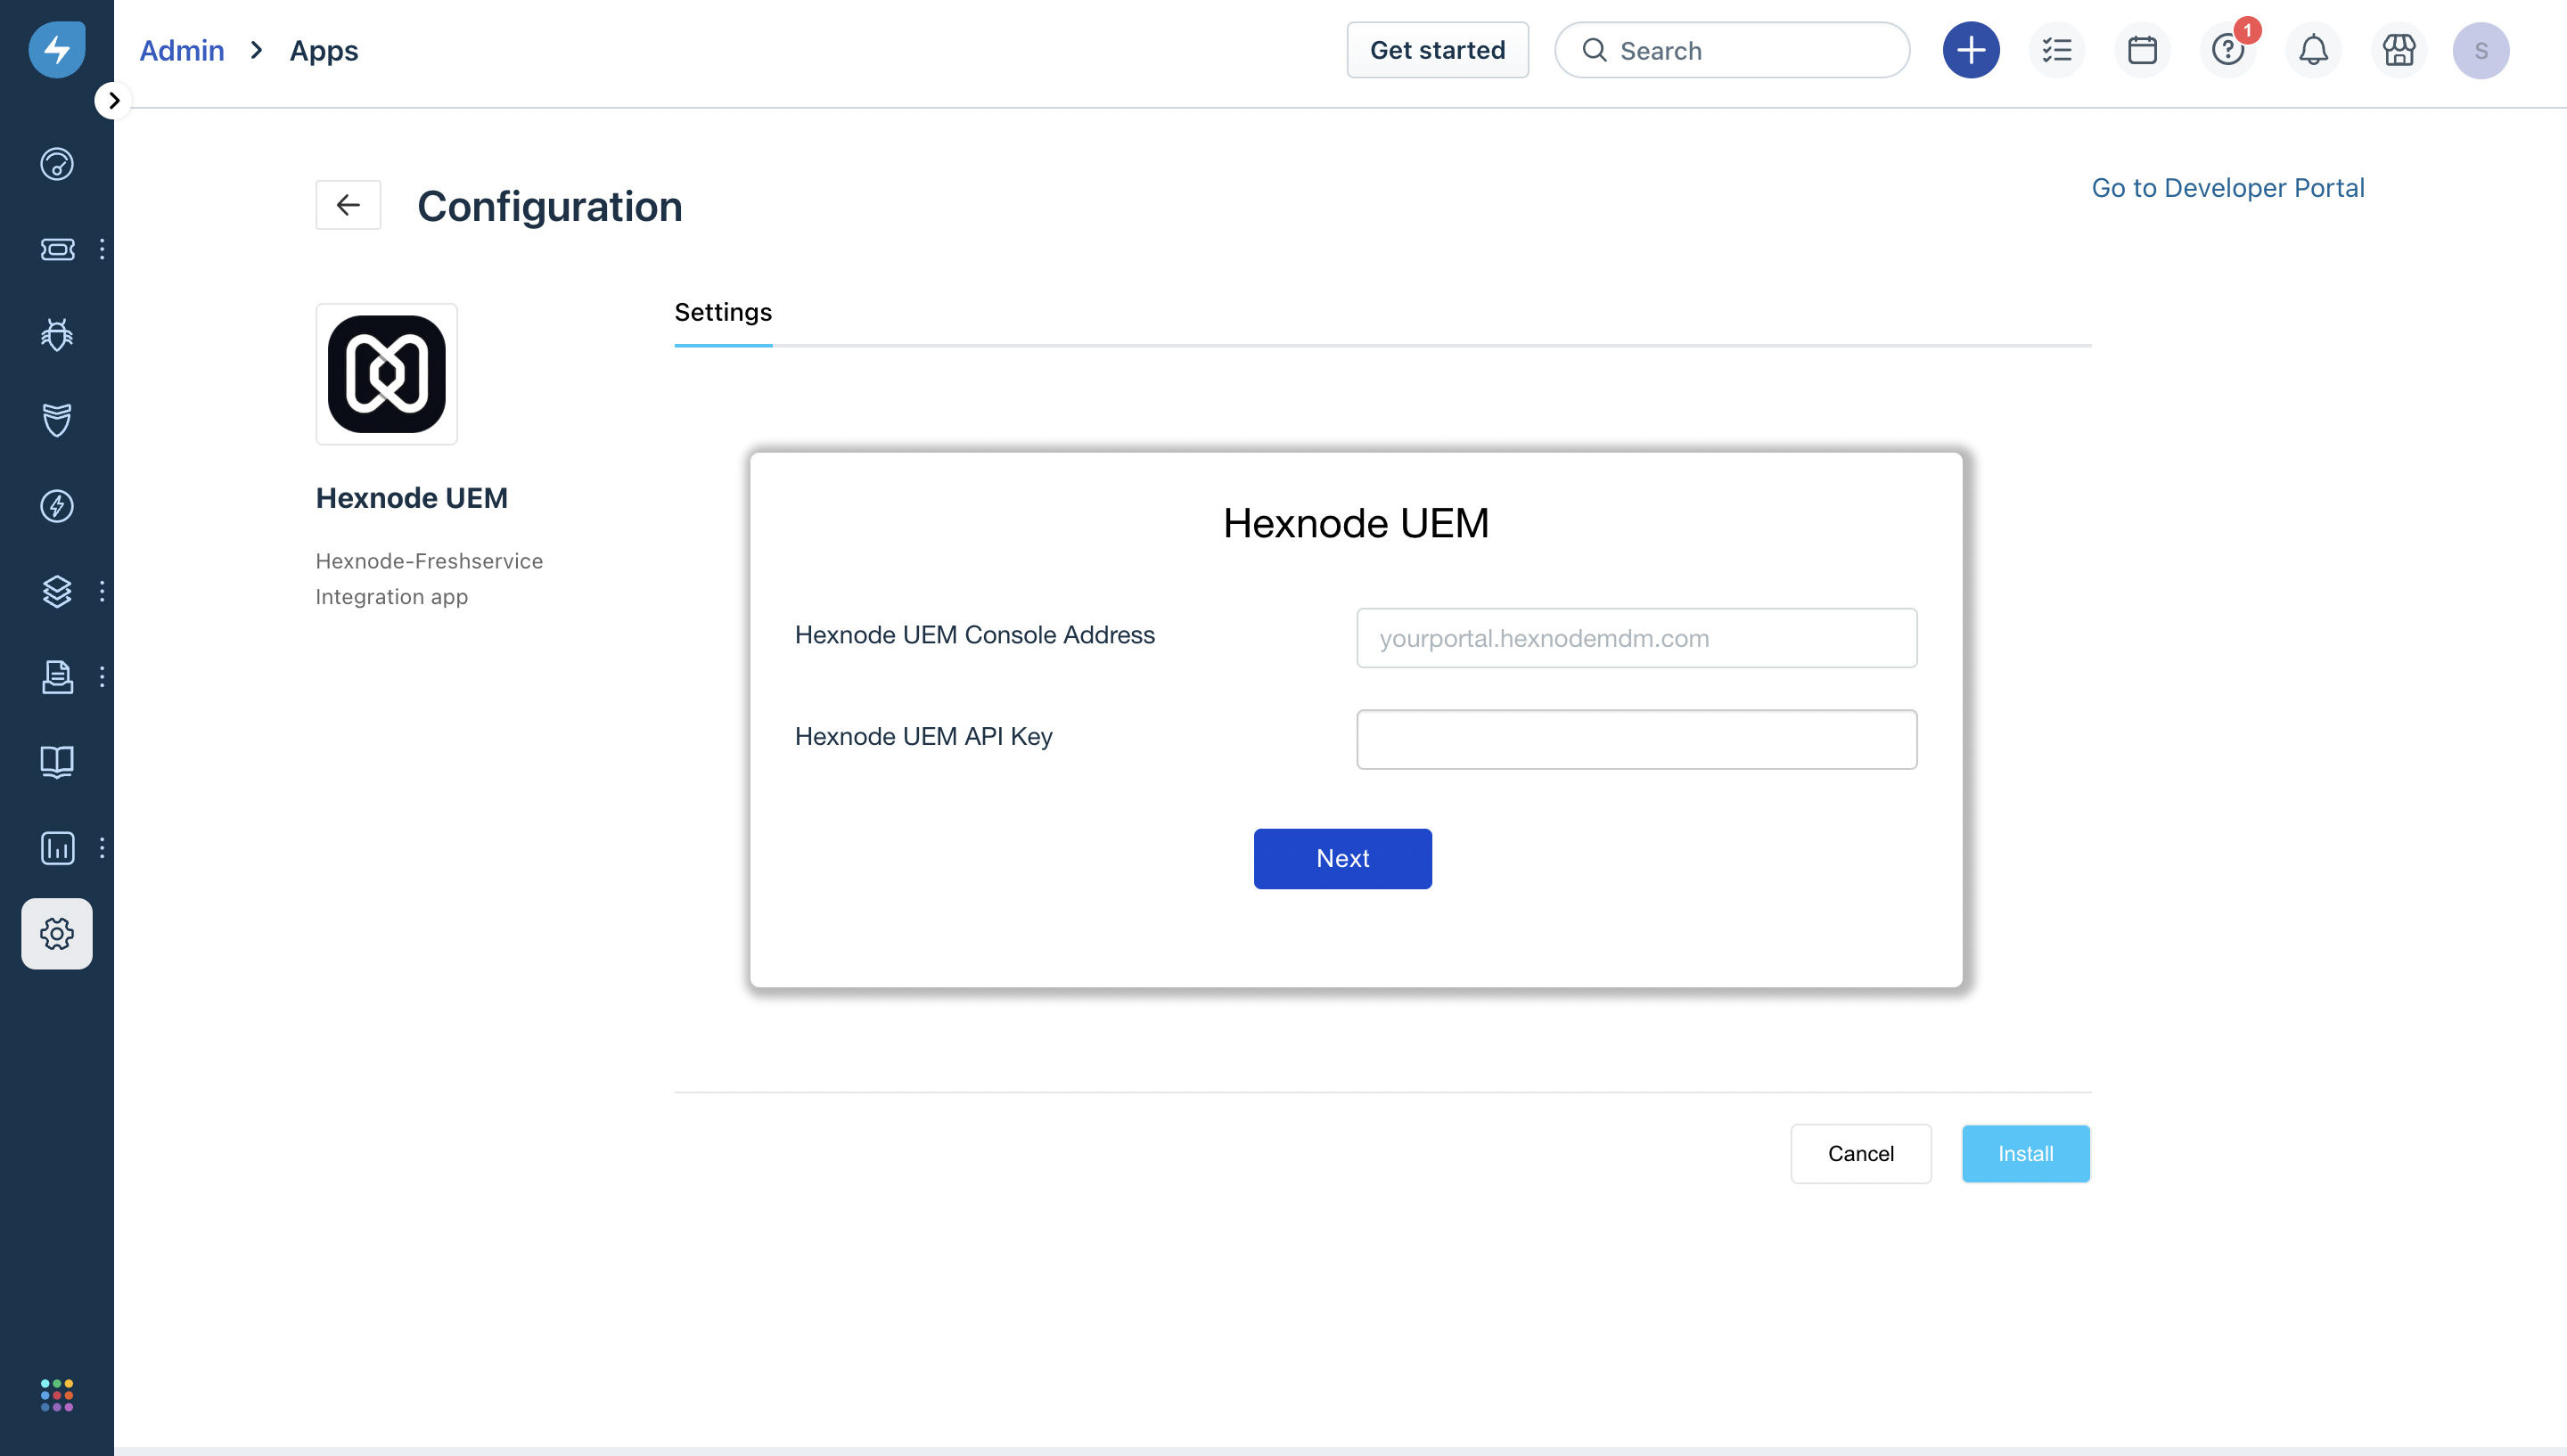
- Click on Install and provide the following details in the configuration window that appears:
- Click Next.
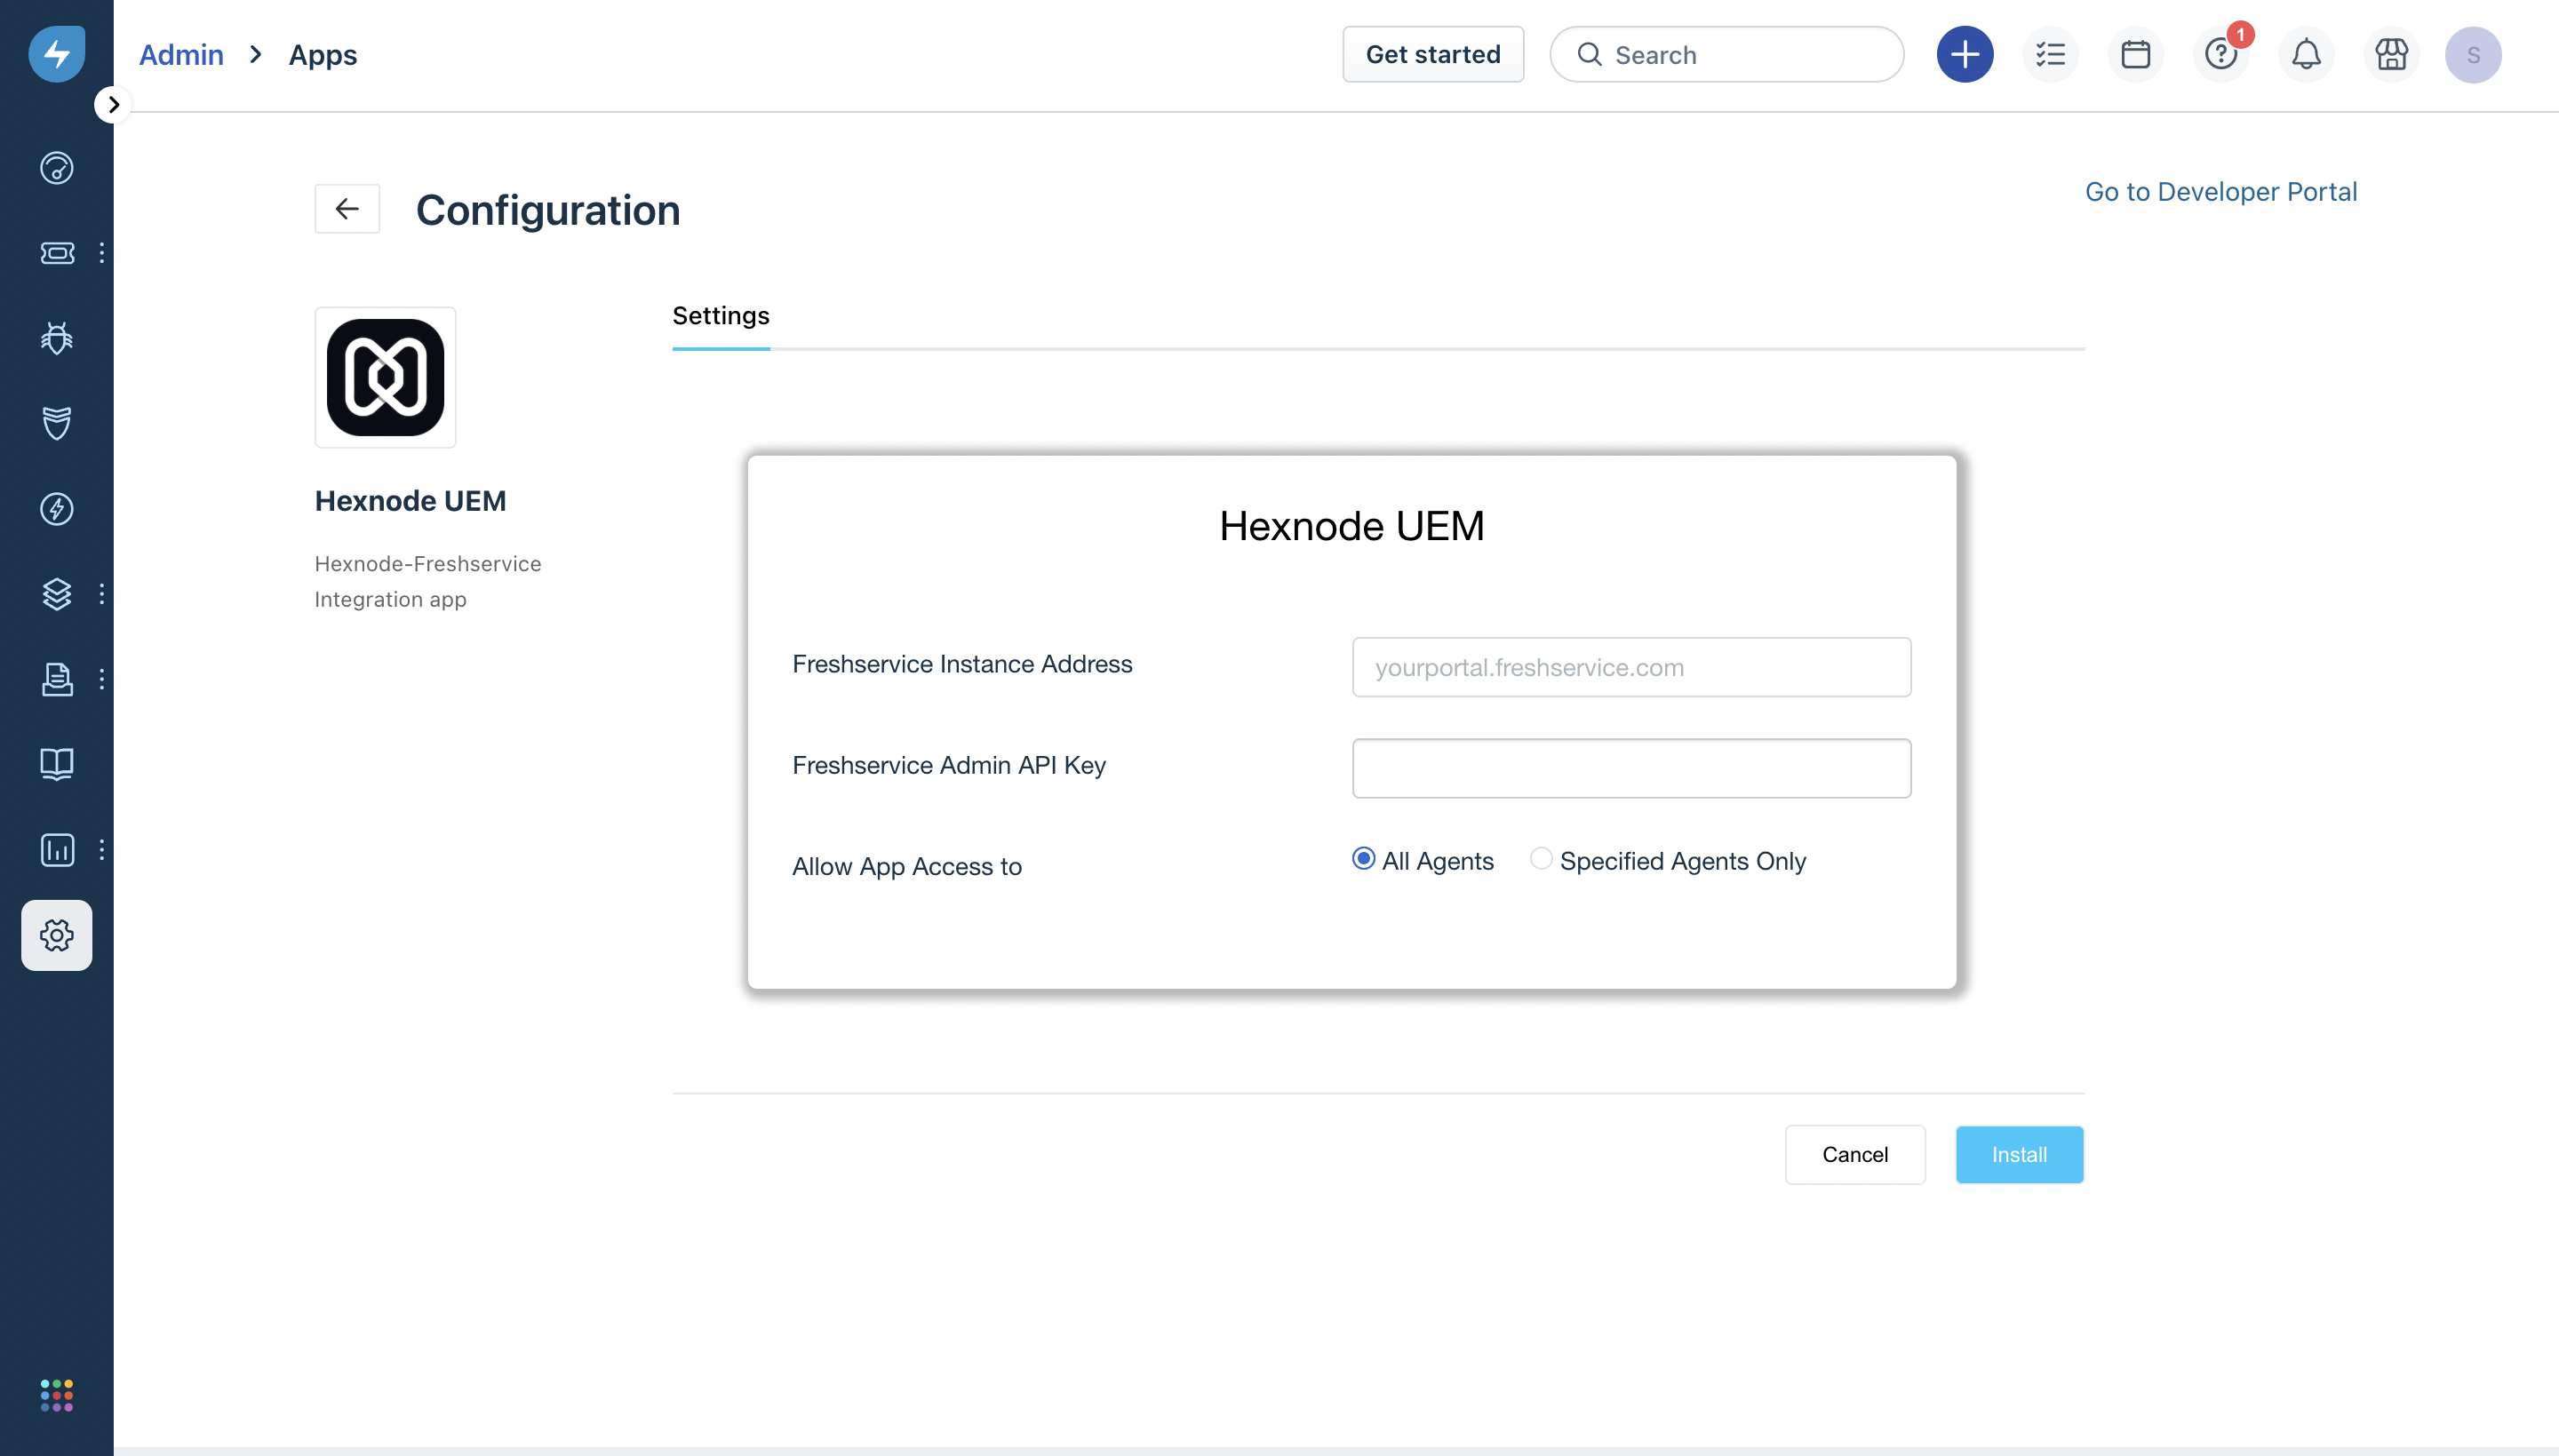
- Now, provide the following details about your Freshservice instance:
- Freshservice Instance Address: Enter the portal URL of your Freshservice account.
- Freshservice Admin API Key: Enter the API key of your Freshservice account. To find your API key, go to Profile settings by clicking on the profile picture on the top-right corner of your Freshservice portal. The API key will be displayed below the ‘Delegate Approvals’ section on the right.
- Allow App Access to:
- All Agents: Choose this option to allow all the agents in your service desk to gain access to Hexnode UEM and all of its capabilities. An ‘Agent’ in Freshservice is the technician who has access to the Freshservice portal.
- Specified Agents Only: Choose this option to allow only specific agents to gain access to Hexnode UEM.
- Click Install. Hexnode UEM will now be enabled for your Freshservice portal.
How does Hexnode’s integration with Freshservice help organizations?
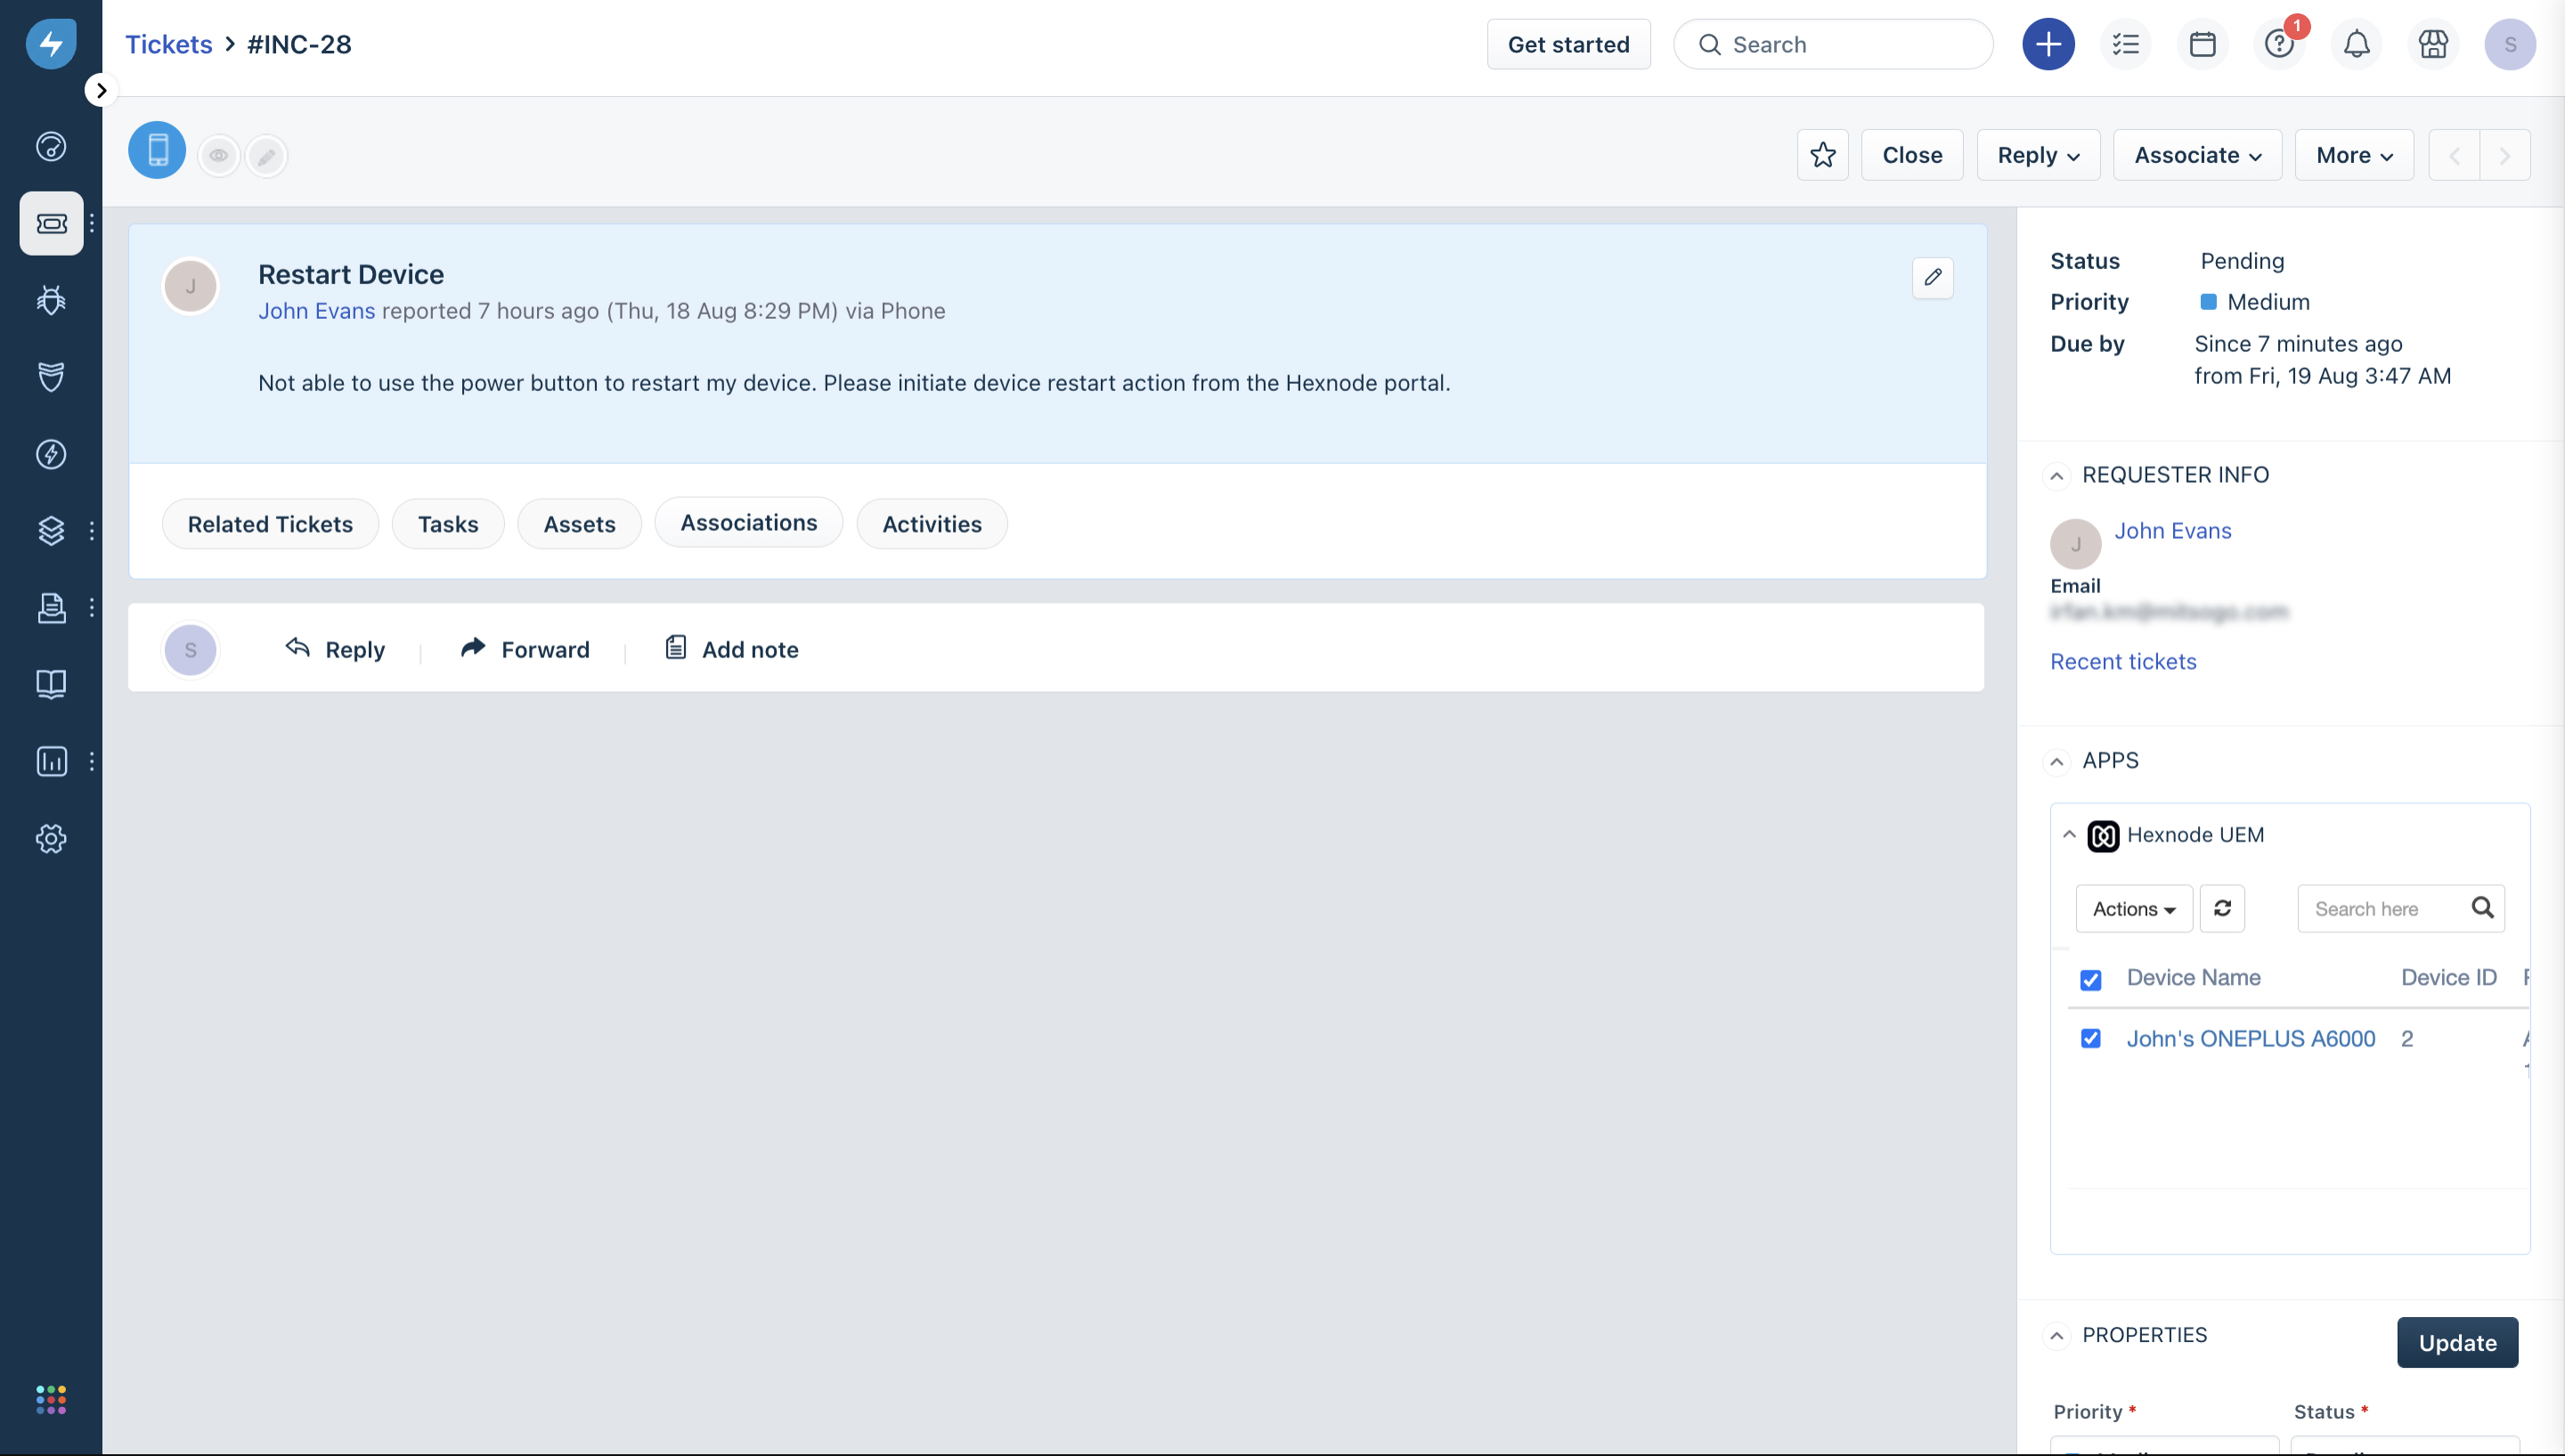
After successfully integrating Hexnode UEM with Freshservice, you can view the details of all the devices associated with the ticket requester in the Freshservice portal. In addition, it allows you to perform basic remote actions. The following actions can be carried out from the Freshservice portal:
- Scan Device
- Scan Device Location
- Lock Device
- Enable Lost Mode
- Disable Lost Mode
- Restart Device
- Enable Kiosk Mode
- Disable Kiosk Mode
- Power off Device
- Disenroll Device
Suppose one of the employees lost their device and raised a Freshservice ticket notifying you, the organization’s IT administrator, of the problem. Using Hexnode’s integration with Freshservice, you can fetch the device details of the employee and initiate the Enable Lost Mode or Power off Device action right from the Freshservice portal.
To manage devices from the Freshservice portal:
- Log in to the Freshservice portal as an agent.
- Navigate to the Tickets tab.
- Click on the ticket you wish to resolve.
- Go to Apps > Hexnode UEM on the right panel to see a list of all the devices enrolled in Hexnode under that requester. Click on the refresh button if you cannot see the enrolled devices.
To perform a remote action on any device(s):
- Select the device.
- Click on the Actions button.
- Choose the necessary action you wish to perform.
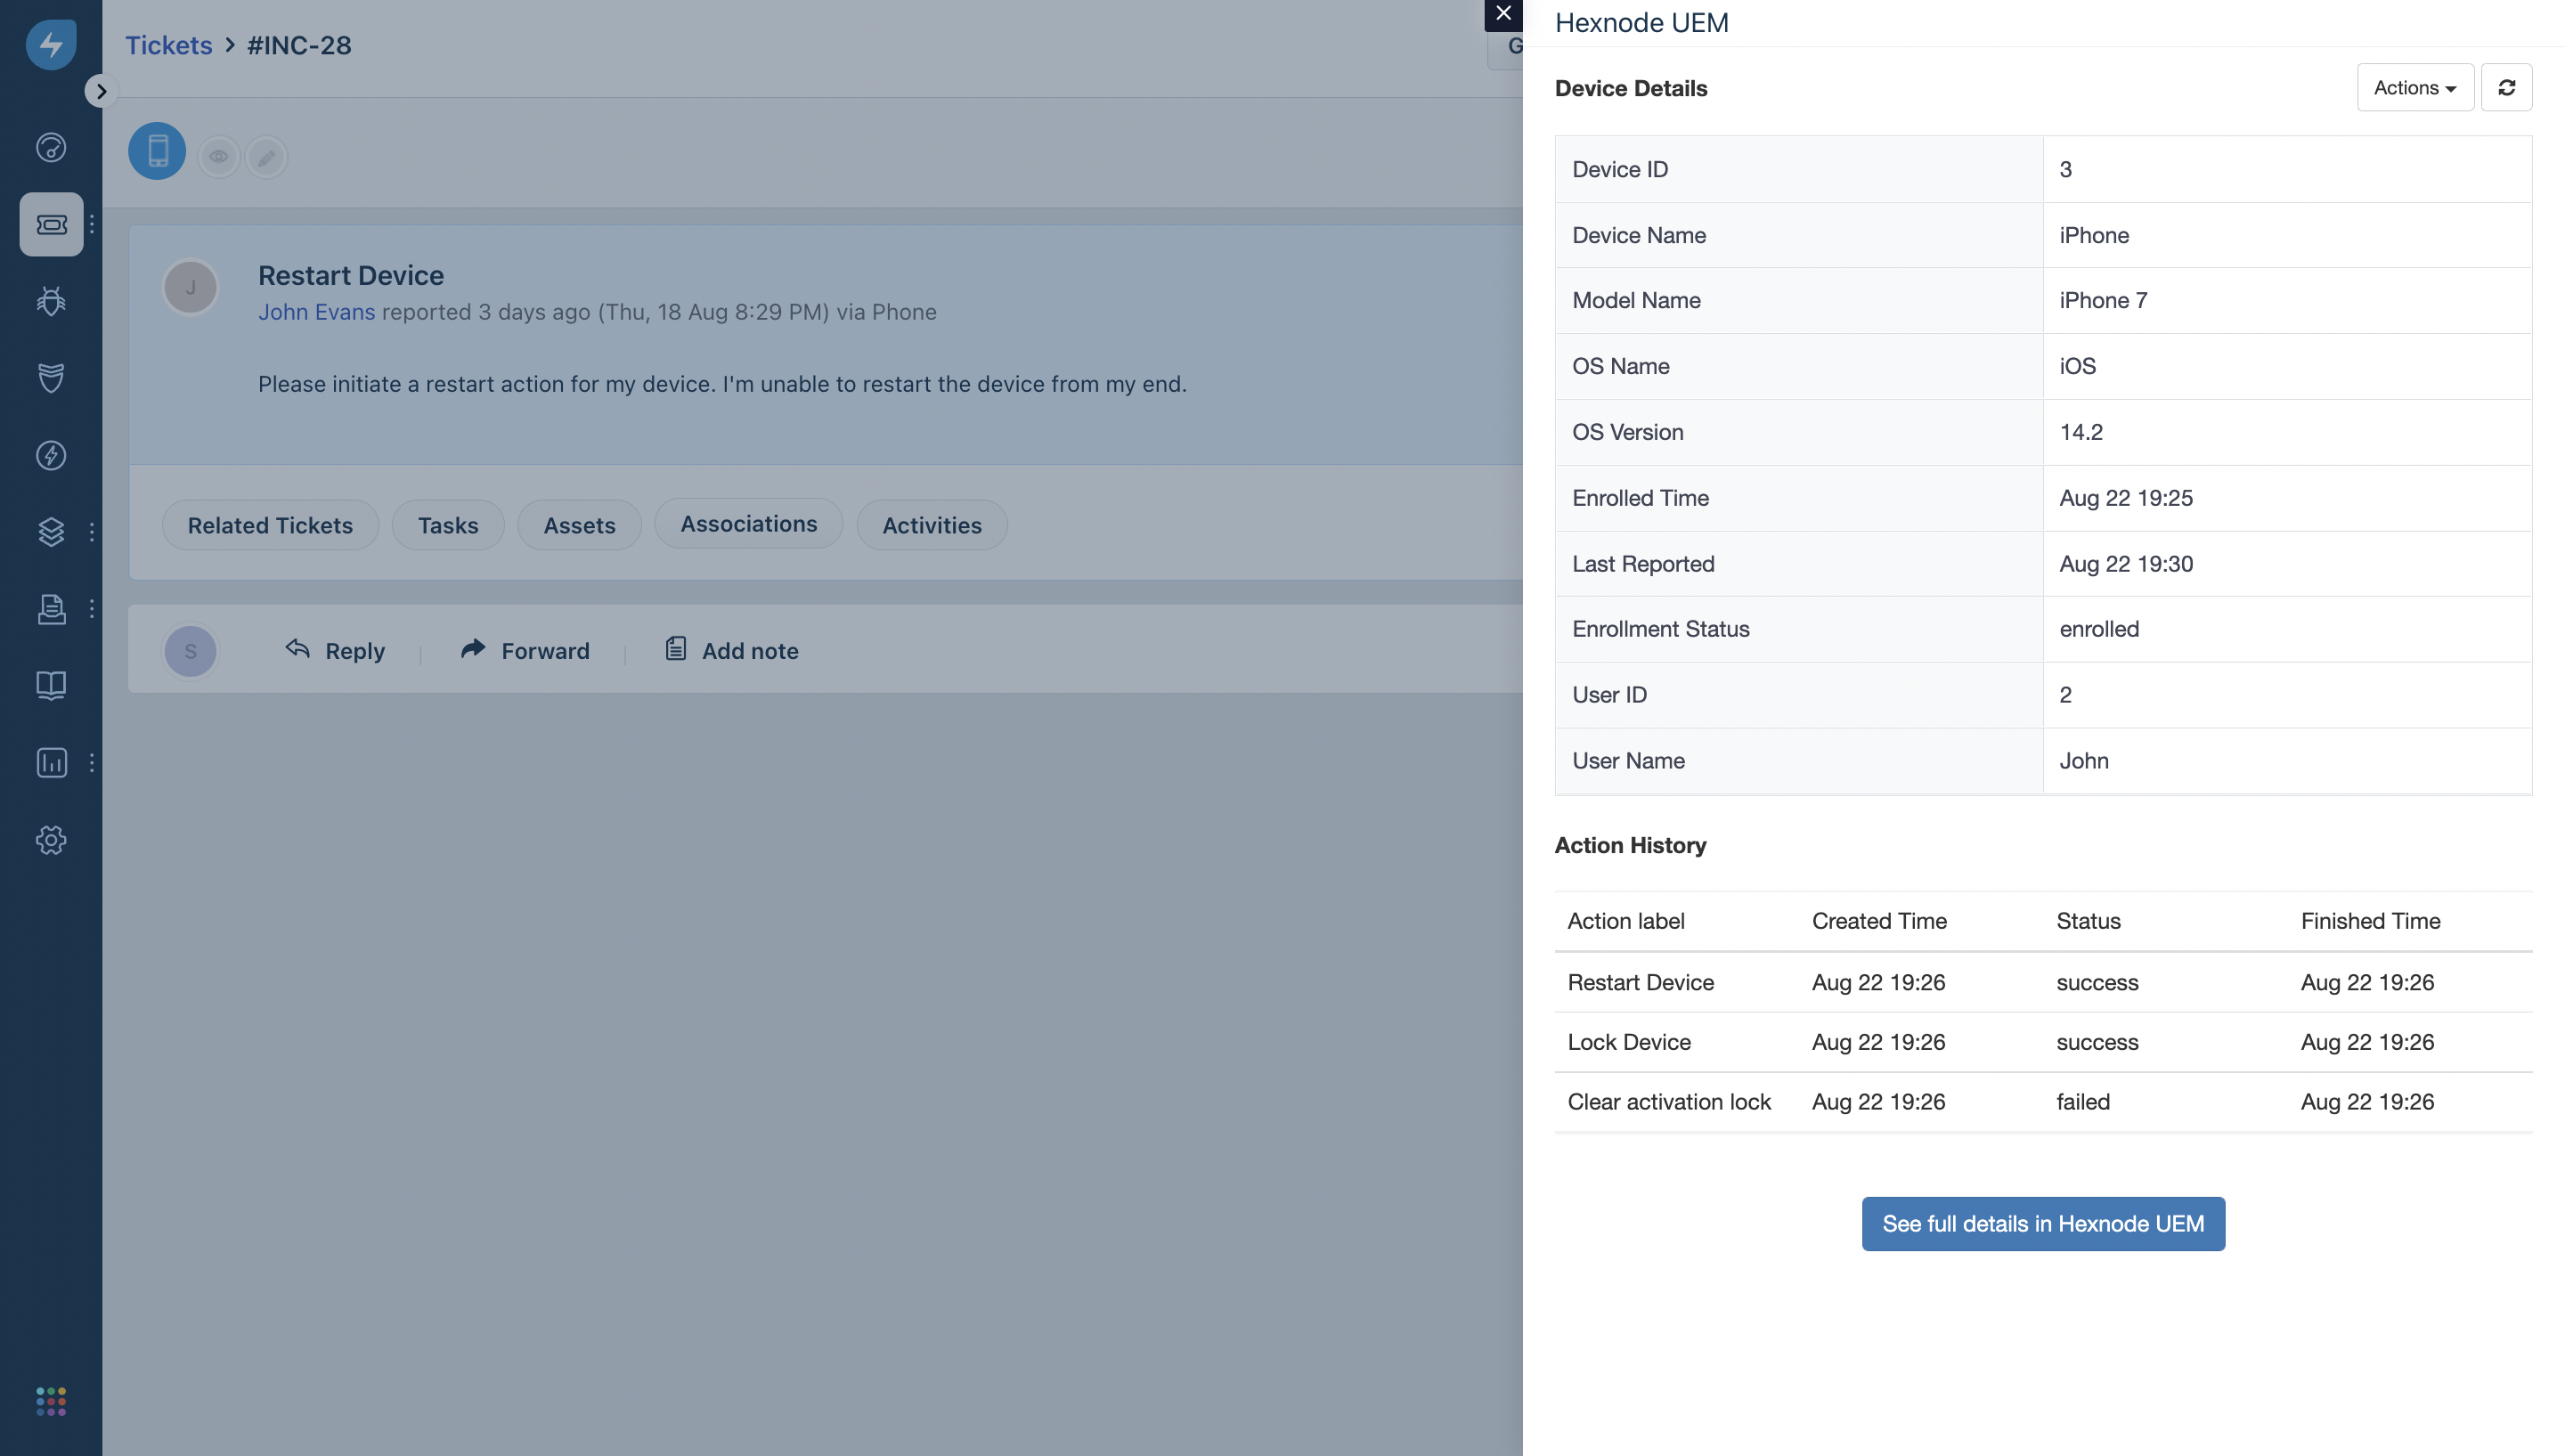
Click on the device name to fetch helpful information such as the model name, OS version, etc., and also see the device’s recent Action History.
Managing the Freshservice instance integrated with the Hexnode portal
To view the details of the Freshservice instance in the Hexnode portal, navigate to Admin > Integrations > Configured Integrations and select the Freshservice instance. Here, you can see a complete list of all the actions carried out on the devices associated with the requesters in Freshservice and the integration summary.
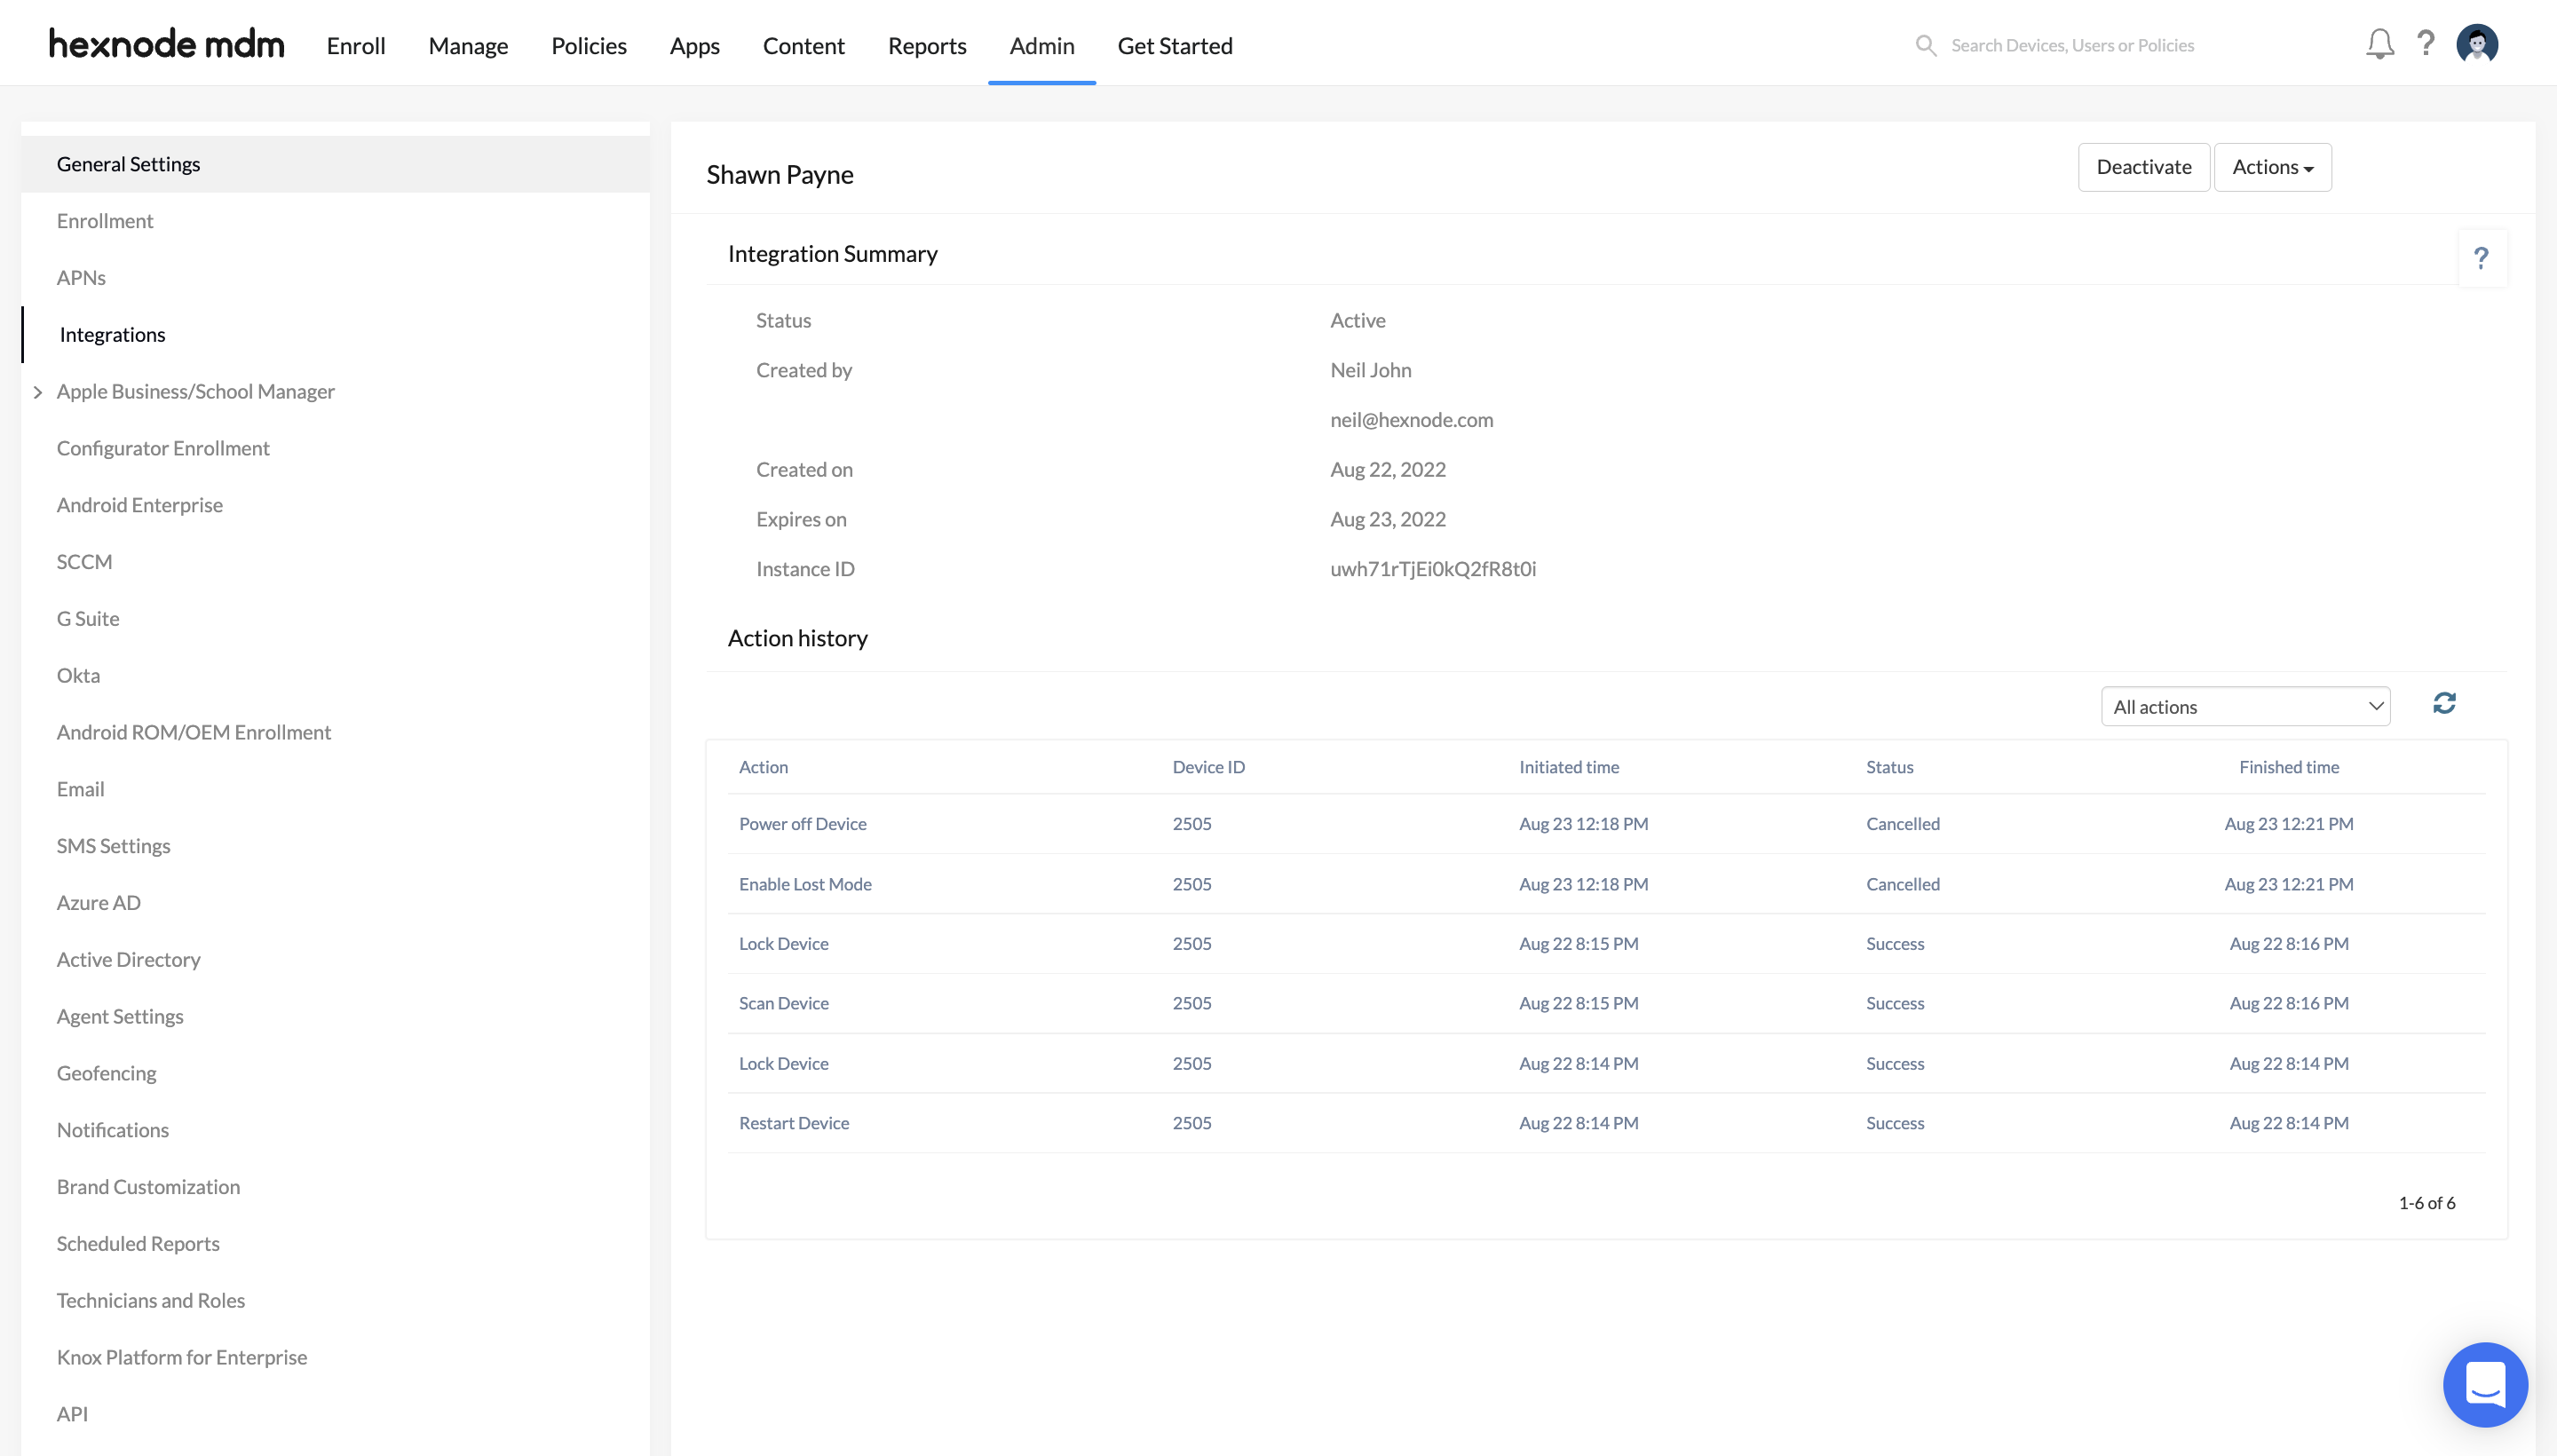
Click the Deactivate button to deactivate the Freshservice instance from Hexnode UEM temporarily. You will be able to Activate the instance later when required. Click on the Actions button to Reset or Delete a Freshservice instance from the Hexnode portal.
