Category filter
How to manage BitLocker?
BitLocker is Microsoft’s built-in full volume encryption tool for Windows PC that enforces encryption on OS drives, fixed data drives, and removable drives for data protection. BitLocker encryption helps prevent unauthorized access to data on lost or stolen devices by encrypting the entire Windows operating system volume on the hard disk and verifying the boot process integrity. When used in conjunction with TPM versions 1.2 and above, BitLocker can validate system files and boot activity. The Device encryption feature on Windows devices automatically activates the BitLocker on Windows 10 or later devices. This automatic activation occurs when a user signs in for the first time with a personal Microsoft account or a work/school account. The Device encryption feature itself serves as a mechanism that facilitates this process, ensuring BitLocker is automatically engaged upon login. This enhances data security without requiring the users to manually enable encryption. Hexnode UEM enables you to set up and manage BitLocker policy to help you configure encryption and recovery settings on Windows devices remotely.
Configure BitLocker encryption with Hexnode UEM
- Log in to your Hexnode UEM portal. Navigate to the Policies tab. Click on New Policy to create a new one.
(or)
Click on any policy to edit an existing one. Enter the Policy Name and Description in the provided fields. - Navigate to Windows > Select BitLocker under Security.
- Click on Configure.
- Configure BitLocker settings.
| BitLocker Settings | Description |
|---|---|
| Require encryption for OS and fixed data drives | Tick this option to make it a compliance requirement to turn on encryption for writing data to OS and fixed drives.
If the drives are left unencrypted, the device is marked non-compliant in the Hexnode portal. |
| Hide warning about existing third-party encryption | Check this option to disable the BitLocker setup wizard warning and the prompt to confirm that no third-party encryption is present. |
| Allow Standard User Encryption | Checking this option allows administrators to enable BitLocker encryption on fixed drives, even when the currently signed-in user is a standard user (those without administrative privileges).
This setting is available only when both ‘Require encryption for OS and fixed data drives‘ and ‘Hide warning about existing third-party encryption‘ options are enabled. |
| Escrow recovery password to Hexnode UEM | Check this option to retrieve the BitLocker recovery password from the device and store it in the UEM console, under Manage > Device Summary > Hardware Info. |
Recovery Password rotation
| Recovery Password rotation | Configure this option to automatically rotate the recovery password for operating systems and fixed drives once it’s used to unlock the drive. This feature will only be effective if Active Directory backup for the recovery password is enforced.
For OS drive: Within the BitLocker policy, enable Do not enable BitLocker until recovery information is stored in AD DS in OS Drive Settings > Configure BitLocker OS drive policy > Configure recovery options. For Fixed drive: Within the BitLocker policy, enable Do not enable BitLocker until recovery information is stored in AD DS in OS Drive Settings > Configure BitLocker fixed drive policy > Configure recovery options. |
Configure Recovery Password rotation
| Settings | Description |
|---|---|
| Not Configured | The configuration will not take effect on the devices, and they will keep operating as per their default behavior. |
| Do not rotate Recovery Password | Choosing this option will keep the recovery password unchanged for operating systems and fixed drives after it has been used to unlock the drive. |
| Rotate Recovery Password for Microsoft Entra joined devices | Selecting this option will rotate the recovery password for devices enrolled via Microsoft Entra ID. |
| Rotate Recovery Password for both Microsoft Entra joined devices and Microsoft Entra hybrid joined devices | Selecting this option will rotate the recovery password for devices enrolled through both Microsoft Entra ID and Microsoft Entra ID hybrid. |
OS Drive Settings
| Configure BitLocker OS drive policy | Enable the option to configure the BitLocker OS drive settings. |
Configure BitLocker OS drive policy
| Settings | Description |
|---|---|
| Configure encryption method | Configure the encryption method (XTS-AES or AES CBC) and cipher strength (128 bit or 256 bit) used by BitLocker for the operating system drives. Choose either of the options from AES CBC 128, AES CBC 256, XTS-AES 128, and XTS-AES 256.
BitLocker uses the default encryption method of XTS-AES 128-bit when this option is not configured. |
| Configure additional startup authentication settings | Enable the option to configure whether BitLocker requires additional authentication at system startup to provide added protection for encrypted data. |
| Settings | Description |
|---|---|
| Allow BitLocker to be activated on devices without a compatible TPM | Check whether your device has a compatible TPM (more info).
Tick this option to enable users to configure BitLocker on the device without a compatible TPM. If the option is disabled and the device doesn’t contain a compatible TPM, encrypting the device using the ‘Force BitLocker Encryption’ remote action will fail.
|
| Configure advanced authentication options for devices with compatible TPM | Configure the additional authentication requirements, including the use of the Trusted Platform Module (TPM) or startup PIN requirements.
|
| Minimum PIN length | Enter the minimum startup PIN length if TPM and PIN are required during BitLocker enablement.
You can set a value in the range 6 (default) – 20 digits. |
| Configure pre-boot recovery message and URL | Check this option to configure a custom pre-boot recovery message and URL so as to guide users on how to find their recovery password. The recovery message and URL are visible to the user when they’re locked out of their PC in recovery mode. |
| Configure recovery options | Enable this setting to configure additional options for the recovery of encrypted OS drives in the absence of the required startup key information.
|
| Settings | Description |
|---|---|
| Users must generate a recovery key or password | Specify whether the user is required to generate a 48-digit recovery password or insert a USB flash drive containing a 256-bit recovery key. The options include:
|
| Save BitLocker recovery information to Active Directory Domain Services (AD DS) | Configure this option to store the BitLocker recovery information on OS drives to Active Directory Domain Services. (This includes both Azure AD and on-premises AD. Depending on the connection, an appropriate directory will be used.)Available options include:
|
| Block certificate-based data recovery agent | Check this option to block the ability to use Data Recovery Agent (DRA) to recover BitLocker-protected operating system drives.
|
| Hide recovery options on the device | Tick this option to prevent users from specifying extra recovery options such as printing recovery keys when they enable BitLocker on an OS drive through a setup wizard. |
| Do not enable BitLocker until recovery information is stored in AD DS | Check this option to disable BitLocker unless the computer is connected to a domain and the backup of BitLocker recovery information to AD DS succeeds. |
Fixed Drive Settings
| Configure BitLocker fixed drive policy | Enable this option to configure the BitLocker fixed drive settings. |
Configure BitLocker fixed drive policy
| Settings | Description |
|---|---|
| Configure encryption method | Configure the algorithm and cipher strength used by BitLocker Drive Encryption for fixed drives. Choose either of the options from AES CBC 128, AES CBC 256, XTS-AES 128, and XTS-AES 256.
BitLocker uses the default encryption method of XTS-AES 128-bit when this option is not configured. |
| Block access to drives not protected by BitLocker | Deny write access to fixed drives that are not BitLocker-protected. If a fixed drive is not encrypted, the user will need to complete the BitLocker setup wizard for the drive before write access is granted. |
| Configure recovery options | Check this option to recover the encrypted fixed drives in the absence of the required credentials. |
| Settings | Description |
|---|---|
| Users must generate a recovery key or password | Specify whether users are required to generate a 48-digit recovery password or a 256-bit recovery key. The options include:
|
| Save BitLocker recovery information to Active Directory Domain Services (AD DS) | You may configure this option if you want to store the BitLocker recovery information on fixed data drives to Active Directory Domain Services. (This includes both Azure AD and on-premises AD. Depending on the connection, an appropriate directory will be used.) Available options include:
|
| Block certificate-based data recovery agent | Check this option to block the ability to use Data Recovery Agent (DRA) to recover BitLocker-protected fixed drives. |
| Hide recovery options on the device | Tick this option to prevent users from specifying extra recovery options such as printing recovery keys when they enable BitLocker on a fixed drive through a setup wizard. |
| Do not enable BitLocker until recovery information is stored in AD DS | Check this option to disable BitLocker unless the computer is connected to a domain and the backup of BitLocker recovery information to AD DS succeeds. |
Removable Drive Settings
| Configure BitLocker removable drive policy | Enable this option to configure the BitLocker removable drive settings. |
Configure BitLocker removable drive policy
| Settings | Description |
|---|---|
| Configure encryption method | Configure the algorithm and cipher strength used by BitLocker Drive Encryption for removable drives. Choose either of the options from AES CBC 128, AES CBC 256, XTS-AES 128, and XTS-AES 256.
BitLocker uses the default encryption method of AES CBC 128-bit when this option is not configured. |
| Block access to drives not protected by BitLocker | Deny write access to removable drives that are not protected by BitLocker. If an inserted removable drive is not encrypted, the user must complete the BitLocker setup wizard for the drive before write access is granted. |
How to check whether your device has a compatible TPM?
Method 1
- Press Win+R and open Run > Type tpm.msc > Click OK to open the TPM Management snap-in console.
- It will show whether your device has a compatible TPM or not.
Method 2
- Press Win+R and open Run > Type tpm.msc > Click OK to open the Device Manager.
- Check to see if you have Security devices listed. If yes, expand Security devices to see if you can see a TPM with its version number.
Method 3
Beginning with Windows 10, version 1803, you can check TPM status in Windows Defender Security Center > Device Security > Security processor details.
Apply the BitLocker configuration to target entities using Hexnode UEM
There are two ways by which you can associate restrictions to the devices in bulk.
If you haven’t saved the policy yet,
- Navigate to Policy Targets.
- Click on + Add Devices, search and select the required device(s) to which you need to apply the policy. Click OK.
- Click on Save to apply the policies to the devices.
If you’ve already saved the policy and taken to the page which displays the policy list,
- Select the required policy.
- Click on Manage and select Associate Targets.
- Search and select the devices/ users/ device groups/ user groups/ domains to which you need to apply the policy. Click Associate.
Possible group policy conflicts
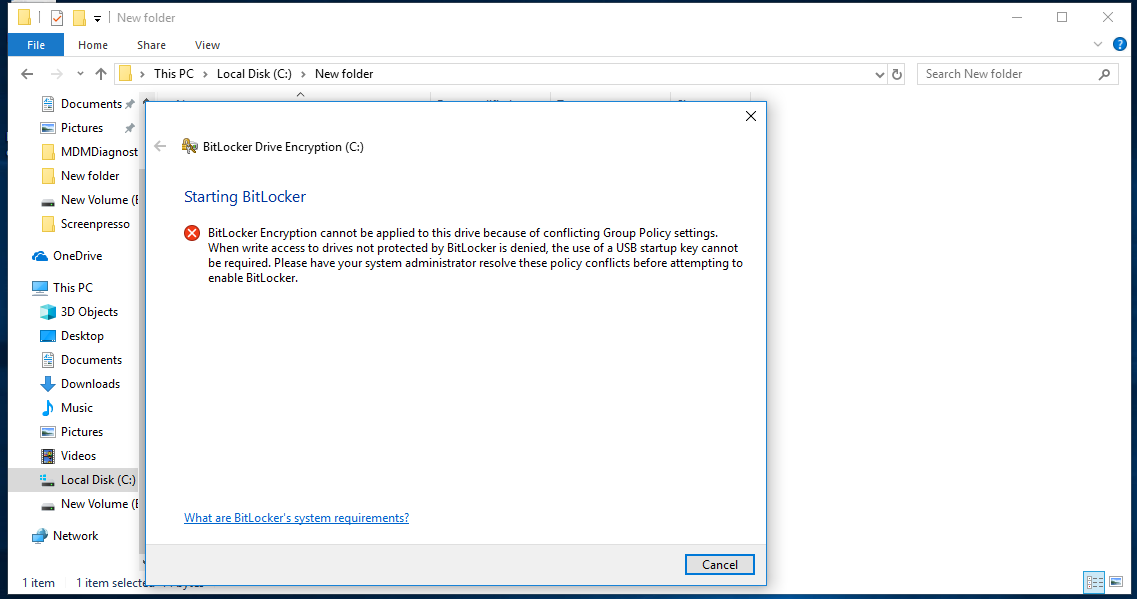
- When write access to drives not protected by BitLocker is denied, the use of a USB startup key cannot be required.

- Storing recovery information to Active Directory Domain Services cannot be required when the generation of recovery passwords is not permitted.
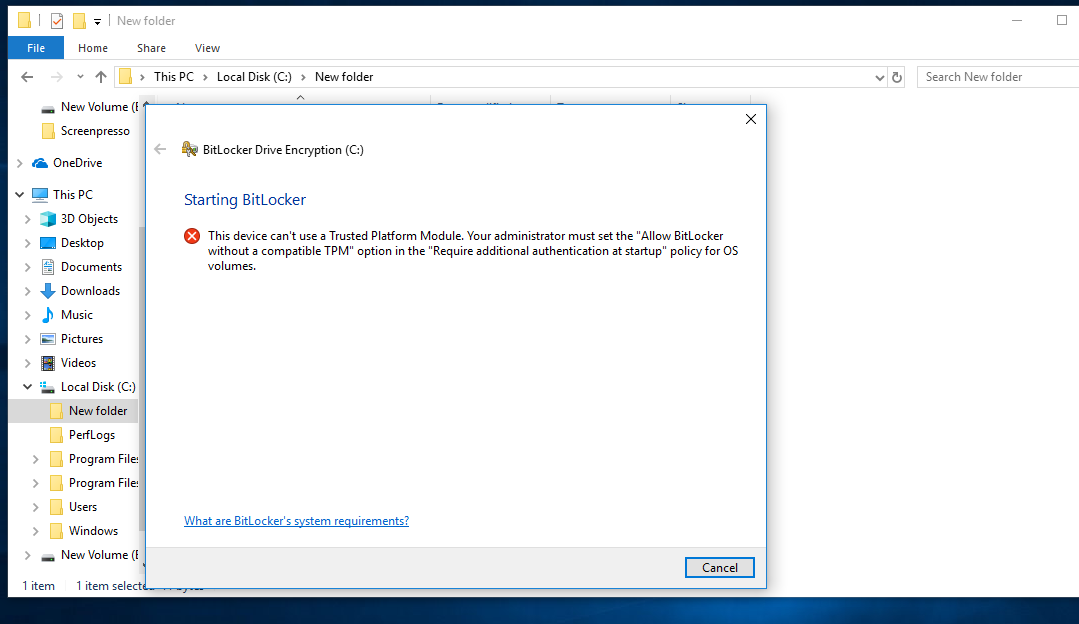
- When the OS drive is to be encrypted, if the device has no compatible TPM, “Allow BitLocker without a compatible TPM” should be checked.

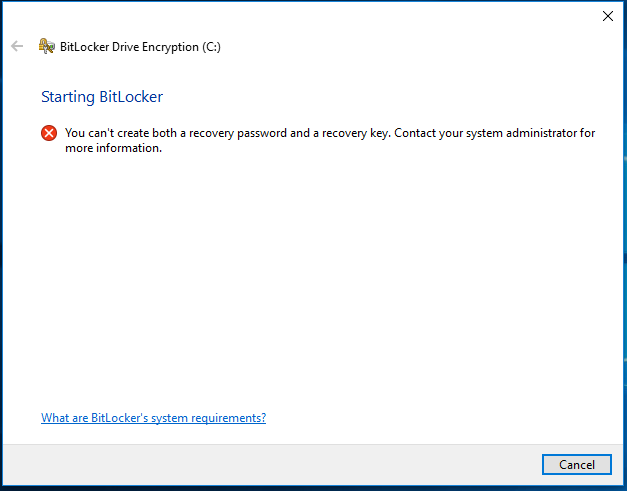
- You cannot create both a recovery key and a recovery password at the same time.

- If one startup authentication method is required, the other method cannot be allowed. If you require the startup key, you must not allow the startup PIN and vice versa.
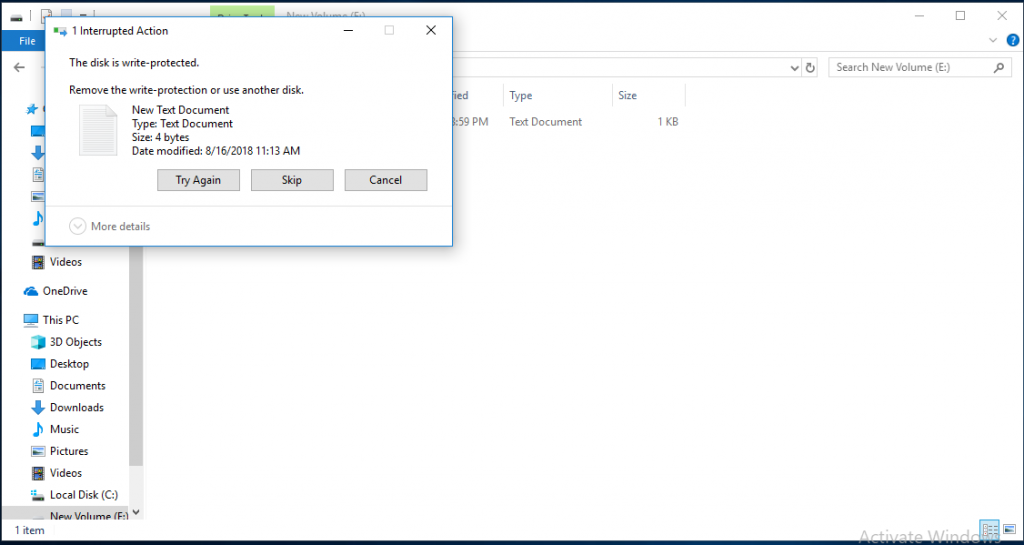
- If the deny write access to removable drives not protected by the BitLocker policy setting is enabled, the option to generate a recovery key must be disallowed.
- Backup of BitLocker recovery information to AD DS must be enabled if both the recovery options are disallowed.


