Category filter
Configuring Email in Windows devices
You can configure the organization email account on the Mail app for Windows devices by deploying Windows email account settings. Push the policy to the devices and the users need not set up email on their devices by themselves. This lets the IT admins set up email settings and synchronize the user’s email accounts with the email server on the devices remotely.
Configure Windows Email settings
To configure Email settings,
- Login to your Hexnode UEM portal.
- Navigate to the Policies tab.
- Click on New Policy to create a new one or click on any policy to edit an existing one. Enter the Policy Name and Description in the provided fields.
- Navigate to Windows and select Email under Accounts.
- Click on Configure.
| Settings | Description |
|---|---|
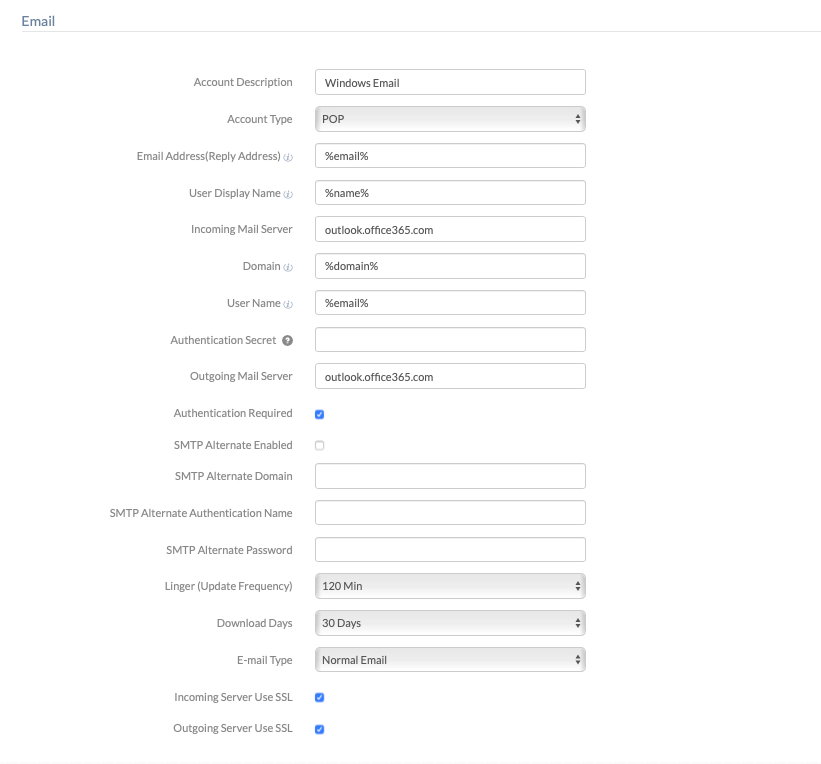
| Account Description | Enter a name/ description to differentiate between multiple email configurations. |
| Account Type | Select the option IMAP (Internet Message Access Protocol) if you want to store all emails on the server and sync them with the device.
By default, the Account Type is set to POP (Post Office Protocol) which enables you to store emails (received and sent) on the device. |
| Email Address (Reply Address) | Enter the email address of the user. The field supports the use of wildcards. The supported wildcard is %email%. |
| User Display Name | Enter the display name of the user. The field supports the use of wildcards. The supported wildcards are:
|
| Incoming Mail Server | Enter the server address or IP address of the incoming email server. An incoming mail server is responsible for handling incoming mails of an email account. |
| Domain | Enter the name of the email domain. You may use the following wildcards:
|
| User Name | Enter the username to get authenticated with the email server and retrieve all emails from the server. The field supports the use of wildcards. The supported wildcards are:
|
| Authentication Secret | Enter the email account password.
|
| Outgoing Mail Server | Enter the server address or IP address of the outgoing email server. An outgoing mail server is responsible for handling the delivery of mails sent from an email account. |
| Authentication Required | Select the option Authentication Required if authentication is required for the outgoing email server.
Disabled by default. |
| SMTP Alternate Enabled | Select the option SMTP Alternate Enabled to enable an alternate SMTP email account.
Disabled by default. |
| SMTP Alternate Domain | Enter the domain name of the alternate SMTP email account. |
| SMTP Alternate Authentication Name | Enter the display name of the alternate SMTP email account. |
| SMTP Alternate Password | Enter the password required to access the alternate SMTP email account. |
| Linger (Update Frequency) | Select the time interval for updating the emails on the device.
The available options are Manually (Manually update emails), 15 Min, 30 Min, 60 Min, and 120 Min (default). |
| Download Days | Select the number of days’ worth of emails you need to download onto the device.
The available options are All emails, 7 Days, 14 Days, and 30 Days (default). |
| E-mail Type | Select the option Visual Voice Mail to convert the voicemail into text, along with a slider to hear the voicemail from the part you want to hear.
By default, the E-mail Type is set to Normal Email. |
| Incoming Server Use SSL | Select the option Incoming Server Use SSL to use SSL for the incoming server.
SSL establishes an encrypted connection between the email server and the device for secure communication. |
| Outgoing Server Use SSL | Select the option Outgoing Server Use SSL to use SSL for the outgoing server. |
Apply Email policy to Devices/Groups
There are two ways by which you can associate restrictions with the devices in bulk.
If you haven’t saved the policy yet,
- Navigate to Policy Targets.
- Click on + Add Devices, search and select the required device(s) to which you need to apply the policy > Click OK.
- Click on Save to apply the policies to the devices.
To associate the policies with a device group, select Device Groups from the left pane under Policy Targets, and follow the above instructions. Similarly, you can associate the policy with Users, User Groups, or Domains from the same pane.
If you’ve already saved the policy and taken to the page which displays the policy list,
- Select the required policy.
- Click on Manage > select Associate Targets.
- Select Device/ User/ Device Group/ User Group/ Domain.
- Search and select the device(s)/ user(s)/ device group(s)/ user group(s)/ domain(s) to which you need to apply the policy > Click Associate.
What happens at the device end?
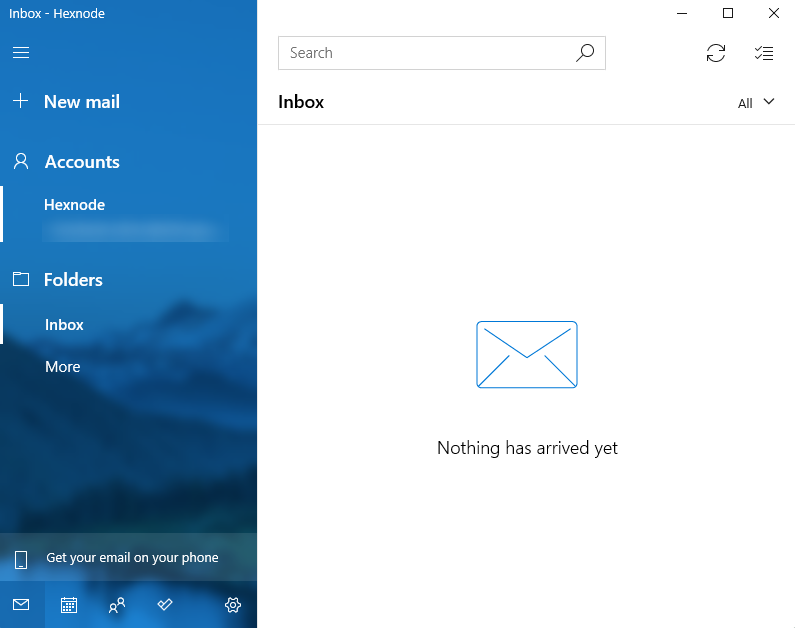
Once the Email accounts policy is associated with the device, the configured mail account gets synchronized with the Mail app.

The given email account will also be listed among other email accounts used by email, calendar and contacts on the device settings under Email & accounts.


