BYOD management in the workplace: Do you need it?
Know how to manage BYOD in your workplace

Get fresh insights, pro tips, and thought starters–only the best of posts for you.
Alma Evans
Mar 28, 2019
7 min read

The first step towards managing your devices is the enrollment process.
Enrollment helps in connecting your devices to work and makes it easy for your users to securely access your organization’s apps and data. This lets you manage your endpoints in an efficient manner by applying strong device management policies on them. It also ensures that only authorized devices are managed in your console.
Depending on the device’s ownership, OS platform and management requirements, there are several modes of enrollment. Generally saying, enrollment can be:
All the basic methods mentioned above are tedious and time-consuming which makes the enrollment process the most challenging hurdle to clear. Admins staging a bulk of devices have to manually enter the server URL and credentials on each of the devices to get them enrolled. Admin must guide the users through the enrollment steps. A small error in the enrollment process can trigger a lot of changes.
This could be efficiently handled with QR codes which could be scanned for quick enrollment and configuration. QR code enrollment helps to simplify the process of onboarding devices, especially when deploying a large fleet of devices.
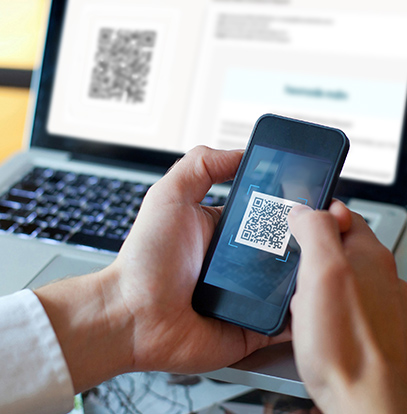
Scanning QR code is the most straight forward method for enrollment. This method is ideal for admins especially those who work in large organizations staging multiple devices. This also works as an efficient device provisioning method for end users who will be enrolling their own devices. Administrators can share a QR code to allow users to self-enroll their devices. As the QR code contains automatic enrollment credentials, it cuts down time for IT admins by eliminating the need to enter/share enrollment credentials.
You could enroll multiple Android devices at once with little to no work from the admin. This enrollment process avoids manual errors with time-saving steps and enables easy provisioning of devices. Users could complete the enrollment process without entering the server name, user name or password merely scanning the QR code. There is no need to generate a new QR code for all enrollments. The same QR code can be used multiple times to push enrollment settings to a variety of endpoints.
Work managed device mode can be configured on Android devices by scanning the QR code during the device set up. All the information that is needed for enrolling the device is contained in the payload of key-value pairs in the QR code. This simplifies the bulk enrollment of work managed and corporate-owned personally enabled devices.
Hexnode MDM supports QR code provisioning to transfer set up details to enroll a large fleet of Android devices. QR code is becoming a more attainable option as the support from device manufacturers broadens. Here’s is a quick list of the various management sets you can deploy using this setup method:
To enroll and provision an Android 7.0+ device as fully managed, IT can scan the QR code displayed on your MDM console. In case of a new device, you just have to boot it up and if the device is already in use go for a factory reset. The user or IT admin taps the initial welcome screen 6 times which triggers him to connect to a network and install the QR code reader to scan the QR code.
On scanning the QR code, the enrollment process is initiated. The set-up wizard automatically installs the Hexnode for Work app already configured with your server URL and other information. No need to download the app from the public app store or enter the server name and enrollment credentials. All done in a simple go merely scanning the QR code. This method is especially useful to provision non-NFC devices as Android Enterprise device owner.
Alternatively, you can use the DPC token method for Android 6.0+ devices. During the initial setup, provide the DPC token as the google account. Providing the DPC controller token automatically installs the Hexnode for work app. For initiating the enrollment process you can scan a QR code instead of manually entering the enrollment credentials. Follow the on-screen instructions to provision the device as a device owner.
For Samsung KME enrollment while configuring the device owner profile you can optionally generate a QR code. This QR code can be used to enroll Android 10+ devices with this profile during the out-of-the-box gesture enrollment. You can additionally add a Wi-Fi network configuration to the QR code to include security data and proxy traffic gateway information within the generated QR code content. By default, this method is for reseller devices, but you can choose to use this option for your non-reseller devices as well. Samsung recommends avoiding this if you’re concerned about the unauthorized use of the QR code for device enrollment.

QR code could also be used in Android Enterprise profile owner enrollment enrollment instead of entering the portal name. Download and install Hexnode for Work app, open the app, scan the QR code available in your portal and stick with the on-screen instructions to create the work profile.

In all these scenarios, QR codes can simplify the enrollment process. Especially, when deploying a large fleet of devices, eliminating any of the possible manual steps can be a huge benefit.
Though the complete enrollment process couldn’t be automated, QR code enrollment can be a great relief while provisioning your huge fleet of work devices.